


Flaky tests produce different results on different runs even when the method arguments and source code (which assertions are written against) are unchanged. Flakiness can be caused by a combination of factors, including randomness, race conditions, or dependencies such as external services.
In this article, we’ll test an Express.js powered Node.js app with the capability to store and read job listings. We will show how you can beat flaky tests using Docker containers. For brevity, we’ll only cover relevant pieces of code within the scope of the subject matter. The code is available for exploration in the GitHub repository.
Jump ahead:
- Why avoid flaky tests?
- Why use Docker containers when testing?
- Testing a Node.js application
- Running tests in Docker containers
Why avoid flaky tests?
Avoiding flaky tests is vital because flaky tests compromise software integrity. Flaky tests also slow development velocity because multiple failures happen in slow-running CI environments.
A test is deterministic when specific assertions return specific results when supplied with specific parameters. Pure functions in functional programming are written with the same rules as deterministic tests. Software modules interact with other modules and share state within application lifetimes. Poorly written tests sometimes introduce state inconsistency through cross-contamination, where state from a previous test run affects running tests. This can lead to test flakiness as testing becomes non-deterministic.
Other causes of flaky behavior include async behavior, concurrency issues, and network interactions (with flaky systems). To mitigate the risk of some of these scenarios, we must ensure tests are properly isolated, and shared resource usage is minimized.
Why use Docker containers when testing?
Docker containers help us keep testing environments deterministic. We can isolate an application’s runtime environment using Docker containers from its host operating system. This allows us to isolate the file system, networks, system calls, and resource usage.
Containers are lightweight processes that are inexpensive and easy to create and teardown. These qualities make them ideal for isolated testing. Using a container orchestration tool like Docker Compose, we can define dependent services within a manifest, making it ideal for spinning mock containers for external services.
The next section of this article will demonstrate testing with Docker, Docker Compose, Knex.js, and PostgreSQL.
Testing a Node.js application
Guaranteeing the behavior of applications running in production is important. To increase our confidence levels, we run manual and automated tests. To gain confidence in our test suites, we need test outputs to be predictable and deterministic.
For this article, we’ll test an Express.s-powered Node.js app. We’ll use Postgres for persistence, but we’ll use knex to manage migrations, seeds, and build query objects.
Setup and installation
First, clone the simple-job-board repo and install the requisite dependencies:
git clone https://github.com/creatrixity/simple-job-board
cd simple-job-board
cp .env.example .env
npm install
Since the application has PostgreSQL as a service dependency, we’ll run a Docker container for PostgreSQL:
# We need to create an isolated bridge network to allow us connect to our instances
docker create network simple-job-board --driver bridge
docker pull postgres
docker run --name simple-job-board-postgres -e POSTGRES_USER=postgres -e POSTGRES_PASSWORD=5uperIn5ecurePa55word -e POSTGRES_DB=simple-job-board -p 5432:5432 -d postgres
In the snippet above, we defined an isolated bridge network for the application. We also pulled the official postgres image and passed some configuration options upon container initialization.
With the PostgreSQL container running and listening for connections, we’ll attempt to connect to the running instance. With the psql CLI installed, execute:
psql -h 127.0.0.1 -p 5432 -U postgres -d simple-job-board
We should get the following prompt below, signifying a successful connection:
# psql (13.3, server 15.0 (Debian 15.0-1.pgdg110+1))
# WARNING: psql major version 13, server major version 15.
#         Some psql features might not work.
# Type "help" for help.

# simple-job-board=#
Defining application and testing configs
Next, we’ll use dotenv to obtain environmental variables. We’ll also set up a little getEnvVariable helper to provide fallbacks for environmental variables. We then define keys for the server port and database host with localhost as the fallback. The config file is made available at src/config.ts:
import dotenv from "dotenv";
dotenv.config();

function getEnvVariable(name: string, fallback: string = ""): string {
  const envVariable = process.env[name];
  const fallbackProvided = fallback.length;
  if (!envVariable && !fallbackProvided) {
    throw new Error(`Environment variable ${name} has not been set.`);
  }
  return envVariable || fallback;
}

const config = {
  server: {
    port: Number(getEnvVariable("PORT")),
  },
  database: {
    host: getEnvVariable("DATABASE_HOST", "localhost"),
  },
};

export default config;
Then, in ./knexfile.ts, define configuration for the development and testing environments. Defining the two environments is similar, except for the definition of the host parameter in testing:
import type { Knex } from "knex";
import appConfig from "./src/config";

// Update with your config settings.

const config: { [key: string]: Knex.Config } = {
  development: {
    client: "postgresql",
    connection: {
      user: "postgres",
      password: "5uperIn5ecurePa55word",
      port: 5432,
    },
    pool: {
      min: 2,
      max: 10,
    },
    migrations: {
      tableName: "knex_migrations",
    },
  },

  testing: {
    client: "postgresql",
    connection: {
      user: "postgres",
      password: "5uperIn5ecurePa55word",
      host: appConfig.database.host,
      port: 5432,
    },
    pool: {
      min: 2,
      max: 10,
    },
    migrations: {
      tableName: "knex_migrations",
    },
  },
};

module.exports = config;
Bootstrapping our Node.js application
Next, we’ll bootstrap our application in src/index.ts. To keep our Node.js application bootstrap code reusable, we’ll create the new application instance within a factory function called createServer .
The createServer factory will accept a reference to a database connection pool file descriptor and an optional port number to expose the application within.
Thankfully, knex provides an abstraction over the database connection:
// src/index.ts
import knex from "knex";
import config from "./config";
import { createServer } from "./createServer";
const knexConfig = require("../knexfile");
const knexSetup = knex(knexConfig.development);

createServer(knexSetup, config.server.port);
After examining the src/createServer.ts file from which the createServer factory is exported, we’ll make a copy of the database connection reference. This is available for other Express modules by storing it within app.locals.
We also conditionally listen on a supplied port number. We intend on reusing the createServer factory within our test setup, and superagent will bind the application to a random port if none is supplied:
// src/createServer.ts
export function createServer(dbConnection: Knex, port?: number): Express {
const app: Express = express();
app.use(bodyParser.json());
// Cache a copy of the dbConnection socket
app.locals.dbConnection = dbConnection;
app.use("/jobs", jobsRouter);
app.get("/", (_req: Request, res: Response) => {
res.json({ message: "Hello  ! Welcome to the simple job board app" });
});
if (port) {
app.listen(port, () => {
console.log(`
! Welcome to the simple job board app" });
});
if (port) {
app.listen(port, () => {
console.log(` Server is running at https://localhost:${port}`);
});
}
return app;
}
Server is running at https://localhost:${port}`);
});
}
return app;
}
Writing the integration tests
We’ll add a couple of integration tests for the job module. Before each test suite runs, we’ll:
- Construct a random unique name for the ephemeral test
database - Obtain a
Postgresconnection - Create an ephemeral test
databasewith the generated random unique name - Obtain a new
Postgresconnection that references thedatabase - Migrate and seed the newly created
database - Call
createServerto help create a new instance of the Express application and assign the new instance to the top-levelappvariable:
  // src/modules/job/job.test.ts
  // -------------------------------------------------------------------------
  // Setup up
  // -------------------------------------------------------------------------
  let app: Express;
  let knexSetup: Knex;
  let databaseName: string;

  beforeAll(async () => {
    databaseName = uniqueNamesGenerator({
      dictionaries: [colors, adjectives, animals],
    });
    knexSetup = knex(knexConfig.testing);
    await knexSetup.raw(`CREATE DATABASE ${databaseName}`);
    knexSetup = knex({
      ...knexConfig.testing,
      database: databaseName,
    });
    await knexSetup.migrate.latest();
    await knexSetup.seed.run();
    app = createServer(knexSetup);
  });
After each test suite is run, we clean up by dropping the ephemeral database and closing the connection to the database to avoid pool starvation and keep resource utilization at optimum levels:
  // src/modules/job/job.test.ts
  // -------------------------------------------------------------------------
  // Tear Down
  // -------------------------------------------------------------------------
  afterAll(async () => {
    await knexSetup.raw(`DROP DATABASE ${databaseName}`);
    await knexSetup.destroy();
  });
For the test cases, we run assertions on the data returned from querying the list of jobs seeded into the database in the earlier steps. We create a new job record by issuing a POST request via superagent. We also assert our new job record that is returned when querying a list of jobs available in the database:
// src/modules/job/job.test.ts
import { jobData } from "../../../seeds/jobs";

describe("/jobs", () => {
  // -------------------------------------------------------------------------
  // Test cases
  // -------------------------------------------------------------------------
  test("GET: / should return a success status", async () => {
    await request(app).get("/").expect("Content-Type", /json/).expect(200);
  });

  test("GET: /jobs should return a list of jobs", async () => {
    const result = await request(app).get("/jobs");
    expect(
      result.get("Content-Type").includes("application/json")
    ).toBeTruthy();
    expect(result.statusCode).toEqual(200);
    expect(result.body.results).toEqual(
      expect.arrayContaining(jobData.map((job) => expect.objectContaining(job)))
    );
  });

  test("POST: /jobs should create a new job", async () => {
    const jobCreationData = {
      role: "Virtual Reality Designer",
      location: "Seattle",
      organization: "Microsoft",
      description: "Reimagine virtual reality experiences",
    };

    const jobCreationResponse = await request(app)
      .post("/jobs")
      .send(jobCreationData)
      .set("Accept", "application/json");

    expect(jobCreationResponse.statusCode).toEqual(201);

    const jobsResponse = await request(app).get("/jobs");
    const jobs = jobsResponse.body.results;
    expect(jobs[jobs.length - 1]).toMatchObject(jobCreationData);
  });
});
Running npm test should give us the output below:
PASS  src/modules/job/job.test.ts
  /jobs
    ✓ GET: / should return a success status (267 ms)
    ✓ GET: /jobs should return a list of jobs (64 ms)
    ✓ POST: /jobs should create a new job (97 ms)

Test Suites: 1 passed, 1 total
Tests:       3 passed, 3 total
Snapshots:   0 total
Time:        3.705 s, estimated 14 s
Ran all test suites.

Watch Usage: Press w to show more.
We have successfully tested our application within our local development environment. Next, we’ll have our tests run within a Docker container.
Running tests in Docker containers
First, we’ll start by creating our Dockerfile with the instructions for building our application image:
FROM node:alpine

WORKDIR /usr/app
COPY ./ /usr/app

RUN npm install

# Define the command to run the test
CMD ["npm", "test"]
Next, let’s define a docker-compose.yml manifest that contains two services: the simple-job-board service that runs the tests for our Express application and the db service, a PostgreSQL database running in a container:
version: "3"
services:
  simple-job-board:
    build: .
    environment:
      DATABASE_HOST: db
    links:
      - db
  db:
    image: postgres:11
    environment:
      POSTGRES_USER: postgres
      POSTGRES_PASSWORD: 5uperIn5ecurePa55word
      POSTGRES_DB: simple-job-board
    ports:
      - "5432:5432"
Then, we’ll initiate the test run by running docker-compose run test to ensure our database service spins up before our test starts running:
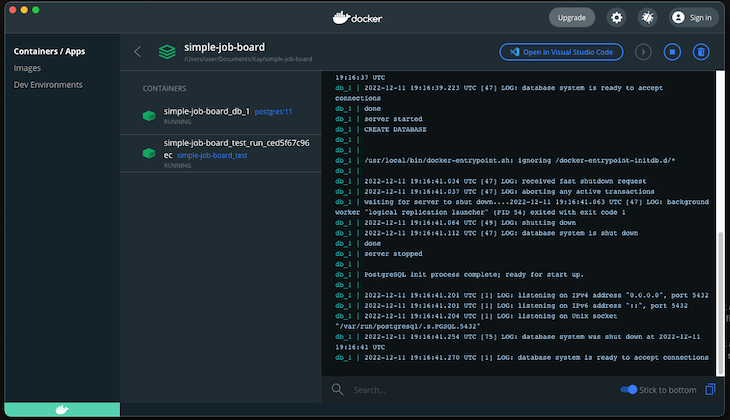
Our test results will pass with green checkmarks running in the Docker containers. You may notice a slight uptick in waiting time before our tests run. This is because of the overhead incurred when we spin up a Docker container:

Conclusion
With Docker containers and test isolation, we greatly reduce the chances of encountering flaky tests. In this article, we created new connections and spun up new databases for each test run guaranteeing a clean slate for each run. We also eliminated state contamination as a source of flakiness. However, remember that there are other sources of flakiness, such as async behavior, concurrency issues, and network interactions. It’s important to acknowledge that test flakiness is multi-variate in nature.
Feel free to clone the project from this tutorial and give it a test.
The post Using Docker containers to beat flaky tests appeared first on LogRocket Blog.
from LogRocket Blog https://ift.tt/oz0pgnd
Gain $200 in a week
via Read more


