


Laravel is one of the most popular PHP frameworks. According to BuiltWith, Laravel is used by more than 720K websites around the world. Laravel is an opinionated framework that is modular, easy to use, and has a burgeoning ecosystem. In this post, you will learn how to run Laravel with Docker Compose on Ubuntu 22.04.
To jump ahead:
- What is Docker?
- Example Laravel app with Backpack
- Laravel Sail
- Setting up Docker and Docker Compose
- Dockerfile for Laravel
- Docker Compose for Laravel
- Don’t ignore the
dockerignorefile - Build and run locally
Prerequisites
- Ubuntu v22.04 with Docker and Docker Compose installed. For this tutorial, we will use Docker v20.10.20 and Docker Compose v2.12.2
- Experience with Docker
- Some prior knowledge of Laravel would be helpful
- Any previous knowledge of Docker multi-stage builds will be useful
- Prior knowledge of how Apache works and its relation to PHP
What is Docker?
Docker is an open source platform that enables software engineers to package their applications into artifacts called containers, making them easy to ship, and avoiding the problem of adding “works on my machine” to your search queries.
So, what are containers? A container is a technology that enables users to package the whole stack as an artifact. In this context, the whole stack is referring to the operating system, the language with any dependencies, your application code, and its dependencies. So on each deployment, you ship the whole stack, not just the five lines of code that changed.
Containers have been around for a long time, but they were popularized by Docker in 2014.
Images are built following the Open Container Initiative (OCI) standard so that they can operate anywhere.
Example Laravel app with Backpack
In this guide to running Laravel with Docker and Docker Compose, we will use a simple Laravel application. This basic Laravel application will use a MySQL database, and to show how things work, we will use the popular Backpack Laravel package that is used to build and customize admin panels.
To keep things simple because Laravel already comes with a user table and user model, we will wire that with Backpack to view and edit users. One caveat here is that if you edit a user, that user will not be able to log in because the password will not be encrypted. However, that is not the concern of this tutorial. For this post, the focus is on running a Laravel application with MySQL using Docker and Docker Compose on Ubuntu v22.04.
The full code for our application is available in this GitHub repository. It also includes the Dockerfile and the docker-compose.yml file.
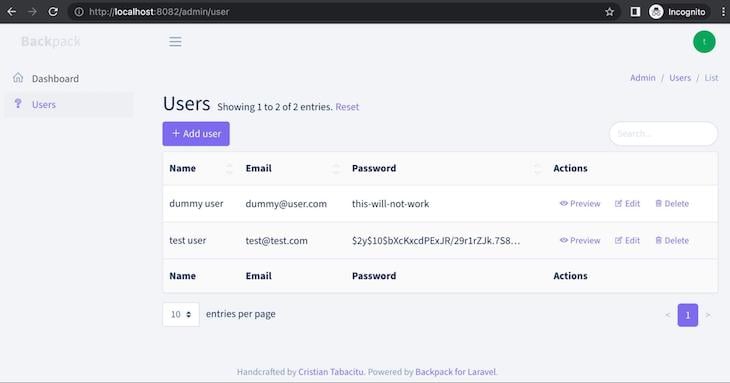
The end application will list the users when visiting http://localhost:8082/admin/user after logging in:
Laravel Sail
The default install instructions for Laravel 9.x come with Laravel Sail. Sail is a great product and an integral part of the Laravel ecosystem. Its GitHub repo states, “Sail provides a Docker powered local development experience for Laravel that is compatible with macOS, Windows (WSL2), and Linux.” So, why are we not using it?
Sail is a great tool for a development environment, but it is not suited for a production-like environment because:
- Sail is too general-purpose and includes multiple things like a database, Redis, and search with MeiliSearch. In production, these dependencies are offloaded to other services like RDS or open search
- The Dockerfile is well-suited for a development environment. It has xdebug, Node.js 16, and yarn. It also has clients for both MySQL and Node.js, but these things add bloat and weight to the container, making it impractical for a production-like environment
- Sail does not use official Docker images and sews together a Docker image with Ubuntu v22.04 as the base image and adds things as needed. It looks more like a virtual machine (VM) than an optimized Docker image
- Sail does not use Docker’s features like Docker multi-stage builds, which cannot only reduce the size of the image but also make Docker images well optimized for certain environments
This takes us to our next step, where you will clone the repository and understand the parts involved to run a Laravel app with Docker and Docker Compose.
Setting up Docker and Docker Compose
To get started, you can clone the repository with git clone git@github.com:geshan/laravel-backpack-demo.git. You can go into the folder with cd laravel-backpack-demo and look around the file structure:
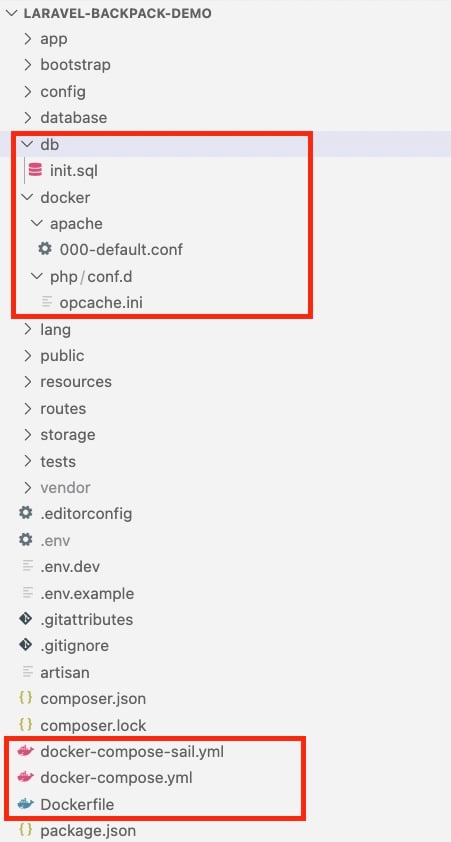
It will look mostly like any other Laravel 9.x project, but you will find some other interesting files. First, there is the /db/init.sql file, which is used to load the MySQL Docker container with some user and migration data, in addition to the default Laravel database structure.
Then there are some Docker-specific configuration files in the /docker folder. As we will use the default PHP Docker image with Apache, an Apache config is there. Similarly, for better performance on production, the Opcache config file is also included. It will not be used, but it is there for reference.
Then, at the root of the project, there are three files that will form the basis of this tutorial. The docker-compose-sail.yml file is the default Docker Compose file that comes with the Laravel 9.x install for Sail. It has been renamed from docker-compose.yml to docker-compose-sail.yml so that we can use the docker-compose.yml file as the default one. After that, we have the Dockerfile that makes use of the multi-stage Docker build.
Dockerfile for Laravel
The Dockerfile to run Laravel 9.x (9.19 at the time of writing) on Ubuntu 22.04 following the multi-stage build looks like:
FROM composer:2.4 as build
COPY . /app/
RUN composer install --prefer-dist --no-dev --optimize-autoloader --no-interaction

FROM php:8.1-apache-buster as dev

ENV APP_ENV=dev
ENV APP_DEBUG=true
ENV COMPOSER_ALLOW_SUPERUSER=1

RUN apt-get update && apt-get install -y zip
RUN docker-php-ext-install pdo pdo_mysql

COPY . /var/www/html/
COPY --from=build /usr/bin/composer /usr/bin/composer
RUN composer install --prefer-dist --no-interaction

COPY docker/apache/000-default.conf /etc/apache2/sites-available/000-default.conf
COPY .env.dev /var/www/html/.env

RUN php artisan config:cache && \
    php artisan route:cache && \
    chmod 777 -R /var/www/html/storage/ && \
    chown -R www-data:www-data /var/www/ && \
    a2enmod rewrite

FROM php:8.1-apache-buster as production

ENV APP_ENV=production
ENV APP_DEBUG=false

RUN docker-php-ext-configure opcache --enable-opcache && \
    docker-php-ext-install pdo pdo_mysql
COPY docker/php/conf.d/opcache.ini /usr/local/etc/php/conf.d/opcache.ini

COPY --from=build /app /var/www/html
COPY docker/apache/000-default.conf /etc/apache2/sites-available/000-default.conf
COPY .env.prod /var/www/html/.env

RUN php artisan config:cache && \
    php artisan route:cache && \
    chmod 777 -R /var/www/html/storage/ && \
    chown -R www-data:www-data /var/www/ && \
    a2enmod rewrite
This Dockerfile starts with the build stage that is taken from the PHP Composer 2.4 official Docker image. At this stage, the whole app is copied to the /app folder inside the image, and the Composer install is run on production mode without interaction and leaving behind the dev dependencies. So at this point, all the non-development Composer packages have been installed in the vendor folder.
Next, you can see the dev stage. This is the stage that will be used in the docker-compose.yml file later, as well. It starts from the official PHP v8.1 Apache Docker image. It sets some environment variables like APP_ENV to dev, APP_DEBUG to true, and COMPOSER_ALLOW_SUPERUSER as 1. These variables are self-explanatory. Then it installed zip, which is needed to install other packages.
Because we are only using MySQL for this project, it installs only pdo and pdo_mysql PHP extensions. Then we get the compose executable from the build stage. This is another advantage of using a multi-stage Docker build. As we will use this image for development, we install all dependencies, including the dev ones, with composer install.
After that, we copy the Apache config file to the right location inside the container from /docker/apache/000-default.conf. The contents of this file look like the following:
<VirtualHost *:80>

  ServerAdmin webmaster@localhost
  DocumentRoot /var/www/html/public/

  <Directory /var/www/>
    AllowOverride All
    Require all granted
  </Directory>

  ErrorLog ${APACHE_LOG_DIR}/error.log
  CustomLog ${APACHE_LOG_DIR}/access.log combined

</VirtualHost>
This is a simple Apache configuration file to serve the website on port 80 from /var/www/html/public. It has some more directives about logs for the virtual host. Next, we copy the .env.dev file as .env file on the container. This file has all the configurations, like the credentials for the MySQL database.
Finally, we run the regular Laravel artisan commands to config cache, route cache, and make storage writable. Then make sure the user www:data has the right permissions and enable the rewrite Apache module. It should work because the image has the apache2 foreground as the command.
The next stage is production, which also starts from the official php:8.1-apache image. It configures and enables OPcache for caching in production. OPcache improves PHP performance by storing pre-compiled script bytecode in shared memory, which makes it great for production use case.
Then install pdo and pdo_mysql as in the development stage. The OPcache configs are also loaded. If the OPcache configs interest you, check out this file. Following that, it copies the whole app from the build stage where the dev dependencies were ignored while executing compose install.
The same Apache configs are loaded in this Docker stage, too, but the .env.prod environment variables are copied to the /var/www/html/.env path. In a real application, this line would have been omitted in favor of injecting runtime environment variables some other way, like using Kubernetes secrets. Finally, the same command is used to make Apache serve our Laravel app. In the next section, you will learn about the Docker Compose file.
Docker Compose for Laravel
The aformentioned Docker file is built and run with a Docker Compose file definition. You can build and run single containers with the regular Docker command. Docker Compose comes in handy when you want to run multiple containers and not type in long commands with multiple parameters.
The Docker Compose file is a YAML file to configure your application’s services. Below is the Docker Compose file to run our Laravel application and the needed MySQL container. Let’s dissect its contents:
version: '3'
services:
  app:
    build:
      context: ./
      target: dev
    volumes:
      - .:/var/www/html
      - .env.dev:/var/www/html/.env
    ports:
      - "8082:80"
    environment:
      - APP_ENV=local
      - APP_DEBUG=true
    networks:
      - laravel
    depends_on:
      - mysql
  mysql:
      image: 'mysql/mysql-server:8.0'
      environment:
        MYSQL_ROOT_HOST: "%"
        MYSQL_ROOT_PASSWORD: "root"
        MYSQL_USER: "laravel"
        MYSQL_PASSWORD: "FhgVoFuOrWspc3TgBIA2K4dZGuJTPwSYBoLnNckcaxy"
        MYSQL_DATABASE: "laravel"
        MYSQL_ALLOW_EMPTY_PASSWORD: 1
      ports:
        - 3906:3306
      volumes:
        - 'mysql8:/var/lib/mysql'
        - './db/init.sql:/docker-entrypoint-initdb.d/01init.sql'
      networks:
        - laravel
networks:
    laravel:
        driver: bridge
volumes:
    mysql8:
        driver: local
The Docker Compose file starts with version 3, which has one set of features. Then we define our services. The first one is the app service, which will have the PHP and Apache server running in the same containers. For this, we instruct Docker Compose that the Docker file is in the same directory with context and the target (read stage) is dev. So we want Docker Compose to build the dev stage from the multi-stage enabled Dockerfile we discussed in the previous section.
In this app service, we then specify the files we want to sync from the local machine to the container in the volumes section. We say we want all the files in the current directory to be synced to /var/www/html in the container. We also specify that the .env.dev file from local needs to be synced up with .env file in the same path.
Next, we specify that the local port 8082 maps to the container port of 80. On port 80 in the container, the Apache server will be running. After that, we add two environment variables APP_ENV with the value local and APP_DEBUG with the value true. These are set to display errors on the browser if they occur as we are using this container for local development.
After that, we specify the network for the app service to be laravel. Networking in Docker Compose enables ways for multiple services to communicate with each other. For this example, we will use the bridge network, which allows communication between containers connected with the same bridge network. Consequently, we specify that the app container depends_on MySQL container is defined next in the file. Rather than a hard dependency, it is used to control the sequence of startup and shutdown.
The mysql service is defined next in the file. It is a MySQL server image provided by MySQL. For this guide, we are using version 8.0. Here, some important environment variables are defined, like the ROOT_HOST, the password for the root user, and another MySQL user and password. The database is specified as laravel.
Port 3906 on the host machine is mapped to 3306 on the container where the MySQL server is running. To keep the data persistent across restarts, a volume named mysql8 is defined, which is mapped to the default data directory of MySQL at /var/lib/mysql on the container. Another important volume mapping is the ./db/init.sql file to the entry point. This is done so that on the first start, our dummy user data will be loaded on the empty MySQL server instance. Next, the network is defined to be laravel and the laravel network is set as a bridge network.
Last but not the least, the volume for the MySQL server named mysql8 is tagged as a local driver. That means Docker will manage where to store the data. You can learn more about the volume by running the docker volume ls command. You can also learn about other useful Docker commands, like Docker images, logs, and more. In the next section, you will learn about the Docker ignore file.
Don’t ignore the dockerignore file
Similar to how we have the .gitignore file to exclude certain files from git, we can use the .dockerignore file to exclude files from being copied to the Docker image and container. For instance, below is the .dockerignore file used in this example.
.git
.env
The above file is instructing Docker to not copy the .git folder and the .env file into the container. This can be helpful not only to keep the container size small but also to mitigate any security concerns. Next we will build and run the containers for Laravel on Ubuntu 22.04.
Build and run locally
Now we have defined and described our Dockerfile and the docker-compose.yml files. To build the images, you can run the following command:
docker compose build
It will show the following output in the beginning:
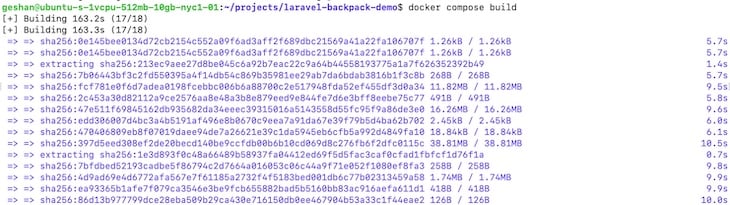
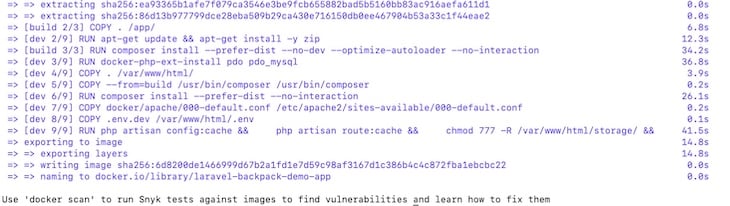
It is pulling all the needed Docker image layers from DockerHub to build the images. In my test, it took almost three minutes to download all the layers. As I was using Docker 20.10, it was using BuildKit by default. It ended with the following output:
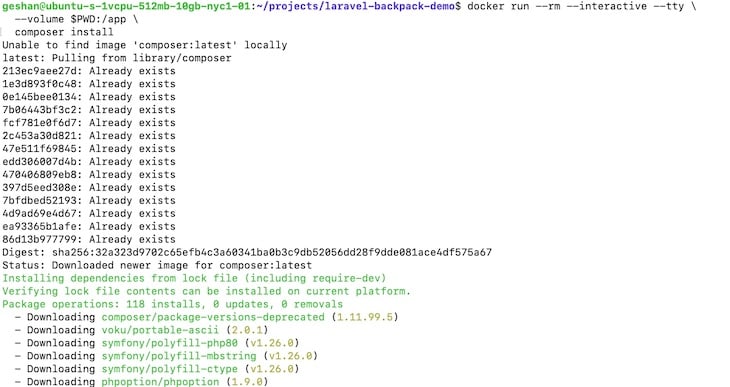
At this point, it would be great to get the composer dependencies pulled in locally because it will be mapped in with the volumes in the Docker Compose file. You can do it by running:
docker run --rm --interactive --tty \
  --volume $PWD:/app \
  composer install
This will pull all the dependencies locally on your machine and later, when the volumes are mapped, these will be available on the container too. Keep in mind, if Docker Compose is not used or the whole folder is not mapped as a volume, this will not be needed. It will yield the following output:
Then, to run the container, we can execute:
docker compose up
Depending on your Docker and Docker Compose version, it can also be docker-compose up if you are using an older version of Docker Compose. It will yield the following result:
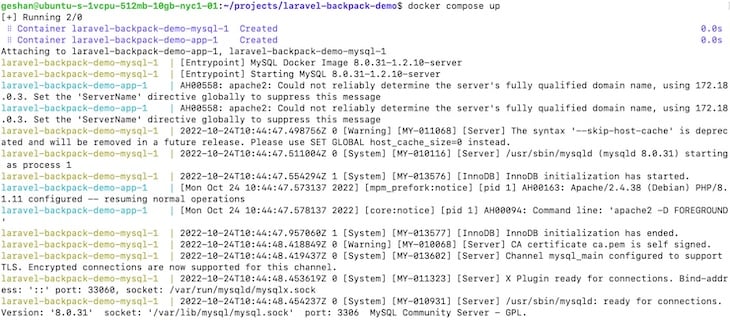
This will start both the services and their relative containers. Once both the containers are up, you can check the app on your browser at http://localhost:8082, which will show the default Laravel page:
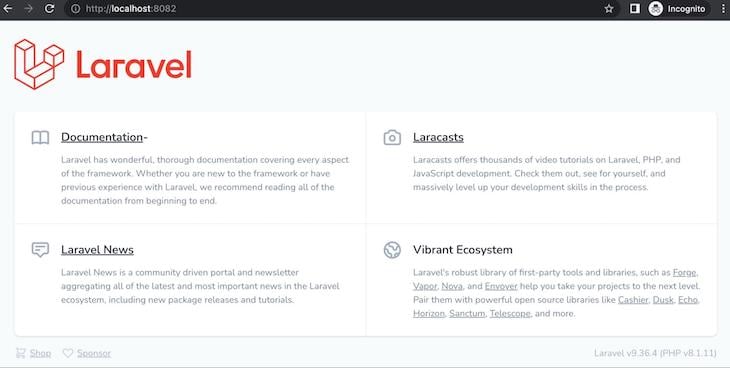
I have added a - besides Documentation to see how the update works, and it works fine. To log in and see the users, you can navigate to http://localhost:8082/admin/login and use test@test.com as the user and testpass as the password, and hit Login:
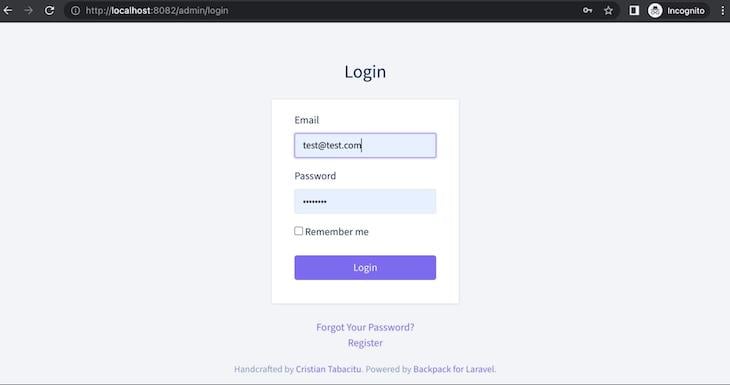
This is possible without running any artisan migrate as the initial data has been loaded with the file ./db/init.sql, which has two users. You can see this after you log in and click Users on the left:

There you have it! Laravel 9.x running with MySQL on Ubuntu 22.04 with Docker and Docker Compose. In addition to being easy to set up, this Docker image also has a stage for production, which is much more optimized than Laravel Sail.
Conclusion
In this guide, you learned what Docker is. Then you learned about a simple Laravel 9.x app with Backpack to display users. After that, you were introduced to the Docker file and Docker Compose file to run this app using Docker on Ubuntu v22.04. In the process, you also learned about dockerignore and how to build and run Docker containers for Laravel that work for local development and also support production mode.
Happy coding!
The post How to run Laravel with Docker Compose on Ubuntu v22.04 appeared first on LogRocket Blog.
from LogRocket Blog https://ift.tt/Y1dlFKy
Gain $200 in a week
via Read more


