


In this article, we’ll be using Whisper to create a speech-to-text application. Whisper requires Python backends, so we’ll create the server for the application with Flask.
React Native serves as the framework for building our mobile client. I hope you enjoy the process of creating this application because I sure did. Let’s dive right into it.
Jump ahead:
- What is speech recognition?
- What is Whisper?
- Setting up Whisper
- Creating a backend application
- Creating a
transcribeendpoint - Hosting the server
- Creating a speech recognition mobile application with React Native
- Creating the recording functions
- Assembling the application
- Running the application
What is speech recognition?
Speech recognition enables a program to process human speech into a written format. Grammar, syntax, structure, and audio are essential for understanding and processing human speech.
Speech recognition algorithms are one of the most complex areas of computer science. Artificial intelligence, machine learning, the development of unsupervised pre-training techniques, and frameworks such as Wav2Vec 2.0, which are effective at self-supervised learning and learning from raw audio, have advanced their capabilities.
Speech recognizers consist of the following components:
- Speech input
- A decoder, which relies on acoustic models, pronunciation dictionaries, and language models for outputs
- The word output
These components and advances in technology enable the consumption of large datasets of unlabeled speech. Pre-trained audio encoders are capable of learning high-quality representations of speech; their only downside is their unsupervised nature.
What is a decoder?
A performant decoder maps speech representations to usable outputs. Decoders resolve the supervisory issues with audio encoders. But, the decoder limits the effectiveness of frameworks such as Wav2Vec for speech recognition. A decoder can be pretty complex to use and requires a skilled practitioner, especially because technologies such as Wav2Vec 2.0 are difficult to use.
The key is to combine as many high-quality speech recognition datasets as possible. Models trained in this manner are more effective than those trained on a single source.
What is Whisper?
Whisper, or WSPR, stands for Web-scale Supervised Pretraining for Speech Recognition. Whisper models receive training to be able to predict the text of transcripts.
Whisper relies on sequence-to-sequence models to map between utterances and their transcribed forms, which makes the speech recognition pipeline more effective. Whisper comes with an audio language detector, a fine-tuned model trained on VoxLingua107.
The Whisper dataset consists of audio paired with transcripts from the internet. The quality of the dataset improves with the use of automated filtering methods.
Setting up Whisper
To use Whisper, we’ll need to rely on Python for our backend. Whisper also needs the command-line tool ffmpeg, which enables our application to record, convert, and stream both audio and video.
Below are the necessary commands to install ffgmeg on different machines:
# on Ubuntu or Debian
sudo apt update && sudo apt install ffmpeg


# on Arch Linux
sudo pacman -S ffmpeg


# on MacOS using Homebrew (https://brew.sh/)
brew install ffmpeg


# on Windows using Chocolatey (https://chocolatey.org/)
choco install ffmpeg


# on Windows using Scoop (https://scoop.sh/)
scoop install ffmpeg
Creating a backend application with Flask
In this section, we’ll create the backend service for our app. Flask is a web framework written in Python. I chose to use Flask for this application due to its ease of setup.
The Flask development team recommends using the latest version of Python, though Flask maintains support for Python ≥ 3.7.
Once the installation of the prerequisites completes, we can create our project folder to hold both our client and backend applications.
mkdir translateWithWhisper && cd translateWithWhisper && mkdir backend && cd backend
Flask makes use of virtual environments to manage project dependencies; Python has an out-of-the-box venv module for creating them.
Use the below command in the terminal window to create the venv folder. This folder holds our dependencies.
python3 -m venv venv
Specifying project dependencies
Using a requirements.txt file, specify the necessary dependencies. The requirements.txt file lives in the root of the backend directory.
touch requirements.txt
code requirements.txt
Copy and paste the code below into the requirements.txt file:
numpy
tqdm
transformers>=4.19.0
ffmpeg-python==0.2.0
pyaudio
SpeechRecognition
pydub
git+https://github.com/openai/whisper.git
--extra-index-url https://download.pytorch.org/whl/cu113
torch
flask
flask_cors
Creating a Bash shell script to install dependencies
In the root project directory, create a Bash shell script file. The Bash script handles the installation of dependencies in the Flask application.
In the root project directory, open a terminal window. Use the below command to create the shell script:
touch install_dependencies.sh
code install_dependencies.sh
Copy and paste the below code block into the install_dependencies.sh file:
# install and run backend
cd backend && python3 -m venv venv
source venv/Scripts/activate

pip install wheel
pip install -r requirements.txt
Now, open a terminal window in the root directory and run the following command:
sh .\install_dependencies.sh
Creating a transcribe endpoint
Now, we’ll create a transcribe endpoint in our application, which will receive audio inputs from the client. The application will transcribe the input and return the transcribed text to the client.
This endpoint accepts a POST request and processes the input. When the response is a 200 HTTP response, the client receives the transcribed text.
Create an app.py file to hold the logic for processing the input. Open a new terminal window and in the backend directory create an app.py file:
touch backend/app.py
code backend/app.py
Copy and paste the code block below into the app.py file:
import os
import tempfile
import flask
from flask import request
from flask_cors import CORS
import whisper

app = flask.Flask(__name__)
CORS(app)

// endpoint for handling the transcribing of audio inputs
@app.route('/transcribe', methods=['POST'])
def transcribe():
    if request.method == 'POST
        language = request.form['language']
        model = request.form['model_size']

        # there are no english models for large
        if model != 'large' and language == 'english':
            model = model + '.en'
        audio_model = whisper.load_model(model)

        temp_dir = tempfile.mkdtemp()
        save_path = os.path.join(temp_dir, 'temp.wav')

        wav_file = request.files['audio_data']
        wav_file.save(save_path)

        if language == 'english':
            result = audio_model.transcribe(save_path, language='english')
        else:
            result = audio_model.transcribe(save_path)

        return result['text']
    else:
        return "This endpoint only processes POST wav blob"
Run the Flask application
In the activated terminal window, which contains the venv variable, run the following command to start the application:
$ cd backend
$ flask run –port 8000
The expectation is that the application starts without any errors. If that is the case, the following result should be visible in the terminal window:

That closes out the creation of our transcribe endpoint in our Flask application.
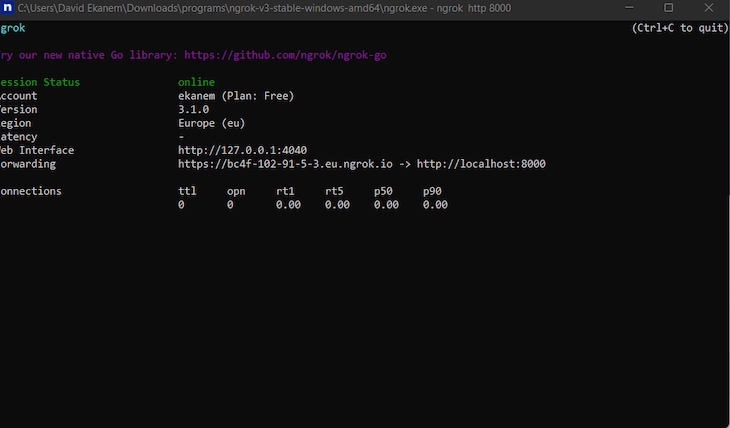
Hosting the server
To make network requests to the created HTTP endpoint in iOS, we’ll need to route to an HTTPS server. ngrok solves the issue of creating a re-route.
Download ngrok, then install the package and open it. A terminal window fires up; input the following command to host the server with ngrok:
ngrok http 8000
ngrok will generate a hosted URL, which will be used in the client application for requests.
Creating a speech recognition mobile application with React Native
For this part of the tutorial, you’ll need to install a few things:
- Expo CLI: command-line tool for interfacing with Expo tools
- Expo Go app for Android and iOS: used for opening up the applications served through the Expo CLI
In a new terminal window, initialize the React Native project:
npx create-expo-app client
cd client
Now, start the development server:
npx expo start
To open the app on an iOS device, open the camera and scan the QR code on the terminal. On Android devices, press Scan the QR code on the Home tab of the Expo Go app.

Handling audio recording
Expo-av handles the recording of audio in our application. Our Flask server expects the file in .wav format. The expo-av package allows us to specify the format before saving.
Install necessary packages in the terminal:
yarn add axios expo-av react-native-picker-select
Creating a model selector
It is imperative that the application is able to select the model size. There are five options to choose from:
- Tiny
- Base
- Small
- Medium
- Large
The selected input size determines what model to compare the input to on the server.
In the terminal again, use the below commands to create a src folder and a sub-folder called /components:
mkdir src
mkdir src/components
touch src/components/Mode.tsx
code src/components/Mode.tsx
Paste the code block into the Mode.tsx file:
import React from "react";
import { View, Text, StyleSheet } from "react-native";
import RNPickerSelect from "react-native-picker-select";

const Mode = ({
  onModelChange,
  transcribeTimeout,
  onTranscribeTimeoutChanged,
}: any) => {
  function onModelChangeLocal(value: any) {
    onModelChange(value);
  }

  function onTranscribeTimeoutChangedLocal(event: any) {
    onTranscribeTimeoutChanged(event.target.value);
  }

  return (
    <View>
      <Text style={styles.title}>Model Size</Text>
      <View style=>
        <RNPickerSelect
          onValueChange={(value) => onModelChangeLocal(value)}
          useNativeAndroidPickerStyle={false}
          placeholder=
          items={[
            { label: "tiny", value: "tiny" },
            { label: "base", value: "base" },
            { label: "small", value: "small" },
            { label: "medium", value: "medium" },
            { label: "large", value: "large" },
          ]}
          style={customPickerStyles}
        />
      </View>
      <View>
        <Text style={styles.title}>Timeout :{transcribeTimeout}</Text>
      </View>
    </View>
  );
};

export default Mode;
const styles = StyleSheet.create({
  title: {
    fontWeight: "200",
    fontSize: 25,
    float: "left",
  },
});
const customPickerStyles = StyleSheet.create({
  inputIOS: {
    fontSize: 14,
    paddingVertical: 10,
    paddingHorizontal: 12,
    borderWidth: 1,
    borderColor: "green",
    borderRadius: 8,
    color: "black",
    paddingRight: 30, // to ensure the text is never behind the icon
  },
  inputAndroid: {
    fontSize: 14,
    paddingHorizontal: 10,
    paddingVertical: 8,
    borderWidth: 1,
    borderColor: "blue",
    borderRadius: 8,
    color: "black",
    paddingRight: 30, // to ensure the text is never behind the icon
  },
});
Creating the Transcribe output
The server returns an output with text. This component receives the output data and displays it.
mkdir src
mkdir src/components
touch src/components/TranscribeOutput.tsx
code src/components/TranscribeOutput.tsx
Paste the code block into the TranscribeOutput.tsx file:
import React from "react";
import { Text, View, StyleSheet } from "react-native";
const TranscribedOutput = ({
  transcribedText,
  interimTranscribedText,
}: any) => {
  if (transcribedText.length === 0 && interimTranscribedText.length === 0) {
    return <Text>...</Text>;
  }

  return (
    <View style={styles.box}>
      <Text style={styles.text}>{transcribedText}</Text>
      <Text>{interimTranscribedText}</Text>
    </View>
  );
};
const styles = StyleSheet.create({
  box: {
    borderColor: "black",
    borderRadius: 10,
    marginBottom: 0,
  },
  text: {
    fontWeight: "400",
    fontSize: 30,
  },
});

export default TranscribedOutput;
Creating client functionality
The application relies on Axios to send and receive the data from the Flask server; we installed it in an earlier section. The default language for testing the application is English.
In the App.tsx file, import the necessary dependencies:
import * as React from "react";
import {
  Text,
  StyleSheet,
  View,
  Button,
  ActivityIndicator,
} from "react-native";
import { Audio } from "expo-av";
import FormData from "form-data";
import axios from "axios";
import Mode from "./src/components/Mode";
import TranscribedOutput from "./src/components/TranscribeOutput";
Creating state variables
The application needs to track recordings, transcribed data, recording, and transcribing in progress. The language, model, and timeouts are set by default in the state.
export default () => {
  const [recording, setRecording] = React.useState(false as any);
  const [recordings, setRecordings] = React.useState([]);
  const [message, setMessage] = React.useState("");
  const [transcribedData, setTranscribedData] = React.useState([] as any);
  const [interimTranscribedData] = React.useState("");
  const [isRecording, setIsRecording] = React.useState(false);
  const [isTranscribing, setIsTranscribing] = React.useState(false);
  const [selectedLanguage, setSelectedLanguage] = React.useState("english");
  const [selectedModel, setSelectedModel] = React.useState(1);
  const [transcribeTimeout, setTranscribeTimout] = React.useState(5);
  const [stopTranscriptionSession, setStopTranscriptionSession] =
    React.useState(false);
  const [isLoading, setLoading] = React.useState(false);
  return (
    <View style={styles.root}></View>
)
}

const styles = StyleSheet.create({
  root: {
    display: "flex",
    flex: 1,
    alignItems: "center",
    textAlign: "center",
    flexDirection: "column",
  },
});
Creating references, language, and model options variables
The useRef Hook enables us to track the current initialized property. We want to set useRef on the transcription session, language, and model.
Paste the code block under the setLoading useState Hook:
  const [isLoading, setLoading] = React.useState(false);
  const intervalRef: any = React.useRef(null);

  const stopTranscriptionSessionRef = React.useRef(stopTranscriptionSession);
  stopTranscriptionSessionRef.current = stopTranscriptionSession;

  const selectedLangRef = React.useRef(selectedLanguage);
  selectedLangRef.current = selectedLanguage;

  const selectedModelRef = React.useRef(selectedModel);
  selectedModelRef.current = selectedModel;

  const supportedLanguages = [
    "english",
    "chinese",
    "german",
    "spanish",
    "russian",
    "korean",
    "french",
    "japanese",
    "portuguese",
    "turkish",
    "polish",
    "catalan",
    "dutch",
    "arabic",
    "swedish",
    "italian",
    "indonesian",
    "hindi",
    "finnish",
    "vietnamese",
    "hebrew",
    "ukrainian",
    "greek",
    "malay",
    "czech",
    "romanian",
    "danish",
    "hungarian",
    "tamil",
    "norwegian",
    "thai",
    "urdu",
    "croatian",
    "bulgarian",
    "lithuanian",
    "latin",
    "maori",
    "malayalam",
    "welsh",
    "slovak",
    "telugu",
    "persian",
    "latvian",
    "bengali",
    "serbian",
    "azerbaijani",
    "slovenian",
    "kannada",
    "estonian",
    "macedonian",
    "breton",
    "basque",
    "icelandic",
    "armenian",
    "nepali",
    "mongolian",
    "bosnian",
    "kazakh",
    "albanian",
    "swahili",
    "galician",
    "marathi",
    "punjabi",
    "sinhala",
    "khmer",
    "shona",
    "yoruba",
    "somali",
    "afrikaans",
    "occitan",
    "georgian",
    "belarusian",
    "tajik",
    "sindhi",
    "gujarati",
    "amharic",
    "yiddish",
    "lao",
    "uzbek",
    "faroese",
    "haitian creole",
    "pashto",
    "turkmen",
    "nynorsk",
    "maltese",
    "sanskrit",
    "luxembourgish",
    "myanmar",
    "tibetan",
    "tagalog",
    "malagasy",
    "assamese",
    "tatar",
    "hawaiian",
    "lingala",
    "hausa",
    "bashkir",
    "javanese",
    "sundanese",
  ];

  const modelOptions = ["tiny", "base", "small", "medium", "large"];
  React.useEffect(() => {
    return () => clearInterval(intervalRef.current);
  }, []);

  function handleTranscribeTimeoutChange(newTimeout: any) {
    setTranscribeTimout(newTimeout);
  }
Creating the recording functions
In this section, we’ll write five functions to handle audio transcription.
The startRecording function
The first function is the startRecording function. This function enables the application to request permission to use the microphone. The desired audio format is preset and we have a ref for tracking the timeout:
  async function startRecording() {
    try {
      console.log("Requesting permissions..");
      const permission = await Audio.requestPermissionsAsync();
      if (permission.status === "granted") {
        await Audio.setAudioModeAsync({
          allowsRecordingIOS: true,
          playsInSilentModeIOS: true,
        });
        alert("Starting recording..");
        const RECORDING_OPTIONS_PRESET_HIGH_QUALITY: any = {
          android: {
            extension: ".mp4",
            outputFormat: Audio.RECORDING_OPTION_ANDROID_OUTPUT_FORMAT_MPEG_4,
            audioEncoder: Audio.RECORDING_OPTION_ANDROID_AUDIO_ENCODER_AMR_NB,
            sampleRate: 44100,
            numberOfChannels: 2,
            bitRate: 128000,
          },
          ios: {
            extension: ".wav",
            audioQuality: Audio.RECORDING_OPTION_IOS_AUDIO_QUALITY_MIN,
            sampleRate: 44100,
            numberOfChannels: 2,
            bitRate: 128000,
            linearPCMBitDepth: 16,
            linearPCMIsBigEndian: false,
            linearPCMIsFloat: false,
          },
        };
        const { recording }: any = await Audio.Recording.createAsync(
          RECORDING_OPTIONS_PRESET_HIGH_QUALITY
        );
        setRecording(recording);
        console.log("Recording started");
        setStopTranscriptionSession(false);
        setIsRecording(true);
        intervalRef.current = setInterval(
          transcribeInterim,
          transcribeTimeout * 1000
        );
        console.log("erer", recording);
      } else {
        setMessage("Please grant permission to app to access microphone");
      }
    } catch (err) {
      console.error(" Failed to start recording", err);
    }
  }
The stopRecording function
The stopRecording function enables the user to stop the recording. The recording state variable stores and hold the updated recordings.
  async function stopRecording() {
    console.log("Stopping recording..");
    setRecording(undefined);
    await recording.stopAndUnloadAsync();
    const uri = recording.getURI();
    let updatedRecordings = [...recordings] as any;
    const { sound, status } = await recording.createNewLoadedSoundAsync();
    updatedRecordings.push({
      sound: sound,
      duration: getDurationFormatted(status.durationMillis),
      file: recording.getURI(),
    });
    setRecordings(updatedRecordings);
    console.log("Recording stopped and stored at", uri);
    // Fetch audio binary blob data

    clearInterval(intervalRef.current);
    setStopTranscriptionSession(true);
    setIsRecording(false);
    setIsTranscribing(false);
  }
The getDurationFormatted and getRecordingLines functions
To get the duration of the recording and the length of the recorded text, create the getDurationFormatted and getRecordingLines functions:
  function getDurationFormatted(millis: any) {
    const minutes = millis / 1000 / 60;
    const minutesDisplay = Math.floor(minutes);
    const seconds = Math.round(minutes - minutesDisplay) * 60;
    const secondDisplay = seconds < 10 ? `0${seconds}` : seconds;
    return `${minutesDisplay}:${secondDisplay}`;
  }

  function getRecordingLines() {
    return recordings.map((recordingLine: any, index) => {
      return (
        <View key={index} style={styles.row}>
          <Text style={styles.fill}>
            {" "}
            Recording {index + 1} - {recordingLine.duration}
          </Text>
          <Button
            style={styles.button}
            onPress={() => recordingLine.sound.replayAsync()}
            title="Play"
          ></Button>
        </View>
      );
    });
  }
Create transcribeRecording function
This function allows us to communicate with our Flask server. We access our created audio using the getURI() function from the expo-av library. The language, model_size, and audio_data are the key pieces of data we send to the server.
A 200 response indicates success. We store the response in the setTranscribedData useState Hook. This response contains our transcribed text.
function transcribeInterim() {
    clearInterval(intervalRef.current);
    setIsRecording(false);
  }

  async function transcribeRecording() {
    const uri = recording.getURI();
    const filetype = uri.split(".").pop();
    const filename = uri.split("/").pop();
    setLoading(true);
    const formData: any = new FormData();
    formData.append("language", selectedLangRef.current);
    formData.append("model_size", modelOptions[selectedModelRef.current]);
    formData.append(
      "audio_data",
      {
        uri,
        type: `audio/${filetype}`,
        name: filename,
      },
      "temp_recording"
    );
    axios({
      url: "https://2c75-197-210-53-169.eu.ngrok.io/transcribe",
      method: "POST",
      data: formData,
      headers: {
        Accept: "application/json",
        "Content-Type": "multipart/form-data",
      },
    })
      .then(function (response) {
        console.log("response :", response);
        setTranscribedData((oldData: any) => [...oldData, response.data]);
        setLoading(false);
        setIsTranscribing(false);
        intervalRef.current = setInterval(
          transcribeInterim,
          transcribeTimeout * 1000
        );
      })
      .catch(function (error) {
        console.log("error : error");
      });

    if (!stopTranscriptionSessionRef.current) {
      setIsRecording(true);
    }
  }
Assembling the application
Let’s assemble all the parts created so far:
import * as React from "react";
import {
  Text,
  StyleSheet,
  View,
  Button,
  ActivityIndicator,
} from "react-native";
import { Audio } from "expo-av";
import FormData from "form-data";
import axios from "axios";
import Mode from "./src/components/Mode";
import TranscribedOutput from "./src/components/TranscribeOutput";

export default () => {
  const [recording, setRecording] = React.useState(false as any);
  const [recordings, setRecordings] = React.useState([]);
  const [message, setMessage] = React.useState("");
  const [transcribedData, setTranscribedData] = React.useState([] as any);
  const [interimTranscribedData] = React.useState("");
  const [isRecording, setIsRecording] = React.useState(false);
  const [isTranscribing, setIsTranscribing] = React.useState(false);
  const [selectedLanguage, setSelectedLanguage] = React.useState("english");
  const [selectedModel, setSelectedModel] = React.useState(1);
  const [transcribeTimeout, setTranscribeTimout] = React.useState(5);
  const [stopTranscriptionSession, setStopTranscriptionSession] =
    React.useState(false);
  const [isLoading, setLoading] = React.useState(false);
  const intervalRef: any = React.useRef(null);

  const stopTranscriptionSessionRef = React.useRef(stopTranscriptionSession);
  stopTranscriptionSessionRef.current = stopTranscriptionSession;

  const selectedLangRef = React.useRef(selectedLanguage);
  selectedLangRef.current = selectedLanguage;

  const selectedModelRef = React.useRef(selectedModel);
  selectedModelRef.current = selectedModel;

  const supportedLanguages = [
    "english",
    "chinese",
    "german",
    "spanish",
    "russian",
    "korean",
    "french",
    "japanese",
    "portuguese",
    "turkish",
    "polish",
    "catalan",
    "dutch",
    "arabic",
    "swedish",
    "italian",
    "indonesian",
    "hindi",
    "finnish",
    "vietnamese",
    "hebrew",
    "ukrainian",
    "greek",
    "malay",
    "czech",
    "romanian",
    "danish",
    "hungarian",
    "tamil",
    "norwegian",
    "thai",
    "urdu",
    "croatian",
    "bulgarian",
    "lithuanian",
    "latin",
    "maori",
    "malayalam",
    "welsh",
    "slovak",
    "telugu",
    "persian",
    "latvian",
    "bengali",
    "serbian",
    "azerbaijani",
    "slovenian",
    "kannada",
    "estonian",
    "macedonian",
    "breton",
    "basque",
    "icelandic",
    "armenian",
    "nepali",
    "mongolian",
    "bosnian",
    "kazakh",
    "albanian",
    "swahili",
    "galician",
    "marathi",
    "punjabi",
    "sinhala",
    "khmer",
    "shona",
    "yoruba",
    "somali",
    "afrikaans",
    "occitan",
    "georgian",
    "belarusian",
    "tajik",
    "sindhi",
    "gujarati",
    "amharic",
    "yiddish",
    "lao",
    "uzbek",
    "faroese",
    "haitian creole",
    "pashto",
    "turkmen",
    "nynorsk",
    "maltese",
    "sanskrit",
    "luxembourgish",
    "myanmar",
    "tibetan",
    "tagalog",
    "malagasy",
    "assamese",
    "tatar",
    "hawaiian",
    "lingala",
    "hausa",
    "bashkir",
    "javanese",
    "sundanese",
  ];

  const modelOptions = ["tiny", "base", "small", "medium", "large"];

  React.useEffect(() => {
    return () => clearInterval(intervalRef.current);
  }, []);

  function handleTranscribeTimeoutChange(newTimeout: any) {
    setTranscribeTimout(newTimeout);
  }

  async function startRecording() {
    try {
      console.log("Requesting permissions..");
      const permission = await Audio.requestPermissionsAsync();
      if (permission.status === "granted") {
        await Audio.setAudioModeAsync({
          allowsRecordingIOS: true,
          playsInSilentModeIOS: true,
        });
        alert("Starting recording..");
        const RECORDING_OPTIONS_PRESET_HIGH_QUALITY: any = {
          android: {
            extension: ".mp4",
            outputFormat: Audio.RECORDING_OPTION_ANDROID_OUTPUT_FORMAT_MPEG_4,
            audioEncoder: Audio.RECORDING_OPTION_ANDROID_AUDIO_ENCODER_AMR_NB,
            sampleRate: 44100,
            numberOfChannels: 2,
            bitRate: 128000,
          },
          ios: {
            extension: ".wav",
            audioQuality: Audio.RECORDING_OPTION_IOS_AUDIO_QUALITY_MIN,
            sampleRate: 44100,
            numberOfChannels: 2,
            bitRate: 128000,
            linearPCMBitDepth: 16,
            linearPCMIsBigEndian: false,
            linearPCMIsFloat: false,
          },
        };
        const { recording }: any = await Audio.Recording.createAsync(
          RECORDING_OPTIONS_PRESET_HIGH_QUALITY
        );
        setRecording(recording);
        console.log("Recording started");
        setStopTranscriptionSession(false);
        setIsRecording(true);
        intervalRef.current = setInterval(
          transcribeInterim,
          transcribeTimeout * 1000
        );
        console.log("erer", recording);
      } else {
        setMessage("Please grant permission to app to access microphone");
      }
    } catch (err) {
      console.error(" Failed to start recording", err);
    }
  }
  async function stopRecording() {
    console.log("Stopping recording..");
    setRecording(undefined);
    await recording.stopAndUnloadAsync();
    const uri = recording.getURI();
    let updatedRecordings = [...recordings] as any;
    const { sound, status } = await recording.createNewLoadedSoundAsync();
    updatedRecordings.push({
      sound: sound,
      duration: getDurationFormatted(status.durationMillis),
      file: recording.getURI(),
    });
    setRecordings(updatedRecordings);
    console.log("Recording stopped and stored at", uri);
    // Fetch audio binary blob data

    clearInterval(intervalRef.current);
    setStopTranscriptionSession(true);
    setIsRecording(false);
    setIsTranscribing(false);
  }

  function getDurationFormatted(millis: any) {
    const minutes = millis / 1000 / 60;
    const minutesDisplay = Math.floor(minutes);
    const seconds = Math.round(minutes - minutesDisplay) * 60;
    const secondDisplay = seconds < 10 ? `0${seconds}` : seconds;
    return `${minutesDisplay}:${secondDisplay}`;
  }

  function getRecordingLines() {
    return recordings.map((recordingLine: any, index) => {
      return (
        <View key={index} style={styles.row}>
          <Text style={styles.fill}>
            {" "}
            Recording {index + 1} - {recordingLine.duration}
          </Text>
          <Button
            style={styles.button}
            onPress={() => recordingLine.sound.replayAsync()}
            title="Play"
          ></Button>
        </View>
      );
    });
  }

  function transcribeInterim() {
    clearInterval(intervalRef.current);
    setIsRecording(false);
  }

  async function transcribeRecording() {
    const uri = recording.getURI();
    const filetype = uri.split(".").pop();
    const filename = uri.split("/").pop();
    setLoading(true);
    const formData: any = new FormData();
    formData.append("language", selectedLangRef.current);
    formData.append("model_size", modelOptions[selectedModelRef.current]);
    formData.append(
      "audio_data",
      {
        uri,
        type: `audio/${filetype}`,
        name: filename,
      },
      "temp_recording"
    );
    axios({
      url: "https://2c75-197-210-53-169.eu.ngrok.io/transcribe",
      method: "POST",
      data: formData,
      headers: {
        Accept: "application/json",
        "Content-Type": "multipart/form-data",
      },
    })
      .then(function (response) {
        console.log("response :", response);
        setTranscribedData((oldData: any) => [...oldData, response.data]);
        setLoading(false);
        setIsTranscribing(false);
        intervalRef.current = setInterval(
          transcribeInterim,
          transcribeTimeout * 1000
        );
      })
      .catch(function (error) {
        console.log("error : error");
      });

    if (!stopTranscriptionSessionRef.current) {
      setIsRecording(true);
    }
  }
  return (
    <View style={styles.root}>
      <View style=>
        <Text style={styles.title}>Speech to Text. </Text>
        <Text style={styles.title}>{message}</Text>
      </View>
      <View style={styles.settingsSection}>
        <Mode
          disabled={isTranscribing || isRecording}
          possibleLanguages={supportedLanguages}
          selectedLanguage={selectedLanguage}
          onLanguageChange={setSelectedLanguage}
          modelOptions={modelOptions}
          selectedModel={selectedModel}
          onModelChange={setSelectedModel}
          transcribeTimeout={transcribeTimeout}
          onTranscribeTiemoutChanged={handleTranscribeTimeoutChange}
        />
      </View>
      <View style={styles.buttonsSection}>
        {!isRecording && !isTranscribing && (
          <Button onPress={startRecording} title="Start recording" />
        )}
        {(isRecording || isTranscribing) && (
          <Button
            onPress={stopRecording}
            disabled={stopTranscriptionSessionRef.current}
            title="stop recording"
          />
        )}
        <Button title="Transcribe" onPress={() => transcribeRecording()} />
        {getRecordingLines()}
      </View>

      {isLoading !== false ? (
        <ActivityIndicator
          size="large"
          color="#00ff00"
          hidesWhenStopped={true}
          animating={true}
        />
      ) : (
        <Text></Text>
      )}

      <View style={styles.transcription}>
        <TranscribedOutput
          transcribedText={transcribedData}
          interimTranscribedText={interimTranscribedData}
        />
      </View>
    </View>
  );
};

const styles = StyleSheet.create({
  root: {
    display: "flex",
    flex: 1,
    alignItems: "center",
    textAlign: "center",
    flexDirection: "column",
  },
  title: {
    marginTop: 40,
    fontWeight: "400",
    fontSize: 30,
  },
  settingsSection: {
    flex: 1,
  },
  buttonsSection: {
    flex: 1,
    flexDirection: "row",
  },
  transcription: {
    flex: 1,
    flexDirection: "row",
  },
  recordIllustration: {
    width: 100,
  },
  row: {
    flexDirection: "row",
    alignItems: "center",
    justifyContent: "center",
  },
  fill: {
    flex: 1,
    margin: 16,
  },
  button: {
    margin: 16,
  },
});
Running the application
Run the React Native application using the below command:
yarn start
The project repository is publicly available.
Conclusion
We have learned how to create speech-to-text functionality in a React Native app in this article. I foresee Whisper changing how narration and dictation work in everyday life. The techniques covered in this article enable the creation of a dictation app.
I am excited to see the new and innovative ways, developers extend Whisper, e.g., using Whisper to carry out actions on our mobile and web devices, or using Whisper to improve accessibility in our websites and applications.
The post Using Whisper for speech recognition in React Native appeared first on LogRocket Blog.
from LogRocket Blog https://ift.tt/BbrAX0y
Gain $200 in a week
via Read more


