


As we continue to build and develop software applications, our requirements for building complex applications have become more diverse and unique. We have a variety of data and many ways to work with it. However, one way is sometimes better and more performant than the other.
This article will discuss how we can use Neo4j and GraphQL and what problems we can solve using them. Before starting this article, you should have a strong knowledge of creating projects and backend development with Node.js and some familiarity with GraphQL.
This is an introductory article for Neo4j, so it is absolutely fine if you are unfamiliar with Neo4j. Even if you have used Neo4j before, this article can help you introduce GraphQL and work on projects with Neo4j and GraphQL. So, without further ado, let’s get right into it!
Jump ahead:
What is GraphQL?
GraphQL is a query language for implementing the API. According to the GraphQL website:
“GraphQL is a query language for APIs and a runtime for fulfilling those queries with your existing data. GraphQL provides a complete and understandable description of the data in your API, gives clients the power to ask for exactly what they need and nothing more, makes it easier to evolve APIs over time, and enables powerful dev tools.”
In more simple terms, GraphQL is a query language that can be used as an API to communicate between the client and the server. For example, we can use queries in GraphQL to get properties and mutations for specific operations.
We make GraphQL requests using types and fields instead of endpoints and retrieve the data as a JSON object. This helps us get only the data we requested from the server. For example, a typical GraphQL query will look like this:
{
  products {
    productId
    title
    variant {
      price
      size
    }
  }
}
The response data will look like this:
{
  "data": {
    "products": [
      {
        "productId": "1",
        "title": "Blue Jeans",
        "variant": {
          "price": 35,
          "size": "XL"
        }
      },
      {
        "productId": "2",
        "title": "Armani Suit",
        "variant": {
          "price": 59,
          "size": "XXL"
        }
      }
    ]
  }
}
As you can see, we are getting the JSON response in the same structure as we sent the request. Please head over to the GraphQL documentation to learn more about GraphQL.
What is Neo4j?
Neo4j is a native graph database that differs from other data storage solutions. Neo4j uses the data storage facility and is highly optimized for storing and maintaining relational data. Neo4j stores the data in the database as a graph. In this graph, each node represents the data, and the relationships between them are defined by a direct edge between the two nodes. All the information to find the next node in a sequence is available in the node itself. According to their website:
“With a native graph database at the core, Neo4j stores and manages data in a natural, connected state. The graph database takes a property graph approach, which benefits traversal performance and operations runtime.”
Why should we use Neo4j?
So, why should we use Neo4j? Because Neo4j uses the connected graph to store data in the native storage layer. It is much more helpful in the relational database, where the data is extensively connected to the other nodes. The queries are similar to SQL. However, the execution time is much faster, especially when performing heavy query operations between multiple nodes.
Some of the most outstanding advantages of using Neo4j include the following:
- Ease of use: Very easy to represent the data
- Speed: The query of the data is much faster
- Learning curve: Neo4j uses CQL for query language, which is similar to SQL and easy for humans to understand
- Simplicity: It doesn’t require complex
JOINoperations like SQL because the data is directly connected to the graph
Using Neo4j with GraphQL
Neo4j gives us the facility to work directly with GraphQL. This allows us to implement our backend project with Neo4j and GraphQL using the Neo4j GraphQL Library. It is a JavaScript library that can be used in any JavaScript GraphQL implementation, such as Apollo Server.
The Neo4j GraphQL Library automatically generates CRUD operations when we provide the GraphQL type definitions to the library. That means we don’t need to write queries or mutations explicitly to perform CRUD operations. The Neo4j GraphQL Library automatically handles all of that for us. It also provides complex pagination, sorting, filtering, and more.
Building an example project
Enough theory discussion — let’s build an example project. In this article, we will create a to-do application using GraphQL as the API and Neo4j AuraDB as the database. We will only focus on the backend part and not cover the frontend, as this is not in the scope of the article. Let’s get started!
Setting up the project
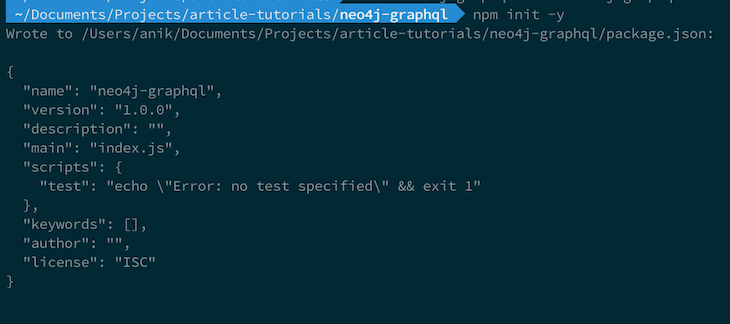
First, let’s initiate a new project. We will create our root project folder and create a package.json file for our Node.js backend project by running the following command:
npm i -y
We will get the following result:
Installing the GraphQL and Neo4j dependencies
Now, let’s run the following command to install the required files for our project:
npm install @neo4j/graphql neo4j-driver graphql apollo-server dotenv
The code above will install all the required packages that we need. Also, let’s install nodemon. It will make our life easier, and we won’t have to restart our server every time while making any changes. Install it with the npm install --save-dev nodemon command.
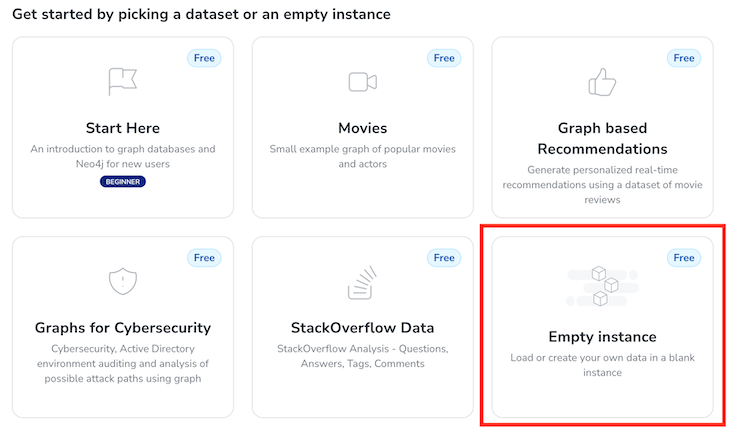
Next, we will create a new Neo4j AuraDB instance from the Neo4j Aura website. You will need to create an account for a new Neo4j AuraDB instance. First, let’s create an Empty instance from the website. You can also make other instances with existing data and play around:
After clicking the Create button, we will get the following modal containing the username and password:
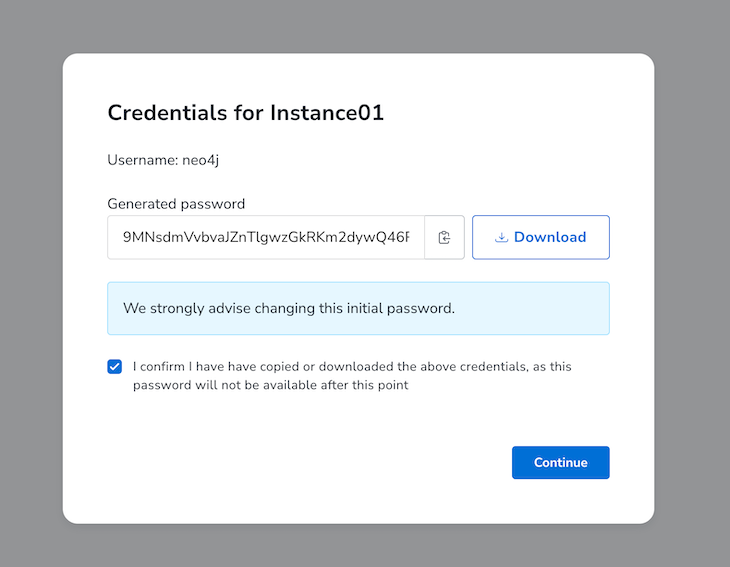
Let’s download the env file containing the credentials by clicking the Download button and selecting Continue.
Configuring the project
Let’s create our first file and start writing some code. Let’s start by creating a new file named server.js and paste the following code:
const { ApolloServer } = require("apollo-server");
const { Neo4jGraphQL } = require("@neo4j/graphql");
const neo4j = require("neo4j-driver");
const { typeDefs } = require("./typedefs");
const Config = require("./config");

const driver = neo4j.driver(
  Config.NEO4J_URI,
  neo4j.auth.basic(Config.NEO4J_USERNAME, Config.NEO4J_PASSWORD)
);

const neoSchema = new Neo4jGraphQL({ typeDefs, driver });

neoSchema.getSchema().then((schema) => {
  const server = new ApolloServer({
    schema: schema,
  });
  server.listen().then(({ url }) => {
    console.log(`GraphQL server ready on ${url}`);
  });
});
Here, we can see that we will also need to create two additional files: config.js and typedefs.js. So, let’s create the config.js file and paste the following code:
require("dotenv").config();

module.exports = class Config {
  static NEO4J_URI = process.env.NEO4J_URI;
  static NEO4J_USERNAME = process.env.NEO4J_USERNAME;
  static NEO4J_PASSWORD = process.env.NEO4J_PASSWORD;
  static NEO4J_AURA_INSTANCENAME = process.env.AURA_INSTANCENAME;
};
Now, let’s paste the following code into the typedefs.js file:
const { gql } = require("apollo-server");

module.exports.typeDefs = gql`
  type Todo @node(label: "Todo") {
    title: String!
    status: String!
    category: Category! @relationship(type: "Category", direction: IN)
  }

  type Category @node(label: "Category") {
    title: String!
    todos: [Todo!]! @relationship(type: "Category", direction: OUT)
  }
`;
Here, the @relationship schema directive helps the Neo4j understand the relationships between the types in our type definition. Before running the server, we also must make the following changes to our package.json file:
{
  ...
  "scripts": {
    ...,
    "start": "node server.js",
    "start:dev": "nodemon server.js"
  },
  ...
}
Now, let’s run the server and see the changes by running npm run start:dev to the terminal. After running the command, we will see the following message:
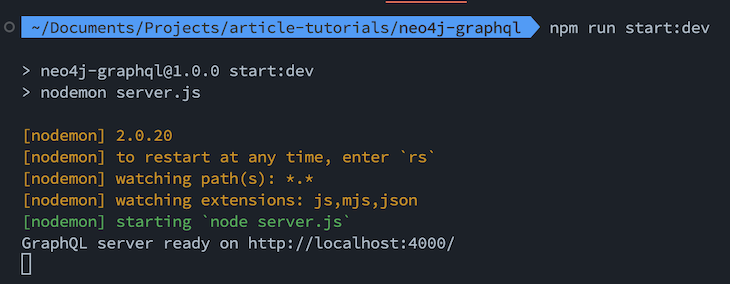
If we click the link, we will see the following screen in our browser:
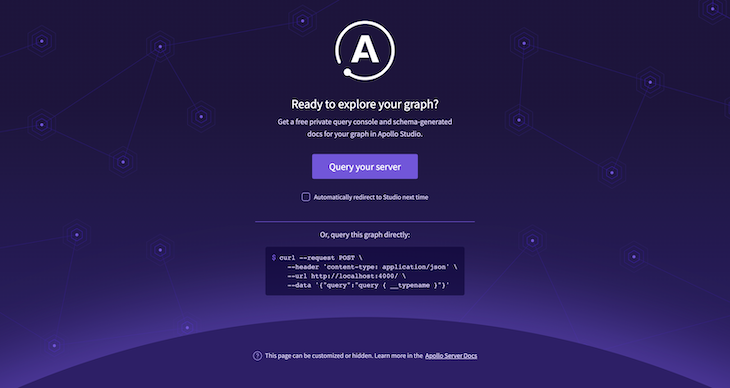
After clicking the Query your server button, we can see that the Neo4j GraphQL library provides some basic CRUD operations (queries and mutations). Now, because we started from an empty Neo4j AuraDB instance, we need to create some todos by running the following mutation in the playground (and, of course, changing the input for each entry):
mutation CreateTodos {
  createTodos(input: {
    category: {
      create: {
        node: {
          title: "Assignment"
        }
      }
    },
    status: "NEW",
    title: "Assignment on Fourier Transform"
  }) {
    info {
      bookmark
      nodesCreated
      relationshipsCreated
    }
    todos {
      category {
        title
      }
      status
      title
    }
  }
}
You can find all the information about the nodes in the Apollo Server playground. Here, note that we can create categories while also creating todo. However, if we want to use an existing category while running the createTodos mutation, we can rewrite the previous mutation, as shown below:
mutation CreateTodos {
  createTodos(input: {
    category: {
      connect: {
        where: {
          node: {
            title: "Assignment"
          }
        }
      }
    },
    status: "NEW",
    title: "Assignment on Fourier Transform"
  }) {
    info {
      bookmark
      nodesCreated
      relationshipsCreated
    }
    todos {
      category {
        title
      }
      status
      title
    }
  }
}
We can also query all the todo items in our database by running the following query in GraphQL:
query Todos {
  todos {
    title
    status
    category {
      title
    }
  }
}
After running the query, we will get the JSON output:
{
  "data": {
    "todos": [
      {
        "title": "Write an Article on ChatGPT",
        "status": "NEW",
        "category": {
          "title": "Writing"
        }
      },
      {
        "title": "Assignment on Fourier Transform",
        "status": "NEW",
        "category": {
          "title": "Assignment"
        }
      },
      {
        "title": "Assignment on Neural Network",
        "status": "NEW",
        "category": {
          "title": "Assignment"
        }
      }
    ]
  }
}
Viewing the visualization result in Neo4j
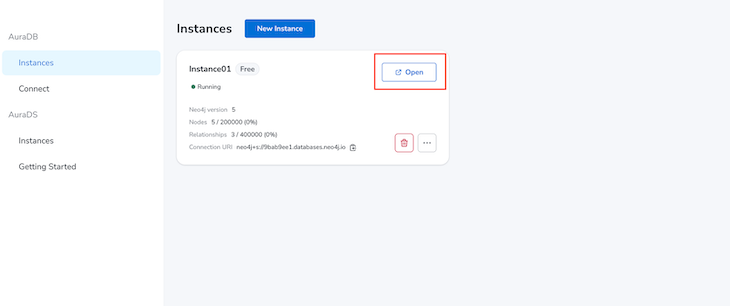
We can also visualize the data from the Neo4j Workspace. Let’s go to the Neo4j AuraDB dashboard and click the Open button of our instance. Then enter your password, and you will log in to the Neo4j Workspace:
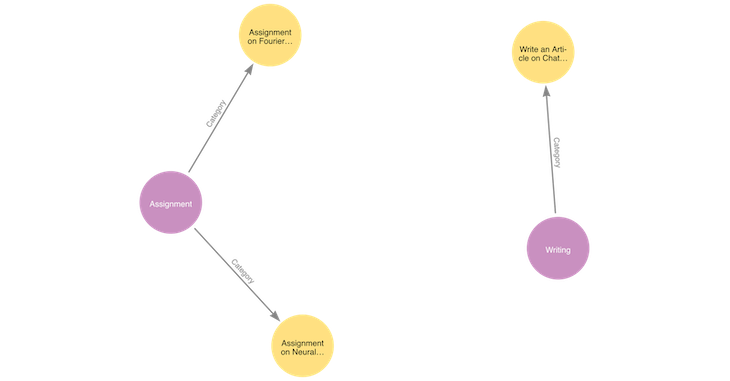
Now, in the Neo4j Workspace, select Show me a graph and hit enter in the search bar. You will see all the nodes and relationships between them. In our example, we will see a graph like the image below:
Conclusion
In this article, we successfully performed the CRUD operation using GraphQL and then visualized the data in Neo4j AuraDB. Using the powerful technology of Neo4j, we can do complex relational queries without all the JOIN operations and get our results faster and more efficiently. We can also use the Neo4j GraphQL Library to work with GraphQL. We saw that we could quickly generate CRUD operations for our given GraphQL type definitions without explicitly writing any queries or mutations.
The post Visualizing GraphQL query data with Neo4j appeared first on LogRocket Blog.
from LogRocket Blog https://ift.tt/bC2Rv3N
Gain $200 in a week
via Read more


