


There is an old adage about the regular expression: “Some people, when confronted with a problem, think ‘I know, I’ll use regular expressions.’ Now they have two problems.” It’s a testament to how messy and complicated regular expression is.
This is where the Swift language version 5.7’s RegexBuilder shines. RegexBuilder simplifies writing regular expressions and makes them more readable. In this article, we’ll cover getting started with RegexBuilder, including using a variety of RegexBuilder components, such as CharacterClass, Currency, and date.
To jump ahead:
- Setting up a Swift Playground on Xcode
- Using Regex API
- The RegexBuilder API
- RegexBuilder quantifiers
- Matching RegexBuilder components
- Capturing matched text
Setting up a Swift Playground on Xcode
You can use the Swift language on many platforms, including Linux. RegexBuilder is supported on Linux, but in this tutorial, we’ll be using Swift on Mac because we’re using methods from the UIKit library, which is only available on Mac.
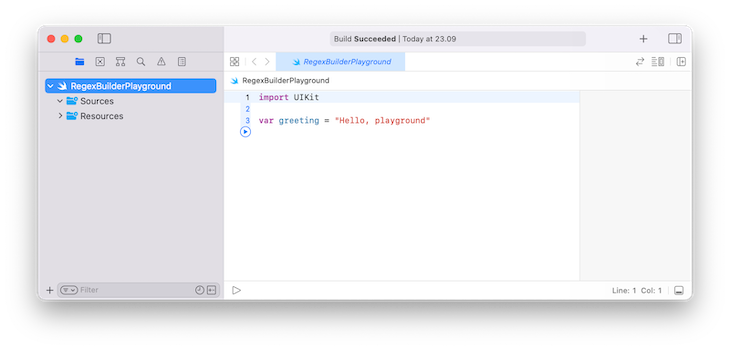
First, open Xcode. Then create a Swift Playground app. After doing that, navigate to File in the menu and click on New > Playground. Give it the name RegexBuilderPlayground. You’ll be greeted with the default code that imports UIKit and declares the variable greeting:
Using Regex API
Before you learn how to use the new RegexBuilder API, you should have familiarity with the original Regex API.
Replace the default code you got when you created a new playground with the following code:
import UIKit

let regex = /\d+@\w+/
let match = "12345@hello".firstMatch(of: regex)
print(match!.0)
Compile and run the code and you will get this result:
12345@hello
As you can see, the regular expression was written with this cryptic syntax: /\d+@\w+/.
\d means a number, \d+ means one or more numbers, @ means the literal @, \w means a word character, and \w+ means one or more word characters. The / is the boundary of the regular expression syntax.
The next line is how you matched the string with the regular expression using the firstMatch method. The result is the match object. You get the full match with the 0 method, if there is one.
The RegexBuilder API
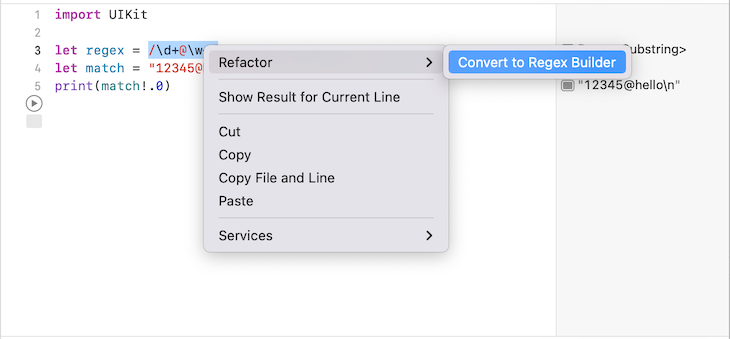
Now, it’s time to check the equivalent code with the RegexBuilder API. There is a shortcut to convert the old regular expression syntax to the RegexBuilder syntax. Highlight and right-click (click while pressing the Control button) on the old regular expression syntax, and you should see an option to refactor the old regular expression syntax to the new RegexBuilder syntax:
The new regular expression syntax will look like this:
let regex = Regex {
    OneOrMore(.digit)
    "@"
    OneOrMore(.word)
}
With this new syntax, you no longer have to wonder what \d means. In the RegexBuilder API, the cryptic \d+ has been replaced with the more friendly syntax, OneOrMore(.digit). It’s very clear what OneOrMore(.digit) means. Same as the case with \w+, its replacement syntax, OneOrMore(.word) is much clearer.
Also, notice that the import line for RegexBuilder has been added:
import RegexBuilder
RegexBuilder quantifiers
OneOrMore is a quantifier. In the legacy API, the quantifiers are *, which means zero or more, + which means one or more, ? which means zero or one, and {n,m} which means, at least, n repetitions and, at most, m repetitions.
If you wanted to make the left side of @ become optional, you could use the Optionally quantifier:
let regex2 = Regex {
    Optionally(.digit)
    "@"
    OneOrMore(.word)
}
The code above means /\d?@\w+/.
What if you want at least four digits and, at most, six digits on the left side of @? You could use Repeat:
let regex3 = Regex {
    Repeat(4...6) {
        .digit
    }
    "@"
    OneOrMore(.word)
}
Matching RegexBuilder components
Let’s start fresh to learn RegexBuilder from scratch. Add the following code:
let text = "Writer/Arjuna Sky Kok/$1,000/December 4, 2022"
let text2 = "Illustrator/Karen O'Reilly/$350/November 30, 2022"
This example demonstrates that you work for LogRocket and need to parse the text of the freelancers’ payments. The text variable indicates that LogRocket should pay Arjuna Sky Kok $1,000 for his writing service on December 4th, 2022, at the latest. The text2 variable indicates that LogRocket should pay Karen O’Reilly $350 for her illustration service on November 30th, 2022.
You want to parse the text into four components, which are the job component, name component, payment amount, and payment deadline.
Using ChoiceOf to indicate choices
Let’s start with the job component. According to the code above, a job is either “Writer” or “Illustrator.” You can create a regular expression expressing a choice.
Add the following code:
let job = Regex {
    ChoiceOf {
        "Writer"
        "Illustrator"
    }
}
As seen in the code, you used ChoiceOf to indicate a choice. You put the things you want to choose inside the ChoiceOf block. You’re not limited to two choices. You can add more choices, but each choice needs a dedicated line. In the legacy API, you would use |.
You can match it with the text variable by adding the following code:
if let jobMatch = text.firstMatch(of: job) {
    let (wholeMatch) = jobMatch.output
    print(wholeMatch)
}
If you compiled and ran the program, you would get the following output:
Writer
This means your regular expression matched the job component. You can test it with the text2 variable if you like.
CharacterClass
Now, let’s move on to the next component: the name. A name is defined by one or more word characters, optional white spaces, and a single quote character. Generally speaking, a name can be more complex than this. But for our example, this definition suffices.
This is your name component’s regular expression:
let name = Regex {
    OneOrMore(
        ChoiceOf {
            CharacterClass(.word)
            CharacterClass(.whitespace)
            "'"
        }
    )
}
You’ve seen OneOrMore and ChoiceOf. But there is also a new component: CharacterClass. In the legacy API, this is comparable to \d, \s, \w, and so on. It’s representative of a category of characters.
CharacterClass(.word) means word characters like a, b, c, d, etc. CharacterClass(.whitespace) means white spaces like space, tab, etc. Other than .word and .space, you also have a couple of character classes. If you want a digit CharacterClass, you can write CharacterClass(.digit) to represent 1, 2, 3, and so on.
So, a name is one or more word characters, any white space, and a single quote character.
You can try this regular expression with the text variable:
if let nameMatch = "Karen O'Reilly".firstMatch(of: name) {
    let (wholeMatch) = nameMatch.output
    print(wholeMatch)
}
The output is what you expect:
Karen O'Reilly
Currency
Now, let’s move to the next component: the payment. The text you want to match is “$1,000” or “$350”. You could create a complex regular expression to match these two payments by checking the $ sign and the optional comma. However, there is a simpler way:
let USlocale = Locale(identifier: "en_US")
let payment = Regex {
    One(.localizedCurrency(code: "USD", locale: USlocale))
}
You could use .localizedCurrency with the USD code and the US locale. This way, you would change the code and the locale in case you wanted to match a payment in another currency, for example, “¥1,000”.
The Regex component One is similar to OneOrMore. It represents an exact one occurrence of an expression.
You can see the result by adding the following code into the file and then compiling and running the program:
if let paymentMatch = text.firstMatch(of: payment) {
    let (wholeMatch) = paymentMatch.output
    print(wholeMatch)
}
The result is a bit different from the previous results. You would get:
1000
The result is not $1,000, but the raw number, 1000. Behind the scenes, RegexBuilder converted the matched text into an integer.
Date
There is an equivalent regular expression for date. You want to parse the date component, December 4, 2022. You can take the same approach. You don’t create a custom regular expression to parse the date. You use a date regular expression component by adding the following code:
let date = Regex {
    One(.date(.long, locale: USlocale, timeZone: .gmt))
}
This time, you used .date with the .long parameter, the same locale, and the GMT time zone. The date you want to parse, “December 4, 2022”, is in the long format. You would use a different parameter if you used a date in a different format.
Now, you should test it by adding the following code and running the program:
if let dateMatch = text.firstMatch(of: date) {
    let (wholeMatch) = dateMatch.output
    print(wholeMatch)
}
The result is in the date format, not the exact string:
2022-12-04 00:00:00 +0000
Just as with the payment case, RegexBuilder converted the matched text into the date.
Capturing matched text
Now, you want to combine all the RegexBuilder code to match the full text. You can stack all the Regex blocks:
let separator = Regex { "/" }
let regexCode = Regex {
    job
    separator
    name
    separator
    payment
    separator
    date
}
So you can give a subset regular expression to a variable and use it inside a bigger Regex block.
Then you should test it with both texts:
if let match = text.firstMatch(of: regexCode) {
    let (wholeMatch) = match.output
    print(wholeMatch)
}

if let match2 = text2.firstMatch(of: regexCode) {
    let (wholeMatch) = match2.output
    print(wholeMatch)
}
The output is perfect:
Writer/Arjuna Sky Kok/$1,000/December 4, 2022
Illustrator/Karen O'Reilly/$350/November 30, 2022
But we’re not satisfied because we want to capture each component, not the whole component. Add the following code:
let regexCodeWithCapture = Regex {
    Capture {
        job
    }
    separator
    Capture {
        name
    }
    separator
    Capture {
        payment
    }
    separator
    Capture {
        date
    }
}
We put a component that we want to capture inside the Capture block. In this case, we put four components inside the block.
This way, when matching the text with the regular expression, you can access the captured components. In the legacy Regex API, we would call this a back reference. Add the following code to get the captured components:
if let matchWithCapture = text.firstMatch(of: regexCodeWithCapture) {
    let (wholeMatch) = matchWithCapture.output
    print(wholeMatch.0)
    print(wholeMatch.1)
    print(wholeMatch.2)
    print(wholeMatch.3)
    print(wholeMatch.4)
}
Compile and run the program and you will get this output:
Writer/Arjuna Sky Kok/$1,000/December 4, 2022
Writer
Arjuna Sky Kok
1000
2022-12-04 00:00:00 +0000
The 0 method refers to the full match. The 1 method points to the first captured component, which is the job component. Then 2 is for the name, 3 is for the payment, and 4 is for the date. You don’t have the 5 method because you only captured four components.
Conclusion
In this article, you learned how to write regular expressions using RegexBuilder. You started by writing a regular expression using the old API and then transformed it to the new syntax. This showed how regular expressions become easier to read. There are some concepts that you reviewed, like quantifiers, choices, character classes, currency, and date. Finally, you captured components of the regular expressions.
This article only scratches the surface of RegexBuilder. There are some things you haven’t learned, like repetition behavior and capturing components using TryCapture. You can also learn the evolution of the RegexBuilder API in the documentation here. The code for this article is available on this GitHub repository.
The post Getting started with RegexBuilder on Swift appeared first on LogRocket Blog.
from LogRocket Blog https://ift.tt/3IOqjeK
Gain $200 in a week
via Read more


