


It’s one thing to write good code; it’s quite another to be confident in your code! End-to-end testing helps you test your app’s user experience by simulating real-world scenarios. This gives you a more complete understanding of how well your app performs, as you’ve run the application from beginning to end to ensure the application flow behaves as expected.
In this article, we will go over what you need to know about end-to-end testing with Next.js apps and how to perform tests with Cypress and Typescript.
Jump ahead:
- What is end-to-end testing?
- End-to-end vs. unit testing
- Why use end-to-end testing?
- Setting up the Next.js application
- Understanding the app
- Setting up Cypress
- Cypress tasks
- Custom commands with TypeScript
- Writing end-to-end tests
What is end-to-end testing?
Before we start working with Cypress, we need to quickly give context on what end-to-end testing is and what benefits it brings to our projects.
As noted, end-to-end testing, also known as E2E testing, ensures that an application runs as intended by simulating real-world user scenarios and use cases from beginning to end.
Some steps taken in an end-to-end test include:
- Going to a specific URL
- Clicking on the login button
- Filling in your username and password
- Navigating user settings
- Logging out
In this example, you can see how the process above simulates how a user would log in to an application and log out afterward, a common scenario.
End-to-end testing vs. unit testing
Both end-to-end testing and unit testing are very important means of testing; some developers use both, while others favor one method in particular. Let’s briefly get to know the differences between them.
- Unit testing: a type of testing where the individual units, functions, or components of an application are tested (e.g., when you test a component in your React app)
- End-to-end testing: E2E tests how a combination of multiple components interacts with one other in order to meet the desired goal (e.g., logging in or changing settings)
Writing unit tests is simpler than writing E2E tests since you can write them as you build each component. E2E tests, by contrast, are written when all necessary components have been built and integrated.
Why use end-to-end testing?
- It ensures the efficiency of the entire application production
- Easily tests the business logic of your application
- Satisfies any end-to-end testing requirements you may have
- Ensures the flow of the application is optimized for the end user’s experience
- Reduces bugs
- Increases confidence in the functionality of the overall application
Setting up the Next.js application
In this tutorial, you’ll see how to implement Cypress in your Next.js applications with the help of TypeScript.
We’ll use a simple Next.js app I built. Use the following directions to get the Next.js app up and running:
# clone the repository
git clone https://github.com/damiisdandy/employee-inventory-learn-cypress-with-typescript.git

# install all dependencies
yarn install

# setting up the database with docker-compose
yarn docker-compose

# create the .env file based on the template.env and put the database URL for your prisma client

# run application
yarn dev
As you can see above, we simply cloned the application, installed all the dependencies, and then used docker-compose (you can learn more about installing docker-compose here). We are using this to create a PostgreSQL database to use for our application.
N.B., this repo has Cypress installed and configured, and you can use this as a reference when following this article.
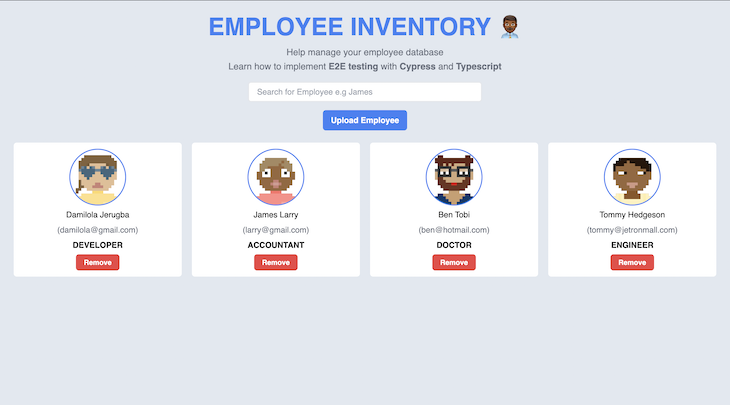
Understanding the app
This is a simple application that lets us manage an employee database by allowing us to upload employee profiles with basic information such as name, email, and occupation. It also allows us to remove employees and search for a specific employee.
Setting up Cypress
Cypress is a JavaScript library that helps you write end-to-end tests and unit tests. You can read more about Cypress on the official website.
Let’s set up Cypress in our Next.js application.
Installing Cypress
To install Cypress, run:
yarn add cypress #npm install cypress
Running Cypress
Once that is done, you can run Cypress with the following command:
yarn cypress open #npx cypress open
In the repo, I created a simple script that does this with the following command:
yarn cypress:open
This runs the Cypress application — you’ll be greeted with the screen below.

Click E2E Testing, then you should see this screen:
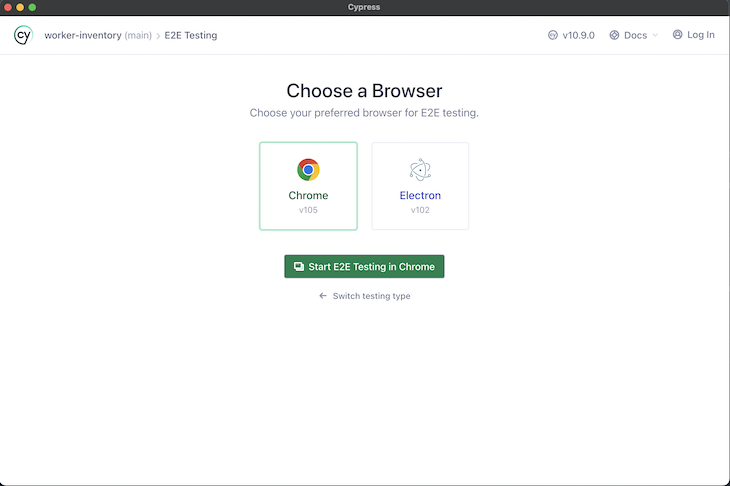
Select Chrome — because E2E tests need to simulate a user’s experience, we need to run the test on a browser rather than directly on the terminal, as with unit testing. After completion, close it.
Now, let’s configure Cypress! 
Creating a config file
At the root of your application, create a file named cypress.config.ts — we will use this file to configure how Cypress runs. You can read more about this in their docs.
Write the following in the config file:
import { loadEnvConfig } from '@next/env';
import { defineConfig } from 'cypress';

const { combinedEnv } = loadEnvConfig(process.cwd());
export default defineConfig({
  env: combinedEnv,
  e2e: {
    baseUrl: 'http://localhost:3000',
    retries: {
      runMode: 3,
    },
    viewportHeight: 1080,
    viewportWidth: 1920,
    video: false,
    screenshotOnRunFailure: false,
    experimentalSessionAndOrigin: true,
  },
});
We have now imported defineConfig from cypress, which is used to write configurations in Cypress. Within this, we specified the base URL of the application, the width, and height of the Chrome browser we’d be using, along with some other configurations.
Setting up test environment variables
You might not want to run tests with the database of the development environment, since you might perform actions like dropping the database or seeding, etc. So, we will need to specify a separate .env file that will be used in the test environment NODE_ENV=test.
Thankfully, Next.js makes it easy for us to specify environment variables based on our test environments.
As we saw in the application setup, we created a .env that will contain a variable called DATABASE_URL, which contains the URL of the database used for our Prisma client.
For testing, we will create another .env file called .env.test. When we run the Cypress test, only these environment variables will be sourced.
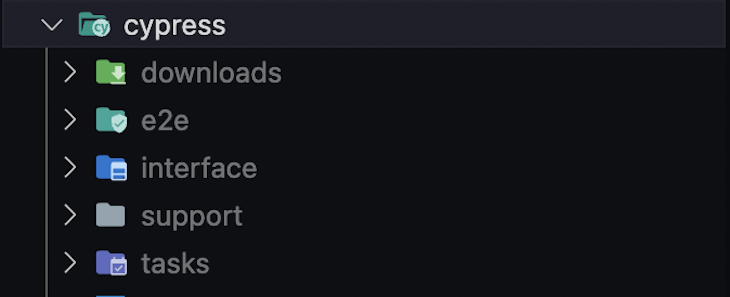
Cypress directory
Once you run the yarn cypress open command, a directory called cypress should automatically be created. If it hasn’t, make it yourself and place the following directories within it:
e2e: this is simply where we write our E2E testsinterface: we’ll get back to this later; it isn’t required by Cypress, but we’ll use this to organize our codesupport: this is where we will write our custom commands with TypeScripttasks: this is where we will write our custom tasks
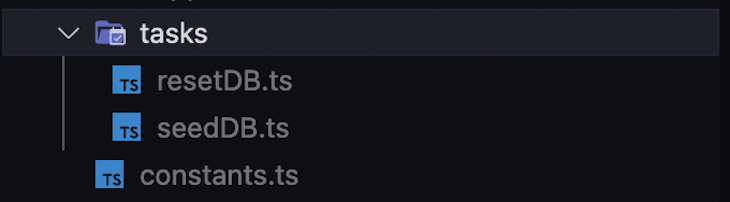
Your file structure should look something like this once complete:
Cypress tasks
Cypress tasks help us execute Node.js commands within our tests (you can read more about Cypress tasks here). We will create two tasks; one to reset the database and another to seed the database (by seeding, I mean populating the database with some default test data).
Inside the task directory, we will create two files called resetDB.ts and seedDB.ts and write the following code within them, respectively:
// /cypress/tasks/resetDB.ts

import { prisma } from '../../pages/api/employees';

export default async function resetDB() {
  return prisma.employee.deleteMany({});
};


// /cypress/tasks/seedDB.ts

import { prisma } from '../../pages/api/employees';
import { DEFAULT_EMPLOYEES } from '../constants';

export default async function seedDB() {
  return await prisma.employee.createMany({
    data: DEFAULT_EMPLOYEES,
  });
};
You’ll notice we imported a file called constants in the database seeding file; this is a file in the root of the Cypress directory that we use to store constants for Cypress tests.
Within this file, you’ll see the following code:
// /cypress/constants.ts

import { Employee } from "@prisma/client";
export const DEFAULT_EMPLOYEES: Omit<Employee, 'id'>[] = [
  {
    email: 'damilola@gmail.com',
    name: 'damilola jerugba',
    occupation: 'DEVELOPER'
  },
  {
    email: 'larry@gmail.com',
    name: 'james larry',
    occupation: 'ACCOUNTANT'
  },
  {
    email: 'ben@hotmail.com',
    name: 'ben tobi',
    occupation: 'DOCTOR'
  },
  {
    email: 'tommy@jetronmall.com',
    name: 'tommy hedgeson',
    occupation: 'ENGINEER'
  },
  {
    email: 'damilola.jerugba@jetronmall.com',
    name: 'damiisdandy',
    occupation: 'DEVELOPER'
  },
];
export const NEW_EMPLOYEE: Omit<Employee, 'id'> = {
  name: "Fiyin Jerugba",
  email: "fiyin@gmail.com",
  occupation: "DOCTOR",
}
So, right now, we should have the following file structure:
Now, it’s time to import our tasks into Cypress! To do this, we simply go to our Cypress config file and add the following to it:
// /cypress.config.ts
// ... previous code imports
import resetDB from './cypress/tasks/resetDB';
import seedDB from './cypress/tasks/seedDB';

const { combinedEnv } = loadEnvConfig(process.cwd());
export default defineConfig({
    // .... previous code
    setupNodeEvents(on, config) {
      on('task', {
        resetDB,
        seedDB,
      });
    },
  },
});
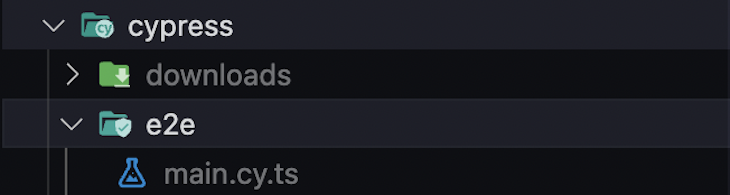
Okay; now that we’ve added our tasks, let’s test them out.
Within the e2e directory in the cypress directory, we’ll create our first test file called main.cy.ts, which is where we will write all of our end-to-end tests.
Let’s write our first test now:
// /cypress/e2e/main.cy.ts

describe('E2E Test', () => {
  beforeEach(() => {
    cy.task('resetDB');
    cy.task('seedDB');
    cy.visit('/');
  });
})
Here, we are simply using the cy.task() function to specify the tasks we want to run; we are using the beforeEach function because we want to run all the following tasks after each test.
After adding this, run yarn cypress open and click Start E2E Testing in Chrome. You should see the following:
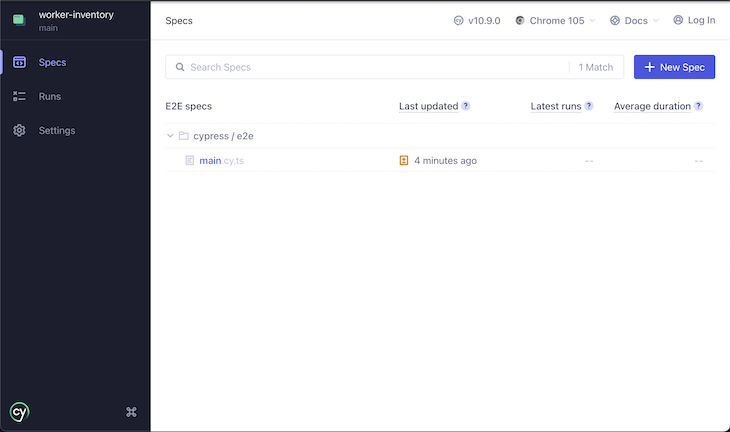
Click on main.cy.ts, and you should see a screen like this:
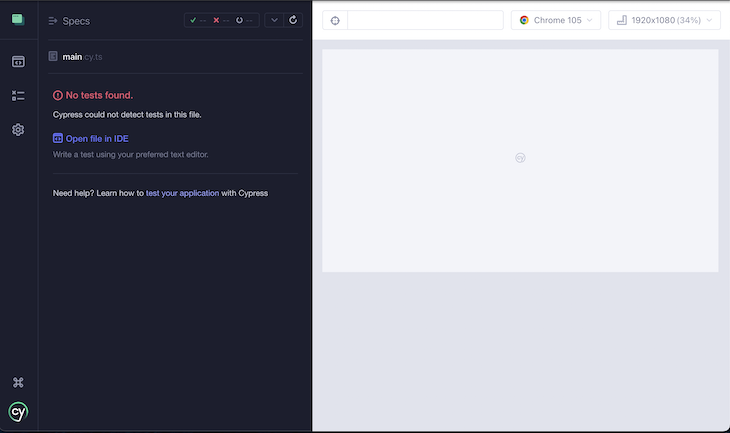
We see “No tests found” because we haven’t listed out any tests, but we have set up the testing environments.
Custom commands with TypeScript
Now, it’s time to use the power of TypeScript to create some handy commands to help make writing tests much easier using auto-completions.
Let’s create a tsconfig.json file within our Cypress folder that extends the one used in the Next.js application:
// /cypress/tsconfig.json

{
  "extends": "../tsconfig.json",
  "compilerOptions": {
    "types": ["cypress", "node", "./support"]
  },
  "include": ["**/*.ts"],
  "exclude": []
}
Listed with the array of "compilerOptions.types", you can see that we are declaring a type from the relative directory, ./support.
The support directory is where we will list our custom commands and their respective types (read more here).
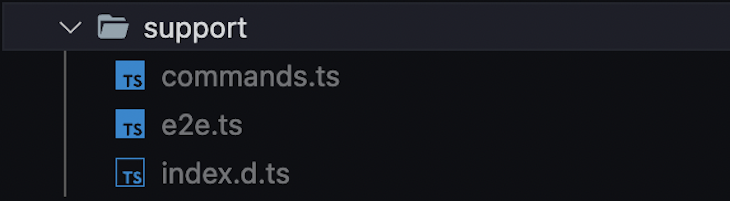
Within that directory, we’ll create three files:
commands.ts: functions for our custom commandse2e.ts: a required file that imports our commandsindex.d.ts: where we will write our type declarations
Your folder structure should look like this:
We’ll create two custom commands: one to easily select DOM elements and another to intercept API calls.
Within the commands.ts file, write the following:
// /cypress/support/commands.ts

Cypress.Commands.add('dataCy', (value) => {
  cy.get(`[data-cy=${value}]`)
});
Cypress.Commands.add('interceptRequest', (method) => {
  cy.intercept({ method, path: '/api/employees' }, (req) => {
    req.alias = method;
  })
})
export { };
The name of the first command is called dataCy. This is a handy command that allows us to select DOM elements that have the data-cy attribute; we’ll need to select DOM elements for our tests to trigger events like click, type, select, etc.
Here’s an example of an HTML/JSX element that has this attribute:
<button data-cy="modal-open-button" className="...">Upload Employee</button>
The second command helps us intercept requests.
Declaring types in TypeScript
Within the index.d.ts file, let’s write the following:
// /cypress/support/index.d.ts
/// <reference  types="cypress" />
import './commands';

type Method = 'POST' | 'GET' | 'DELETE';

declare global {
  namespace Cypress {
    interface Chainable {
      dataCy(value: string): Chainable<Element>;
      interceptRequest(method: Method): Chainable<null>;
    }
  }
}
Then, within the e2e.ts file, we simply import the custom commands:
// /cypress/support/e2e.ts

import './commands';
export { };
We’ve officially written our custom commands! Now, it’s time to write some actual tests.
Writing end-to-end tests
We are going to write an E2E test that performs the following actions, based on the application:
- Search for employees
- Upload employee
- Remove employee
Search for employees
This will be a simple test to automatically type an employee’s name into the search box and check if the employee is listed in the application.
Within the main.cy.ts file, we’ll write the following:
// cypress/e2e/main.cy.ts

import { slugify } from '../../helper';
import { DEFAULT_EMPLOYEES, } from "../constants";

describe('E2E Test', () => {
  beforeEach(() => {
    cy.task('resetDB');
    cy.task('seedDB');
    cy.visit('/');
  });
  it('Search for Employees', () => {
    cy.dataCy("search-bar").click().type(DEFAULT_EMPLOYEES[0].name);
    cy.dataCy("employee").first()
      .dataCy(`employee-name-${slugify(DEFAULT_EMPLOYEES[0].email)}`)
      .contains(DEFAULT_EMPLOYEES[0].name, { matchCase: false });
  });
})
We are importing two files. The first is a file called helper, which is at the root of our application and is used to slugify the email of an employee so we can easily identify it. You may be wondering why we don’t just use the ID. We cannot use the ID since dropping and seeding the database can make it unpredictable.
Obviously, within our React code, we’ll dynamically set the data-cy with the same slugify() function.
<p data-cy={`employee-name-${slugify(email)}`} className="text-center capitalize">
  {name}
</p>
Test steps:
- Click the search bar and type the employee’s name
- Select the
firstDOM element that has the attributedata-cy="employee" - Find the DOM element that has the attribute (e.g.,
data-cy="employee-name-damilolagmail.com") - Check if it exists and has the correct name
Running the Cypress test with yarn cypress open should show the following:

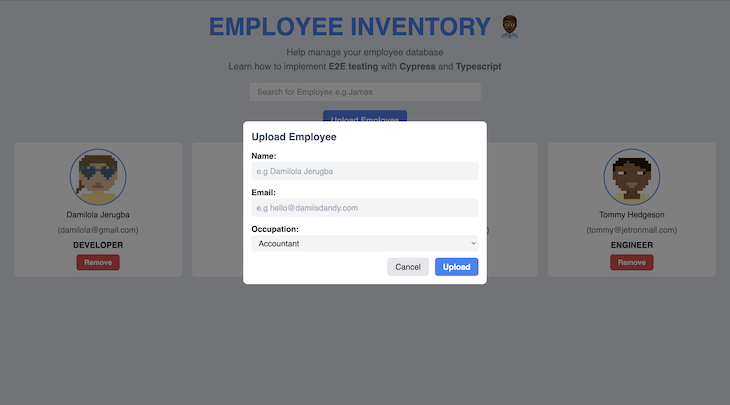
Upload employee
This test opens the modal to upload an employee, fills in the form, then finally uploads the employee.
Within the main.cy.ts file, we’ll write the following:
import { slugify } from '../../helper';
import { DEFAULT_EMPLOYEES, NEW_EMPLOYEE } from "../constants";
import Modal from '../interface/Modal';

describe('E2E Test', () => {
// ...previous code
  it('Create employee', () => {
    cy.interceptRequest('POST').as('createEmployee');
    const modal = new Modal();
    modal.openModal().selectInputandType('name', NEW_EMPLOYEE.name)
      .selectInputandType('email', NEW_EMPLOYEE.email)
      .selectOccupation(NEW_EMPLOYEE.occupation)
      .clickUpload();
    cy.wait('@createEmployee');
    cy.dataCy('employee').last()
      .dataCy(`employee-name-${slugify(NEW_EMPLOYEE.email)}`).contains(NEW_EMPLOYEE.name, { matchCase: false })
      .dataCy(`employee-email-${slugify(NEW_EMPLOYEE.email)}`).contains(NEW_EMPLOYEE.email, { matchCase: false })
      .dataCy(`employee-occupation-${slugify(NEW_EMPLOYEE.email)}`).contains(NEW_EMPLOYEE.occupation, { matchCase: false })
  });
})
You’ll notice that we imported a class called Modal within the interface directory; this is a simple class that helps us create a model of the modal’s UI, so we can write cleaner and more descriptive code.
Within the interface directory, create a Modal.ts file with the following class:
// cypress/interface/Modal.ts

import { Occupation, Employee } from "@prisma/client";

export default class Modal {
  openModal() {
    cy.dataCy('modal-open-button').click();
    return this;
  }
  selectInputandType(name: keyof Omit<Employee, 'id' | 'occupation'>, value: string) {
    cy.dataCy(`modal-input-${name}`).click().type(value);
    return this;
  }
  selectOccupation(value: Occupation) {
    cy.dataCy(`modal-input-occupation`).select(value);
    return this;
  }
  clickUpload() {
    cy.dataCy('modal-button').click();
    return this;
  }
}
This class has some helper methods that interact with the modal’s UI — we return this so we can chain the methods.
Test steps:
- We first intercept any
POSTrequest with our custom command - Open the modal and fill in the details of the employee
- Click the button to upload and wait for the request to finish
- After the request finishes, check if the new employee uploaded exists among the listed employees
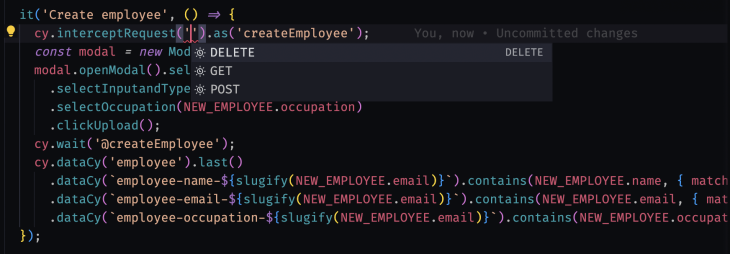
Notice here how TypeScript helps us out with auto-completion for the custom command’s parameters.
Remove employee
This test simply removes an employee and verifies this by checking the number of employees listed after the removal.
import { slugify } from '../../helper';
import { DEFAULT_EMPLOYEES, NEW_EMPLOYEE } from "../constants";
import Modal from '../interface/Modal';

describe('E2E Test', () => {
// ...previous code
  it('Delete employee', () => {
    cy.dataCy('employee-delete-button').last().click();
    cy.dataCy('employees').children().should('have.length', DEFAULT_EMPLOYEES.length - 1)
  })
})
Test steps:
- Click on the last remove button
- Check the length of the list of employees and ensure it is decremented by one
Running the Cypress test with yarn cypress open should show this:
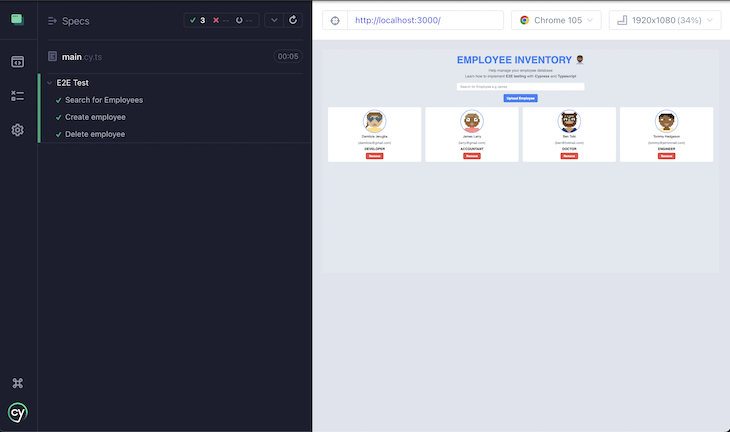
Congratulations, you’ve written an end-to-end test with Cypress!
Conclusion
In this article, we have seen the power of end-to-end testing using Cypress and Typescript.
E2E testing allows us to test the entire flow of our application to simulate that of an actual user, giving us the confidence we need when testing our apps.
With the power of TypeScript, we get a better developer experience with the auto-completion of types and the speed at which it catches errors.
The post End-to-end testing for Next.js applications with Cypress and TypeScript appeared first on LogRocket Blog.
from LogRocket Blog https://ift.tt/htl41Oi
Gain $200 in a week
via Read more


