RSS, or Really Simple Syndication, is one of the means used by site publishers to distribute content in a timely manner. It lets site visitors stay updated on the latest content without having to check for new pieces regularly.
An RSS feed uses an XML file containing details about pieces of content like a list of articles or podcasts in reverse chronological order — where the latest content is displayed on top. It is a file that can be automatically updated to serve a different purpose.
When this file is available for a website, users can access and engage the site’s content using an RSS feed reader or aggregator. This reader is a tool that can fetch the XML content and present the data in a user-friendly format.
The RSS feed is also useful when setting up a campaign for the site’s newsletter. The email marketing platforms can use it to pull content like blog posts, so they can automatically send new content to subscribers.
In this lesson, we will learn how to integrate an RSS feed into a Next.js application. To follow this tutorial, ensure you are familiar with Next.js.
What we’ll cover:
- Setting up our Next.js RSS feed project
- A quick look inside our Next.js RSS feed project
- Creating an RSS feed for our Next.js app
- Using the
rsslibrary - Using the
feedlibrary- Generating other RSS feed formats
Setting up our Next.js RSS feed project
To add an RSS feed to Next.js, we need a Next application. Just so we can focus on the subject, I have created a Next blog starter project containing a list of MDX blog posts that we can subscribe to via RSS.
Let’s clone it using the following command:
git clone https://github.com/Ibaslogic/nextjs-mdx-blog-starter
Then, run the following command to install […]:
cd nextjs-mdx-blog-starter

npm install
# or
yarn
Finally, use the following command to run the project:
npm run dev
# or
yarn dev
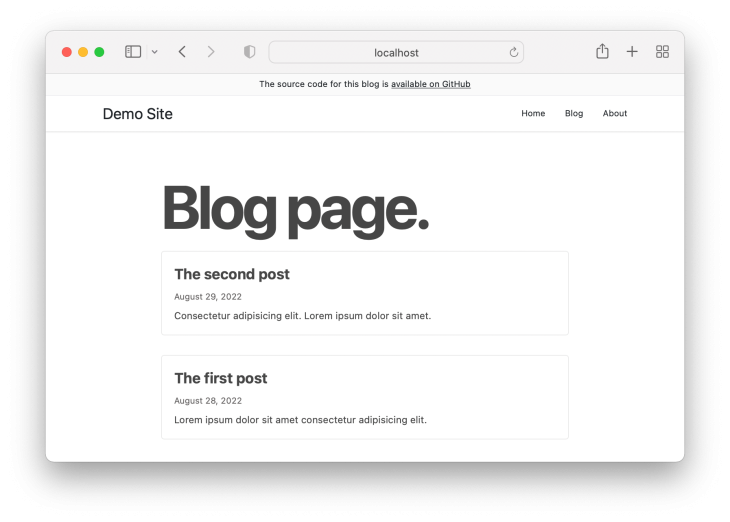
The project blog page should look like so:

A quick look inside our Next.js RSS feed project
Let’s see how we generated the post list to be on the same page. Knowing how the post list is generated will be useful in generating RSS feeds for our blog posts.
If you open the utils/mdx.js file, you will see that we exported an async function called getSortedPost(), returning a list of posts with front matter details like title, slug, description, date, and more.
We then invoked the function inside the getStaticProps() fetching method in the blog page file — pages/blog/index.js — to get access to the data and render the component.
For our RSS feed project, we will create a function to generate the XML feed file and invoke it inside the getStaticProps(). This is because getStaticProps() will be called during the build time for a production site. That is a perfect time to generate the RSS feed.
Note that this fetching method is also always called on every request in development. Hence, the XML file will be generated in development when we navigate to the blog page.
If you have interacted with a website powered by WordPress, you may know that you can view the site’s RSS feed by appending /feed/ to the end of the website URL like so:
https://example.com/feed/
In our project, adding a path in a similar way — like http://localhost:3000/feed/ — will display a 404 error page. So, let’s add the RSS feed to our Next.js app in the next section.
Creating an RSS feed for our Next.js app
There are different ways to create an RSS feed. In the sections below, we will take a look at two different packages: the rss package and the feed npm package.
Using the rss library
The rss package lets us generate an RSS feed and add it to our Next project. Let’s add it by running the following command:
npm i rss
#or
yarn add rss
Once we have added the package, we can create a new RSS feed, add items to the feed, and more.
Creating a new RSS feed
Let’s create a utils/generateRSSFeed.js file and add the following code:
import RSS from 'rss';

export default async function generateRssFeed() {
 const feedOptions = {};
 const feed = new RSS(feedOptions);
}
We started by importing RSS from the rss module and creating a new feed instance. The RSS feed accepts an object that will consist of the feed options.
Let’s add the feed options by updating the file‘s contents to the following:
import RSS from 'rss';

export default async function generateRssFeed() {
 const site_url = 'localhost:3000';

 const feedOptions = {
  title: 'Blog posts | RSS Feed',
  description: 'Welcome to this blog posts!',
  site_url: site_url,
  feed_url: `${site_url}/rss.xml`,
  image_url: `${site_url}/logo.png`,
  pubDate: new Date(),
  copyright: `All rights reserved ${new Date().getFullYear()}, Ibas`,
 };

 const feed = new RSS(feedOptions);
}
The feed options are self-explanatory.
We used the localhost URL as the site_URL. If you are deploying to production, that URL must be the production URL.
The feed_URL specifies the path for the RSS feed. It will be available at http://localhost:3000/rss.xml in development.
Keep note of this path, as we will maintain the same URL when we write the XML content to the client later in this lesson. You can specify your path, like /feed.xml instead of /rss.xml or whatever name you want.
Adding items to the RSS feed
We need to get the list of posts to add our blog posts to the feed. As mentioned earlier, the getSortedPost() function returns the list of post details.
We will import the function, loop through the posts list, and add each individual post to the feed.
The utils/generateRSSFeed.js file now looks like so:
import RSS from 'rss';
import { getSortedPost } from './mdx';

export default async function generateRssFeed() {
 const site_url = 'localhost:3000';

 const allPosts = await getSortedPost();

 const feedOptions = {
  // ...
 };

 const feed = new RSS(feedOptions);

 allPosts.map((post) => {
  feed.item({
   title: post.title,
   description: post.description,
   url: `${site_url}/blog/${post.slug}`,
   date: post.date,
  });
 });
}
Since the getSortedPost() function from the utils/mdx.js file is an async function, we await it using an await keyword and assign the returned posts to the allPosts variable. We looped through the allPosts variable using the map function and added each individual post to a feed item.
Sending XML data to the client
Next, we will write the RSS feed to a file as XML using the Node.js fs function. Let’s import fs and use fs.writeFileSync() API like so:
import fs from 'fs';
import RSS from 'rss';
import { getSortedPost } from './mdx';

export default async function generateRssFeed() {
 // ...
 allPosts.map((post) => {
  // ...
 });

 fs.writeFileSync('./public/rss.xml', feed.xml({ indent: true }));
}
This API creates an rss.xml file in the public folder and writes the XML data to the file.
Save the file.
Finally, find the getStaticProps() fetching method in your project and invoke the generateRssFeed() function. In our project, we can find it in the blog page file, pages/blog/index.js. So let’s import the generateRssFeed() and call it in the getStaticProps() like this:
// ....
import generateRssFeed from '../../utils/generateRSSFeed';

export async function getStaticProps() {
 await generateRssFeed();
 // ....
}

// ....
Let’s save all files.
If we run the npm run build production build command, an RSS feed will be generated automatically in the public folder. However, since we are in development, we will generate the file if we navigate to the blog page. Remember, the fetching method holding the generateRssFeed() lives in the blog page file.
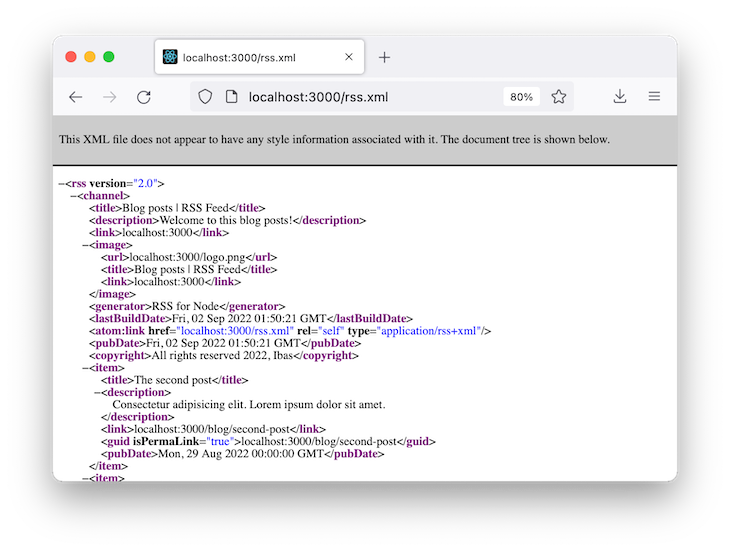
So, navigate to the http://localhost:3000/blog page to generate the file. After that, visit http://localhost:3000/rss.xml in the browser to see an XML page like so:

As we can see in the image above, the latest item in the XML file is the latest blog post. Now, anytime we add a new post, the file will be regenerated to contain the post, and any users that subscribe will automatically get the update.
Using a feed reader
Now that we have a working RSS feed link — though still in development at localhost:3000 — users can use the link to subscribe to the feed in an RSS reader.
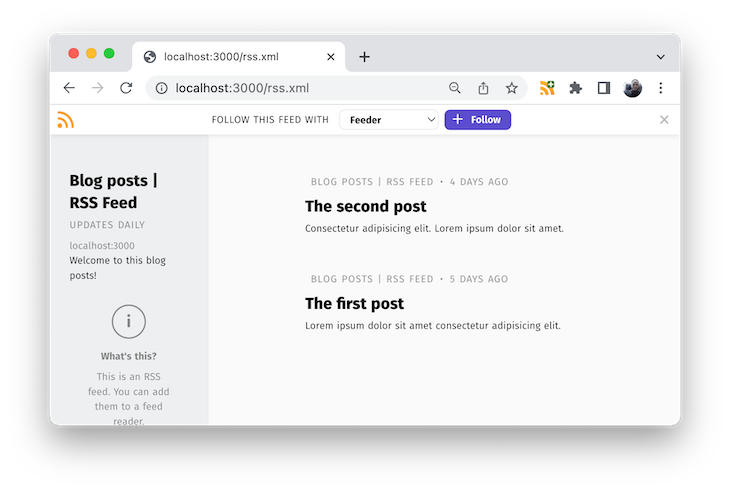
If we install a feed reader extension for Chrome and visit the feed URL, we will see the below:

The content here is friendly to users, and the posts are linked back to the source. Once the users subscribe to the feed, they get notifications for new updates.
Using the feed library
The feed npm package is more robust than the rss package. It lets us generate different feed formats, including RSS, Atom, and JSON.
Let’s add it to our project:
npm i feed
#or
yarn add feed
Next, replace the content of the utils/generateRSSFeed.js file with the following:
import fs from 'fs';
import { Feed } from 'feed';
import { getSortedPost } from './mdx';

export default async function generateRssFeed() {
 const allPosts = await getSortedPost();
 const site_url = 'localhost:3000';

 const feedOptions = {
  title: 'Blog posts | RSS Feed',
  description: 'Welcome to this blog posts!',
  id: site_url,
  link: site_url,
  image: `${site_url}/logo.png`,
  favicon: `${site_url}/favicon.png`,
  copyright: `All rights reserved ${new Date().getFullYear()}, Ibas`,
  generator: 'Feed for Node.js',
  feedLinks: {
   rss2: `${site_url}/rss.xml`,
  },
 };

 const feed = new Feed(feedOptions);

 allPosts.forEach((post) => {
  feed.addItem({
   title: post.title,
   id: `${site_url}/blog/${post.slug}`,
   link: `${site_url}/blog/${post.slug}`,
   description: post.description,
   date: new Date(post.date),
  });
 });

 fs.writeFileSync('./public/rss.xml', feed.rss2());
}
Implementing the feed package is similar to implementing the rss package. You can follow the same steps as above. If we save the file, we should also get a similar result.
Generating other RSS feed formats
To generate RSS feeds for our Next.js app in other formats, including JSON, we will update feedLinks to the following:
feedLinks: {
  rss2: `${site_url}/rss.xml`,
  // other feed formats
  json: `${site_url}/rss.json`,
  atom: `${site_url}/atom.xml`,
},
Then, we will write the RSS feeds to their respective files in the public folder, like so:
// write other feed formats to public folder
fs.writeFileSync('./public/rss.json', feed.json1());
fs.writeFileSync('./public/atom.xml', feed.atom1());
After saving the utils/generateRSSFeed.js file and navigating to the blog page to generate the feed files, we can visit http://localhost:3000/rss.json and http://localhost:3000/atom.xml in the browser to see the RSS feeds in their respective formats.
Adding an RSS feed icon
To ensure that site users easily find the RSS feed URL, we will add an icon that points to the RSS feed at the bottom of our web project. We can get the icon from the React Icons library.
Let’s install react-icons:
yarn add react-icons
#or
npm install react-icons
Open the components/Footer.js file and import the feed icon component at the top:
import { MdRssFeed } from 'react-icons/md';
Then, find this code:
><div className={styles.footer__content}>
<p>© {new Date().getFullYear().toString()} by Ibas</p>
</div>
And update it to the following instead:
<div className={styles.footer__content}>
<p>
© {new Date().getFullYear().toString()} by Ibas
</p>
<a
href="http://localhost:3000/rss.xml"
rel="noreferrer"
target="_blank"
>
<MdRssFeed color="#ee802f" size="30px" />
</a>
</div>
In production, the URL path must be the production URL. If we save and test our project, the icon should appear in the site footer, like so:
![]()
Conclusion
Adding an RSS feed to a Next.js app is one way to keep users updated on the latest content shared on your site. This lesson discussed integrating the RSS XML file in our Next.js app.
If you enjoyed this lesson, share it around the web. The complete source code is available on GitHub, and the finished project is live here.
The post Adding an RSS feed to your Next.js app appeared first on LogRocket Blog.
from LogRocket Blog https://ift.tt/FwodsH0
Gain $200 in a week
via Read more


