


DynamoDB is a NoSQL database, meaning that it does not have a pre-defined structure. With DynamoDB, you can store any data you want without worrying about the data model, making it a powerful tool to use when working with unstructured data.
But NoSQL comes at a cost. Not defining a structure means you must consistently maintain the structure and data types, or risk your application crashing.
Developers have come up with ways to prevent these issues. In this article, we will explore why you should use ORM, or object-relational mapping, with DynamoDB to manage the models of your database. We will also see why Dynamoose is the best ORM tool to use for our purposes. Finally, we’ll integrate Dynamoose with a NestJS application and build a complete CRUD app that you can use as a reference.
To jump ahead in this article:
- Pain points with DynamoDB
- The solution to DynamoDB’s issues
- Why you should choose Dynamoose as your ORM tool
- Creating a NestJS app with Dynamoose
Let’s get started!
Pain points with DynamoDB
The most common way to interact with DynamoDB from a JavaScript application is by using the DynamoDB client of aws-sdk. But this comes with several issues.
1. DynamoDB does not have a way to manage data models
The aws-sdk client does not offer a way to manage your application models. This becomes a hassle if your application requires consistency.
2. DynamoDB does not have data validation
This can be a debatable topic because one of the significant benefits of using DynamoDB is the ability to store anything in the database.
But, in reality, we don’t often require that. For example, we don’t put email into the age field, right? So what do we do?
if(name.length > 0 && isEmail(email)){
  // store the value
}
We have to do the validation ourselves, and for every field, which becomes difficult to maintain.
3. Weird syntax with DynamoDB
The syntax for accessing DynamoDB is strange and often depends on string queries, which is inconvenient. Below is an example from the official documentation that queries a table containing information about an episode from a video series.
var params = {
  ExpressionAttributeValues: {
    ':s': {N: '2'},
    ':e' : {N: '09'},
    ':topic' : {S: 'PHRASE'}
  },
  KeyConditionExpression: 'Season = :s and Episode > :e',
  ProjectionExpression: 'Episode, Title, Subtitle',
  FilterExpression: 'contains (Subtitle, :topic)',
  TableName: 'EPISODES_TABLE'
};

ddb.query(params, function(err, data) {
   // handle the error and the other things here
});
This can take a long time to understand. And when there are multiple fields to reason with, it becomes a nightmare!
4. DynamoDB is difficult to maintain
These issues with DynamoDB give developers (including myself) a tough time reasoning with the queries. And because the syntax is unfamiliar, it requires a steep learning curve, which is not desirable for fast-paced projects.
The solution to DynamoDB’s issues
We can solve the previously mentioned issues with ORM, or object-relational mapping. ORM tools make it easy to manage the models of your database, and make accessing the database easier by using simpler syntax.
There are many benefits to using ORM:
- Syntax is straightforward
- Managing the models becomes easier when you can take advantage of your favorite TypeScript
- It’s more secure
- Data validation can be done easily
- It can communicate with the DynamoDB tables and provide TypeScript support
Why you should choose Dynamoose as your ORM tool
There are many ORM tools to choose for DynamoDB, including dynamodb-data-types, dyngodb, and dynasaur.
But none of them are nearly as popular as Dynamoose, which:
- Is easy to use
- Is similar to Mongoose, which is the ORM tool for MongoDB, making the syntax very familiar to developers
- Offers Good Types support
- Has powerful filtering capabilities
- Supports DynamoDB transactions
- Offers callback and promise support
Today, we will see how we can use Dynamoose with a NestJS application.
Creating a NestJS app with Dynamoose
The first step to creating our NestJS project is to install the NestJS CLI.
npm i -g @nestjs/cli
Next, initialize the boilerplate project.
nest new nestjs-dynamoose-integration
Then, install the required dependency.
yarn add dynamoose
And we are ready to start!
1. Configuring Dynamoose
In order for Dynamoose to talk to your DynamoDB tables on your AWS account, it needs the proper permission. You can find the different ways to configure that here.
For our purposes, we will set the credentials using the access_key and the secret_key inside the application.
Open the main.ts file, and add the following configuration code:
import { NestFactory } from '@nestjs/core';
import { AppModule } from './app.module';

import * as dynamoose from 'dynamoose';

async function bootstrap() {
  // do this before the app is created.
  dynamoose.aws.sdk.config.update({
    accessKeyId: 'YOUR_ACCESS_KEY',
    secretAccessKey: 'YOUR_SECRET_ACCESS_KEY',
    region: 'YOUR_PREFERRED_REGION',
  });

  const app = await NestFactory.create(AppModule);
  await app.listen(3000);
}
bootstrap();
If you are unsure how to get these keys, you can refer to the documentation. Ideally, you should load them using the environment variables, and don’t use them as plain text inside the project.
2. Creating the user endpoints
The nice thing about NestJS is that it automatically creates many boilerplates for you. Today we are going to build a CRUD endpoint using Dynamoose. Let’s create the boilerplate codes for it.
Run the following command on your command line.
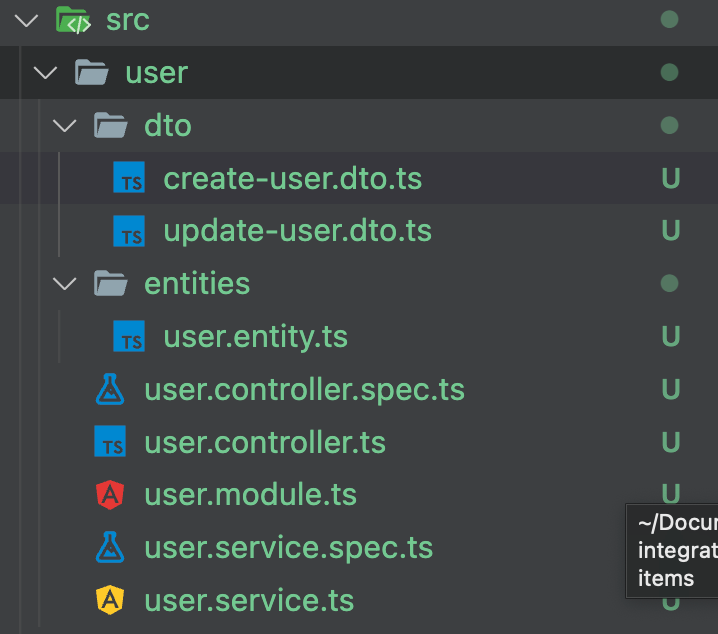
nest g resource user
After running the command, you will see that all the necessary codes are auto-generated.
How cool is that?
3. Defining the data structure
The next step is to create an entity class that extends the Document class provided by Dynamoose, which will define the structure of our entity.
Open up the user.entity.ts file and paste the following code.
import { Document } from 'dynamoose/dist/Document';

export class User extends Document {
  Id = 0;
  Name = '';
}
This structure serves two purposes:
- It helps other developers take a quick look at the data structure
- It auto-suggests the fields using the power of the TypeScript
This step is optional, but I would highly recommend it!
4. Creating the schema to define Dynamoose database models
Following the footprint of the Mongoose library, Dynamoose also defines the database models using the concept of a schema. A schema is the definition of a data model our DynamoDB table understands.
As discussed earlier, DynamoDB does not restrict the data that we can upload to the database tables. But we can define the desired data shape using the schema, and Dynamoose will make sure that our data conforms to that structure.
Some other benefits include:
- We can mark a field as
required, which will make sure that field will never be empty - We can define the
typeof a property - We can define the structure of the nested objects
- We can provide a
custom validationfunction to validate a field’s value - We can generate
timestampsautomatically
Let’s create a new user.schema.ts file in the entities directory and paste the following code there.
import * as dynamoose from 'dynamoose';

export const UserSchema = new dynamoose.Schema(
  {
    Id: {
      type: Number,
      hashKey: true,
      required: true,
    },
    Name: {
      type: String,
      required: true,
      index: {
          name: nameIndex,
          global: true
      }
    },
  },
  {
    timestamps: true,
  },
);
Let’s understand what’s going on here:
- The
Idfield is specified as aNumber, so we can’t pass just any key here - The
Namefield isrequired, so if it is empty, it will cause an error - The type of the
NameisString, so no other data type can go there - We added the
timestampsproperty, which will automatically generate and maintain thecreatedAtandupdatedAtfields for us - We created a global index on the
Namefield
These things occurred without us writing unnecessary validation functions.
5. Creating CRUD operations
Let’s open up the user.service.ts file where we will create all the required CRUD operations.
First, ensure we have a local dbInstance and initialize it with user information.
Keep in mind that, ideally, we want to create a separate user.repository.ts file to keep our database logic. We usually use service classes for business logic.
For simplicity, we are now putting the DB operations inside the service class.
@Injectable()
export class UserService {
  private dbInstance: Model<User>;

  constructor() {
    const tableName = 'users';
    this.dbInstance = dynamoose.model<User>(tableName, UserSchema);
  }

  //... crud functions
}
Here, we are adding a private dbInstance with the User model. Inside the constructor, we specify which table we want to use and provide the UserSchema here.
Now, our dbInstance knows which DynamoDB table to access, and the expected data types.
Creating a user
To create a user, we can write the following function.
async create (createUserDto: CreateUserDto) {
    return await this.dbInstance.create({
      Id: createUserDto.Id,
      Name: createUserDto.Name,
    });
}
Notice that we are using the CreateUserDto request object, which NestJS already defined for us.
It will look something like this:
export class CreateUserDto {
  Id: number;
  Name: string;
}
Getting a user
To get a single user, we can query the database using the primary key like this:
async findOne(id: number) {
    return await this.dbInstance.get({ Id: id });
}
You can also query using many things, like a partial match, or less than, or greater than operators. You can find more details in the documentation.
Updating a user
To update the user, we get an update function provided by Dynamoose.
async update(id: number, updateUserDto: UpdateUserDto) {
    return await this.dbInstance.update({
      Id: id,
      Name: updateUserDto.Name,
    });
}
Deleting a user
To delete a user by ID, input this code:
async remove(id: number) {
    return await this.dbInstance.delete({ Id: id });
}
The final version should look like this:
import * as dynamoose from 'dynamoose';
import { Injectable } from '@nestjs/common';
import { CreateUserDto } from './dto/create-user.dto';
import { UpdateUserDto } from './dto/update-user.dto';
import { User } from './entities/user.entity';
import { Model } from 'dynamoose/dist/Model';
import { UserSchema } from './entities/user.schema';

@Injectable()
export class UserService {
  private dbInstance: Model<User>;

  constructor() {
    const tableName = 'users';
    this.dbInstance = dynamoose.model<User>(tableName, UserSchema);
  }

  async create(createUserDto: CreateUserDto) {
    return await this.dbInstance.create({
      Id: createUserDto.Id,
      Name: createUserDto.Name,
    });
  }

  async findOne(id: number) {
    return await this.dbInstance.get({ Id: id });
  }

  async update(id: number, updateUserDto: UpdateUserDto) {
    return await this.dbInstance.update({
      Id: id,
      Name: updateUserDto.Name,
    });
  }

  async remove(id: number) {
    return await this.dbInstance.delete({ Id: id });
  }
}
6. Test user endpoints
Let’s head over to Postman and create a user using the following body.
endpoint: http://localhost:3000/user
method: POST
body: {
    "Id": 1,
    "Name" : "Faisal"
}
If you try to get the particular user like this…
endpoint: http://localhost:3000/user/1
method: GET
… it will give you the following response:
{
    "Id": 1,
    "Name": "Faisal",
    "createdAt": 1660504687981,
    "updatedAt": 1660504687981
}
You can see there are two extra fields: createdAt and updatedAt, which are generated automatically.
Similarly, you can also play with the update and delete methods.
Now you have a fully working CRUD application capable of talking to the actual DynamoDB using Dynamoose.
Final remarks
In this article, you learned how to use Dynamoose with a NestJS application. Check out the GitHub repository for this project here. An alternative package called nestjs-dynamoose adds some syntactic sugar around the usage.
I hope you learned something new today. Have a great day!
The post Modeling NestJS app data with Dynamoose appeared first on LogRocket Blog.
from LogRocket Blog https://ift.tt/fetDJIF
Gain $200 in a week
via Read more


