


As game developers, we generally want our games to look and feel good. We can use a few tricks to give our game a little shine. One of these tricks is post-processing.
If you’ve played any games, you’re probably aware of post-processing, even if you didn’t know what it’s called. Post-processing plays a massive part in making games because it helps improve your game’s visuals, thereby making it more fun to play.
Not only that, but post-processing also solves the problems of color correction, effects, and more. The Unity game engine has its Post Processing Stack built in. In this tutorial, we’ll look at how to use post-processing in Unity and how to use it, including:
- What is post-processing?
- Post-processing in Unity
- How to use post-processing in Unity
- Post-processing effect tools in Unity
- Combining post-processing effects in Unity
- Other post-processing effects in Unity
First, let’s take a quick look at what post-processing is.
What is post-processing?
Post-processing describes the image effects that we can apply to our game scene. A scene contains your game’s environments and menus.
One way you can think of game scene design is by considering each scene’s file to be like a separate level. You place your environments, obstacles, and decorations in each scene, essentially designing and building your game in pieces.
You can apply post-processing effects as finishing touches to your game’s visuals. Sometimes, you can even use post-processing to create an entirely different look for your game.
For example, you could turn a dark scene into a bright one by using auto-exposure and the Bloom effect to depict daylight. You could also turn a bright day into a cold and cloudy one using the White Balance effect.
A lot of what we perceive in our games as virtually polished is mostly achieved through what we call post-processing effects. Post-processing includes full-screen filters and effects performed on a camera’s image buffer before displaying the image on the screen.
Post-processing is commonly used to add cinematic qualities to our scenes by simulating certain qualities particular to film cameras, such as a motion blur. Unity uses the following examples to show what a game scene could look like both with and without post-processing:
Without (before) post-processing:
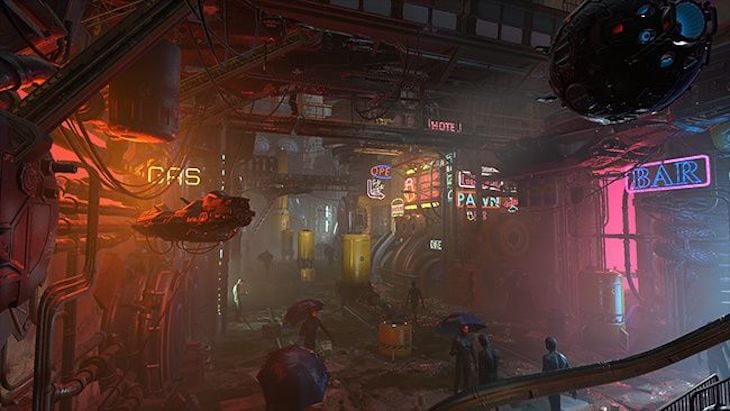
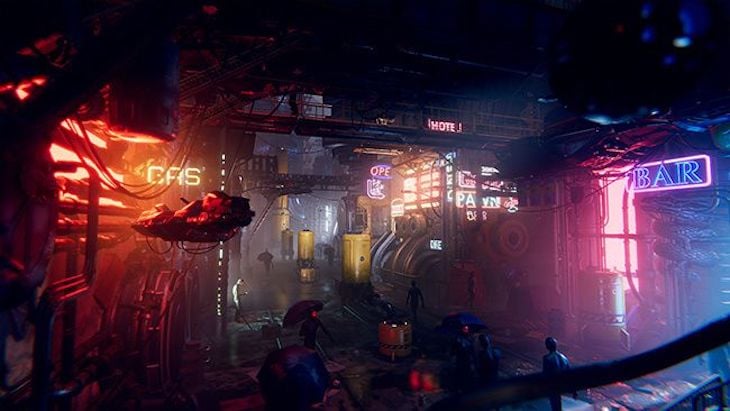
Studying both images, we can see the change in colors as well as a brighter glow in some parts of the image scene. This means effects like tonemapper and the bloom effect have been applied to the scene, although there could be more.
The images above show how important post-processing is in altering the graphics of our game to be displayed on the screen.
Post-processing improves the game’s visual aspects and makes the images more lifelike and vivid. It also fine-tunes the game’s renders, making the graphics more authentic. You can even use post-processing effects to change a scene’s mood.
Let’s now move on to discuss post-processing in Unity.
Post-processing in Unity
The Unity game engine supports post-processing by providing several effects that can significantly improve your game’s appearance in no time. We can use these effects to provide beautiful graphics and improve our game.
It is important to note that the way Unity’s post-processing package is available to you depends on your Unity project’s render pipeline. There are three ways we can use post-processing: the Built-in Render Pipeline, the Universal Render Pipeline, and the High-Definition Render Pipeline.
The Built-in Render Pipeline is a render pipeline that does not come with the post-processing package by default. We’ll have to install it using the package manager.
The Universal Render Pipeline (URP) is a render pipeline that has its post-processing solution installed in Unity by default when you create a project using the URP Template.
The High Definition Render Pipeline (HDRP), like the URP, also has its post-processing solution installed by Unity by default when you create a project using the HDRP template.
Although post-processing is slightly different when working with either URP or HDRP, their workflows are pretty much the same — though the HDRP offers some more advanced effects. This article will focus on the most commonly used URP, which should also apply to the HDRP.
How to use post-processing in Unity
First, we’ll look at how we can use post-processing in the built-in pipeline. Afterwards, we’ll look at setting up post-processing in the URP or HDRP.
Using post-processing in Unity’s built-in pipeline
Since the built-in pipeline does not have post-processing built in by default, we’ll have to install it by selecting window> Package Manager.
It should open a new pop-up window; if it doesn’t, check that you set your package manager to Unity Registry.
In this pop-up window, search for and install your required package — in this case, Post Processing. You’ll see the window as shown below:
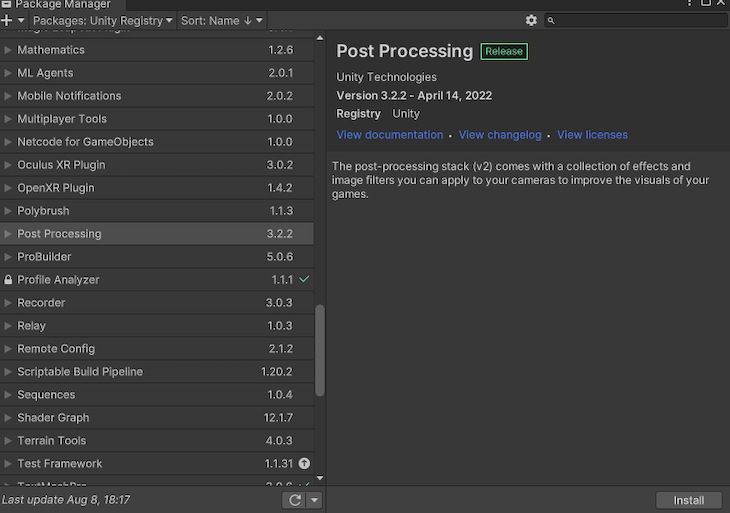
Click on the “Install” button at the bottom right corner of the window.
Now that we have that installed the Post Processing package, we need to configure our game and scene to take advantage of the package. To accomplish this, we will require a Post-processing Volume component to determine the area in which we will apply our effects. So let’s build one.
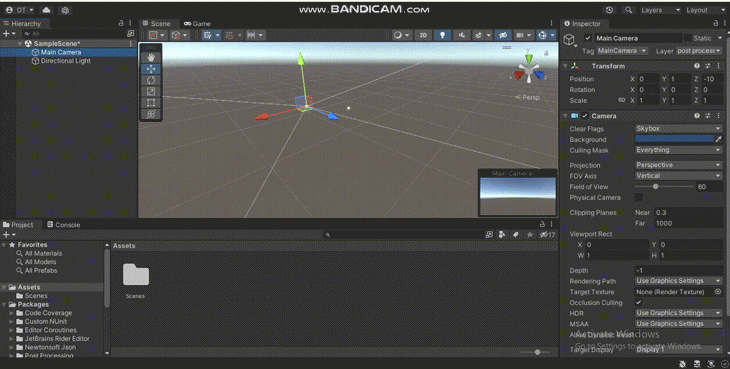
Select your primary camera. In the default tab, we must create a new layer, name it post-process layer, and assign it as our default layer, like so:
Next, scroll down, click the “Add Component” button, search for the post-process layer we created in the previous step, and select it. This will allow every effect we add to to be visible.
Once we’ve done that, we’ll click the “Add Component” button again and create a Post-process Volume component.
Tick the “Is Global” box to set this component to global; this will make the effects applied to our scene visible on the entire screen.
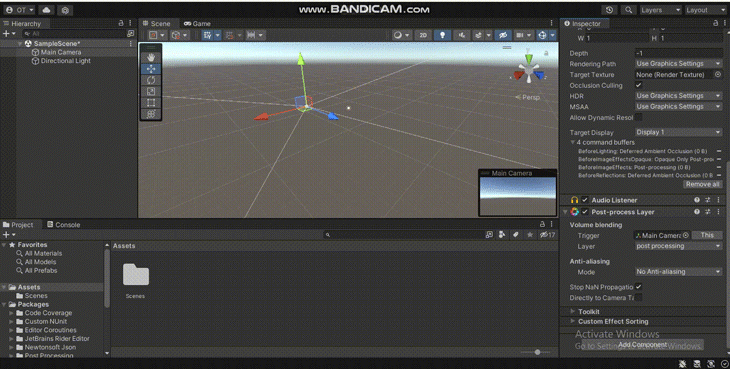
After we’ve ticked this box, let’s now create a new profile by clicking the new button. We can then move on to add the effects we we want.
Setting up post-processing in URP and HDRP
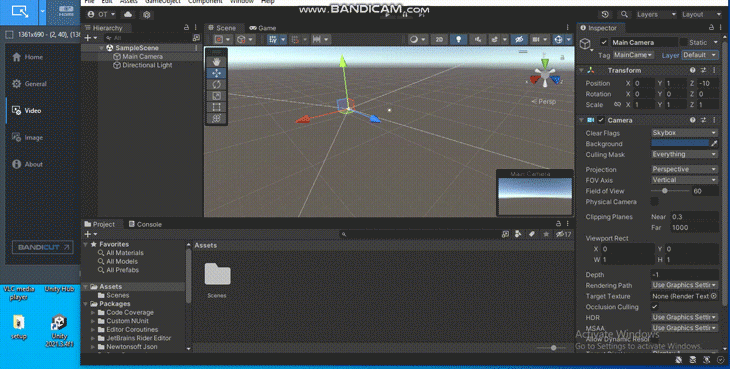
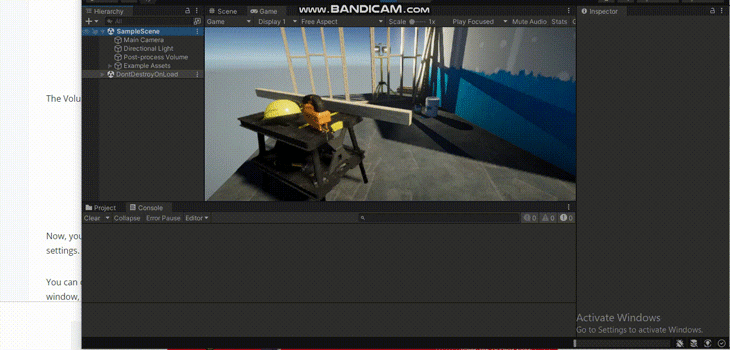
Since URP and HDRP have similar workflows, we’ll only look at how to set up post-processing in URP for this. I’ll be creating a 3D URP sample scene so we can use it to explain the post-processing effect tools in the next section.
First, let’s create a GameObject with a Volume component. There are different options for our Volume.
The Global Volume applies effects to the entire screen, whereas the Box, Sphere, and Mesh Volumes define a boundary in their respective shapes and apply post-processing effects when the camera enters the boundary.
After we’ve created that, our inspector tab should look like this for our Volume:
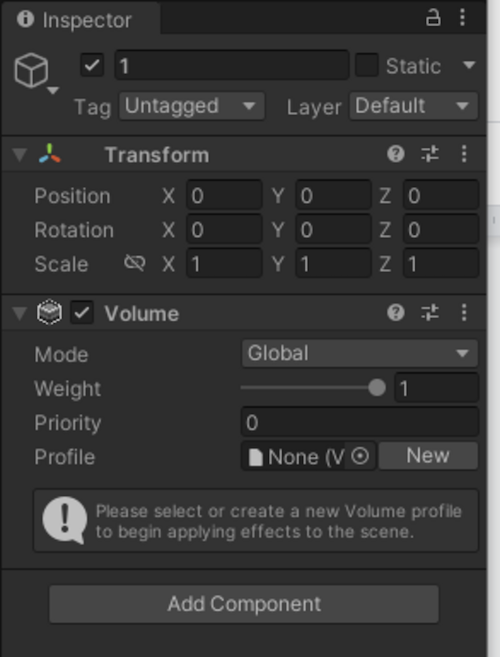
We then need to create a Volume profile, which is like a container for holding your post-processing effects and their settings. As you can see in the image above, you need this Volume profile in order to start applying scene effects.
In our inspector tab under our volume profile, click the “New” button. Once we have added a Volume profile, we’ll click the “Add Override” button.

Select “Post-processing,” and we should see a list of effects. Let’s see how they work in the next section.
Post-processing effect tools in Unity
In this section, we will explore various post-processing effect tools in Unity and how they can affect your images.
Before we continue, here’s what our sample image scene looks like without post-processing:

Let’s now add some post-processing effects to this sample image scene. For each effect, you can modify the various properties to achieve the exact look and feel you want.
Bloom effect
When it comes to making objects glow or look brighter, the Bloom effect comes in handy. It makes areas in our objects more visible or stand out uniquely by adding more light to our image. If we add the bloom effect, like so:
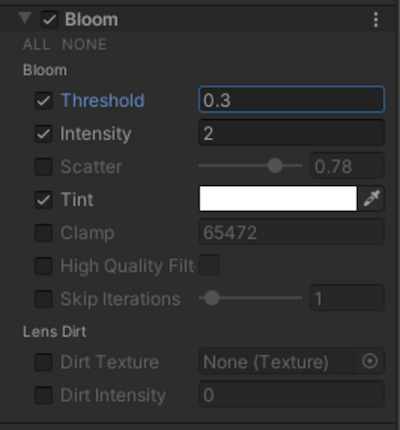
We will get the result below:
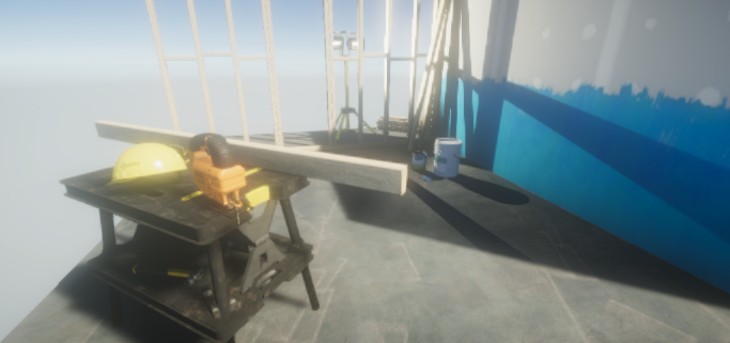
You could use the Bloom effect to give the impression of a bright, sunny day, or perhaps for a game with fantasy or otherworldly themes.
Vignette effect
Vignette is a post-processing effect property that adds a dark border around the screen where our image is displayed. This is often seen in images shot with low-quality camera lenses, but is now often used intentionally to add a dramatic effect. If we add a vignette to our image, like so:
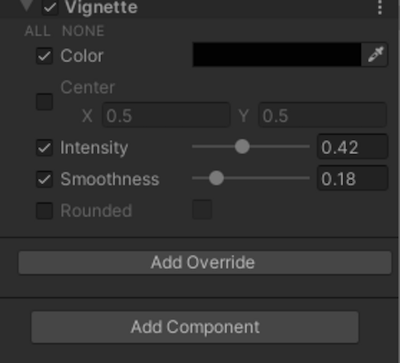
We will get the following result:
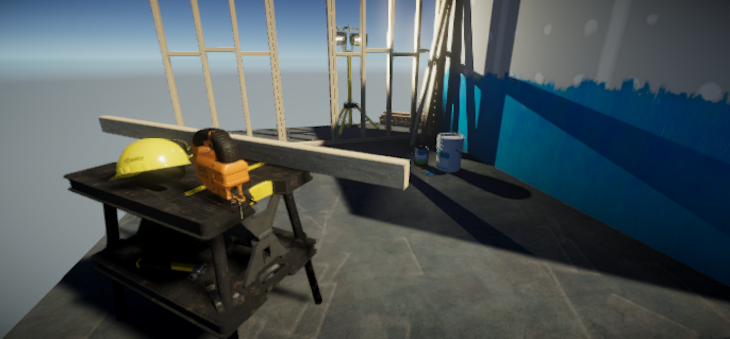
As you can see, the Vignette effect adds more depth to the scene, which could be used in a horror scene as it adds a sense of creepiness.
Chromatic Aberration effect
When we want our scene to appear as if it were recorded through a lens that is unable to converge light at the edges, we use the Chromatic Aberration effect. If we add chromatic aberration to our image, like so:
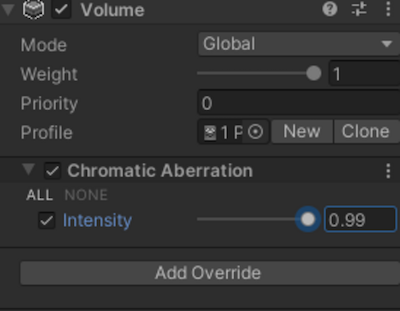
Our result will look like the below:

You may have seen a similar effect used in games where the character you’re playing gets injured or hurt.
Depth Of Field effect
The Depth Of Field effect blurs anything beyond a specified distance to keep the focus on certain things in the scene. It is one of the commonly used post-processing effects and can make your game scene look like it has more depth. An example of when If we add this to our image, like so:
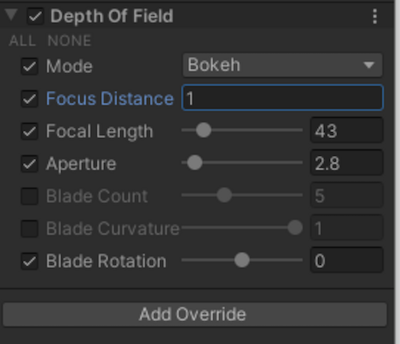
We will get the result below:
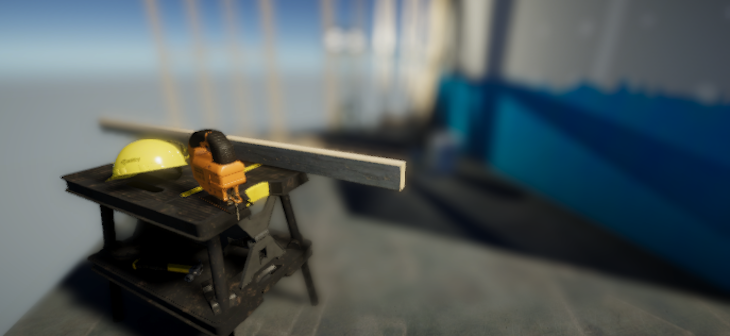
An example of when you could use this effect is to give the impression of a very hot day that causes things in the distance to appear hazy and blurry.
Film Grain effect
The Film Grain effect is used to add a particle-like grittiness to our image or scene, making it look like an old-school film. If we add the Film Grain effect to our image, like so:

We will get the following result:
An example of when we could use the Film Grain effect is if we wanted a scene to look like a classical film.
Tonemapping effect
The Tonemapping effect remaps the High Definition Range (HDR) color values, giving the appearance that a scene with a lower dynamic range has a wider range of colors.
In other words, this effect broadens the color range in order to increase contrast and make the scene appear more realistic.
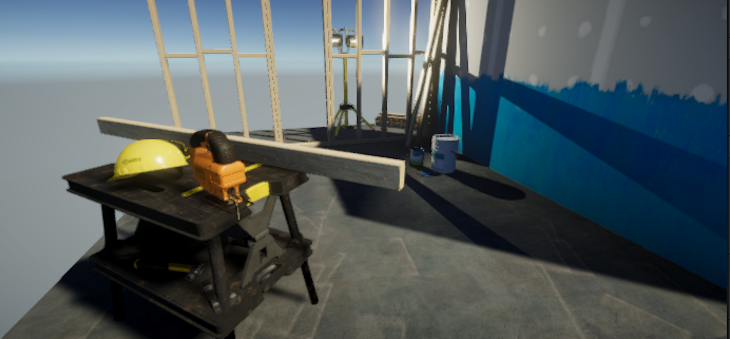
If we add tone mapping to our image, like so:
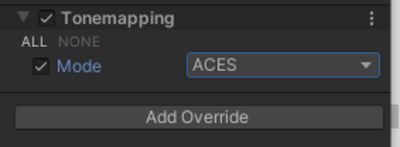
Our result will look like the below:
There are two Tonemapping modes we can choose from in Unity. Neutral tone mapping has minimum impact on the colors, which is a great start when you want better color-correcting control. ACES tone mapping, which we used above, is an industry standard for achieving a more cinematic look.
White Balance effect
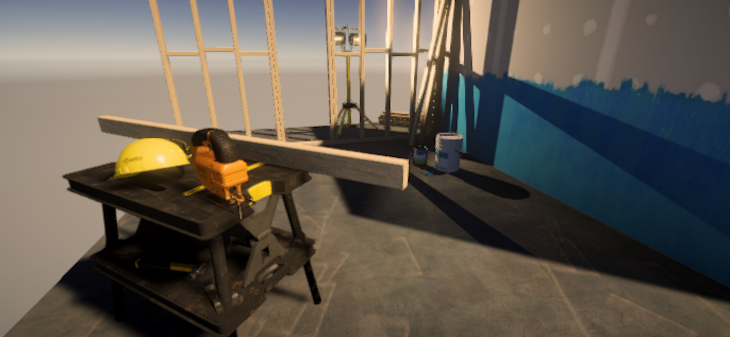
The White Balance effect changes the overall tone of the scene by shifting the temperature or the tint while maintaining the white areas. If we add it to our image, like so:
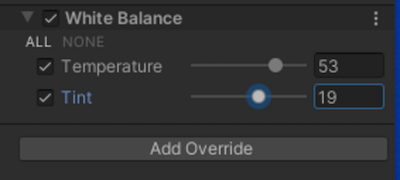
We will get the result below:
In this case, we shifted the temperature higher, making the image appear warmer. If you wanted to make the image appear cooler, you would shift the temperature lower.
Lens Distortion effect
The Lens Distortion effect simulates the distortion caused by a camera lens in real life. A wider field of view is possible with the right values. If we add it to our image, like so:
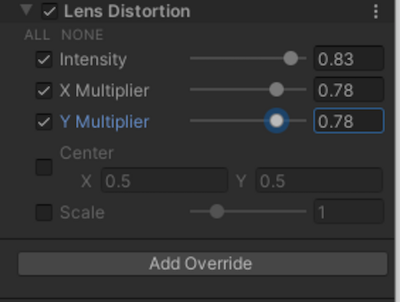
Our result will look like the below:
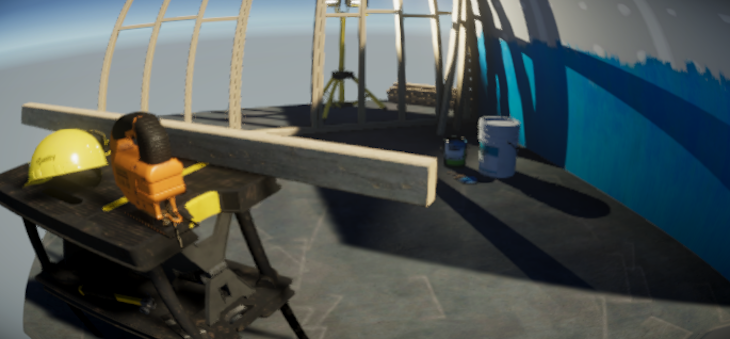
The Lens Distortion effect is great for things like underwater scenes, scenes that take place from a fish’s point of view, or sniper view scene.
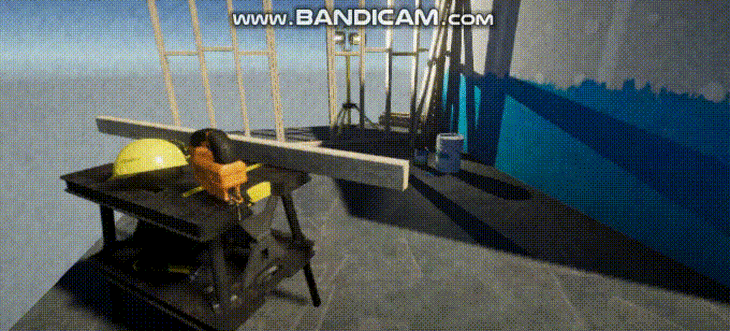
Combining post-processing effects in Unity
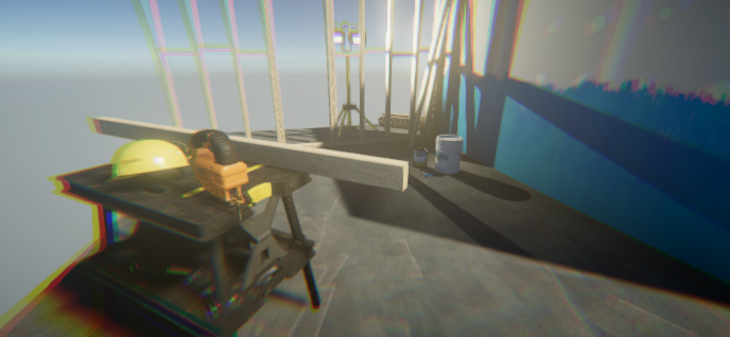
We can also combine two or more effects. Let’s see how to do that by combining a Bloom effect alongside a Chromatic Aberration effect, as shown below:
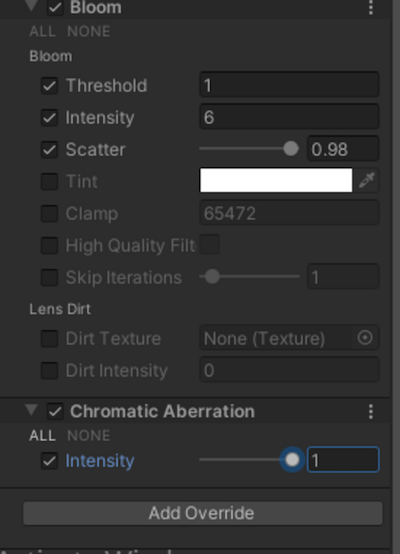
Our result will look like the following:
Other post-processing effects in Unity
The post-processing effects we reviewed above are available in all Unity render pipelines. There are other post-processing effect tools we didn’t review above. Depending on the render pipeline you pick, the number of post-processing effects available and their behaviors may differ.
You can check out Unity’s official post-processing overview to get a list of the post-processing effects that might be available. You can also read up on optimizing your Unity project and other useful articles to help enhance the games you make with this game engine.
Conclusion
This article talked about post-processing and how important it is in our game. We also looked at how post-processing works in Unity, demonstrating examples of various effects on an example image. Please share if you found this helpful.
The post Exploring post-processing in Unity appeared first on LogRocket Blog.
from LogRocket Blog https://ift.tt/QhfYMEk
Gain $200 in a week
via Read more


