Vue is designed to be dynamically extensible, allowing you to quickly develop reusable and maintainable components, use client-side data binding, and provide a rich ecosystem of plugins to enhance its functionality.
One of the many features available in Vue is the watcher function, which allows us to monitor an application state and trigger actions based on these changes. In this article, we’ll look at how watchers work in Vue, what they can do, and how to utilize them to build powerful apps.
- What is a watcher?
- Using a watcher
- Example scenarios of watchers in action
- Stopping a watcher
- Computed properties vs. watchers
What is a watcher?
A watcher in Vue is a special feature that allows us to observe some data and perform specific actions when it changes. It is a more generic way to observe and react to data changes in the Vue instance.
With watchers, we are not just able to watch a property and perform custom actions; we can also access the old value that this particular property is changing from, as well as the new value that it has changed to.
Using watchers
Using the Options API, we may utilize the watch option to listen for changes in a property value, as shown below:
<script>
export default {
  data() {
    return {
      message: "Hello Vue!",
    };
  },
  watch: {
    message(newValue, oldValue) {
      // do something with newValue and oldValue.
    },
  },
};
</script>
Additionally, we can also accomplish the same thing with the Composition API‘s watch() function:
<script setup>
import { ref, watch } from "vue";
const message = ref("Hello Vue!");

watch(message, (newValue, oldValue) => {
  // do something with newValue and oldValue.
});
</script>
So that anytime the value of message changes, we are able to access its new value or previous value and perform any preferred action.
In a subsequent chapter, we’ll look at more practical examples of employing watchers in real-world applications. However, before we get there, let’s go over all of the options available to a watcher.
Deep watching with the deep option
The default behavior of watchers in Vue.js is shallow; i.e., they only monitor changes to data at the top level and would not react to nested property changes.
For example, we have an array of objects:
<script>
export default {
  data() {
    return {
      someData: [
        {
          id: 1,
          name: "John",
        },
        {
          id: 2,
          name: "Jane",
        },
      ],
    };
  },
  watch: {
    someData(newValue, oldValue) {
      console.log("someData changed!");
    },
  },
};
</script>
…and set up a watcher for this data as we did above. Our watcher will not be triggered any time an object’s property changes, such as when we set someData[0].id to a random number, for example.
We can fix this by setting an optional deep property in our watcher to true. However, this will change the syntax in which our watcher is created a bit, as we’ll have to introduce a new handler function:
// . . .
watch: {
  someData: {
    handler(newValue, oldValue) {
      // console.log(newValue, oldValue);
      console.log("someData changed!");
    },
    deep: true,
  },
},
And with this new addition, our watcher will be triggered even when a nested property changes.
This example can also be replicated with the watch() function in the Vue 3 Composition API like below:
<script setup>
import { ref, watch } from "vue";

const someData = ref([
  {
    id: 1,
    name: "John",
  },
  {
    id: 2,
    name: "Jane",
  },
]);

watch(someData, (newValue, oldValue) => {
    console.log("someData changed!");
  },
  {
    deep: true,
  }
);
</script>
The immediate option
Watchers are not activated immediately unless the value you are watching has changed. But in some cases, we may want to perform certain actions with the initial value of the property we are watching. For example, our application might require that we send an API request with the initial data and then repeat the process if the data changes.
We can force a watcher to be executed immediately by using the handler function like we did in the previous example, and also set its immediate option to true:
<script>
export default {
  data() {
    return {
      message: "Hello Vue.js!",
    };
  },
  watch: {
    message: {
      handler(val) {
        console.log(val);
      },
      immediate: true,
    },
  },
};
</script>
By doing this, we can have our watcher take a certain action as soon as our app is launched and continue to do so whenever the property we are watching changes in the future.
With Vue 3, the immediate option can also be added to an optional object, as shown below:
<script setup>
import { ref, watch } from "vue";
const message = ref("Hello Vue!");

watch(
  message,
  (newValue) => {
    console.log(newValue);
  },
  {
    immediate: true,
  }
);
</script>
Furthermore, the Composition API introduces a new watchEffect() method that is quite similar to watch() with the immediate option set to true. However, while the watch function/option just tracks the explicitly monitored source, watchEffect() will automatically track every reactive property accessed throughout its execution:
<script setup>
import { ref, watchEffect } from "vue";
const foo = ref("Hello world!");
const bar = ref("Hello again!");

watchEffect(() => {
  console.log(foo.value);
  console.log(bar.value);
});
</script>
In this manner, the initial value of foo and bar is logged to the console, and will continue to be logged anytime their value changes.
Example scenarios of watchers in action
To further understand how watchers work in a real life application, let’s go over some practical examples.
Watch typing state
A simple and intuitive experiment with watchers is an application that watches a typing state and performs certain actions as the user is typing:
<template>
  <div>
    <input type="text" v-model="message" />
    <p v-if="typing">Typing...</p>
  </div>
</template>

<script setup>
import { ref, watch } from "vue";

const message = ref("");
const typing = ref(false);

watch(message, (value) => {
  typing.value = true;
  setTimeout(() => {
    typing.value = false;
  }, 2000);
});
</script>
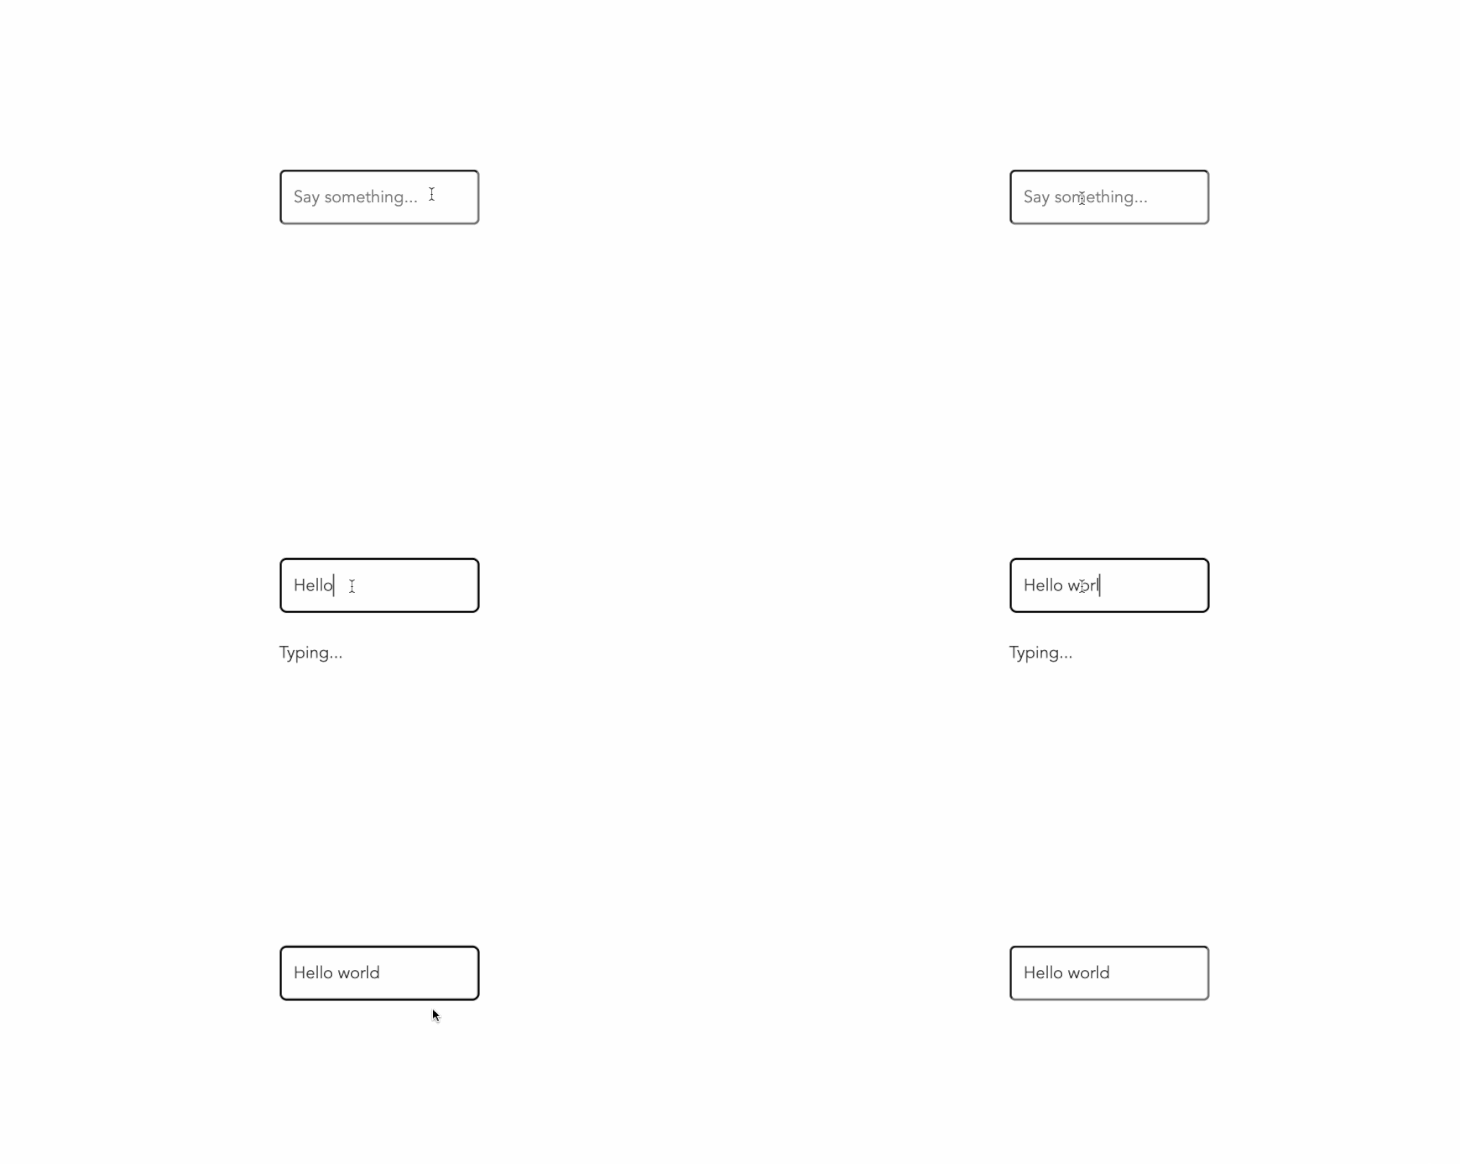
As in this example, we created two reactive states (message and typing). We then bind the message to an input element and also create a watcher for it, so that anytime it changes, we set the typing value from false to true and automatically set it back to false after 2 seconds.
When we run this example in the browser, we’ll get the following result:

While this example is basic, you could take it a step further by sending a request to a remote API and updating your markup based on the response from this request, similar to how search engines like Google provide search recommendations as you type.
Real-time converter
Another interactive example is a simple converter application, where the output can be affected and calculated based on different input points.
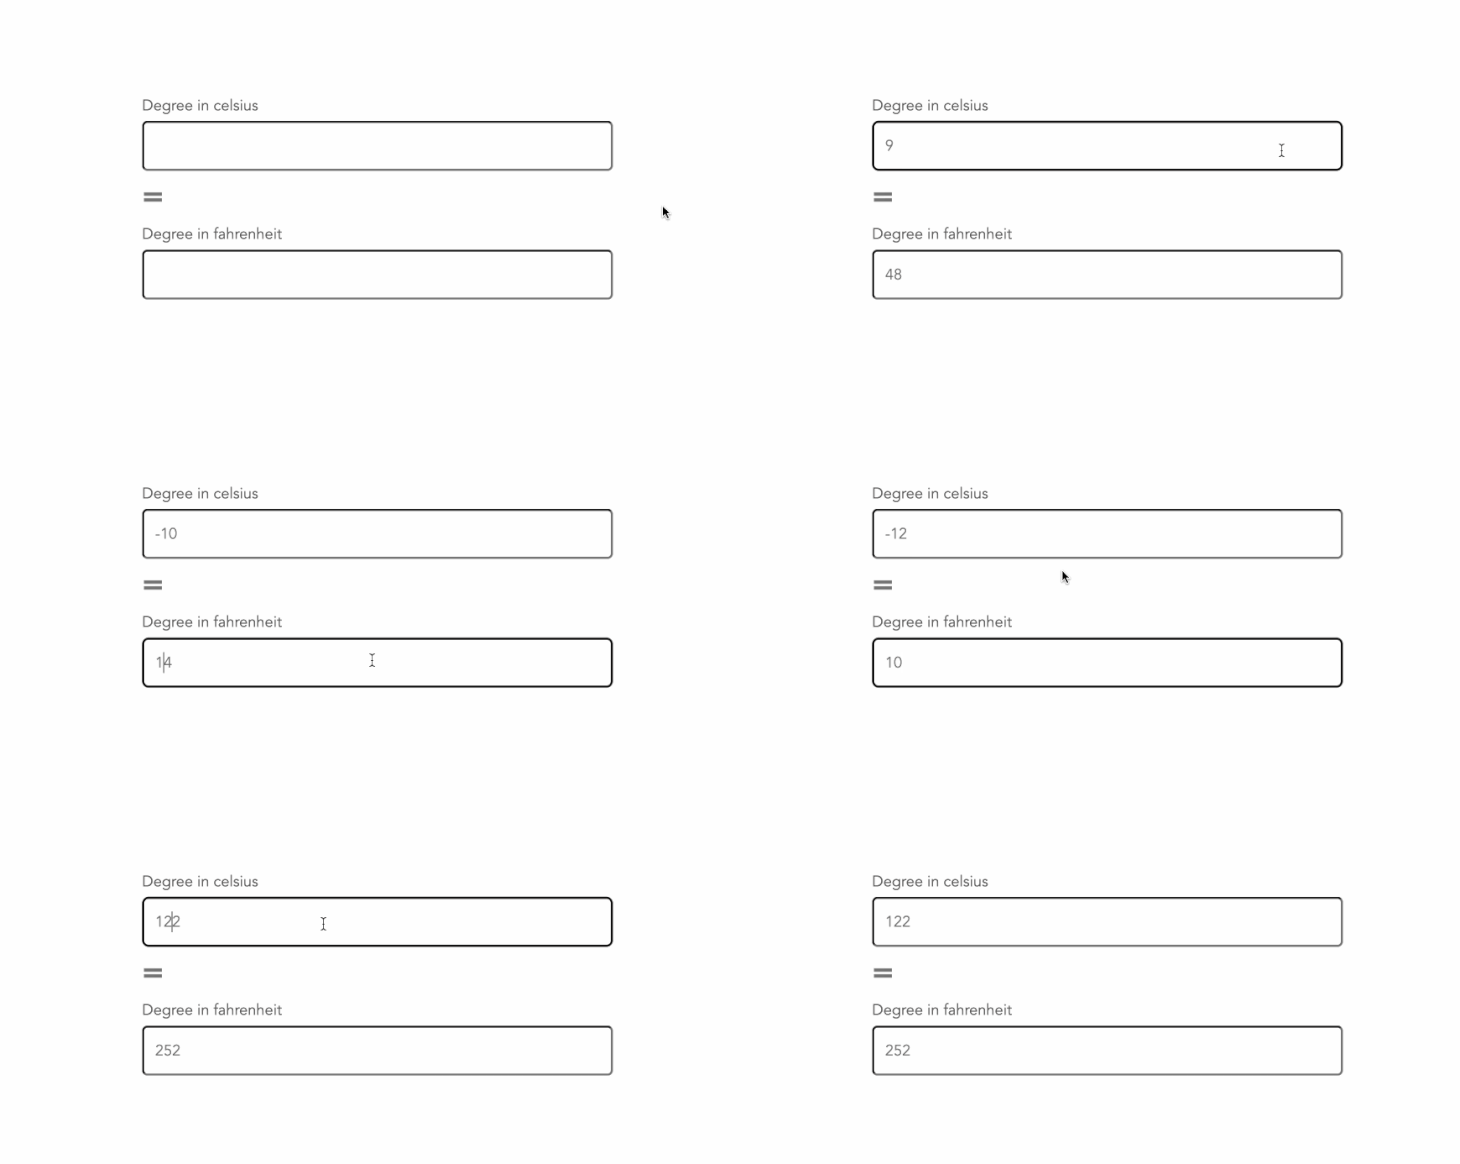
Like with the code below, we created a temperature converter, where the Fahrenheit value could be calculated by entering a Celsius value and vice versa:
<template>
  <div class="centered">
    <div>
      <label for="celsius">Degree in celsius</label>
      <input type="text" v-model="tempCelsius" id="celsius" />
    </div>
    <p style="font-size: 30px; margin: 0; font-weight: 600">=</p>
    <div>
      <label for="fahrenheit">Degree in fahrenheit</label>
      <input type="text" v-model="tempFahrenheit" id="fahrenheit" />
    </div>
  </div>
</template>

<script setup>
import { ref, watch } from "vue";

const tempCelsius = ref(null);
const tempFahrenheit = ref(null);

watch(tempCelsius, (newValue) => {
  tempFahrenheit.value = Math.round((newValue * 9) / 5 + 32);
});

watch(tempFahrenheit, (newValue) => {
  tempCelsius.value = Math.round(((newValue - 32) * 5) / 9);
});
</script>
Running this would also give us the output below:

Simple countdown timer
To see the watchEffect() function in action, we’ve also created a simple countdown timer application below, which will begin counting from 10 seconds after our application is mounted and will end when the timer reaches 5 seconds:
<template>
  <div class="centered">
    <h1></h1>
  </div>
</template>

<script setup>
import { ref, watchEffect } from "vue";
const counter = ref(10);

watchEffect(() => {
  if (counter.value > 5) {
    setTimeout(() => {
      counter.value--;
    }, 1000);
  }
});
</script>
The logic behind this is pretty straightforward. We’d created a reactive counter property with a value of 10. We then created a watchEffect() that will continuously decrease our counter by 1 every second, and stop whenever its value is at 5.
Stopping a watcher
When the parent component is unmounted, watchers stop automatically, and in most cases, you won’t need to end a watcher manually. However, there are scenarios where you’d want to stop a watcher, perhaps when a condition has been met, and it’s pretty simple to do so.
With the Composition API, we’ll only need to assign our watcher to a custom variable and then invoke this variable to stop the watcher, as seen below:
const unwatch = watch(foo, (value) => {
  // ...
});

// stop watcher
unwatch();
The same would work with watchEffect() too. However, with the Options API, we can only stop a watcher programmatically if it has been created with the this.$watch() method and not via the watcher option:
<script>
export default {
  data() {
    return {
      foo: null,
    };
  },
  created() {
    const unwatch = this.$watch("foo", (value) => {
      console.log(value);
    });

    setTimeout(() => {
      unwatch();
    }, 5000);
  },
};
</script>
In this example, we established a new watcher in our app’s created hook, and after 5 seconds, we stopped the watcher.
Computed properties vs. watchers
There is a lot of uncertainty about when to utilize computed properties and when to use watchers. Notwithstanding, this section can clarify the situation.
Computed properties are used to calculate the value of a property based on some other conditions. Watchers, on the other hand, are not primarily used for changing the value of a property; instead, they are used to notify you when the value has changed and let you perform certain actions based on these changes.
Computed properties should be used when you need to get the current value of an object and use it in your logic, such as calculating something based on it. And watchers should be used when you need to know when one or more values have changed and react accordingly.
Conclusion
Watchers are a powerful feature in Vue. They allow us to react immediately and dynamically to changes in the system.
If a watcher is added to an element, any time it changes, we can act on that change. While this may seem like an extreme case, it’s a good example of how being able to react to changes can be useful. And in this article, we were able to go over in detail how to use watchers as well as its available options. In addition, we looked at various practical examples of how to use watchers in real-world applications.
The post Understanding watchers in Vue appeared first on LogRocket Blog.
from LogRocket Blog https://ift.tt/GiuDOpg
Gain $200 in a week
via Read more


