


Once, most web applications refreshed the entire web page with user actions to communicate with web servers. Later, the AJAX (Asynchronous JavaScript and XML) concept made web application content dynamic without needing to reload webpages by offering a way to communicate with web servers in the background.
AJAX then became a W3C-approved web standard. As a result, developers can now use AJAX APIs in any standard browser to fetch JSON, XML, HTML, or raw string content in web pages via the HTTP protocol.
The React Native framework offers a cross-platform application development solution with an embedded JavaScript engine (Hermes), platform-specific UI element wrappers, and React. The React Native framework implements polyfills for AJAX browser APIs with underlying platform-specific networking APIs, so we can use standard JavaScript web APIs for sending AJAX requests in React Native.
In this tutorial, I will demonstrate various approaches for handling AJAX requests in your React Native apps with practical examples. Also, I will explain how to handle AJAX errors and network latencies in a user-friendly way.
Jump ahead:
- Ways to make AJAX requests in React Native
- A React Native AJAX tutorial six ways
- Handling AJAX errors
- Fetch vs. Axios vs. Other HTTP clients vs. TanStack Query (summary table)
Ways to make AJAX requests in React Native
Let’s start by identifying the possible ways to make AJAX requests in React Native — then, we can practically test them with examples. We can call these HTTP client libraries or APIs since they both help us to communicate with a server using the HTTP protocol.
We can use the following inbuilt and library-based ways to make AJAX requests:
The inbuilt Fetch API
In 2015, the Fetch API was introduced as a modern successor to the well-known legacy XMLHttpRequest API. Fetch offers a promise-based modern interface for sending AJAX requests with many HTTP configurations, such as HTTP methods, headers, payloads, etc. You don’t need a third-party polyfill to use Fetch in React Native since it is a pre-included feature in the React Native framework.
The inbuilt XMLHttpRequest API
XMLHttpRequest (a.k.a. XHR) was the oldest standard API for sending AJAX requests before the Fetch API. The XHR API offers a traditional event-based approach for AJAX programming. React Native offers this API along with the Fetch API for networking requirements. Modern developers nowadays don’t try to use the XHR API directly, mainly thanks to Fetch and other developer-friendly AJAX libraries, like Axios.
Axios
Axios is a popular open-source HTTP client library that works on browser environments (including IE 11) and Node.js. Most frontend developers nowadays choose Axios due to its minimal, promise-based API, automatic request/response transformation, and global configuration support.
Alternative AJAX libraries
While Axios is a popular HTTP client library, the JavaScript library ecosystem has hundreds of open-source alternatives. These alternatives act as a wrapper for the XMLHttpRequest object or Fetch function, as Axios does.
The Wretch and SuperAgent libraries are popular alternatives to Axios.
AJAX with caching libraries
Most web applications perform CRUD operations by communicating with a RESTful web API, which use the AJAX concept to communicate with their backend web APIs. Developers often have to write additional code to improve the usability of CRUD operations in the frontend.
For example, we can load frequently used data faster on the UI by caching data in the frontend, and minimize bandwidth usage by deduping network calls. TanStack Query (formerly React Query) and SWR-like caching libraries help developers to make AJAX requests efficiently and in a user-friendly way by writing less code.
A React Native AJAX tutorial six ways
We are going to create a full-stack mobile app that lists book details. First, let’s create a simple RESTful API, then we can consume it using the various inbuilt AJAX APIs and libraries above to understand how to make AJAX requests in React Native.
Creating a RESTful backend
Create a new directory and Node.js project with the following commands:
mkdir bookstore-backend
cd bookstore-backend

npm init
# --- or ---
yarn init
Add the Express.js library to start creating the RESTful API:
npm install express
# --- or ---
yarn add express
Create a new file named server.js, and add the following code:
const express = require('express');
const app = express();
const books = [
    {
        id: 100,
        title: 'Golang experts',
        author: 'John Stack',
        price: 200
    },
    {
        id: 101,
        title: 'C++ for beginners',
        author: 'John Doe',
        price: 250
    },
    {
        id: 102,
        title: 'Flutter development',
        author: 'Steven Doe',
        price: 350
    },
    {
        id: 103,
        title: 'JavaScript internals',
        author: 'John Stack',
        price: 300
    }
];

const port = 5000;

app.get('/books', (req, res) => {
  res.json(books);
});

app.listen(port, () => {
    console.log(`Bookstore API is running at port ${port}`);
});
Here, we return a hard-coded book list via the GET /books endpoint. Start the RESTful API server with the following command:
node server.js
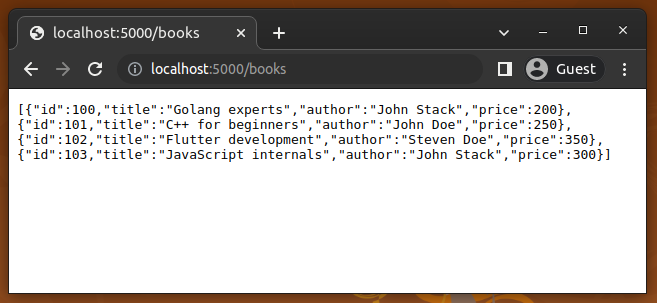
Test the app backend by navigating to http://localhost:5000/books from your browser or making a request with the curl command. You will get the book list as a JSON array as follows:
Let’s make AJAX requests to the GET /books endpoint with the above APIs and libraries by creating a simple React Native bookstore app. You can keep this server instance running in the background, since we’ll need it soon after we implement the UI.
Creating the app frontend
Now, we’ll create our app’s React Native frontend, which will have minimal error handling features and a native loading indicator.
First, we will develop the frontend with a hard-coded book list on the client-side, then we will modify the app’s source code to fetch the book information from the backend via various AJAX APIs and libraries.
Create a new React Native project:
npx react-native init Bookstore
The above command will scaffold a new project in the Bookstore directory. Next, run the app on a physical device or emulator/simulator to make sure that everything works fine:
cd Bookstore

npm start
# --- or ---
yarn start

npx react-native run-android
# --- or ---
npx react-native run-ios
Replace your App.js source file’s content with the following source code:
import React, { useState, useEffect } from 'react';
import {
  SafeAreaView,
  View,
  FlatList,
  StyleSheet,
  Text,
  ActivityIndicator,
} from 'react-native';

const BookItem = ({ title, author, price }) => (
  <View style={styles.item}>
    <View style={styles.itemLeft}>
      <Text style={styles.title}>{title}</Text>
      <Text style={styles.author}>{author}</Text>
    </View>
    <View style={styles.itemRight}>
      <Text style={styles.price}>${price}</Text>
    </View>
  </View>
);

const BookList = () => {
  const [books, setBooks] = useState([]);
  const [loading, setLoading] = useState(true);
  const [error, setError] = useState(false);

  async function getBooks() {
    await new Promise((resolve) => setTimeout(resolve, 2000));
    setBooks([{
        id: 100,
        title: 'Golang experts',
        author: 'John Stack',
        price: 200
    },
    {
        id: 101,
        title: 'C++ for beginners',
        author: 'John Doe',
        price: 250
    }]);
    setLoading(false);
  }

  useEffect(() => {
      getBooks();
  }, []);

  if(error)
    return <Text style={styles.errorMsg}>Unable to connect to the server.</Text>;

  if(loading)
      return <ActivityIndicator size='large'/>;

  return (
    <FlatList
      data={books}
      renderItem={({ item }) => <BookItem {...item} />}
      keyExtractor={item => item.id}
    />
  );
}

const App = () => {
  return (
    <SafeAreaView style={styles.container}>
      <BookList/>
    </SafeAreaView>
  );
}

const styles = StyleSheet.create({
  container: {
    flex: 1,
    marginTop: '10%',
  },
  item: {
    flex: 1,
    flexDirection: 'row',
    flexWrap: 'wrap',
    alignItems: 'flex-start',
    backgroundColor: '#eee',
    padding: 12,
    marginVertical: 8,
    marginHorizontal: 16,
  },
  itemLeft: {
    width: '70%'
  },
  itemRight: {
    width: '30%',
  },
  title: {
    fontSize: 22,
    color: '#222',
  },
  author: {
    fontSize: 16,
    color: '#333',
  },
  price: {
    fontSize: 20,
    color: '#333',
    textAlign: 'right'
  },
  errorMsg: {
    color: '#ee8888',
    fontSize: 20,
    padding: 24,
    textAlign: 'center'
  },
});

export default App;
The above code renders a book list using the inbuilt React Native FlatList component. As mentioned before, we aren’t using any AJAX request handlers yet, but we simulated a network request with the getBooks asynchronous function. We initially implemented the app using a simulated network operation with hard-coded data to easily demonstrate all AJAX handling methods by modifying the getBooks function only.
The getBooks function simulates the network latency with the setTimeout function and returns hard-coded data after 2000 milliseconds. The UI renders a loading animation to indicate the network latency and an error message if we invoke setError(true).
I used loading and error state variables in the App component since I only call the getBooks function once. But, if we call getBooks in many places, we can implement a reusable custom Hook called useBooks for better code quality. Learn more about creating custom Hooks from this article.
Once you run the above code, you will see the following result:

Using the Fetch API
Let’s load books to the React Native bookstore app from our backend web service with the inbuilt Fetch API. We don’t need to import anything else, since the fetch function resides in the global script scope similar to the browser environment.
Use the following code for the existing getBooks function:
async function getBooks() {
    try {
      const books = await fetch('http://<computer_ip>:5000/books')
                      .then((response) => response.json() );
      setBooks(books);
    }
    catch(err) {
      setError(true);
    }
    finally {
      setLoading(false);
    }
  }
Make sure to use the same WiFi network for both your computer and mobile test device, then input your computer’s local IP address in the above URL where it says computer_ip. The awaited fetch function doesn’t return JSON directly (it returns a Response object), so we have to use then once to get the promise, which then resolves to the received JSON content.
Once you run the app, you will see book details from the backend as follows:

fetch accepts an options object that lets you set the HTTP method, body, headers, etc. Look at the following code snippet that performs a POST request:
const options = {
  method: 'POST',
  body: JSON.stringify({inStock: false})
};

await fetch('/books', options)
  .then((response) => response.json() );
If you make AJAX requests to multiple endpoints, you can use the Fetch API like fetch('/books'), fetch('/books/100'), etc. with a global base URL configuration by implementing a global Fetch interceptor.
Earlier, we didn’t get a chance to perform basic error handling tests because we didn’t invoke the setError(true) function call. Now, we can test it by running the frontend without running the server. You should get an error message instead of the book list, as shown below:

We will discuss other popular AJAX error handling strategies in a separate section.
Using Axios
First, install the Axios package:
npm install axios
# --- or ---
yarn add axios
Next, import the axios object, as shown below:
import axios from 'axios';
Now, update the getBooks function with the following code to make an AJAX request with Axios:
async function getBooks() {
    try {
      const { data: books } = await  axios.get('http://<computer-ip>:5000/books');
      setBooks(books);
    }
    catch(err) {
      setError(true);
    }
    finally {
      setLoading(false);
    }
  }
Axios transforms data according to the HTTP response content type, so we don’t need to request JSON explicitly, as we did in our Fetch API example. Here, we use JavaScript’s destructuring syntax to assign the data property value to the books variable instantly.
Axios offers us convenient functions for HTTP methods. For example, we can make a POST request as follows:
await axios.post('/books/101', {inStock: false});
Similar to the GET response, we can post JSON content directly without using the JSON.stringify function, unlike with fetch.
If you make AJAX requests to multiple endpoints, you can use Axios like axios.get('/books'), axios.patch('/books/100'), etc., with a global base URL configuration by updating your config defaults.
Using alternative AJAX libraries SuperAgent and Wretch
There are many Axios alternatives out there. Let’s try two trending HTTP client libraries: SuperAgent and Wretch.
Install the SuperAgent package to get started:
npm install superagent
# --- or ---
yarn add superagent
Now, import the superagent API as follows:
import superagent from 'superagent';
Add the following code to the getBooks function to complete the implementation:
async function getBooks() {
    try {
      const { body: books } = await superagent.get('http://<computer-ip>:5000/books');
      setBooks(books);
    }
    catch(err) {
      setError(true);
    }
    finally {
      setLoading(false);
    }
 }
SuperAgent offers a promise-based API similar to Axios, so we can use the modern await keyword, as shown above. It offers a plugin system to extend the functionality of the library. For example, we can use the superagent-use plugin to define a global configuration and superagent-prefix to define a base URL for all requests.
Wretch is a wrapper around fetch with a more readable API than Fetch. It eliminates the excessive callback in the inbuilt fetch function while requesting JSON data. Let’s use Wretch in our app!
First, install the Wretch package:
npm install wretch
# --- or ---
yarn add wretch
Next, use the wretch function in the getBooks function, as shown below:
async function getBooks() {
    try {
      const books = await wretch('http://<computer-ip>:5000/books').get().json();
      setBooks(books);
    }
    catch(err) {
      setError(true);
    }
    finally {
      setLoading(false);
    }
  }
As you can see, wretch tries to offer a more minimal API than fetch with a more developer-friendly syntax. The json function provides a promise that resolves to the JSON content — we can use await in a more intuitive way than inbuilt fetch.
Wretch offers you pre-built modern middlewares for request deduplication, caching, retrying, and delaying requests. Handling POST requests is also easy as Axios:
await wretch('/books/101').post({inStock: false}).json();
Using TanStack Query
All the above ways offer good solutions for handling AJAX requests in React Native — we can use them to connect app frontends with RESTful backends via the HTTP protocol. But a typical modern React Native app goes beyond basic AJAX handling with caching, request deduplication, automatic retries, and various usability enhancements. Some AJAX libraries like Wretch offer modern middlewares for some of these requirements, but using a dedicated caching library brings you many pre-built usability and performance enhancements for handling AJAX data.
You can integrate a caching library with a preferred AJAX library for usability and performance enhancements. Let’s use TanStack Query along with Axios for better AJAX handling.
Make sure that you’ve already installed the Axios library into your project. Next, install the TanStack Query library, as shown below:
npm install @tanstack/react-query
# --- or ---
yarn add @tanstack/react-query
Now, replace your App.js source code with the following code:
import React, { useState } from 'react';
import {
  SafeAreaView,
  View,
  FlatList,
  StyleSheet,
  Text,
  ActivityIndicator,
} from 'react-native';
import {
  useQuery,
  useQueryClient,
  QueryClient,
  QueryClientProvider,
} from '@tanstack/react-query';
import axios from 'axios';

const BookItem = ({ title, author, price }) => (
  <View style={styles.item}>
    <View style={styles.itemLeft}>
      <Text style={styles.title}>{title}</Text>
      <Text style={styles.author}>{author}</Text>
    </View>
    <View style={styles.itemRight}>
      <Text style={styles.price}>${price}</Text>
    </View>
  </View>
);

const BookList = () => {
  const [books, setBooks] = useState([]);
  const [loading, setLoading] = useState(true);
  const queryClient = useQueryClient();
  const query = useQuery(['books'], getBooks);

  async function getBooks() {
    const response = await axios.get('http://<computer-ip>:5000/books');
    return response.data;
  }

  if(query.isLoading)
    return <ActivityIndicator size='large'/>;

  if(query.isError)
    return <Text style={styles.errorMsg}>Unable to connect to the server.</Text>;

  return (
    <FlatList
      data={query.data}
      renderItem={({ item }) => <BookItem {...item} />}
      keyExtractor={item => item.id}
    />
  );
}

const App = () => {
  const queryClient = new QueryClient();
  return (
    <QueryClientProvider client={queryClient}>
      <SafeAreaView style={styles.container}>
        <BookList/>
      </SafeAreaView>
    </QueryClientProvider>
  );
}

const styles = StyleSheet.create({
  container: {
    flex: 1,
    marginTop: '10%',
  },
  item: {
    flex: 1,
    flexDirection: 'row',
    flexWrap: 'wrap',
    alignItems: 'flex-start',
    backgroundColor: '#eee',
    padding: 12,
    marginVertical: 8,
    marginHorizontal: 16,
  },
  itemLeft: {
    width: '70%'
  },
  itemRight: {
    width: '30%',
  },
  title: {
    fontSize: 22,
    color: '#222',
  },
  author: {
    fontSize: 16,
    color: '#333',
  },
  price: {
    fontSize: 20,
    color: '#333',
    textAlign: 'right'
  },
  errorMsg: {
    color: '#ee8888',
    fontSize: 20,
    padding: 24,
    textAlign: 'center'
  }
});

export default App;
As you can see, TanStack Query offers you data loading and error statuses, so you don’t need to define multiple state variables or custom Hooks to implement the loading state and error messages. Here, we show the loading animation according to the isLoading property and an error message according to the isError property.
TanStack Query implements query deduplication by default, so if you use the same request twice, your app will only make one HTTP request. Verify it by using two BookList component instances, as follows:
<SafeAreaView style={styles.container}>
  <BookList/>
  <BookList/>
</SafeAreaView>
You can find the number of invocations of the GET /books endpoint by using a breakpoint or a simple console.log, as follows:
app.get('/books', function (req, res) {
  console.log('Test');
  res.json(books);
});
Study more about caching libraries and find a preferred one for your needs with this article.
Handling AJAX errors
AJAX requests can fail due to network issues, server-side breakdowns, and web domain configuration problems. If we don’t handle such errors in the frontend, users may face non-user-friendly app behaviors. Therefore, it’s always good to implement error handling strategies in AJAX-oriented React Native apps for enhanced user-friendliness.
Developers typically use one of the following strategies to handle AJAX errors in a user-friendly way:
- Show an error message for the user by explaining the failure reason, as we did in the previous examples
- Retry the AJAX request automatically several times, and show an error message if it still fails
- Offer users a way to retry the failed request manually with a button
- Implement automatic retry, a developer-friendly error message, and a manual retry action
- Retry when the user connects to the internet after being offline during the AJAX requests’ transport
TanStack Query retries failed requests several times until it receives data from the data provider function. Fetch users can use the fetch-retry package, and Axios users can use the axios-retry package to implement automatic retries for AJAX requests.
For example, look at the following code snippet that uses axios-retry.
import axiosRetry from 'axios-retry';
axiosRetry(axios, {
  retryCondition: () => true,
  retries: 3,
  retryDelay: () => 1000
});
Here, we set three retry attempts with a 1000 millisecond delay in between each retry attempt. Add the above code to the bookstore app, start the app without running the backend, let the loading animation spin a second, and then start the RESTful server. You will see the book list thanks to automatic retries:

If we don’t start the RESTful server for three seconds, you will see the error message because the axios-retry library won’t make more than three retries with the above setup:

We can also use the exponential backoff retry concept to implement retries by considering device and server-side resource usage. Choose a good AJAX error handling strategy like automatic retries for better application usability.
You can also add a manual retry button with the following code:
import React, { useState, useEffect } from 'react';
import {
  Button,
  SafeAreaView,
  View,
  FlatList,
  StyleSheet,
  Text,
  ActivityIndicator,
} from 'react-native';
import axios from 'axios';
import axiosRetry from 'axios-retry';

axiosRetry(axios, {
  retryCondition: () => true,
  retries: 3,
  retryDelay: () => 1000
});

const BookItem = ({ title, author, price }) => (
  <View style={styles.item}>
    <View style={styles.itemLeft}>
      <Text style={styles.title}>{title}</Text>
      <Text style={styles.author}>{author}</Text>
    </View>
    <View style={styles.itemRight}>
      <Text style={styles.price}>${price}</Text>
    </View>
  </View>
);

const BookList = () => {
  const [books, setBooks] = useState([]);
  const [loading, setLoading] = useState(true);
  const [error, setError] = useState(false);

  async function getBooks() {
    try {
      setLoading(true);
      setError(false);
      const { data: books } = await axios.get('http://<computer-ip>:5000/books');
      setBooks(books);
    }
    catch(err) {
      setError(true);
    }
    finally {
      setLoading(false);
    }
  }

  useEffect(() => {
      getBooks();
  }, []);

  if(error)
    return (
      <View>
        <Text style={styles.errorMsg}>Unable to connect to the server.</Text>
        <View style={styles.btnWrapper}>
          <Button onPress={() => getBooks()} title="Retry"></Button>
        </View>
      </View>
    );

  if(loading)
      return <ActivityIndicator size='large'/>;

  return (
    <FlatList
      data={books}
      renderItem={({ item }) => <BookItem {...item} />}
      keyExtractor={item => item.id}
    />
  );
}

const App = () => {
  return (
    <SafeAreaView style={styles.container}>
      <BookList/>
    </SafeAreaView>
  );
}

const styles = StyleSheet.create({
  container: {
    flex: 1,
    marginTop: '10%',
  },
  item: {
    flex: 1,
    flexDirection: 'row',
    flexWrap: 'wrap',
    alignItems: 'flex-start',
    backgroundColor: '#eee',
    padding: 12,
    marginVertical: 8,
    marginHorizontal: 16,
  },
  itemLeft: {
    width: '70%'
  },
  itemRight: {
    width: '30%',
  },
  title: {
    fontSize: 22,
    color: '#222',
  },
  author: {
    fontSize: 16,
    color: '#333',
  },
  price: {
    fontSize: 20,
    color: '#333',
    textAlign: 'right'
  },
  errorMsg: {
    color: '#ee8888',
    fontSize: 20,
    padding: 24,
    textAlign: 'center'
  },
  btnWrapper: {
    paddingLeft: '15%',
    paddingRight: '15%',
    paddingTop: '15%'
  },
});

export default App;
The above code produces a retry button after an AJAX request failure. If the web server works again when you click the Retry button, the book list will work as usual, as shown in the preview below:

Fetch vs. Axios vs. Other HTTP clients vs. TanStack Query
Now, we have sent AJAX requests to a RESTful web API via inbuilt APIs and various third-party libraries. Every approach is competitively good, but which one do you plan to use in your next React Native app?
Before you decide, it’s worth noting that TanStack Query is not yet another HTTP client — it’s a caching library that you can use along with any HTTP client library for syncing your app frontend and web services.
Choose one according to the following comparison factors:
| Comparison factor | Fetch | Axios | Other clients (SuperAgent, Wretch, etc.) | TanStack Query |
|---|---|---|---|---|
| API type | Promise-based minimal | Promise-based minimal | Promise-based minimal/detailed, legacy event-based, or callback-based | Detailed OOP, callback-based |
| Global configuration support | Not supported as an inbuilt feature, but it’s possible by creating a wrapper/interceptor | Supported, known as config defaults | Most libraries support setting global configurations by creating a custom library instance | Supported, offered via the QueryClient class |
| Underlying React Native JavaScript API used in Hermes | Fetch | XMLHttpRequest | Fetch, XMLHttpRequest | Depends on the HTTP client |
| Usability and performance enhancements: caching, deduping requests, etc. | Developers have to implement them themselves or use a community library | Developers have to implement them themselves or use a community library | Developers have to implement them themselves or use a community library. Wretch offers official extensions for deduping requests, retrying, delaying requests, and caching | Caching, cache manipulation (for building realtime UIs), deduping requests, and automatic retries by default. Developers can easily implement re-fetch data on focus, network status change data refetching, etc. |
| Extending AJAX request/response handling logic | Possible with wrappers/interceptors | Possible with request/response interceptors | Most libraries come with inbuilt plugin systems. i.e., Wretch middlewares, SuperAgent plugins, etc. | The responsibility of sending AJAX requests doesn’t belong to this library since it expects data via a promise. Extend your AJAX library instead. |
Conclusion
We studied various ways to send AJAX requests in React Native in this tutorial. We compared each approach based on several crucial comparison factors. In the past, web apps fetched XML documents and HTML segments with AJAX to make web pages dynamic. Web and React Native mobile apps typically use RESTful JSON-based web APIs via AJAX.
It’s possible to use any preferred document format like YAML, XML, etc., as a communication message format for web services. But, nowadays, JSON is the industry default for transporting data with AJAX. React Native developers can also use WebSockets to go beyond AJAX’s request-response model.
Many developers prefer AJAX because of the readable and developer-friendly RESTful model, inbuilt APIs and library availability, and easiness in HTTP-oriented development. Choose a method to send AJAX requests from the above methods and handle errors in a user-friendly and hardware-resources-friendly way.
The post Understanding AJAX requests in React Native appeared first on LogRocket Blog.
from LogRocket Blog https://ift.tt/1tiFBk8
Gain $200 in a week
via Read more


