Smart contracts are programs stored on the blockchain that run when certain conditions are predetermined or called. Smart contracts are used to automate agreements, eliminate intermediaries, and create a more decentralized network free from external influence.
In this article, we’ll take a look at a specific strategy referred to as nested contracts, or contracts with a contract. Specifically, we’ll review how to create multiple contracts and call functions from within a parent contract. We’ll demonstrate how to call a nested contract from the parent contract and also how to call it from an external contract. All of the smart contract examples used in this article are written in Solidity.
Let’s dive in.
Jump ahead:
- Prerequisites
- Why nest a contract within a contract?
- Can smart contracts interact with each other?
- Demo: Calling a nested smart contract from the parent contract
- Demo: Calling a nested smart contract from an external contract
Prerequisites
In order to follow along with the tutorial portion of this article, you should have the following:
- Basic knowledge of Solidity
- Familiarity with Remix IDE, Rinkerby Faucet or Goerli Faucet testnet, and MetaMask
Why nest a contract inside a contract?
There are several reasons why it may be advantageous to include a smart contract within another smart contract:
- Security: Nesting contracts can help isolate the risk of vulnerabilities; when all contract variables are included within one smart contract, it’s easier to miss an error or weaknesses that could be exploited by a bad actor
- Segmentation: Multiple contracts enable us to break the main contract into smaller pieces with less complex logic
- Reusable code: Many basic contract functions are readily available in the form of open source, reusable logic through companies like OpenZeppelin; taking advantage of their code can provide significant development time savings
Can smart contracts interact with each other?
Smart contracts are able to create or deploy other contracts. They can also call functions of other smart contracts. In this article, we’ll examine two examples of calling a nested smart contract:
- Contract within a contract: When contracts are nested within one main contract, they or their functions can be called from one of the other contracts
- Calling a nested contract from an external contract: Contracts can also be called externally; for example, you could use a constructor function to call an external contract
Demo: Calling a nested smart contract from the parent contract
For our first example, let’s create and then deploy a child contract within a parent contract.
Creating the nested contract
To start, we’ll open Remix and create the parent contract. For this example, we’ll make a loan contract; anyone may call this contract and request a loan.
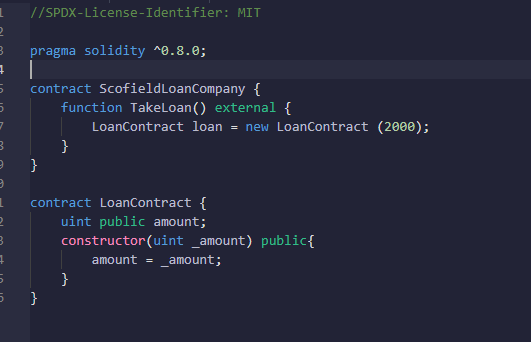
The first line of the contract is our License. This is very important, as not calling it will raise an error:
//SPDX-License-Identifier: MIT
pragma solidity ^0.8.0;
We’re using Remix as a compiler, and it has different versions. Verify the version that you’re using; if the version does not tally with the compiler, you’ll get an error. In this example, we’re using Remix version ^0.8.0 and above. The ^ symbol signifies “above”.
As shown below, the ParentLoanCompany contract takes a function called TakeLoan that takes external attributes. External modules can be used to introduce custom or third-party APIs to a Web3 instance. External modules are simply classes whose methods and properties can be made available within the Web3 instance.
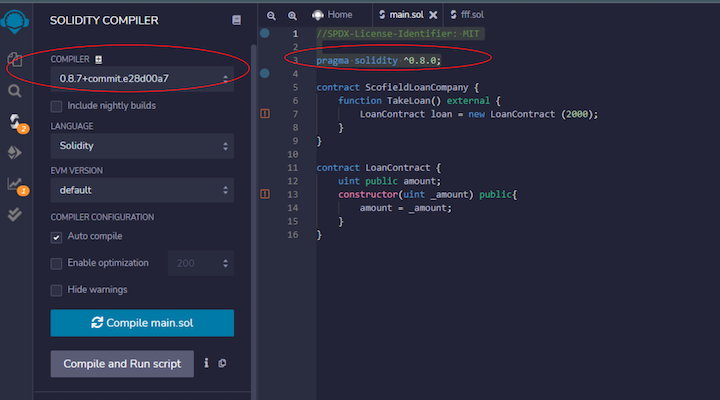
contract ParentLoanCompany {
    function TakeLoan() external {
        LoanContract loan = new LoanContract (2000);
    }
}
We used the external attribute in order to call our child contract.
Before we do that, let’s create our child contract inside the parent contract:
 contract ChildLoanContract {
    uint public amount;
    constructor(uint _amount) public{
        amount = _amount;
    }
}
Our ChildLoanContract is the contract that the user directly interacts with, and we call the child contract into the parent contract. Let’s review the basic details of the child contract:
uint public amount;
    constructor(uint _amount) public{
We must make Solidity aware that this contract deals with money. To do so, we call the uint, which is an unsigned integer, and we make it public.
We create a constructor that runs first, and once when the contract is called, we give an argument of _amount, which means whoever calls this function must specify the amount they wish to borrow.
Finally, we call amount = _amount; which means whatever amount the user puts in becomes the loan amount that is made public.
Now, let’s go back to the ParentLoanCompany contract and add the below code snippet to connect both contracts.
LoanContract loan = new LoanContract (2000);
We call the ChildLoanContract by calling the LoanContract and give it a name loan. This is very important when we want to later call the address of the borrower. This is equivalent to new which is the function that creates a new contract of type LoanContract.
Deploying the nested contract
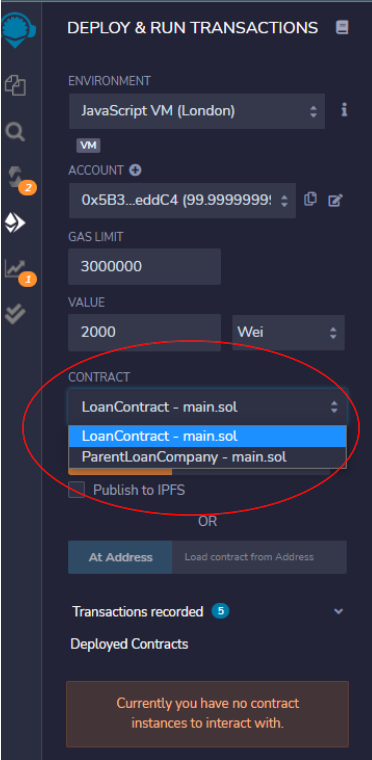
After deploying the ParentLoanCompany contract with the Remix IDE, we should see two contracts on the Contract panel.
Demo: Calling a nested smart contract from an external contract
Now, let’s take a look at how an external contract can call a nested contract.
Creating the contracts
Just like the previous example, the first line of code is our License. If we do not provide this, Remix will throw an error.
Next, we specify our version and compiler; Remix uses this compiler to test our project and if the compiler and the version are different we’ll get an error.
// SPDX-License-Identifier: MIT
pragma solidity ^0.8.0;
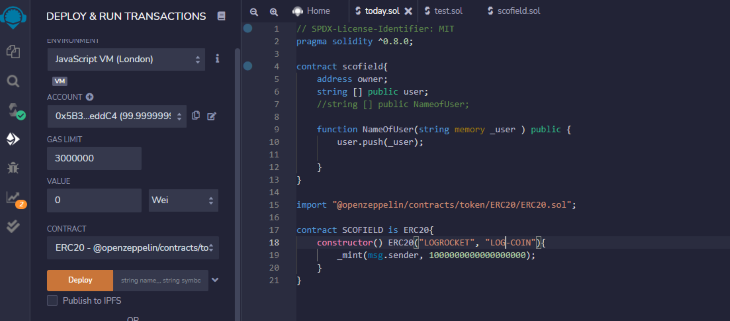
We’ll create a contract, called scofield, that allows the user to store an address in the string [] public user array.
We also create an argument in the NameOfUser function that stores the name that a caller of the contract provides inside the _user.
contract scofield{
    address owner;
    string [] public user;
    function NameOfUser(string memory _user ) public {
        user.push(_user);
    }
}
Now, let’s create the nested contract.
We’ll create another contract inside the same file that mints our coin, LOGROCKET. The coin’s symbol is LOG_COIN. This coin will be minted using a contract we imported from OpenZeppelin.
In our scofield contract, we’ll import the OpenZeppelin contract and paste the following command into our Remix editor:
import "@openzeppelin/contracts/token/ERC20/ERC20.sol";
Next, we call the external COINMAKER contract. We specify that it is an ERC-20 contract, and then we call a constructor function which we give an argument of name of coin, LOGROCKET, and symbol of coin, LOG-COIN.
Our constructor function must run before any other function. It has a _mint argument which tells the contract how many coins the msg.sender can mint. We specified that the msg.sender can mint 1000000000000000000 Wei, which is the smallest Ethereum unit.

Converting Ethereum currencies
As a side note, we should talk for a moment about Ethereum units. In this contract, we’re creating one Ether, but we’re using the smallest Ethereum unit (Wei) to represent the value.
Here’s a useful tool for converting different Ethereum units, such as Wei, Gwei, Finney, and Ether.
Deploying and calling the nested contract
Now it’s time to deploy our contract. In the Remix DEPLOY & RUN panel, we see the contract dropdown and a list of contracts. These contracts are pulled in alongside our COINMAKER and scofield contracts, which are the two contracts we created.
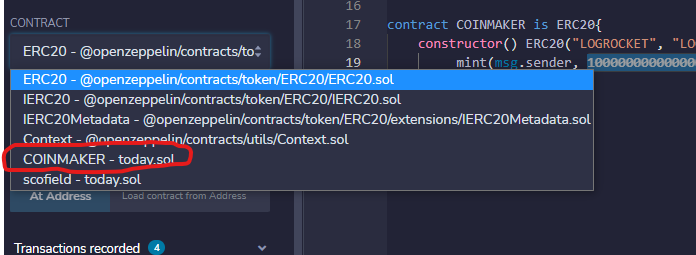
Now, let’s deploy the COINMAKER contract.
If you try to deploy without first installing your MetaMask wallet, you’ll see something like this:

Next, let’s talk about the gas fee and testnet faucet. To transact this contract, you can request test ETH from a testnet. In the article, I used Rinkeby, but it’s being depreciated. If you prefer, you can use Goerli instead.
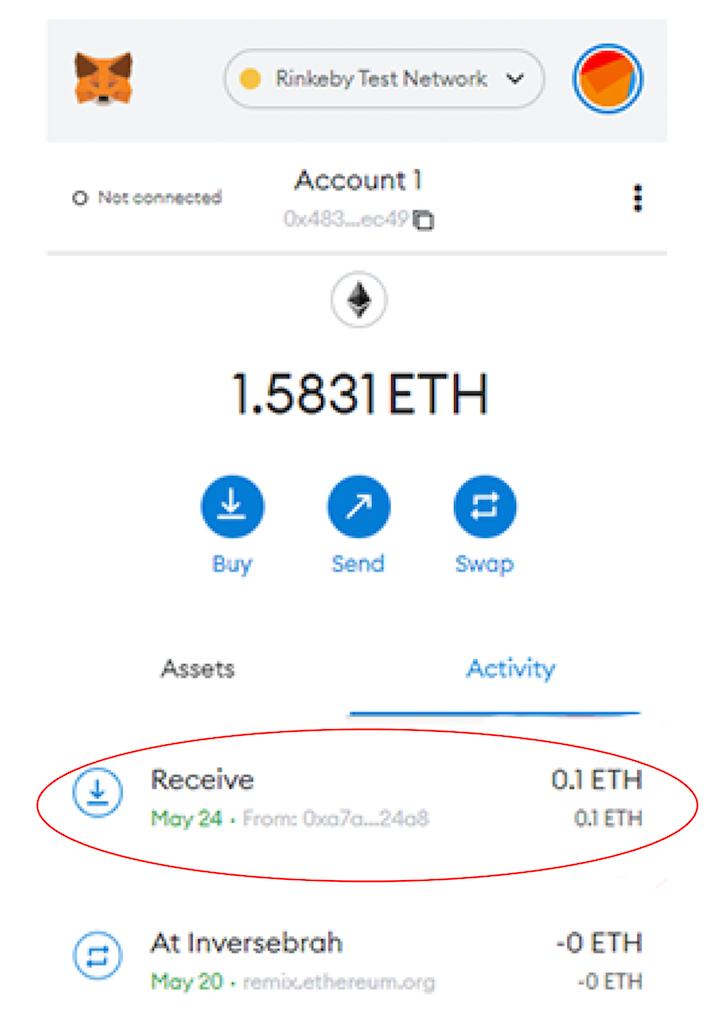
As shown in the above image, you’ll get 0.1 ether from the testnet, which will be more than enough to pay the gas fee. However, you can make the request a few times if you want to keep practicing.
Before deploying the contract, make sure you change the Environment from Javascript VM to Injected Web3.
Now, let’s deploy the contract again. This time you should see the following MetaMask notification:
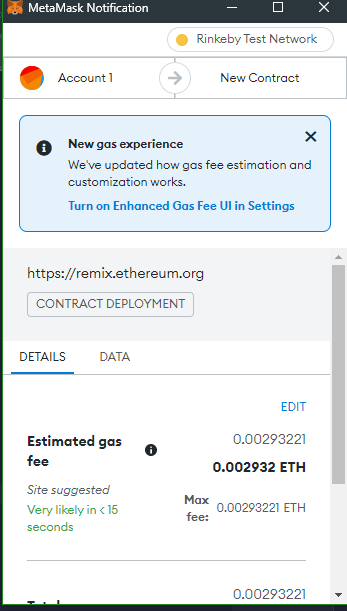
At the bottom of the panel, we see that the creation of COINMAKER is pending.
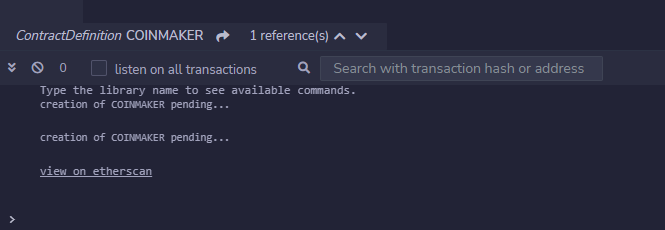
Next, click on view on etherscan. This will open Etherscan, where we can see the coin we just created.
We can see the name of the token, LOGROCKET, as well as the amount of gas that was used to deploy this contract.
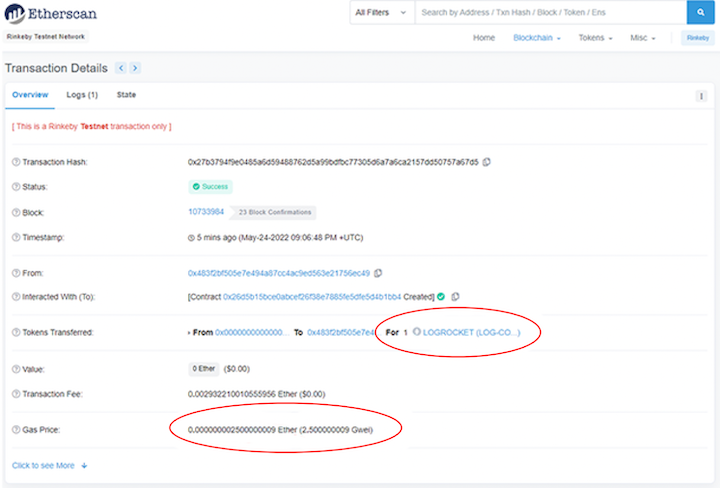
Click on the name of the token to see more details:

Here we can see the number of people holding the token (just one right now).
Now, let’s get back to our contract.
Each function within our contract has a purpose. Here’s a summary:
Approve: Allows the sender to keep a certain amount of funds on the blockchain with an address that can withdraw that specified amountDecreaseAllowance: Allows us to decrease the amount we set in theApprovefunction, so the contract created might reduce the specified amount if was scheduled too highIncreaseAllowance: Increases the allocated funds in the blockchainTransfer: Allows the contract owner to transfer funds in the contract to another userTransferFrom: Allows the owner to transfer from theApprovefunction, rather than from the owner funds, after being approved into the blockchain
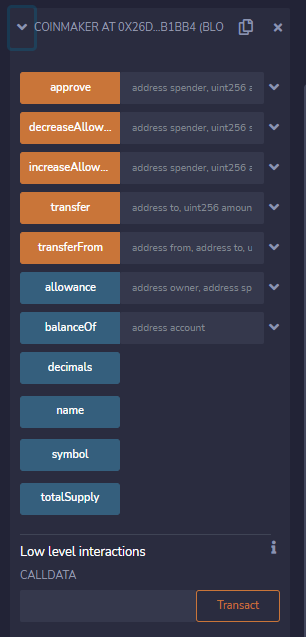
That’s it; you just created your own Web3 coin!
Conclusion
Using multiple smart contracts can provide more security to projects. In this article, we used the example of a loan smart contract to demonstrate calling a nested contract from the parent contract. We also used the example of a custom coin minting contract to demonstrate calling an external contract from a nested contract.
Creating contracts within contracts, or nested smart contracts, is useful for limiting what a user can do, and what they can call.
The post Nested smart contracts: Creating a contract within a contract appeared first on LogRocket Blog.
from LogRocket Blog https://ift.tt/Dh7N53J
via Read more


