


In this article, we’ll demonstrate how to implement reCAPTCHA v2 in a React application and how to verify user tokens in a Node.js backend.
Jump ahead:
- Prerequisites
- What is CAPTCHA?
- What is reCAPTCHA?
- Implementing reCAPTCHA in React
- Setting up a sample React project
Prerequisites
To follow along with the examples in the tutorial portion of this article, you should have a foundational knowledge of:
- React and its concepts
- Creating servers with Node.js and Express.js
- HTTP requests
What is CAPTCHA?
CAPTCHA (Completely Automated Public Turing test to tell Computers and Humans Apart) is a type of challenge-response security measure designed to differentiate between real website users and automated users, such as bots.
Many web services use CAPTCHAs to help prevent unwarranted and illicit activities such as spamming and password decryptions. CAPTCHAs require users to complete a simple test to demonstrate they are human and not a bot before giving them access to sensitive information.
What is reCAPTCHA?
There are several types of CAPTCHA systems, but the most widely used system is reCAPTCHA, a tool from Google. Luis von Ahn, the co-founder of Duolingo, created the tool back in 2007 and is being used by more than six million websites, including BBC, Bloomberg, and Facebook.
The first version of reCAPTCHA was made up of randomly generated sequences of distorted alphabetic and numeric characters and a text box.
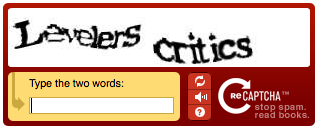
To pass the test, a user needs to decypher the distorted characters and type them into the text box. Although computers are capable of creating images and generating responses, they can’t read or interpret information in the same way a person can to pass the test.
reCAPTCHA generates a response token for each request a user makes and sends it to Google’s API for verification. The API returns a score that determines if the user is human or an automated program.
reCAPTCHA currently has two working versions: v2 and v3. Although v3 is the most recent version of reCAPTCHA (released in 2018), most websites still use reCAPTCHA v2, which was released in 2014.
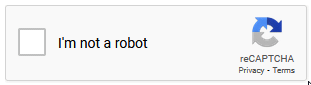
reCAPTCHA v2 has two variants: checkbox and invisible. The checkbox variant, which is also known as “I’m not a robot”, is the most popular. one option for this variant displays a checkbox widget that users can interact with to verify their identity.
The invisible variant displays a reCAPTCHA badge, indicating that the service is running in the background.
In some cases where a user’s behavior triggers suspicion, reCAPTCHA v2 will serve up a challenge that the user must pass to prove they’re not a bot.
Implementing reCAPTCHA in React
Now that we understand what reCAPTCHA is, let’s see how we can implement it in a React app. But first, we need to sign our app up for an API key in the Google reCAPTCHA console. The key pair consists of two keys: site key and secret key.
The site key invokes the reCAPTCHA service in our app. The secret key verifies the user’s response. It does this by authorizing the communication between our app’s backend and the reCAPTCHA server.
Go ahead and create your key pair here.
First, you’ll need to sign in with your Google account. Then, you’ll be redirected to the admin console. Next, you’ll fill out the registration form on the page to generate your site’s key pair.
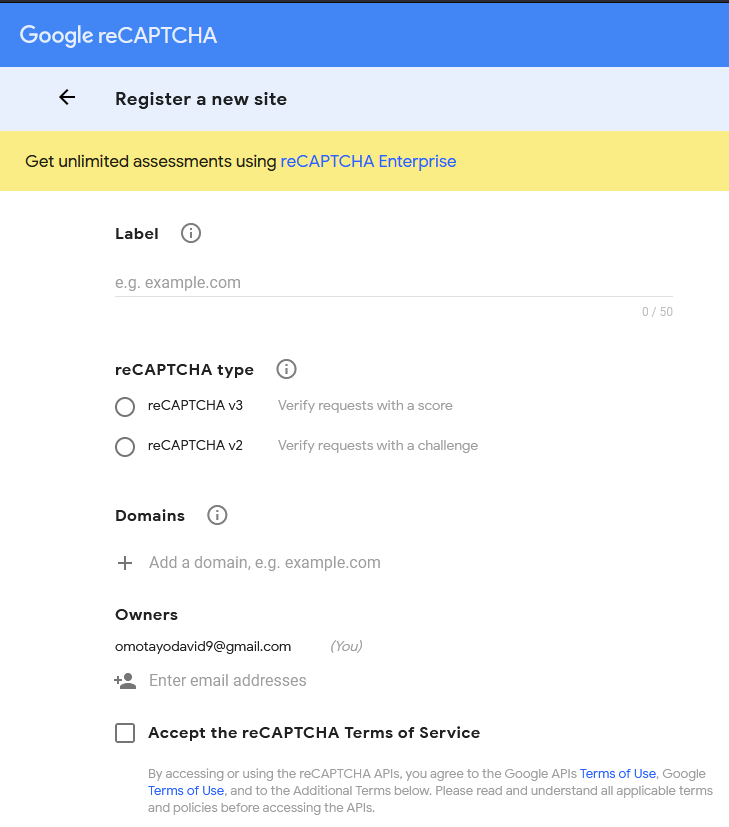
The registration is fairly straightforward, but for clarity, I’ll explain what each form field means and how to fill each field.
Key pair registration
Label
For the label field, provide a name to help you recognize the purpose of the key pair that you’re creating. If you have more than one key pair set up on your account, the labels will help you distinguish between them.
Type
The type selector refers to the version of reCAPTCHA that you want to use on your site. You can choose either v3 or v2. Since this tutorial will only cover v2 implementation, go ahead and choose v2 and the “I am not a robot” variant.
Domains
The domains field is where you’ll set the domain names that will work with your reCAPTCHA. You can input a valid domain name or “localhost” if your project is still in development, and click + to add the domain.
Owner
The owner field is where you can provision access to your app’s reCAPTCHA to others. By default, you’ll be the owner, but you can add more individuals by providing their Google emails.
Once you’ve completed the form fields, check the necessary boxes and click Submit.
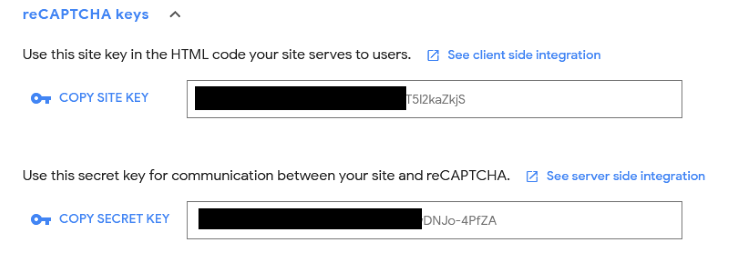
Now you should be able to see your site key and secret key. They will look similar to the ones shown here:
Next, we‘ll set up a React sample project and implement reCAPTCHA using the key pairs we just created.
Setting up a sample React project
To verify a user’s input with reCAPTCHA we require a server that’ll communicate with Google’s API. So we‘ll need to keep that in mind when setting up the project.
First, create a folder. For this sample project, I will name the folder react-node-app, but you can use a different name of your choosing.
Next, open the folder in your preferred IDE and run the following command:
npm init -y
This will create a package.json file that will help us manage our dependencies and keep track of our scripts.
Go ahead and bootstrap a React app with create-react-app by typing the following command in your terminal:
npx create-react-app my-app
This command will create a my-app folder inside the react-node-app folder and will install React inside the my-app folder.
After installation, open the my-app folder and clean up the unnecessary boilerplate codes and files in the project folder, then create a Form.js component within the src folder.
Next, add the following code into the form component and import it inside the App.js main component.
const Form = () =>{

    return(
        <form>
            <label htmlFor="name">Name</label>
                <input type="text" id="name" className="input"/>
            <button>Submit</button>
        </form>
    )
}

export default Form
The above code is a simple login form with an input element and a Submit button.
Styling the form component isn’t necessary, but if you’d like to add a little flair, add the following CSS code inside the App.css file in the project folder.
.input{
  width: 295px;
  height: 30px;
  border: rgb(122, 195, 238) 2px solid;
  display: block;
  margin-bottom: 10px;
  border-radius: 3px;
}

.input:focus{
  border: none;
}

label{
  display: block;
  margin-bottom: 2px;
  font-family: 'Courier New', Courier, monospace;
}

button{
  padding: 7px;
  margin-top: 5px;
  width: 300px;
  background-color: rgb(122, 195, 238);
  border: none;
  border-radius: 4px;
}
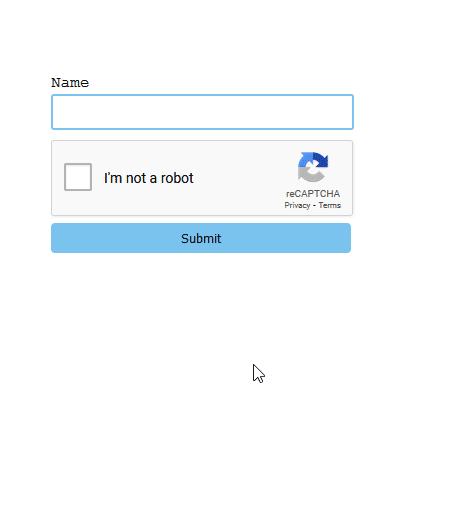
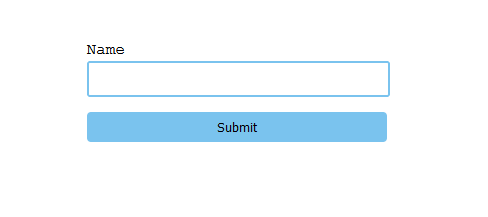
Now, start the development server with the command npm start in the terminal.
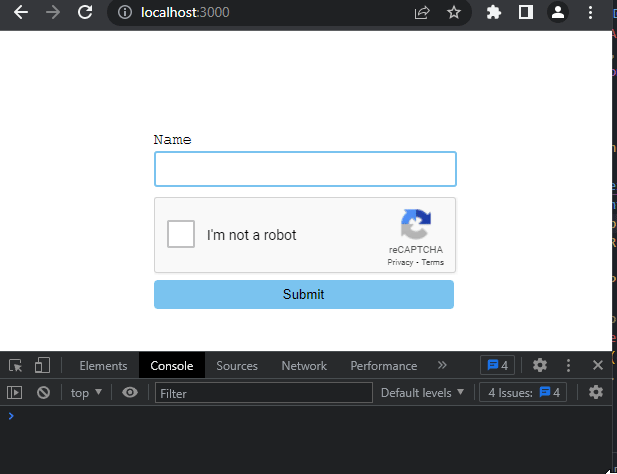
You should see a form similar to this displayed on your browser:
N.B., It is recommended to use a framework that has support for SSR (server-side-rendering), like Next.js or Remix, when creating something similar for production.
Installing react-google-recaptcha
The react-google-recaptcha library enables the integration of Google reCAPTCHA v2 in React. The package provides a component that simplifies the process of handling and rendering reCAPTCHA in React with the help of useful props.
To install react-google-recaptcha, type and run the following command:
npm install --save react-google-recaptcha
Adding reCAPTCHA
After installing react-google-recaptcha, head over to the form.js component file and import it, like so:
import reCAPTCHA from "react-google-recaptcha"
Now add the reCAPTCHA component to the form, just before or after the Submit button. Your placement of the component is optional, the reCAPTCHA widget will appear wherever the reCAPTCHA component is placed in the form when rendered.
<form >
            <label htmlFor="name">Name</label>
                <input type="text" id="name" className="input"/>
                <reCAPTCHA />
            <button>Submit</button>
</form>
As mentioned previously, the reCAPTCHA component accepts several props. However, the sitekey prop is the only prop we need to render the component. This prop facilitates the connection between the site key we generated earlier from the reCAPTCHA key pair and the reCAPTCHA component.
Here are other optional props of the reCAPTCHA component:
theme: changes the widget’s theme tolightordarksize: changes the size or type of CAPTCHAonErrored: fires a callback function if the test returns an errorbadge: changes the position of the reCAPTCHA badge (bottomright,bottomleft, orinline)
<reCAPTCHA
sitekey={process.env.REACT_APP_SITE_KEY}
/>
Here we add a sitekey prop to the reCAPTCHA component and pass it an environment variable with the reCAPTCHA site key.
To do the same in your project, create a .env file in the root folder of your project. Next, add the following code to the file:
/*.env*/
REACT_APP_SECRET_KEY = "Your secret key"
REACT_APP_SITE_KEY = "your site key"
This way, you can use your secret keys safely in your app by referencing the variable names where they’re needed.
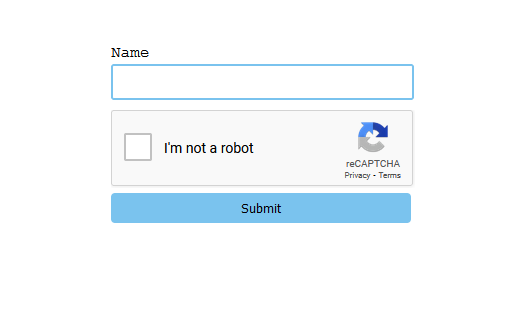
Now, if save your code and go to the browser, a reCAPTCHA box should appear where the reCAPTCHA component is placed in your code. In this example, it appears before the submit button.
After each verification, we need to reset the reCAPTCHA for subsequent checks. To accomplish this, we need to add a ref prop to the reCAPTCHA component.
To use the ref prop, first, import the useRef hook from React:
import React, { useRef } from 'react';
Next, store the ref value in a variable, like so:
const captchaRef = useRef(null)
Then, add the ref prop to the reCAPTCHA component and pass it the captchaRef variable:
<reCAPTCHA
sitekey={process.env.REACT_APP_SITE_KEY}
ref={captchaRef}
/>
Here’s the entire code in our Form component up to this point:
import reCAPTCHA from "react-google-recaptcha"

const Form = () =>{
    return(
            <form>
                <label htmlFor="name">Name</label>
                    <input type="text" id="name" className="input"/>
                    <reCAPTCHA
                    sitekey={process.env.REACT_APP_SITE_KEY}
                    ref={captchaRef}
                    />
                <button>Submit</button>
            </form>
    )
}
export default Form
Now that we have a working widget, we just need to complete three steps to get reCAPTCHA functioning:
- Get the response token from the
reCAPTCHAcomponent - Reset the
reCAPTCHAcomponent for subsequent checks - Verify the response token in the backend
Getting the response token
We can also use the ref prop to get the generated token from our reCAPTCHA. All we have to do is get the value of the ref with the following code:
const token = captchaRef.current.getValue();
Resetting reCAPTCHA for subsequent checks
If we add the above code to the form component, it will actually cause an error. This is because the value of the ref is still null, since the reCAPTCHA is in an unchecked state. To solve this issue, we we’ll add an onSubmit event handler to the form with a function that encapsulates the code:
const handleSubmit = (e) =>{
        e.preventDefault();
        const token = captchaRef.current.getValue();
        captchaRef.current.reset();
    }

return(
        <form onSubmit={handleSubmit} >
            …
        </form>
    )
In the above code, we created a handleSubmit function. Inside this function, we added the token variable for getting the response token from reCAPTCHA, as well as a code that resets the reCAPTCHA each time the form is submitted.
This way, the getValue() method will only attempt to get the ref’s value, which is the response token, when the submit button is clicked.
Now if you log the token variable to the console, check the reCAPTCHA box, and submit the form, you should see a generated response token similar to the one below in your console:
Verifying the token in the Node.js backend
The token we generated in the previous section is only valid for two minutes, which means we need to verify it before it expires. To do so, we’ll need to set up our app’s backend and send the token to Google’s API to check the user’s score.
Setting up the Node.js backend
To set up a Node.js server, navigate back to the react-node-app folder, create a new folder, and name it server. Inside the server folder, create a new file and name it index.js. This file will serve as the entry point for our Node app.
Next, cd into the server folder and run the following command to install Express.js and Axios:
npm i express axios dotenv --save
Now, add the following code inside the index.js file:
const express = require("express");
const router = express.Router();
const app = express();
const cors = require('cors');
const axios = require('axios');
const dotenv = require('dotenv').config()
const port = process.env.PORT || 2000;
//enabling cors
app.use(cors());
//Parse data
app.use(express.json());
app.use(express.urlencoded({extended: true}));
//add router in express
app.use("/", router);
//POST route
router.post("/post", async (req, res) => {
//Destructuring response token from request body
const {token} = req.body;
//sends secret key and response token to google
await axios.post(
`https://www.google.com/recaptcha/api/siteverify?secret=${process.env.SECRET_KEY}&response=${token}`
);
//check response status and send back to the client-side
if (res.status(200)) {
res.send("Human 
 ");
}else{
res.send("Robot
");
}else{
res.send("Robot  ");
}
});
app.listen(port, () =>{
console.log(`server is running on ${port}`);
});
");
}
});
app.listen(port, () =>{
console.log(`server is running on ${port}`);
});
In the above code, we set up an Express server and created a POST API endpoint for the /post route. Inside the endpoint function, we destructured the request body to get the token data that will be sent from the client side.
Then we created an axios.post request to Google’s API with our SECRET_KEY passed in as an environment variable, as well as the token from the client side.
To set up an environment variable in Node.js, cd back to the react-node-app folder and run the following command:
npm install dotenv --save
After installation, create a .env file within the react-node-app folder, open the file, then add your site’s secret key.
Beneath the axios.post request is an if statement that checks the status of the response returned by the API and sends it to the client side.
Ok, let’s move on. Navigate back to the react-node-app folder, open the package.json file, and replace the script command with the following:
…
"scripts": {
  "start": "node server/index.js"
},
…
The above code will let us start our server using the npm start command when we run it in the terminal.
Save the project. Then, go to your terminal, open a new terminal tab, cd into the server folder, and start the server by running npm start.
Checking the user’s score
Next, we’ll send an axios.post request from the client side (React app) to our server, with the generated token as the data.
To do this, navigate back to your React app and paste the following code inside the handleSubmit function we created earlier:
 const handleSubmit = async (e) =>{
        e.preventDefault();

        const token = captchaRef.current.getValue();
        captchaRef.current.reset();

        await axios.post(process.env.REACT_APP_API_URL, {token})
        .then(res =>  console.log(res))
        .catch((error) => {
        console.log(error);
        })
    }
This code is an axios.post request that sends the generated token from reCAPTCHA to the Node.js backend.
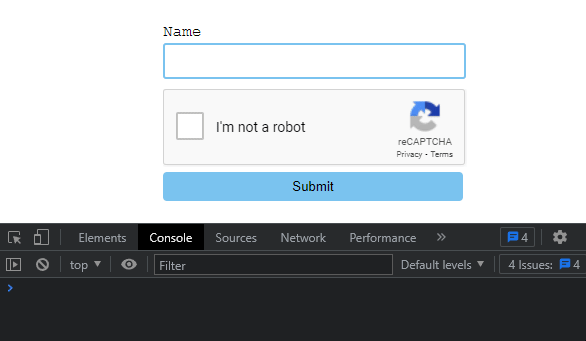
If you save your code and run the app, you should see a reCAPTCHA form similar to this:
That’s it! You’ve successfully implemented a working Google reCAPTCHA and a backend server that verifies users’ responses in React.
Conclusion
In this article, we examined what reCAPTCHA is and how it works. We also walked through a tutorial to demonstrate how to implement reCAPTCHA in a React application and how to verify a user’s response token with a Node.js backend server.
I hope this article will help you build secure and bot-free React applications.
The post How to implement reCAPTCHA in a React application appeared first on LogRocket Blog.
from LogRocket Blog https://ift.tt/aZf1hTG
via Read more


