


Generating value from apps is foremost among objectives for many decision makers — it’s crucial for developers to understand how to effectively monetize the applications they create.
In Flutter, there are main three ways you can monetize apps:
- Ads: Mobile compatible ads are shown while interacting with the app
- In-app purchases: One-time or subscription-based purchases that are made on digital products such as videos, music, pictures, and virtual coins in a game
- Payments: Payments on physical goods such as clothes and grocery items are made via payment providers such as Google Pay and Apple Pay
In this tutorial, we are going to walk through how you can monetize your Flutter app using AdMob (ads for mobile).
AdMob is an Ad network from Google that shows a variety of targeted advertisements on your app to users. To integrate the AdMob service in the Flutter app, you’ll use the google_mobile_ads plugin, created by the Flutter team itself.
This plugin allows you to display banner, interstitial (full-screen), rewarded, and native ads inside your Flutter app.
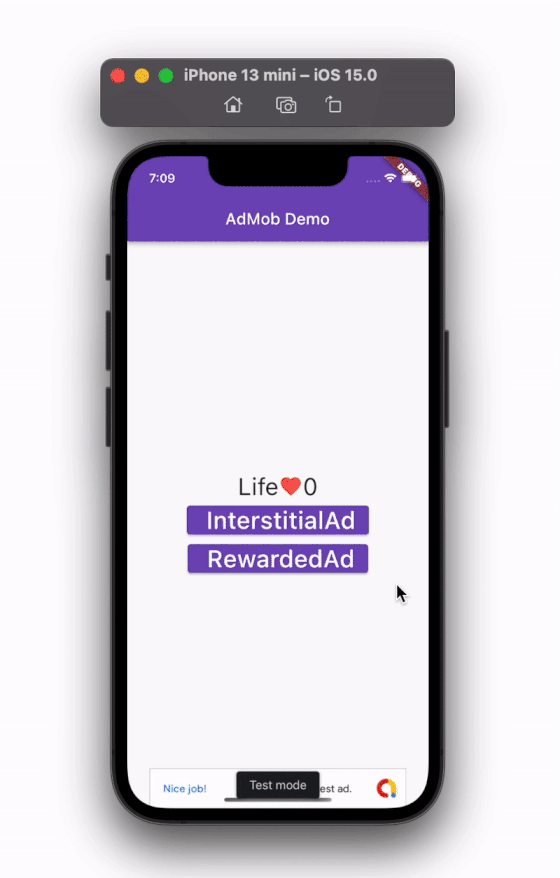
We are going to build a simple app that shows different ad formats when a button is pressed.
Here’s how it looks when complete:
Here’s what we are going to cover in this tutorial:
Setting up AdMob
Setting up AdMob comprises the following steps:
- Adding the AdMob app
- Creating AdUnits
- Add and initialize the plugin
- Prepare test ads
- Update platform-specific files
Adding the AdMob app
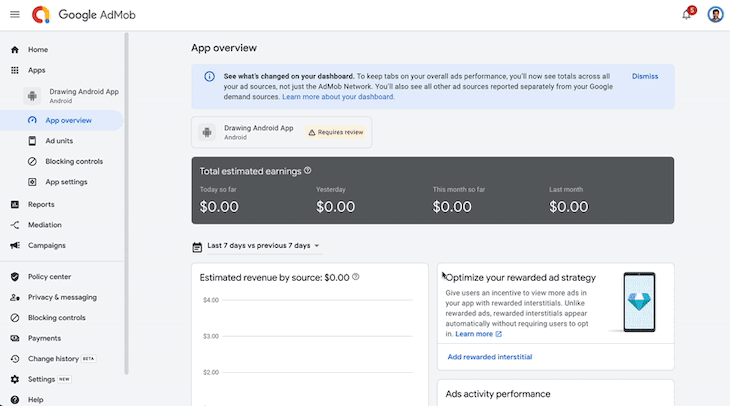
Before you get started integrating AdMob in your Flutter app, the first steps require you to create the new app inside the AdMob console.
Here’s how you can create the app in AdMob:
- Head over to the AdMob homepage and sign up for an account
- Go to the dashboard and click Apps on the left-side menu
- Next, click Add App and select Android as the platform
- If your app is not published yet, select No for Is the app listed on a supported app store? and then click Continue
- Enter the App Name and click ADD APP
- Click Done
- Repeat the same process for an iOS app
(Note: Make sure you add (create) an app for both Android and iOS apps so that you can better track the revenue from each platform)
Creating AdUnits
The kind of advertisement presented is determined by the ad unit. You should create ad units for each type of ad that you plan to have in your app.
Here’s how you do it:
- Click Apps on the left-side menu and then select your app
- Click the ADD AD UNIT button
- Select the type of ad (e.g Banner)
- Enter the Ad unit name, click Create ad unit, and then select Done
- Similarly, create an ad unit for the Interstitial and Rewarded ads. While creating the rewarded ads, be sure to keep the default settings
- Finally, create Ad units for the iOS app as well
Add and initialize the plugin
After creating the app and ad units, you can return to your app and add the google_mobile_ads plugin.
Your code should look like this:
dependencies:
  flutter:
    sdk: flutter
  # The following adds the Cupertino Icons font to your application.
  # Use with the CupertinoIcons class for iOS style icons.
  cupertino_icons: ^1.0.2
  google_mobile_ads: ^1.2.0 # NEW
Now, it’s time to initialize the plugin. Navigate to the main.dart and add the following lines before runApp, which looks like this:
void main() {
  WidgetsFlutterBinding.ensureInitialized();
  MobileAds.instance.initialize(); //<-- SEE HERE
  runApp(MyApp());
}
Prepare test ads
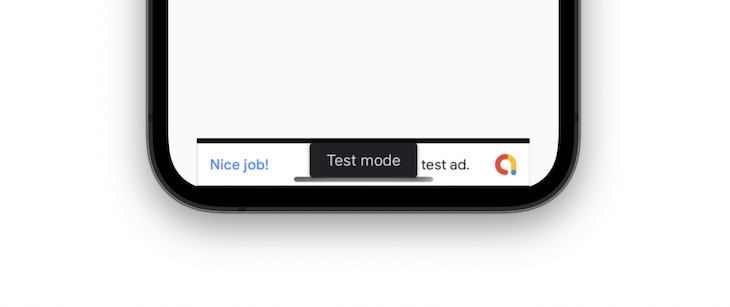
While you are still developing your app, it’s advisable to test your app with test ads and not the real ads.
(Note: Testing the real ads by yourself can send the wrong signal to Google and your account may be suspended. Additionally, if you are testing the app on an emulator, test ads are automatically enabled)
There are a couple of ways you can enable the test ads for real devices.
- Using demo test IDs
- Adding your device to the testing list
Using demo test IDs
Using the demo test IDs is the easiest and fastest way to test ads. You just need to copy and paste the IDs and you can continue testing your app. The demo IDs for Android are available here and for iOS they can be found here.
You can keep these demo IDs in a separate Dart file and then call from the app when required like this:
// ad_helper.dart
import 'dart:io';

class AdHelper {
  static String get bannerAdUnitId {
    if (Platform.isAndroid) {
      return 'ca-app-pub-3940256099942544/6300978111';
    } else if (Platform.isIOS) {
      return 'ca-app-pub-3940256099942544/2934735716';
    } else {
      throw new UnsupportedError('Unsupported platform');
    }
  }
}
//--- Call like this ----
_bannerAd = BannerAd(
  adUnitId: AdHelper.bannerAdUnitId,
);
Add your device to the testing list
You can also add your device to the testing list by providing your test ID. If you opt to add your device to the test list, you no longer need to use the demo IDs. In your code, replace MobileAds.instance.initialize() with the following code:
MobileAds.instance
  ..initialize()
  ..updateRequestConfiguration(
    RequestConfiguration(testDeviceIds: ['7C92BD192385F05DDBD6FC73370E2D63']),
  );
(Note 1: You can find this test ID in the console while you run your app)
(Note 2: Replace the demo IDs and test IDs before publishing your app)
Update platform specific files
The final step in setting up AdMob is to update the platform-specific file. In this step, you’ll add the AdMob App ID in the AndroidManifest.xml (for Android) and info.plist (for iOS).
For Android, open the AndroidManifest.xml file and add the following tag:
<manifest xmlns:android="http://schemas.android.com/apk/res/android"
    package="com.example.admob_demo">
   <application
        android:label="admob_demo"
        android:name="${applicationName}"
        android:icon="@mipmap/ic_launcher">
...
       <meta-data
           android:name="com.google.android.gms.ads.APPLICATION_ID"
           android:value="ca-app-pub-3940256099942544~3347511713"/>
    </application>
</manifest>
For iOS, open the info.plist file and add the following key-value pair:
<?xml version="1.0" encoding="UTF-8"?>
<!DOCTYPE plist PUBLIC "-//Apple//DTD PLIST 1.0//EN" "http://www.apple.com/DTDs/PropertyList-1.0.dtd">
<plist version="1.0">
<dict>
   <key>CFBundleDevelopmentRegion</key>
   <string>$(DEVELOPMENT_LANGUAGE)</string>
   <key>CFBundleDisplayName</key>
   <string>Admob Demo</string>
   <key>CFBundleExecutable</key>
   <string>$(EXECUTABLE_NAME)</string>
...
   <key>GADApplicationIdentifier</key>
    <string>ca-app-pub-3940256099942544~1458002511</string>
</dict>
</plist>
(Note: The app IDs used in the above code are all test IDs. You can simply use this to test but make sure to replace them with your original ID before going live)
Banner ads
Banners ads are the simplest form of advertisement which can be shown at the top or bottom of the page. Typically the ads inside the banner refresh by themselves after some time.
(Note: Before you show banner ads, make sure you have completed all the steps in the
“Setting up AdMob” section above)
Here’s how you show banner ads in your Flutter app:
- Create a variable that holds the instance of the banner ad
- Initialize the banner ad with required parameters such as
adUnitId,request,sizeandlistener - Load the banner ad by calling its
.load()method - As soon as the ad is loaded, you can display it using the
AdWidget
The following is a code example to give you a better understanding of what is happening and what it should look like:
late BannerAd _bannerAd;
bool _isBannerAdReady = false;
@override
void initState() {
  super.initState();
  _loadBannerAd();
}

void _loadBannerAd() {
  _bannerAd = BannerAd(
    adUnitId: AdHelper.bannerAdUnitId,
    request: AdRequest(),
    size: AdSize.banner,
    listener: BannerAdListener(
      onAdLoaded: (_) {
        setState(() {
          _isBannerAdReady = true;
        });
      },
      onAdFailedToLoad: (ad, err) {
        _isBannerAdReady = false;
        ad.dispose();
      },
    ),
  );

  _bannerAd.load();
}
//----------- Show Ads like this -------
if (_isBannerAdReady)
  Align(
    alignment: Alignment.bottomCenter,
    child: Container(
      width: _bannerAd.size.width.toDouble(),
      height: _bannerAd.size.height.toDouble(),
      child: AdWidget(ad: _bannerAd),
    ),
  ),
Output

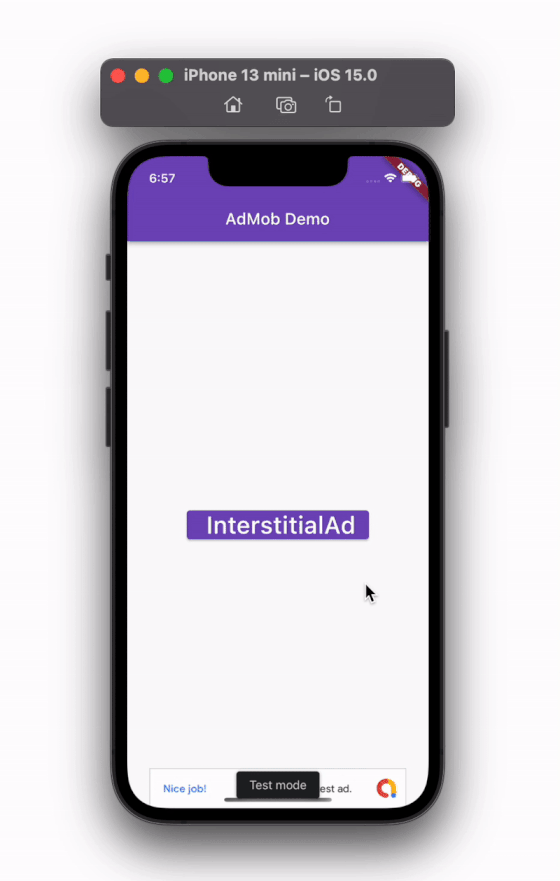
Interstitial ads
Interstitial ads are full-screen ads and are typically shown during natural pauses in your app, such as moving to another page.
Here’s how you display the interstitial ads:
- Inside the
initStateof your app, load the interstitial ad with required parameters such asadUnitId,request, andadLoadCallback. InsideadLoadCallback, you get a callback whether the ad has loaded or not - Once the ad is loaded, create the instance of the loaded ad
- You can use this instance to show the interstitial ad on button presses
- In the instance of the interstitial ad, attach the
FullScreenContentCallbackthat gives a callback for theonAdShowedFullScreenContent,onAdDismissedFullScreenContentandonAdFailedToShowFullScreenContent - On the
onAdDismissedFullScreenContentcallback, dispose the current ad and load the new ad - Finally, show the interstitial with the
.show()method
The following is a code example for interstitial ads:
InterstitialAd? _interstitialAd;
@override
void initState() {
  super.initState();
  _createInterstitialAd();
}
void _createInterstitialAd() {
  InterstitialAd.load(
      adUnitId: AdHelper.interstitialAdUnitId,
      request: request,
      adLoadCallback: InterstitialAdLoadCallback(
        onAdLoaded: (InterstitialAd ad) {
          print('$ad loaded');
          _interstitialAd = ad;
          _numInterstitialLoadAttempts = 0;
          _interstitialAd!.setImmersiveMode(true);
        },
        onAdFailedToLoad: (LoadAdError error) {
          print('InterstitialAd failed to load: $error.');
          _numInterstitialLoadAttempts += 1;
          _interstitialAd = null;
          if (_numInterstitialLoadAttempts < maxFailedLoadAttempts) {
            _createInterstitialAd();
          }
        },
      ));
}
void _showInterstitialAd() {
  if (_interstitialAd == null) {
    print('Warning: attempt to show interstitial before loaded.');
    return;
  }
  _interstitialAd!.fullScreenContentCallback = FullScreenContentCallback(
    onAdShowedFullScreenContent: (InterstitialAd ad) =>
        print('ad onAdShowedFullScreenContent.'),
    onAdDismissedFullScreenContent: (InterstitialAd ad) {
      print('$ad onAdDismissedFullScreenContent.');
      ad.dispose();
      _createInterstitialAd();
    },
    onAdFailedToShowFullScreenContent: (InterstitialAd ad, AdError error) {
      print('$ad onAdFailedToShowFullScreenContent: $error');
      ad.dispose();
      _createInterstitialAd();
    },
  );
  _interstitialAd!.show();
  _interstitialAd = null;
}
// --- Show like this ------
ElevatedButton(
  onPressed: () {
    _showInterstitialAd();
  },
  child: Text(
    ' InterstitialAd',
    style: TextStyle(fontSize: 30),
  ),
),
Output
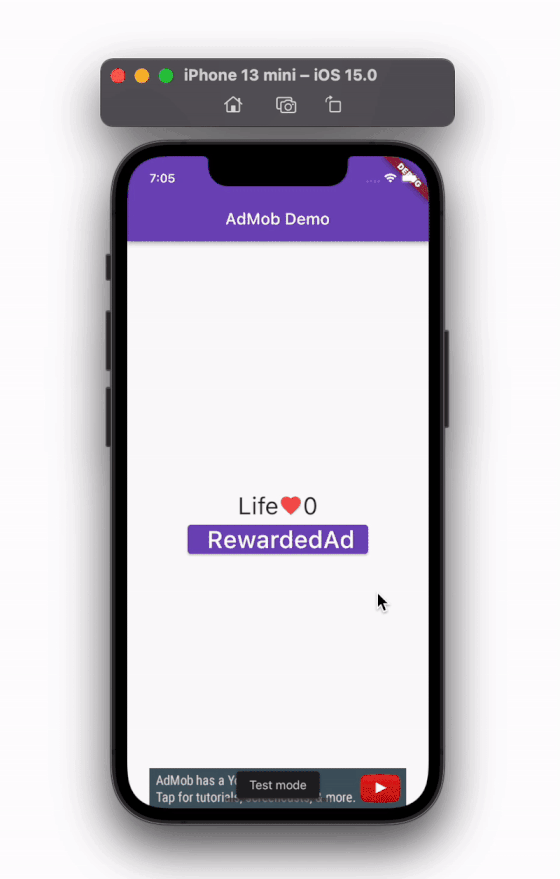
Rewarded ads
Rewarded ads are full-screen ads and are typically opted into by users in order to receive the reward. The reward can be anything, such as a virtual coin or extra life in a game that helps the user to accomplish a task.
Most of the steps for displaying the rewarded ads are identical to the interstitial ads except, while showing the rewarded ad, you get a callback if the user has earned the reward and you can update it on screen accordingly.
Here’s the difference:
_rewardedAd!.show(
    onUserEarnedReward: (AdWithoutView ad, RewardItem reward) {
  setState(() {
    life += 1;
  });
});
Output
The full source code can be found here.
Conclusion
Adding monetization to your app helps you provide additional streams of revenue for applications.
In this tutorial, we first looked at the different ways you can monetize your app and then explored how to integrate the AdMob service into your Flutter app.
We went through step-by-step instructions in setting up AdMob and then demonstrated how you can show different types of ads with practical examples. We also understood when to use a specific ad type to get the best results.
The post A guide to monetizing your Flutter app using AdMob appeared first on LogRocket Blog.
from LogRocket Blog https://ift.tt/zH8EDZu
via Read more


