Being a tech enthusiast or web developer means staying up-to-date with the latest technology and trends. Many software developers work on personal projects as a way of constant self-development and improvement, so you may already be familiar with buzz words in Web3 programming like blockchain development, Ethereum, smart contracts, DApp, Solidity programming, and more.
In this article, we’ll dive deep into these terms, solidifying what we covered by building and hosting a live Web3 project that any blockchain enthusiast or developer can use to boost their personal portfolio. To follow along with this tutorial, you’ll need the following:
- Basic knowledge of JavaScript
- Basic knowledge of React
- Basic knowledge of Solidity
- Your preferred IDE; we’ll use VS Code
You can also clone my GitHub to view the full code used in this tutorial. Let’s get started!
Table of contents
- What is Web3 programming?
- Building our React application
- Building our React components
- Formatting our React components
- Ensuring responsive design
- Improving our display
- Connecting our React application to the blockchain
- Using Solidity to write our smart contracts on Ethereum network
- Deploying our Web3 application
- Testing our Web3 application
- Conclusion
What is Web3 programming?
The World Wide Web, developed by Tim-Berners Lee in 1989, began with Web 1.0. Known as the read-only Web, Web 1.0 was basically a static web where users could only read content created by web developers. The basic communication mode was HTTP, and web pages were developed with HTML.
Starting in 2004, Web 2.0 offered an opportunity for users to participate in content creation. Therefore, Web 2.0 can be referred to as the wisdom-web or participative web. The Web 2.0 era brought about major developments in the web technology space, for example, the creation of several languages and frameworks, some of which include React, Angular, Vue, XML, CSS3, Tailwind CSS, DOM, TypeScript, and more.
Meanwhile, new standards and older languages were improved on with the goal of providing more interactivity between users and web technology applications. Altogether, this resulted in information flow through various platforms like social media, instant messaging, blogging, vlogging, podcasting, video sharing, and chatting. The advent of social media sites like Facebook, Instagram, LinkedIn, and YouTube led to global communication and information sharing, making it possible for people to work and collaborate remotely in real time.
Web3, or the semantic web, has brought about data-driven development and machine-based interpretations of this data. In this new Web3 era, data privacy and data policy is a top priority. This concern is accounted for using blockchain-based decentralization, which gives users the full ownership rights to their data.
Additionally, Web3 provides a more personalized experience for users because web technologies customize internet experience to each individual device based on history and usage habits. Some of these features include AI, the Metaverse, personalized searches, and personal data control. Eventually, with Web3, you won’t need individual accounts for each social media platform because of a centralized repository being developed.
Now that we understand some of the basics of Web3, let’s build a Solidity project using React.
Building our React application
To get started with this project, I’d suggest you choose a hosting site and purchase a domain name. If you don’t want to spend money on a personal project, you could try hosting sites like Hostinger, Heroku, or Netlify to deploy your project.
Create a folder on your desktop, give it a name like web3.0 project, and open this folder in your code editor. Now, we can create a new folder in our code editor and name it client where we’ll place our React application. Create a third folder and rename it smartContract, where we’ll write our Solidity contracts. Next, we pass the following commands in the terminal of our IDE:
cd .\client\
#or
cd client
We pass the command below to create our React application using Vite, which installs builds and starts our React application in just a few seconds:
npm init vite@latest
We need to make sure that Node.js is installed on our device. If you run into an error saying too many arguments, you can separate the commands as follows:
cd .
client\
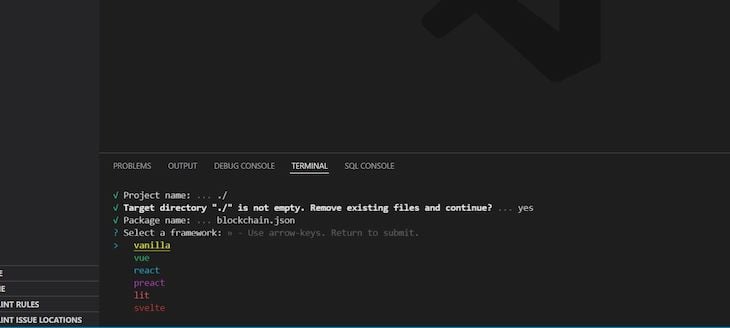
After running the commands above, we’ll be prompted to give our project a name. Since we’re in our project folder, we can use ./ with any preferred project name. Let’s use blockchain.json here. For .json standard, you should begin your project name with a single word lowercase naming convention.
Next, we’ll be prompted to select the framework of our choice, in our case, React. We’ll also use React as our variant when prompted a second time, which results in the image below:
After selecting react as our choice application, we should see a message prompt like in the image below:
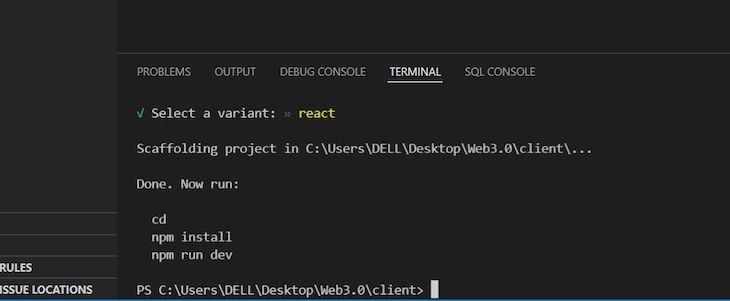
npm install
After passing the commands above, we’ll see something like the image below, meaning we’ve successfully installed React on our local machine:

npm run dev
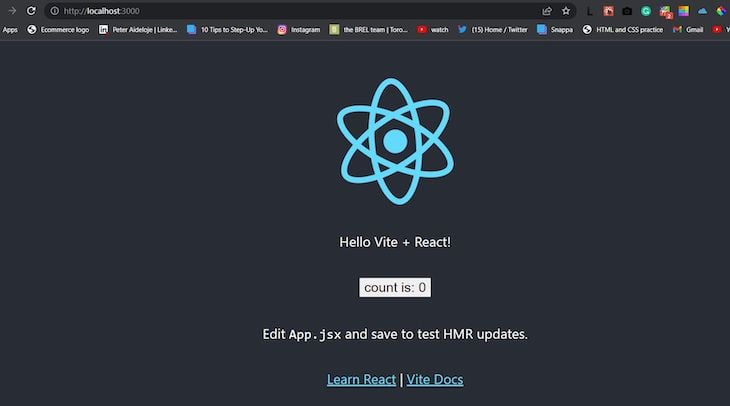
With the commands above, we host our React application on port 3000. We should now have the same results as in the image below:

On clicking the link http://localhost:3000 in our local machine, we see that our React app has been successfully initialized:
Next, we’ll use Tailwind CSS to implement our designs without writing our CSS code in a separate folder. To install Tailwind CSS, we pass the following commands:
npm install -D tailwindcss postcss autoprefixer
Next, we run the command below:
npx tailwindcss init -p
If you encounter any difficulties in creating a tailwind.config.js folder, try running the following commands:
npx tailwindcss init
npx tailwindcss-cli@latest init
Next, we’ll create our Postcss.js file by passing the following CLI commands in the terminal on our local machine:
 npm i -D postcss-load-config
 npm i -D postcss-plugin
 npm fund
We can also manually create a file in our src folder and name it postcss.config.js. After successfully creating our postscss.config.js file, we should get a message prompt like the one below:

Next, we’ll configure Tailwind by replacing our tailwind.config.js folder with the following code snippets:
module.exports = {
  content: ["./src/**/*.{html,js,jsx,ts}"],
  theme: {
    extend: {},
  },
  plugins: [],
}
In the content section inside the module.exports of our tailwind.config.js file, we include {html,js,jsx,ts}, which are HTML, JavaScript, React (App.jsx), and TypeScript, respectively, to account for the types of features we want our tailwind.config.js to configure. We include TypeScript in case we need to pass a TypeScript command in our App.jsx in the future, in which case, our tailwind.config.js would run the command in our browser.
Now, we can replace all the values in our index.css folder inside our src root with the following values:
@tailwind base;
@tailwind components;
@tailwind utilities;
We’ll do the same to our App.jsx folder by clearing all the values and replacing them with the values below:
const App = () =>{
  return (
    <div className="App">
    <h1 class="text-3xl font-bold underline">
    My first Blockchain Application!
  </h1>
     </div>
   )
  }
export default App
Next, we can run the command below to check if our app is working:
npm run dev
The image below should be displayed on our browser, meaning that our app is working. Ensure that your text is bold and underlined, which indicates that Tailwind CSS is running as expected:
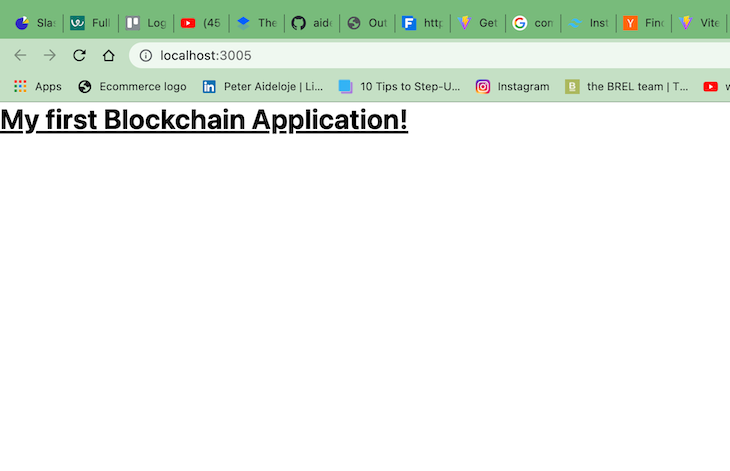
With that, we’ve completed our frontend application configuration. Next, we can get started building our React components.
Building our React components
We’ll focus on building our smart contract on the Ethereum network. To do so, cd into your smartcontract folder in a new terminal on your local machine using the commands below:
cd ..
cd smartContract
npm init -y
The code above initializes a package.json file, which is the beginning of our smartContract. The App.jsx file inside our client folder serves as the direct interface to what is displayed on the webpage.
Now, we’ll create a components folder inside our src folder. We’ll also create the following files inside our component folder.
Navbar.jsx
The Navbar.jsx file contains our Navbar component placed inside the <h1></h1> tag inside our Navbar functional component. On this Navbar, we’ll enlist all our services. Later on, we’ll style our Navbar with some color:
const Navbar = () => {
    return (
        <h1>Navbar</h1>
    );
}
export default Navbar;
Footer.jsx
The Footer.jsx file contains our Footer component placed inside the <h1></h1> tags. Just like how Navbar functions at the top, the Footer functions at the bottom of our page:
const Footer = ()=> {
    return(
        <h1>Footer</h1>
    );
}
export default Footer;
Loader.jsx
The Loader.jsx component functions as a loading spinner:
const Loader = ()=> {
    return (
       <h1>Loader</h1>
     );
}
export default Loader;
Services.jsx
In the Services.jsx file, we’ll list our services as follows:
const Services = () =>{
   return (
      <h1>Services</h1>
     );
}
export default Services;
Transactions.jsx
In the Transaction.jsx file, we’ll carry out our transactions. We’ll offer a transactional service that allows users to carry out several transactions on the blockchain application using the Ethereum network:
const Transactions = () => {
   return (
       <h1>Transactions</h1>
     );
}
export default Transactions;
Welcome.jsx
The welcome.jsx component welcomes all users or visitors to the application. As the first point of contact that users interface with, the welcome.jsx component is displayed at the front page of our application, housing all the frontend displays that are shown to the user on our landing page, like our form, wallet, and others:
const Welcome = () => { return ( <h1>Welcome</h1> ); } export default Welcome;
Note that .js and .jsx are synonymous, but jsx indicates that we’re going to write React code.
index.js
Next, we’ll create a final component file index.js that will enable us to export the other component files. It contains the following code:
export { default as Loader } from './Loader';
export { default as Navbar } from './Navbar';
export { default as Services } from './Services';
export { default as Transactions } from './Transactions';
export { default as Footer } from './Footer';
export { default as Welcome } from './Welcome';
Formatting our React components
Include the following code snippet in your App.jsx folder:
import {Navbar, Welcome, Footer, Loader, Services,Transactions} from './components';
Now, we can format our div to achieve the result below:
import {Navbar, Welcome, Footer, Loader, Services,Transactions} from './components';
const App = () =>{
  return (
    <div className="min-h-screen">
      <div className='gradient-bg-welcome'>
        <Navbar />
        <Welcome />
        </div>
        <Services />
        <Transactions />
        <Footer />
     </div>
   );
  }
export default App;
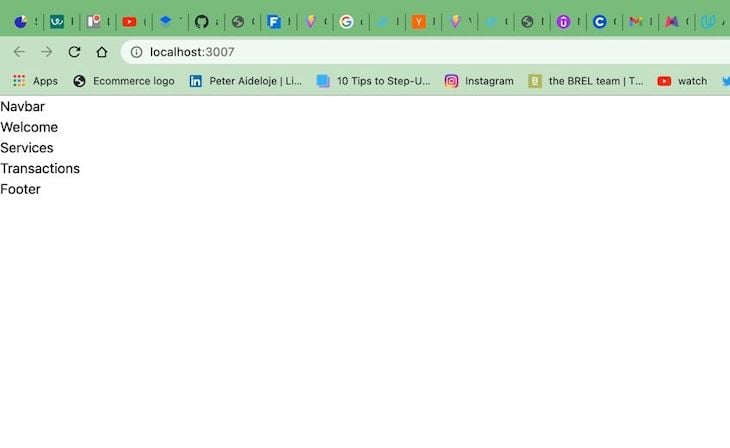
Upon running npm run dev, you should see the same image as above. Next, we’ll add the code snippet below to our index.css file to add styling:
@import url("https://fonts.googleapis.com/css2?family=Open+Sans:wght@300;400;500;600;700&display=swap");
* html {
  padding: 0;
  margin: 0;
  box-sizing: border-box;
}
body {
  margin: 0;
  font-family: "Open Sans", sans-serif;
  -webkit-font-smoothing: antialiased;
  -moz-osx-font-smoothing: grayscale;
}
.gradient-bg-welcome {
  background-color:#0f0e13;
  background-image:
    radial-gradient(at 0% 0%, hsla(253,16%,7%,1) 0, transparent 50%),
    radial-gradient(at 50% 0%, hsla(225,39%,30%,1) 0, transparent 50%),
    radial-gradient(at 100% 0%, hsla(339,49%,30%,1) 0, transparent 50%);
}
.gradient-bg-services {
  background-color:#0f0e13;
  background-image:
    radial-gradient(at 0% 0%, hsla(253,16%,7%,1) 0, transparent 50%),
    radial-gradient(at 50% 100%, hsla(225,39%,25%,1) 0, transparent 50%);
}
.gradient-bg-transactions {
  background-color: #0f0e13;
  background-image:
    radial-gradient(at 0% 100%, hsla(253,16%,7%,1) 0, transparent 50%),
    radial-gradient(at 50% 0%, hsla(225,39%,25%,1) 0, transparent 50%);
}
.gradient-bg-footer {
  background-color: #0f0e13;
  background-image:
    radial-gradient(at 0% 100%, hsla(253,16%,7%,1) 0, transparent 53%),
    radial-gradient(at 50% 150%, hsla(339,49%,30%,1) 0, transparent 50%);
}
.blue-glassmorphism {
  background: rgb(39, 51, 89, 0.4);
  border-radius: 16px;
  box-shadow: 0 4px 30px rgba(0, 0, 0, 0.2);
  backdrop-filter: blur(5px);
  -webkit-backdrop-filter: blur(5px);
  border: 1px solid rgba(0, 0, 0, 0.3);
}
/* white glassmorphism */
.white-glassmorphism {
  background: rgba(255, 255, 255, 0.05);
  border-radius: 16px;
  backdrop-filter: blur(5px);
  -webkit-backdrop-filter: blur(5px);
  border: 1px solid rgba(255, 255, 255, 0.3);
}
.eth-card {
  background-color:#a099ff;
  background-image:
    radial-gradient(at 83% 67%, rgb(152, 231, 156) 0, transparent 58%),
    radial-gradient(at 67% 20%, hsla(357,94%,71%,1) 0, transparent 59%),
    radial-gradient(at 88% 35%, hsla(222,81%,65%,1) 0, transparent 50%),
    radial-gradient(at 31% 91%, hsla(9,61%,61%,1) 0, transparent 52%),
    radial-gradient(at 27% 71%, hsla(336,91%,65%,1) 0, transparent 49%),
    radial-gradient(at 74% 89%, hsla(30,98%,65%,1) 0, transparent 51%),
    radial-gradient(at 53% 75%, hsla(174,94%,68%,1) 0, transparent 45%);
}
.text-gradient {
  background-color: #fff;
  background-image: radial-gradient(at 4% 36%, hsla(0,0%,100%,1) 0, transparent 53%), radial-gradient(at 100% 60%, rgb(0, 0, 0) 0, transparent 50%);
  -webkit-background-clip: text;
  -webkit-text-fill-color: transparent;
}
@tailwind base;
@tailwind components;
@tailwind utilities;
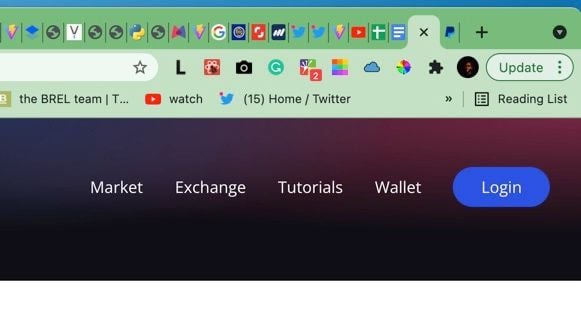
After adding the values above, we should have the color gradient on our Navbar section like in the image below:
npm run dev

Next, we’ll include our smart contract logo in a new image folder that will be placed inside the client folder. We can include this image path by importing it in our Navbar file along with other importation and formatting in the Nav.jsx file, like in the code snippet below:
import { HiMenuAlt4 } from 'reacts-icons/hi';
import { AiOutlineClose } from 'react-icons/ai';

import logo from '../../images/logo.png'
Let’s install all the necessary dependencies that our React application will use by running the command below in our terminal:
npm install react-icons ethers
ethers allows us interact with the blockchain and our smart contract.
Next, we’ll edit the logo image that is inside of our Navbar.jsx file by creating a new nav class and an img with the source as {logo} and the size w-40. Add an unordered list <ul></ul> with a className value, like in the code snippet below:
 <nav className='w-full flex md: justify-center justify-between items-center p-4'>
            <div className='md: flex-[0.5] flex-initial justify-center items-center'>
                <img src= {logo} alt="logo" className='w-40 cursor-pointer'/>
            </div>
            <ul className='text-white md:flex hidden list-none
            flex-row justify-betwen items-center flex-initial'>
            </ul>
        </nav>
Next, we’ll create a new functional component for our NavbarItem and set a few props like title and classProps:
const NavbarItems = ({title, classProps }) =>{
    return (
        <li className={`mx-4 cursor-pointer ${classProps}`}>
            {title}
        </li>
    );
}
We can now call our NavbarItem as a reusable component inside our Navbar function and create a new dynamic array block:
{["Market", "Exchange", "Tutorials", "Wallet"].map((item, index)=>(<NavbarItem key={item + index} title={item}/> )}
Inside our Navbar function, we have the following code:
ul className='text-white md:flex hiddent list-none flex-row justify-betwen items-center flex-initial'>
{["Market", "Exchange", "Tutorials", "Wallet"].map((item, index)=>(<NavbarItem key={item + index} title={item}/>))}
Next, we’ll create a Login button for our application with the following code snippet:
<li className='bg-[#2952e3] py-2 px-7 mx-4 rounded-full cursor-pointer hover:bg-[#2546bd]' >
Login
</li>
Ensuring responsive design
We want to achieve responsive design for our Navbar so that our display is the same for users across both mobile and web devices. To achieve this, we’ll introduce a React state and toggleMenu, setToggleMenu that would perform a certain action when the mobile Navbar is currently opened:
const Navbar = () => {
    const [toggleMenu, setToggleMenu] = useState(false);
    return (
        <nav className='w-full flex md: justify-center justify-between items-center p-4'>
            <div className='md: flex-[0.5] flex-initial justify-center items-center'>
                <img src= {logo} alt="logo" className='w-40 cursor-pointer'/>
            </div>
            <ul className='text-white md:flex hiddent list-none flex-row justify-betwen items-center flex-initial'>
                  {["Market", "Exchange", "Tutorials", "Wallet"].map((item, index)=>(<NavbarItem key={item + index} title={item}/>))}

                 <li className='bg-[#2952e3] py-2 px-7 mx-4 rounded-full cursor-pointer hover:bg-[#2546bd]' >
                     Login
                 </li>
            </ul>
            <div className="flex relative">
                {toggleMenu
                ? <AiOutlineClose fontSize={28} className="text-white md:hidden cursor-pointer" onClick={()=>setToggleMenu(false)} />
                : <HiMenuAlt4 fontSize={28} className="text-white md:hidden cursor-pointer" onClick={()=>setToggleMenu(true)} />
                }
                {toggleMenu && (
                    <ul>
                        <li className='text-xl w-full my-2'>
                            <AiOutlineClose onClick={()=> setToggleMenu(false)} />
                        </li>
                        {["Market", "Exchange", "Tutorials", "Wallet"].map((item, index)=>(<NavbarItem key={item + index} title={item} classProps ="my-2 text-lg" />))}
                    </ul>
                )}
            </div>
        </nav>
    );
}
export default Navbar;
We can go to our browser, right-click inspect, and navigate to mobile view. We should have the same image as below:
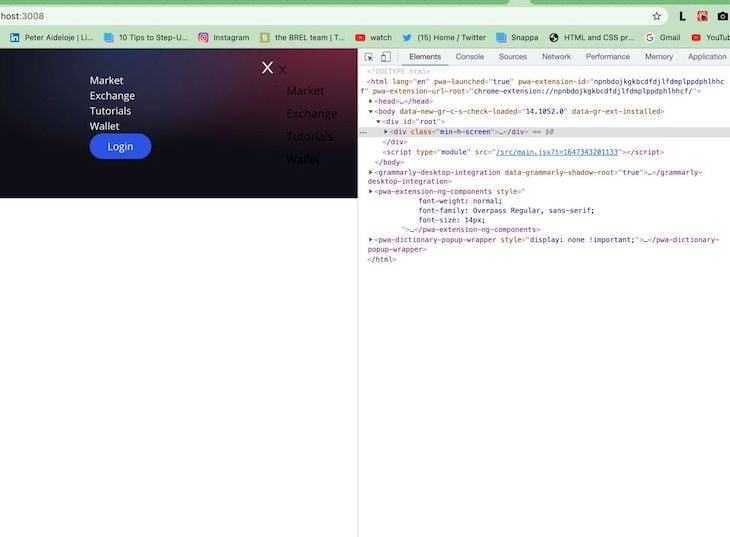
From the image above, we can view both the desktop and the mobile view. Next, let’s work on our welcome.jsx component and include some new div and classNames:
 <h1 className="text-3xl sm:text-5xl text-white text-gradient py-1">
                        Blockchain and Crypto Transactions<br /> across the world
                    </h1>
                    <p className="text-left mt-5 text-white font-light md:w-9/12 w-11/12 text-base">
                        Explore the Crypto world. Buy and sell cryptocurrencies easily on crypto our wallet
                    </p>
The welcome.jsx component contains the code below:
import { AiFillAlipayCircle } from "react-icons/ai";
import { SiEthereum } from "react-icons/si";
import { BsInfoCircle }  from "react-icons/bs";
import { Loader } from './';
const commonStyles = () => 'min-h-[70px] sm:px-0 px-2 sm:min-w-[120px] flex justify-center items-center border-[0.5px] border-gray-400 text-sm font-light text-white';
const Welcome = () => {

    const connectWallet = () => {
    }
    return (
        <div className="flex w-full justify-center items-center">
            <div className="flex md:flex-row flex-col items-start justify-between md:p-20 py-12 px-4">
                <div className="flex flex-1 justify-start flex-col md:mr-10">
                    <h1 className="text-3xl sm:text-5xl text-white text-gradient py-1">
                        Blockchain and Crypto Transactions<br /> across the world
                    </h1>
                    <p className="text-left mt-5 text-white font-light md:w-9/12 w-11/12 text-base">
                        Explore the Crypto world. Buy and sell cryptocurrencies easily on crypto our wallet
                    </p>
                    <button type="button" onClick={connectWallet} className="flex flex-row justify-center items-center my-5 bg-[#2952e3] p-3 rounded-full cursor-pointer">
                        <p className= "text-white text-base font-semibold">
                        Connect Wallet
                        </p>
                    </button>
                      <div className="grid sm:grid-cols-3 grid-cols-2 w-full mt-10">
                        <div className={`rounded-tl-2xl ${commonStyles} text-white`}>
                           Reliability
                        </div>
                       <div className={`rounded-th-2xl ${commonStyles} text-white`}>
                           Security
                        </div>
                       <div className={`rounded-tr-2xl ${commonStyles} text-white`}>
                           Ethereum
                       </div>
                       <div className={`rounded-bl-2xl ${commonStyles} text-white`}>
                           Web 3.0
                        </div>
                       <div className={`rounded-bh-2xl ${commonStyles} text-white`}>
                           Low fees
                        </div>
                       <div className={`rounded-br-2xl ${commonStyles} text-white`}>
                           Blockchain
                        </div>
                     </div>
                </div>
                <div className="flex flex-col flex-1 items-center justify-start w-full md:mt-0 mt-10">
                    <div className="p-3 justify items-start flex-col rounded-xl h-40 sm:w-72 w-full my-5 eth-card white-glassmorphism">
                        <div className="flex justify-between">
                        </div>
                    </div>
                </div>
            </div>
        </div>
    );
}
export default Welcome;
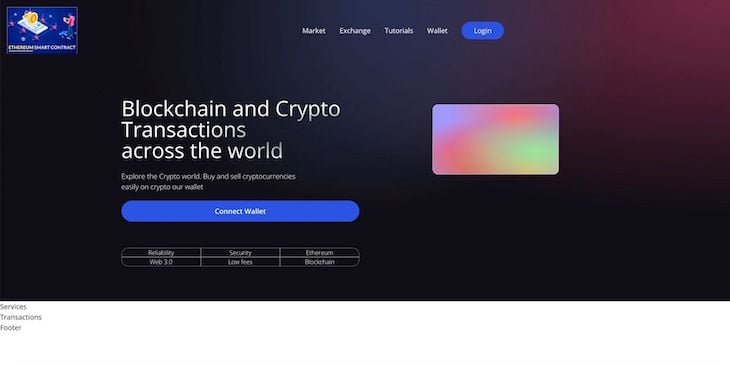
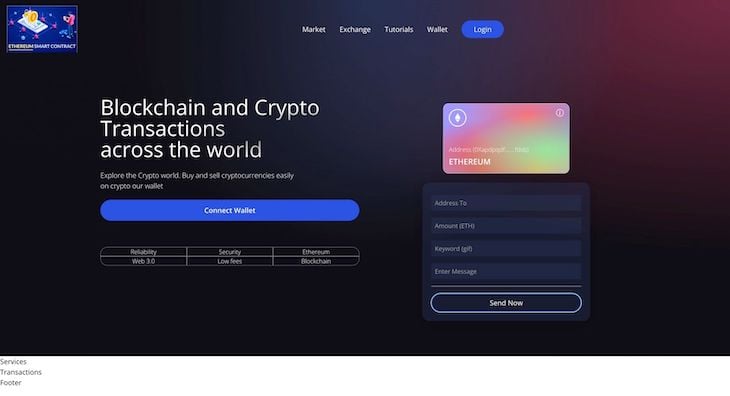
The codebase above results in the image below. We’ve included some extra divs and given them unique classNames and properties to suit our design below:
Next, we added an Ethereum card that has the same design in the image below. We also added a form and a send Now button to our welcome.jsx component that would help to collect inputs from users:
<Input placeholder= "Address To" name = "addressTo" type="text" handleChange={()=>{}} />
                            <Input placeholder= "Amount (ETH)" name = "amount" type="number" handleChange={()=>{}} />
                            <Input placeholder= "Keyword (gif)" name = "keyword" type="text" handleChange={()=>{}} />
                            <Input placeholder= "Enter Message" name = "message" type="text" handleChange={()=>{}} />
We can find the complete welcome.jsx component’s codebase and result below:
Improving our display
We’ll make some changes in our code by changing md to mf to achieve a better display. These changes are implemented in the classes of the code snippet below:
mf:flex-row
<div className="flex mf:flex-row flex-col items-start justify-between md:p-20 py-12 px-4">
mf:mr-1
- <div className="flex flex-1 justify-start flex-col mf:mr-10">
mf:mt-0 mt-10">
<div className="flex flex-col flex-1 items-center justify-start w-full mf:mt-0 mt-10">
Now, let’s make some changes in our tailwind.css file by replacing the codebase in our tailwind.config.js with the one below:
 module.exports = {
  purge: ["./src/**/*.{js,jsx,ts,tsx}", "./public/index.html"],
  mode: "jit",
  darkMode: false, // or 'media' or 'class'
  theme: {
    fontFamily: {
      display: ["Open Sans", "sans-serif"],
      body: ["Open Sans", "sans-serif"],
    },
    extend: {
      screens: {
        mf: "990px",
      },
      keyframes: {
        "slide-in": {
          "0%": {
            "-webkit-transform": "translateX(120%)",
            transform: "translateX(120%)",
          },
          "100%": {
            "-webkit-transform": "translateX(0%)",
            transform: "translateX(0%)",
          },
        },
      },
      animation: {
        "slide-in": "slide-in 0.5s ease-out",
      },
    },
  },
  variants: {
    extend: {},
  },
  plugins: [require("/Users/peter/Dropbox/Mac/Desktop/web3.0/client/tailwind.config.js")],
};
When using the code snippet above, be sure to change your plugins to the required path on your local machine where your tailwind.config.js is located.
plugins: [require("/Users/peter/Dropbox/Mac/Desktop/web3.0/client/tailwind.config.js")]
With that, we’ve successfully completed our frontend design and React application. Now, let’s get started building our smart contract.
Connecting our React application to the blockchain
We’ll install dependencies by running the code snippet below in our terminal inside our smartContract folder:
cd smartContract
npm install --save-dev hardhat @nomiclabs/hardhat-waffle ethereum-waffle chai @nomiclabs/hardhat-ethers ethers
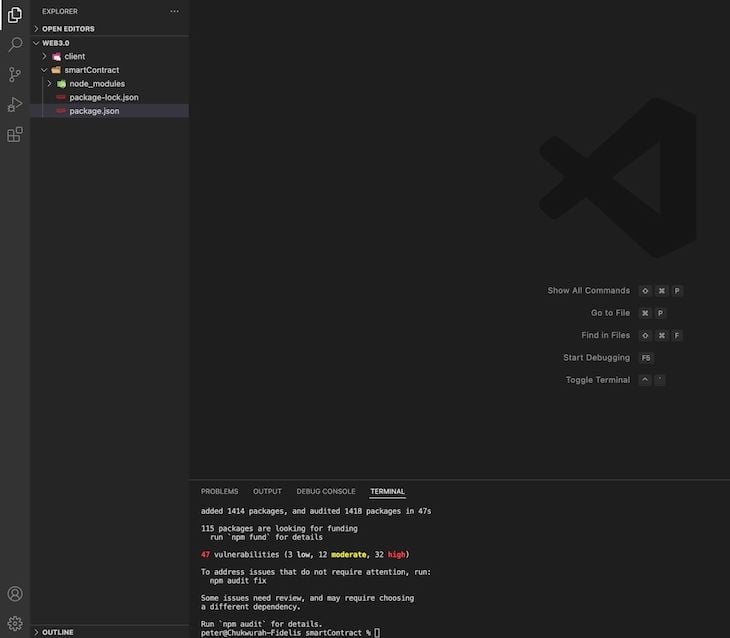
To create a basic structure for our smart contract, we’ll use Hardhat, an Ethereum development environment for professionals. It also allows us to run Solidity and test our smart contract once before deployment. After a successful installation, we’ll get a prompt like the one below:
Run the command below:
npx hardhat

Click the enter button to create a basic sample project and add a .gitignore by clicking y when prompted:
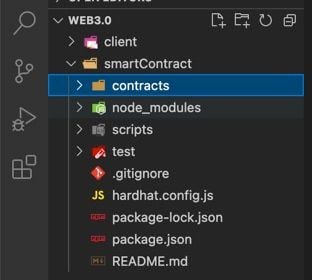
We can see that we have a contract folder that contains Greeter.sol and a test folder. To be certain that everything is working fine, we pass the following command:
npx hardhat test
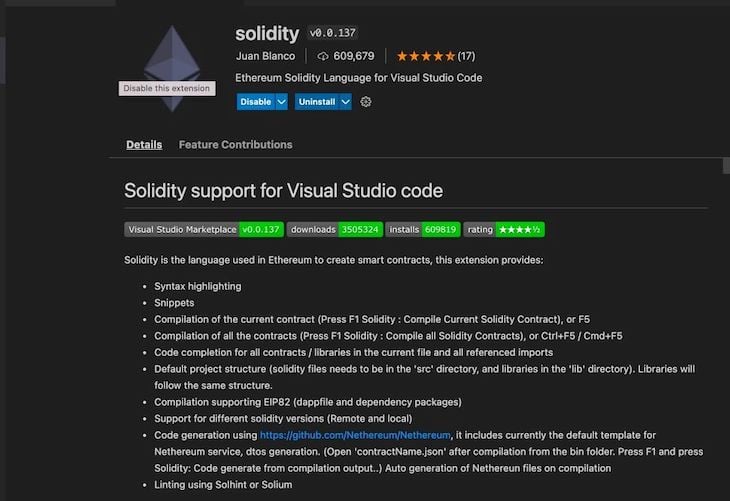
Next, let’s search for the Solidity extension from our VS Code editor and install it in our editor to help with some syntax and auto completion features:
Using Solidity to write our smart contracts on Ethereum network
We’ll delete the Greeter.sol contract that was created by default by Hardhat. Afterwards, we can go ahead and create our own contract by creating a new file and renaming it Transactions.sol. The .sol suffix stands for Solidity. Solidity programming language is a combination of several languages like Java, JavaScript, Rust, and C++, among others.
Next, we’ll select which version of Solidity we want to use by following the code snippets below. Be sure to include the license in comments above the version:
// SPDX-License-Identifier: UNLICENSED
pragma solidity ^0.8.0;

Now, we can create our contract, give it a name that is the same as the title of the file, and declare an integer variable inside the Transaction class. We’ll use this variable to hold our transactions, and we’ll name this variable transactionCounter.
Create an event called Transfer. This Transfer event is like a function that would accept parameters like address from, address receiver, amount, timestamp, etc. Each transfer that is consummated needs to have these properties:
// SPDX-License-Identifier: UNLICENSED
pragma solidity ^0.8.0;
contract Transactions {
    uint256 transactionCounter;
    event Transfer (address from, address receiver, uint amount, string message, uint256 timestamp, string keyword);
    struct TransferSystem{
        address sender;
        address receiver;
        uint amount;
        string message;
        uint256 timestamp;
        string keyword;
    }
}
To save our transactions, we can define an array of transactions with the type TransferSystem. We’ll also define some functions with naming conventions that explain the action performed, like addToBlockchain, getAllTransactions, and getTransactionCount:
  TransferSystem [] transactions;

    function addToBlockchain(address payable receiver, uint amount, string memory message, string memory keyword) public{

    }
    function getAllTransactions() public view returns (TransferSystem[] memory){
    }
    function getTransactionCount() public view returns (uint256){
    }
In our addToBlockchain function, we’ll increment the transactionCount by one, pushing our parameters and then emitting them:
function addToBlockchain(address payable receiver, uint amount, string memory message, string memory keyword) public{
        transactionCount +=1;
        transactions.push(TransferSystem(msg.sender, receiver, amount, message, block.timestamp, keyword));
        emit Transfer(msg.sender, receiver, amount, message, block.timestamp, keyword);
    }
In our getAllTransactions function, we’ll return transactions:
function getAllTransactions() public view returns (TransferSystem[] memory){
        return transactions;
    }
In our getTransactionsCount function, we’ll return transactionCount:
function getTransactionCount() public view returns (uint256){
        return transactionCount;
    }
With that, we’ve completed our Ethereum Solidity smart contract.
Deploying our Web3 application
To deploy our smart contract, go to script on your VS Code editor, click on sample-script.js, and rename it deploy.js. We’ll edit this file by creating a main function that helps to deploy our transaction. We’ll also change the default Greeter constant to Transaction:
const main = async () => {
  const Transactions = await ethers.getContractFactory("Transactions");
  const transactions = await Transactions.deploy();
  await transactions.deployed();
  console.log("Transactions deployed to: ", transactions.address);
}
const runMain = async () => {
  try {
    await main();
    process.exit(0);
  } catch (error) {
    console.error(error);
    process.exit(1);
  }
}
runMain ();
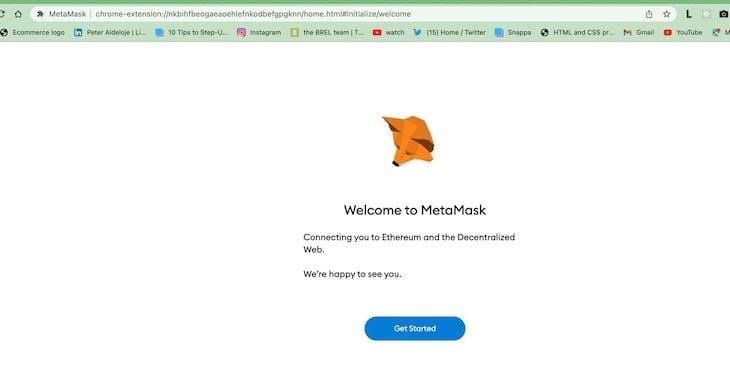
The code snippet above would help to deploy our transactions on the blockchain wallet. But to do so, we need to have some Ethereum or gas already. Gas refers to fractions of Ether that are required to conduct transactions. You can visit the Ropsten Testnet Faucet to get test Ethereum. We also need to provide our wallet address. For this, we need to set up a Metamask extension on our browser:
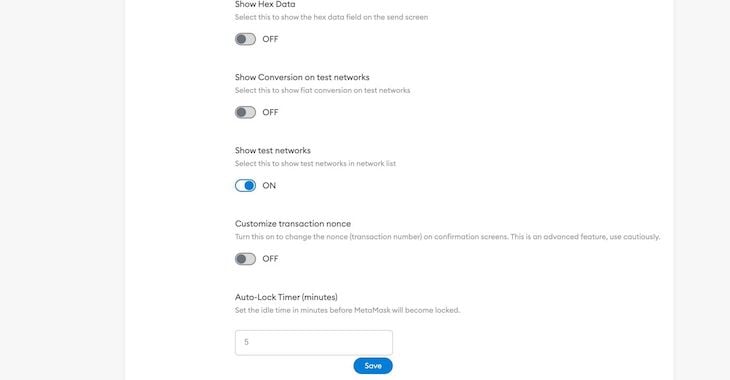
Now, we can change the show test networks toggle to enable test networks on the Ethereum Mainnet:
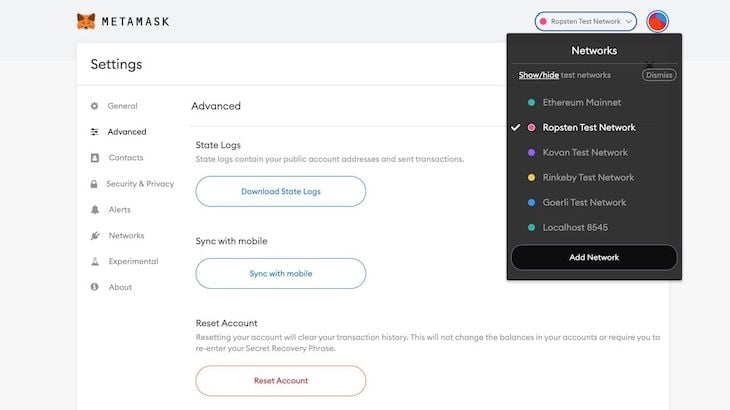
In the top-right corner, we can change the Ethereum Mainnet to Ropsten Test Network:
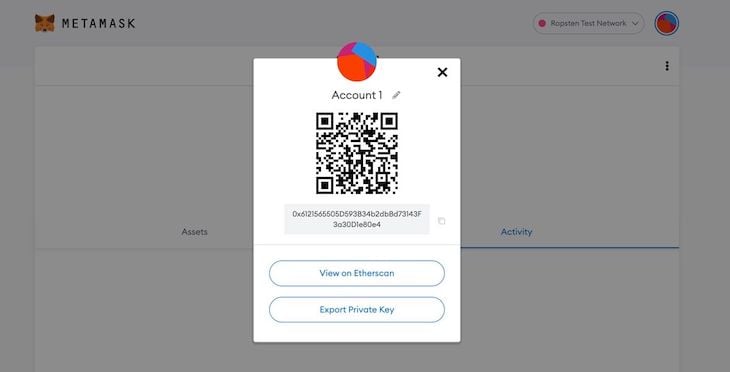
We can now copy our account address from account one and paste it on Ropsten Test Faucet:

To deploy our blockchain, we can go to Alchemy. Note that our network choice here is going to be Ropsten, which prevents us from paying real Ethereum gas fees:

After successfully creating an account with Alchemy, click on create app at the top right corner and enter your preferred details. Next, click on view keys and copy the HTTP keys.
Now, we can head back to our hardhat.config.js to test our smart contract using hardhat-waffles as our plugin. We should edit our hardhat.config.js to look like the code below:
require('@nomiclabs/hardhat-waffle');
module.exports = {
  solidity : '0.8.0',
  networks : {
    ropsten:{
      url: `https://eth-ropsten.alchemyapi.io/v2/SFRRwFrEK3nQkYAis0Z0dBLjcWEHtztJ`,
      accounts: ['085164c615a0edb827a8ee5c1759b7c704bc519130841121ad07b21aff359929']
    }
  }
}
In our hardhat.config.js folder, we assigned the private keys that are generated above to our accounts, while the URL is the HTTP from Alchemy. To deploy our application, we go to the terminal and enter the following commands:
npx hardhat run scripts/deploy.js --network ropsten
We’ll get a generated address number like in the image below:

Next, we go to our client folder, right click on src, and create a new folder called utils. Inside of our util folder, we can create a new file called constant.js and enter the address generated using the code snippet below:
export const contractAddress= `0x02207Ac5b9ffc1d8BFc242ad3BAB1A44Ebc7D9bb`;
Head to smartContract → artifact →Transactions.sol → Transactions.json → abi. ABI, which means application binary interface, is the standard way to interact with the smart contract on the Ethereum system.
Next, we’ll copy everything on Transactions.json, then paste in a new file that we’ll create inside our utils folder. We can name this new file Transactions.json. Let’s import this in our constants.js folder using the code snippet below:
import abi from `./Transactions.json`;
export const contractABI = abi.abi;
export const contractAddress = `0x02207Ac5b9ffc1d8BFc242ad3BAB1A44Ebc7D9bb`;
Next, we’ll create a new folder in our src folder called context, as well as a file called TransactionContext.jsx, which will enable us to use the React Context API throughout our application:
import React, {useEffects, useState} from 'react';
import { ethers } from 'ethers';
import { contractABI, ContractABI, contractAddress } from '../util/constants';
export const TransactionContext = React.createContext();
const { ethereum } = window;
const getEthereumContract = () => {
    const provider = new ethers.provider.Web3Provider(ethereum);
    const signer = provider.getSigner();
    const transactionContract = new ethers.Contract(contractAddress, contractABI, signer);

    console.log({
        provider,
        signer,
        transactionContract
    });
}
export const transactionProvider = ( children ) => {
    return (
        <TransactionContext.Provider value=>
            {children}
        </TransactionContext.Provider>
    );
}
We’ll also import our TransactionContext in our main.jsx file like in the code snippet below:
import React from 'react'
import ReactDOM from 'react-dom'
import './index.css'
import App from './App'
import TransactionContext from './context/TransactionContext'
ReactDOM.render(
  <TransactionProvider>

  <React.StrictMode>
    <App />
  </React.StrictMode>
  </TransactionProvider>,
  document.getElementById('root')
)
We made some changes to our code snippet for TransactionContext.jsx, shared below:
import React, {useEffect, useState} from 'react';
import { ethers } from 'ethers';
import { contractABI, contractAddress } from '../util/constants';
export const TransactionContext = React.createContext();
const { ethereum } = window;
const getEthereumContract = () => {
    const provider = new ethers.provider.Web3Provider(ethereum);
    const signer = provider.getSigner();
    const transactionContract = new ethers.Contract(contractAddress, contractABI, signer);

   return transactionContract;
}
export const TransactionProvider = ({children}) => {
     const [currentAccount, setCurrentAccount] = useState('');
     const [formData, setFormData] = useState({addressTo: '', amountTo: '', keyword: '', message: ''});
     const [isLoading, setIsLoading] = useState(false);
     const [transactionCount, setTransaction] = useState(localStorage.getItem('transactionCount'));
     const handleChange = (e, name) => {
         setFormData((prevState) => ({ ...prevState, [name]: e.target.value }));
     }
      const checkIfWalletIsConnected = async () => {

    try{
        if (!ethereum) return alert ("Please install metamask!");
        const accounts = await ethereum.request({ method: 'eth_accounts'});
        if(accounts.length){
            setCurrentAccount(accounts[0]);
        }
        else{
            console.log("No accout found!");
        }
        console.log(accounts);
      } catch(error) {

        throw new Error("No ethereum object...");
    }
  }
      const connectWallet = async () => {
          try {
            if (!ethereum) return alert ("Please install metamask!");
            const accounts = await ethereum.request({ method: 'eth_requestAccounts'});
            setCurrentAccount(accounts[0]);
          } catch (error) {
              console.log(error);
              throw new Error("No ethereum object...");
          }
      }
      const sendTransaction = async () => {
          try {
            if (!ethereum) return alert ("Please install metamask!");
            const {addressTo, amount, keyword, message} = formData;
            const transactionContract = getEthereumContract();
            const parsedAmount = ethers.utils.parsedEther(amount);
            await ethereum.request({
                method: 'eth_sendTransactions',
                params: [{
                from: currentAccount,
                to: addressTo,
                gas: '0x5208',
                vaue: parsedAmount._hex,
                }]
            });
           const transactionHash = await transactionContract.addToBlockchain(addressTo,parsedAmount,message,keyword);

           setIsLoading(true);
           console.log(`Loading - ${transactionHash.hash}`);
           await transactionHash.wait();
           setIsLoading(false);
           console.log(`Success - ${transactionHash.hash}`);
           const transactionCount = await transactionContract.getTransactionCount();
           setTransactionCount(transactionCount.toNumber());
          } catch (error) {
            console.log(error);
            throw new Error("No ethereum object...");
          }
      }
     useEffect(()=> {
        checkIfWalletIsConnected();
     },[]);
    return (
        <TransactionContext.Provider value=>
            {children}
        </TransactionContext.Provider>
    );
   }
The code below shows all further changes made to the Welcome.jsx component:
import { AiFillAlipayCircle } from "react-icons/ai";
import { SiEthereum } from "react-icons/si";
import { BsInfoCircle }  from "react-icons/bs";
import { TransactionContext } from "../context/TransactionContext";
import React, { useContext } from 'react';
import { Loader } from './';
const Input = ({placeholder, name, type, value, handleChange}) => (
    <input
    placeholder={placeholder}
    type={type}
    step= "0.0001"
    value={value}
    onChange={(e)=>handleChange(e,name)}
    className= "my-2 w-full rounded-sm p-2 outline-none bg-transparent text-white border-none text-sm white-glassmorphism"
    />
);
const commonStyles = () => 'min-h-[70px] sm:px-0 px-2 sm:min-w-[120px] flex justify-center items-center border-[0.5px] border-gray-400 text-sm font-light text-white';
const Welcome = () => {
    const { connectWallet, currentAccount, formData, sendTransaction, handleChange } = useContext(TransactionContext);
    const handleSubmit = (e) => {
        const {addressTo, amount, keyword, message} = formData;

        e.preventDefault();
        if(!addressTo || !amount ||  !keyword || !message) return;
        sendTransaction();
    }
    return (
        <div className="flex w-full justify-center items-center">
            <div className="flex mf:flex-row flex-col items-start justify-between md:p-20 py-12 px-4">
                <div className="flex flex-1 justify-start flex-col mf:mr-10">
                    <h1 className="text-3xl sm:text-5xl text-white text-gradient py-1">
                        Blockchain and Crypto Transactions<br /> across the world
                    </h1>
                    <p className="text-left mt-5 text-white font-light md:w-9/12 w-11/12 text-base">
                        Explore the Crypto world. Buy and sell cryptocurrencies easily on our crypto wallet
                    </p>
                    {!currentAccount && (<button type="button" onClick={connectWallet} className="flex flex-row justify-center items-center my-5 bg-[#2952e3] p-3 rounded-full cursor-pointer">

                        <p className= "text-white text-base font-semibold">Connect Wallet</p>
                    </button>)}
                      <div className="grid sm:grid-cols-3 grid-cols-2 w-full mt-10">
                        <div className={`rounded-tl-2xl ${commonStyles} text-white`}>
                           Reliability
                        </div>
                       <div className={`rounded-th-2xl ${commonStyles} text-white`}>
                           Security
                        </div>
                       <div className={`rounded-tr-2xl ${commonStyles} text-white`}>
                           Ethereum
                       </div>
                       <div className={`rounded-bl-2xl ${commonStyles} text-white`}>
                           Web 3.0
                        </div>
                       <div className={`rounded-bh-2xl ${commonStyles} text-white`}>
                           Low fees
                        </div>
                       <div className={`rounded-br-2xl ${commonStyles} text-white`}>
                           Blockchain
                        </div>
                     </div>
                </div>
                <div className="flex flex-col flex-1 items-center justify-start w-full mf:mt-0 mt-10">
                    <div className="p-3 justify-end items-start flex-col rounded-xl h-40 sm:w-72 w-full my-5 eth-card white-glassmorphism">
                        <div className="flex justify-between flex-col w-full h-full">
                            <div className="flex justify-between items-start">
                                <div className="w-10 h-10 rounded-full border-2 border-white flex justify-center items-center">
                                    <SiEthereum fontSize={21} color="#fff" />
                                </div>
                                <BsInfoCircle fontSize={17} color="#fff"/>
                                </div>
                                <div>
                                <p className="text-white font-light text-sm">
                                 Address (0Xapdpqdf.......fdsb)
                                </p>
                                <p className="text-white font-light text-white font-semibold text-lg mt-1">
                                    ETHEREUM
                                </p>
                             </div>
                            </div>
                        </div>
                        <div className="p-5 sm:w-96 flex-full flex flex-col justify-start items-center blue-glassmorphism">

                            <Input placeholder= "Address To" name = "addressTo" type="text" handleChange={handleChange} />
                            <Input placeholder= "Amount (ETH)" name = "amount" type="number" handleChange={handleChange} />
                            <Input placeholder= "Keyword (gif)" name = "keyword" type="text" handleChange={handleChange} />
                            <Input placeholder= "Enter Message" name = "message" type="text" handleChange={handleChange} />
                            <div className="h-[1px] w-full bg-gray-400 my-2" />
                            {false ?(
                                <Loader />
                            ): (
                                <button
                                type="button"
                                onClick={handleSubmit}
                                className="text-white w-full mt-2 border-[1px] p-2 border-[#3d4f7c] rounded-full cursor-pointer">
                                    Send Now
                                </button>
                            )}
                        </div>
                </div>
            </div>
        </div>
    );
}
export default Welcome;
Now, let’s go ahead and test our application.
Testing our Web3 application
To test our application, we can open Metamask to create a new account so we can generate a different address to send the money:

After successfully creating a second account, we can copy and paste the address on our addressTo on our browser page, select the amount of Ethereum you want to send, pass in any keyword or message, then click the Send Now button:
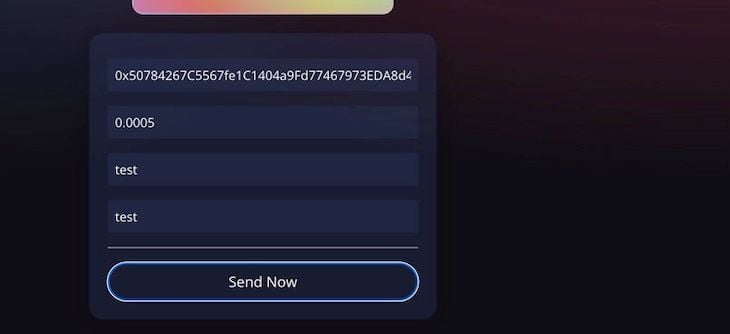
Keep in mind that we need to click on the connect wallet button after restarting the application to connect to Metamask again. Before going ahead to consummate transactions, do the following:
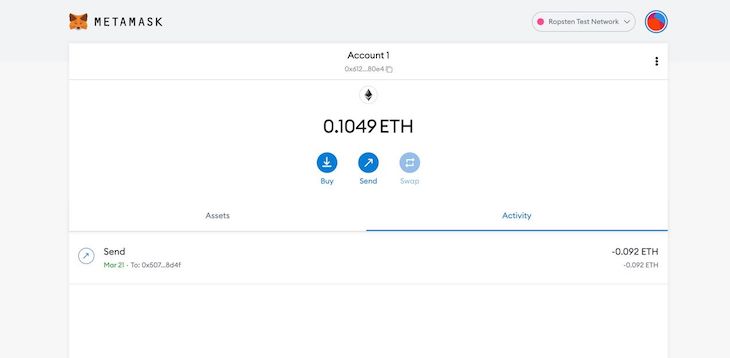
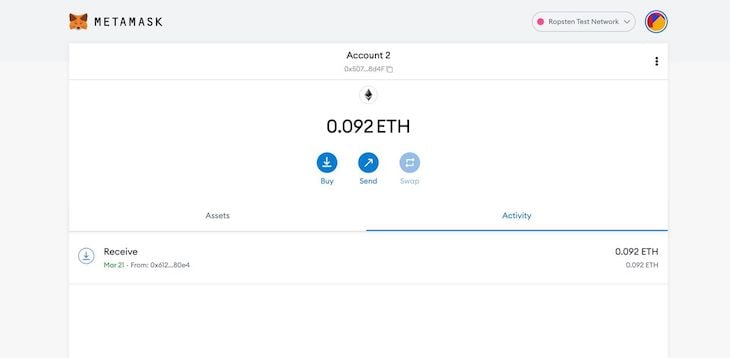
You could also check out the completed projects on YouTube.
Conclusion
In this article, we successfully built a Web3 application from scratch. We began with an introduction to Web3 technology before diving deep to build our application using the Solidity programming language. Then, we tested our application and carried out blockchain transactions.
Throughout this article, we’ve observed the tremendous role that Solidity and JavaScript play in developing smart contracts. We used React to develop the frontend of our smart contract with several components like Loader, welcome, and more, while we built our smart contract using Solidity. You can follow the steps outlined in this article to build your first smart contracts on Ethereum network.
I hope you’ve found this article useful. Please share your views on how Web3 can be improved upon, and do leave a comment if you have any questions or concerns. I’m looking forward to seeing your projects. Happy coding!
The post The role of Solidity and JavaScript in Web3 applications appeared first on LogRocket Blog.
from LogRocket Blog https://ift.tt/U3IMQ8d
via Read more


