Middlemen are everywhere. Most of the things we use for our day-to-day activities are sustained and available because of the aid of these middlemen.
For instance, the retailers and wholesalers of goods and services we use are nothing but middlemen that help us to get what we need in a more efficient way. We do not need to meet the manufacturer or know where the raw materials come from.
If you are a consumer, you go through the retailer without needing to see any of the many steps in the chain that led up to it. In essence, this is what proxy is — it acts as a middleman.
What is a proxy?
A proxy, or proxy server, acts as a relay between the website you are visiting and your device. This can provide a huge benefit for security, if you consider, for example, that proxies mean you do not have to reveal your real identity.
Just like a middleman, the proxy server works as an intermediate server between clients and servers by forwarding client requests to resources — it’s best thought of as a gateway. Proxy servers should not be mistaken for virtual private networks (VPNs) because, while their use may be similar, they are not the same.
A VPN client on your computer establishes a secure tunnel with the VPN server, replacing your local ISP routing. VPN connections encrypt and secure all of your network traffic; not just the HTTPS calls from the browser like a proxy server.
Most people do not realize this, but anything on the Internet is either on the client or server-side of things. Your browser is an example of a client; when you register on Facebook or Twitter, the form fields (traffic) you fill are being sent and processed by a server.
Now, when you try to do anything on the Internet, your computer (client) communicates directly with the server. This is what proxy servers can help us avoid.
Importance of proxies
Protection
Going to a website without using a proxy is not considered secure in today’s cybersecurity environment; it leaves you open and vulnerable to anyone who has access to the server. Using a proxy helps to keeps client information protected from being breached.
Firewall
Most companies or homes set up a firewall to restrict users of their network to access certain websites. A proxy server can be used in bypassing blocked websites. It’s frequently the case for organizations to have blocked or blacklisted websites that are deemed dangerous for their employees’ data security.
In addition, many websites have geographic restrictions. In those cases, if access to those websites is necessary, a proxy server will help you.
Anonymity
Since you are sending your traffic through a middleman or gateway, this creates a certain level of anonymity.
It removes your identity from the client-server equation and achieves this by handing over only certain data to the middleman, which is the only information the server receives about you. A user can keep their personal information and browsing habits anonymous this way through using a proxy.
Implementing a proxy in a Next.js app
Next.js is an open-source development framework built on top of Node.js, enabling React-based web application functionalities such as server-side rendering and static website generation.
Now, we are going to experiment with everything we have talked about regarding proxy servers in a simple Next.js application. Next.js even provides a way to do this with its Rewrites array.
Make sure you have at least Node.js version 12 installed on your machine. Having Node.js on your machine comes with npm (Node package manager), which also comes with npx (Node Package Execute), which will be used to install Next.js.
Some developers prefer Yarn, another option instead of npm — go ahead and install it if that is what you want to use.
Installing Next.js
Input the following command on your machine:
npx create-next-app@latest
#OR
yarn create next-app
Regardless of the package manager you have installed, you will get this:
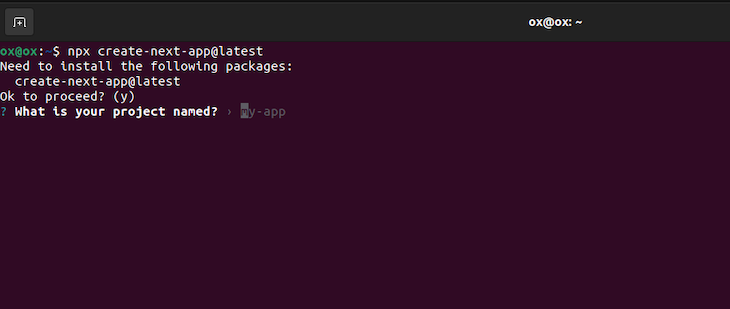
Hit Enter, after which it will prompt you to input the project’s folder’s name. If you hit Enter again, the project’s name will be my-app.
After the installation is complete, move into your project directory. This is what your Next.js fresh installation looks like:
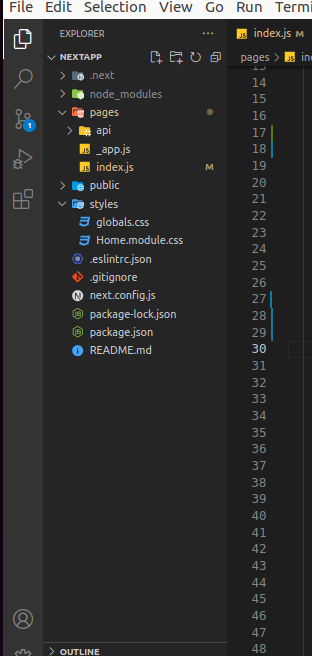
To start it up, run:
npm run dev
#OR
yarn dev
It will start at http://localhost:3000
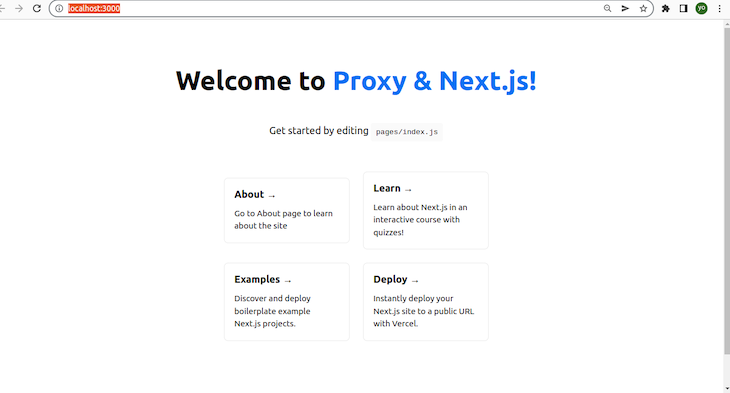
You will get something like this image (I have made some minor edits here  ).
).
At this point, I’m assuming you have a certain degree of familiarity with Next.js, so I will just get straight to the point. We are going to use this app (note that it is running at port 3000 by default; you can always reconfigure this) and have it connect to a backend server elsewhere that is on an entirely different port.
I am going to create a cat page, where I will be getting random facts about cats from https://meowfacts.herokuapp.com (this is a simple API that displays random facts about cats).
Next.js provides an easy way to do this. In next.config.js, replace the code inside with this:
//js
module.exports = () => {
  const rewrites = () => {
    return [
      {
        source: "/cats",
        destination: "https://meowfacts.herokuapp.com",
      },
    ];
  };
  return {
    rewrites,
  };
};
Rewrites allow you to map an incoming request path to a different destination path.
Rewrites act as a URL proxy and masks the destination path, making it appear as though the user hasn’t changed their location on the site. In contrast, redirects will reroute to a new page and show the URL changes.
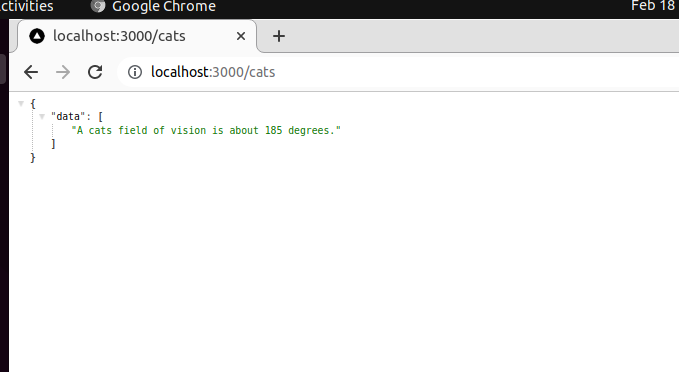
What we did in the code above is simply configure our Next.js application so that when we go to /cats, it gets the data from the destination without revealing it.
I will go ahead and add another route that will fetch its data (random duck image) from https://random-d.uk/api/random. I will simply need to add another object like so:
  {
        source: "/ducks",
        destination: "https://random-d.uk/api/random",
      },
Now, it looks like this:
module.exports = () => {
  const rewrites = () => {
    return [
      {
        source: "/cats",
        destination: "https://meowfacts.herokuapp.com",
      },
      {
        source: "/ducks",
        destination: "https://random-d.uk/api/random",
      },
    ];
  };
  return {
    rewrites,
  };
};
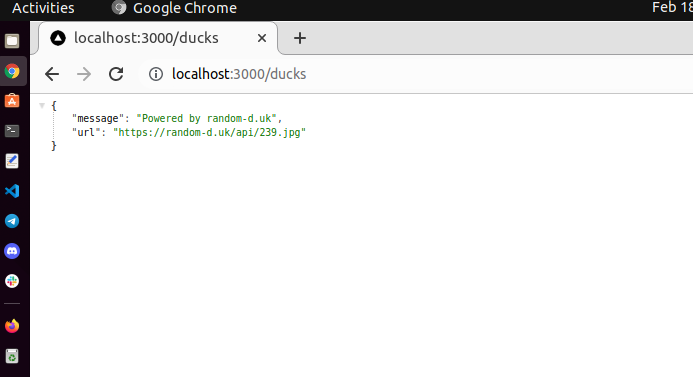
With this, when we go to /ducks on your Next.js application, it fetches data from https://random-d.uk/api/random without ever revealing its URL. Look at the following images as an example:
Conclusion
Congratulations! You have reached the end of this tutorial. We have looked at what a proxy is, the utility of proxies — ranging from the protection it provides to the anonymity it brings.
We implemented a proxy in Next.js, which provides an out-the-box way to do this. With Rewrites, we are able to map an incoming request path to a different destination path, and are able to test this out with some external APIs and correct the feed on our local machine.
The post How to use a proxy in Next.js appeared first on LogRocket Blog.
from LogRocket Blog https://ift.tt/CEQpzA2
via Read more


