Frameworks and libraries are designed to help us get things done faster and better. But, those from the JavaScript ecosystem (e.g., React, Vue, Svelte, Angular, and jQuery) all follow one standard — they preload JavaScript code on most interactions. This is where Qwik is different.
Qwik is a new framework that promises near-instant loading, regardless of the size or complexity of your web application. Here’s what the Qwik team has to say about the framework:
“Qwik is an open-source DOM-centric, resumable web-app framework designed for best possible time-to-interactive, by focusing on resumability of server-side-rendering of HTML and fine-grained, lazy-loading of code.”
In this article, we’ll introduce the Qwik framework and Qwik City server functions. Then, we’ll demonstrate how to set up a project in Qwik and use some of Qwik City’s server functions to load data without relying on JavaScript async-await functions.
Jump ahead:
- Prerequisites
- What are Qwik City server functions?
- Setting up the Qwik project
- Starting the Qwik project
- Using Qwik City server functions
Prerequisites
To follow along with the tutorial portion of this article, you should have a basic understanding of JavaScript. It does not matter what operating system or environment you are using, but you should have the following installed on your computer:
- Node.js (v.16.18+); to check your Node version, run:
node -v - npm and Yarn; I will use npm for this tutorial
- An IDE or code editor; I will use VS Code for this tutorial
What are Qwik City server functions?
Qwik City is a meta-framework for Qwik, similar to Next.js for React. In fact, Qwik City’s recently released server functions make Qwik + Qwik City a more comparable alternative to more mature, popular frontend + meta-framework combinations like React + Next.js, Solid + SolidStart, Svelte + SvelteKit, and Vue.js + Nuxt.js.
Qwik City provides the routing for the Qwik framework. In its server functions, the code does not run on the server alone; it also runs on the browser. Qwik City takes JavaScript code and converts it into plain HTML.
You know what this means, right? It means webpages load faster because there is no JavaScript code.
Well, technically, the JavaScript code is still there, but the execution of that code is paused. That’s why Qwik is considered resumable. Qwik wants developers to be able to use JavaScript and still score 100% on Google’s PageSpeed test!
The key server functions we’ll investigate in this tutorial are Data Load and Form Action.
Setting up the Qwik project
To set up a project in Qwik, start by running the below command in your terminal or command line tool:
npm create qwik@latest
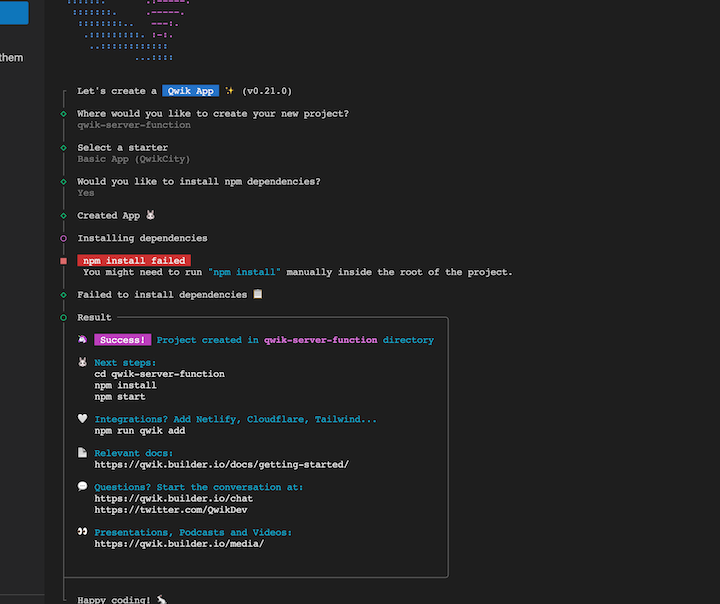
You’ll be prompted to choose a name for your project. Here, I’m using qwik-server-function as my project name:
You’ll also be prompted to select from three starter projects. For this tutorial, select Basic App (QwikCity). Then, select Yes for the prompt: “Begin immediately installing the npm packages?”
When I first ran through this set up, npm installation failed due to internet connectivity. If this happens to you, just locate your root directory by running: cd name-of-directory. For example, I ran: cd qwik-server-function.
After your packages are successfully installed, you’ll still need to navigate to your project directory. Following successful npm installation, you should see something like this:
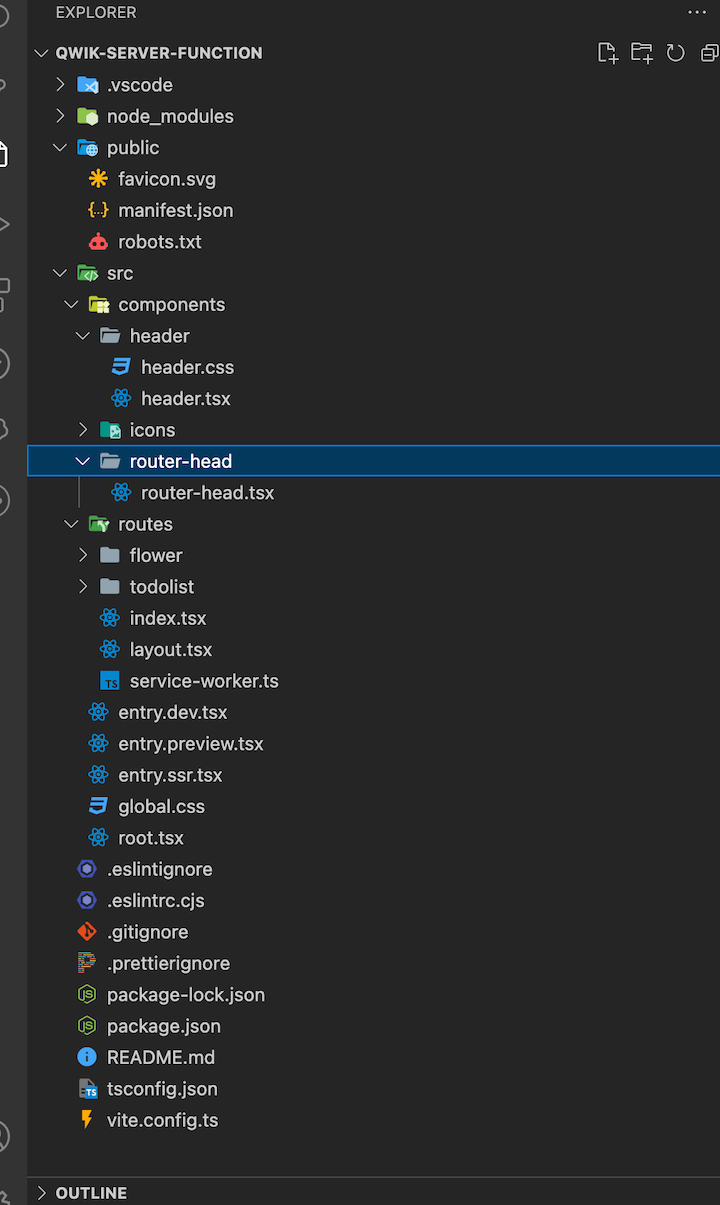
Here’s the Qwik project structure:
If you’re familiar with Next.js, you will know that — unlike React — it takes care of routing under the hood. Qwik City follows this pattern; its routing is file system based. Files and directories in the src/routes folder play a role in the routing of the application.
The routes folder will house every new major thing that we will do. Note that the starter we selected during installation already has two mini projects (flower and todolist) that we can play around with.
Starting the Qwik project
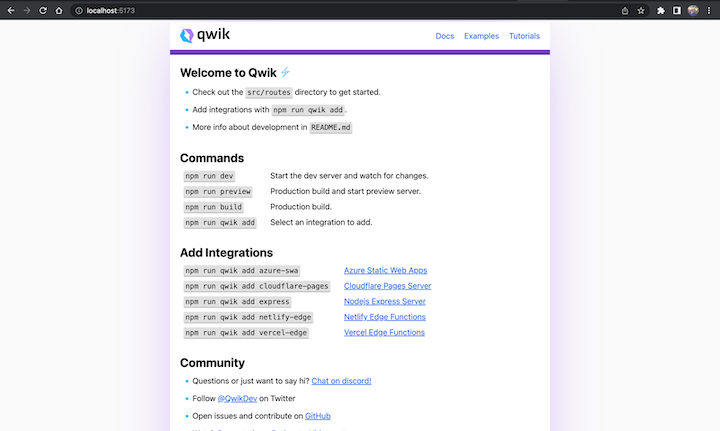
To start the Qwik project, run npm start; the project will run on port 5173:
Next, let’s create a folder and a file, function/index.tsx, in the routes folder.
Now, let’s create a basic component that returns a clickable button that increases by 1 whenever clicked.
import { component$, useStore } from '@builder.io/qwik';
export default component$(() => {
  return (
    <Counter />
  );
});
export const Counter = component$(() => {
  const addOne = useStore({ count: 0 });
  return (
    <>
      I am a dynamic component. Qwik will download me only when it is time to re-render me after the
      user clicks on the <tt>+1</tt> button.
      <br />
      Current count: {addOne.count}
      <br />
      <button onClick$={() => (addOne.count++)}>+1</button>
    </>
  );
});
Notice in the above code, JavaScript does not load when the page loads. This is basically plain HTML.
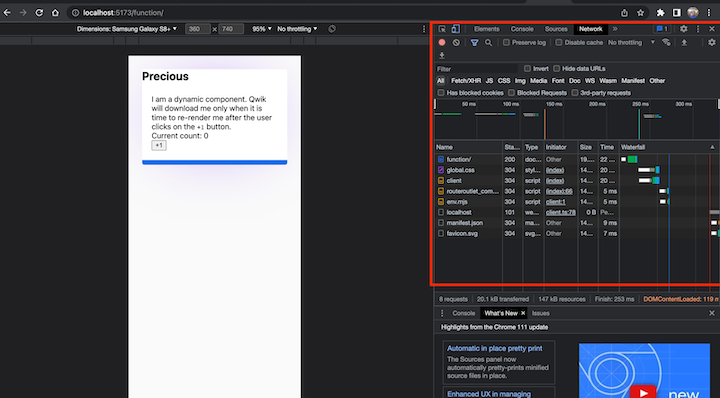
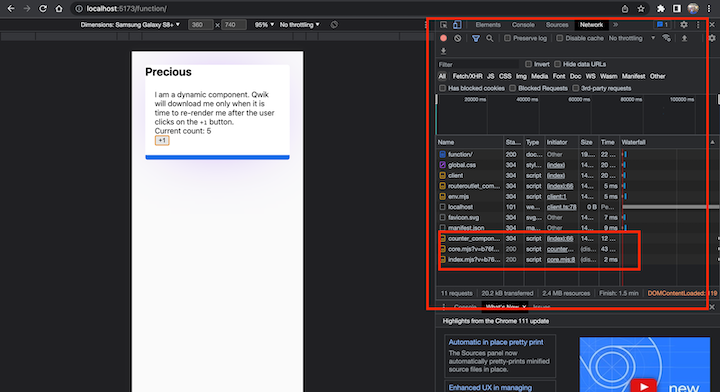
Next, let’s open our browser and go to http://localhost:5173/function. You should have something functionally similar to that shown below. I have removed the default header and footer, so your version may look slightly different:
This is just a simple example, you can build a complex UI with JavaScript functionality and Qwik City will only return HTML or the most minimal JavaScript.
Now, let’s inspect the code in our browser. Below is what you’ll see in the “Network” tab — minimal JavaScript:
If you click the +1 button, JavaScript will resume:
Using Qwik City server functions
Now that we have our project set up, let’s experiment with a couple of Qwik City’s server functions. We’ll take a closer look at Data Loader and Form Actions.
Data Loader
Qwik’s Data Loader is a solution that addresses the need to display retrieved data quickly in HTML. Using this tool, it is possible to guarantee that the data will be accessible in a timely fashion. This reduces loading time and enhances user experience.
With Data Loader, there’s no need to use JavaScript’s async-await function, Qwik City handles that under the hood in a very intelligent way. Data is loaded and made available in the server.
To demonstrate, let’s create a folder in the routes folder. For this tutorial, I will call the folder: loader. Then, create an index.tsx file and add the following code:
import { component$ } from '@builder.io/qwik';
import { loader$ } from '@builder.io/qwik-city';
export const useGetServerTime = loader$(() => {
  return new Date().toISOString();
});
export default component$(() => {
  const serverTime = useGetServerTime();
  return (
    <div>{serverTime}</div>
  )
});
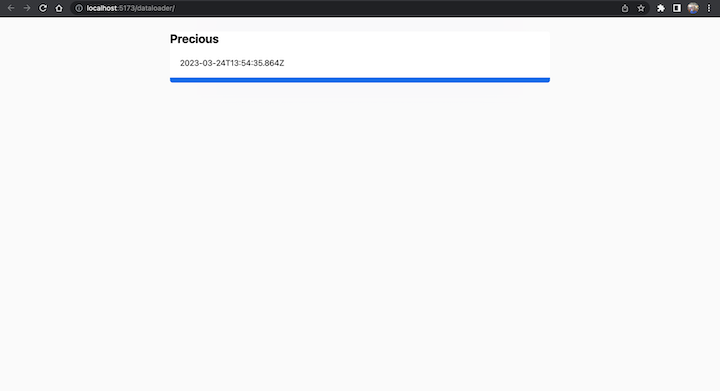
If you open it in the browser, you should see the following:
It’s important to understand that, under the hood, useGetServerTime is just a variable that is made available on the server; it returns the inbuilt Date function in JavaScript.
Now, let’s look at another example. This time, we’ll see how Qwik City server functions work with complex data that may take longer to load.
For this tutorial, I’ll create a file that holds a list of songs by JCole. You could also choose to create a file from an API or a database.
First, create the Song.tsx file in the loader folder:
export interface Song {
  id: number;
  name: string;
  year: number;
}
export const products: Song[] = [
  {
    id: 1,
    name: "procrastination (broke)",
    year: 2023,
  },
  {
    id: 2,
    name: "Work Out",
    year: 2022,
  },
  {
    id: 3,
    name: "Breakdown",
    year: 2022,
  },
  {
    id: 4,
    name: "God Gift",
    year: 2022,
  },
  {
    id: 5,
    name: "Rise and Shine",
    year: 2022,
  },
];
Next, in the loader/index.tsx file, paste the following code:
import { component$ } from '@builder.io/qwik';
import { loader$ } from '@builder.io/qwik-city';
import { songs } from "./Song";
export const useSongs = loader$(() => {
  return songs;
});

export const useGetServerTime = loader$(() => {
  return new Date().toISOString();
});
export default component$(() => {
  const serverTime = useGetServerTime();
  const songs = useSongs();
  return (
    //
    <div>
      <div>{serverTime}</div>
      <ul>
        {songs.value.map((song) => {
          return (
            <li>
              <div>{song.id}</div>
              <div>{song.name}</div>
              <div>{song.year}</div>
            </li>
          );
        })}
      </ul>
    </div>

  )
});
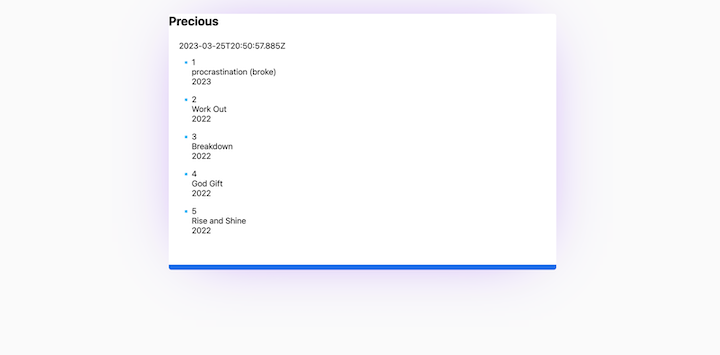
In the above code, we are getting data from the Songs.tsx file.
In lines 2 to 6, we import the Songs.tsx file and input it into a song variable. We also export the song variable using the loader$ syntax. See lines 19 to 27 to note how we map through the items.
Here are the results:
Form Action
Qwik’s Form Action is known as action$. This is a very cool server function. What it does is simply run the code when there is an explicit need. That is to say, the code is run based on user actions. Let’s look at an example.
To start, let’s create another folder inside the routes folder. For this example, I created a formation folder; inside there is an index.tsx file.
Paste this code in the newly created file:
import { action$, Form } from '@builder.io/qwik-city';
import { component$ } from '@builder.io/qwik';
export const useAddUser = action$((user) => {
    const userID = (Math.random() + 1).toString(36).substring(7);
    return {
      success: true,
      userID,
    };
  });

  export default component$(() => {
    const action = useAddUser();
    return (
      <Form action={action}>
        <input name="name"/>
        <button
         onClick$={() => {
            console.log("You clicked me");
            console.log(action);
          }}
         type="submit">Add user</button>
        {action.value?.success && <div>User added successfully</div>}
      </Form>
    );
  });
In lines 3 to 9 of the above code, we export a component that adds the user. First, it generates a random string and returns it along with the success response.
Then, in lines 11 to 25, we export and use the component$ provided by Qwik for displaying whatever we want. Here we simply make a variable action and assign it to the useAddUser() function.
Next, we use the <Form> component, which works like the regular HTML <form> element.
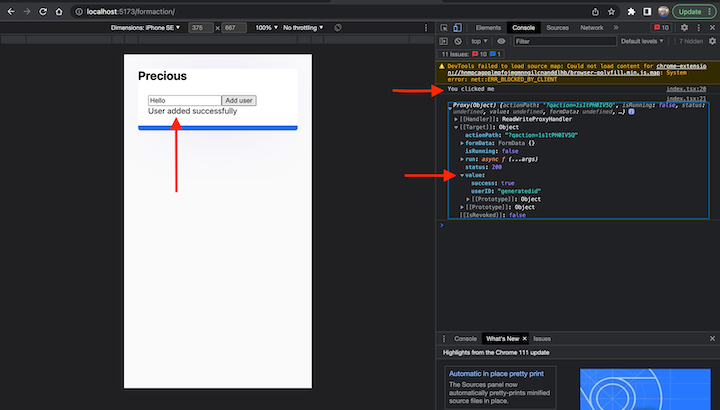
Note that we console logged the action at some point. At the time of page load, none of the action$ gets executed, unlike the loader$ function that we talked about earlier. Instead, action$ gets executed when there is an interaction.
Here’s the result:
Here, clicking the Add user button, tells the server to execute the action.
Conclusion
In this article we demonstrated that Qwik is more than just another framework; it has a “superpower” — reusability! Qwik improves a web application’s performance by converting slow-loading JavaScript into plain HTML, without affecting functionality.
We also demonstrated how to use Qwik City’s loader$ server function, which gets executed in the background, to load external data without using JavaScript’s async-await function, and its action$ server function, which runs code only when there’s an explicit need.
I hope you enjoyed this article. The code for the tutorial portion of this article is available on GitHub.
The post Using server functions with Qwik and Qwik City appeared first on LogRocket Blog.
from LogRocket Blog https://ift.tt/vfETVUd
Gain $200 in a week
via Read more


