This article is a sponsored by MacPaw Inc.
As someone who wears multiple hats, it is challenging to balance a full-time job, freelance projects, and all sorts of creative endeavors.
This is how I started off: By day, I’m a full-time product designer. By night, I juggle all sorts of freelance work and creative projects.
I am currently self-employed. However, there are challenges that come with being my own boss: Working with clients, sales and negotiation, invoicing, building a personal brand, crafting a content strategy, time tracking, project management… The list goes on.
Trying to keep up with everything used to be tough. No matter how hard I tried, my to-do list always seemed never-ending. I was constantly feeling overwhelmed.
I thought to myself, “There’s got to be a better way.”
After analyzing my workflow, I realized that many tasks could be simplified or automated so that I could save time, focus on high-value tasks, and work fewer hours.
After years of trial and error, I discovered a range of tools and strategies that helped me save time and stay organized to focus on what really matters.
The apps mentioned in this guide are available on Setapp. Whether you’re a Mac user or not, these hacks will help you get more done in less time and improve your quality of life. I hope you find value in this guide.
Streamline Your Workflow With the Best AppsYou can use Setapp to access 240+ apps on your Mac and iPhone under a single monthly subscription.
Personally, I use Setapp to do three things:
- Try out apps that could help save time. Some of these apps cost more than Setapp’s subscription, so it’s a relief that I do not need to pay for each one individually.
- For apps that I only need to use occasionally, I can quickly install and uninstall them as needed, with no extra cost. This saves me precious space on my Mac and ensures that I’m not cluttering up my system with unnecessary apps.
- Since Setapp’s library is updated regularly, I always get to try out new apps to further enhance my workflow.
As a freelance designer, I need to track how much time I spend on each project to calculate my billable hours. I used to manually create events on my calendar and calculate the hours spent on each project. It’s a waste of time, and sadly, it is inaccurate.
To solve this problem, you can use Timemator to track your time accurately and minimize distractions.
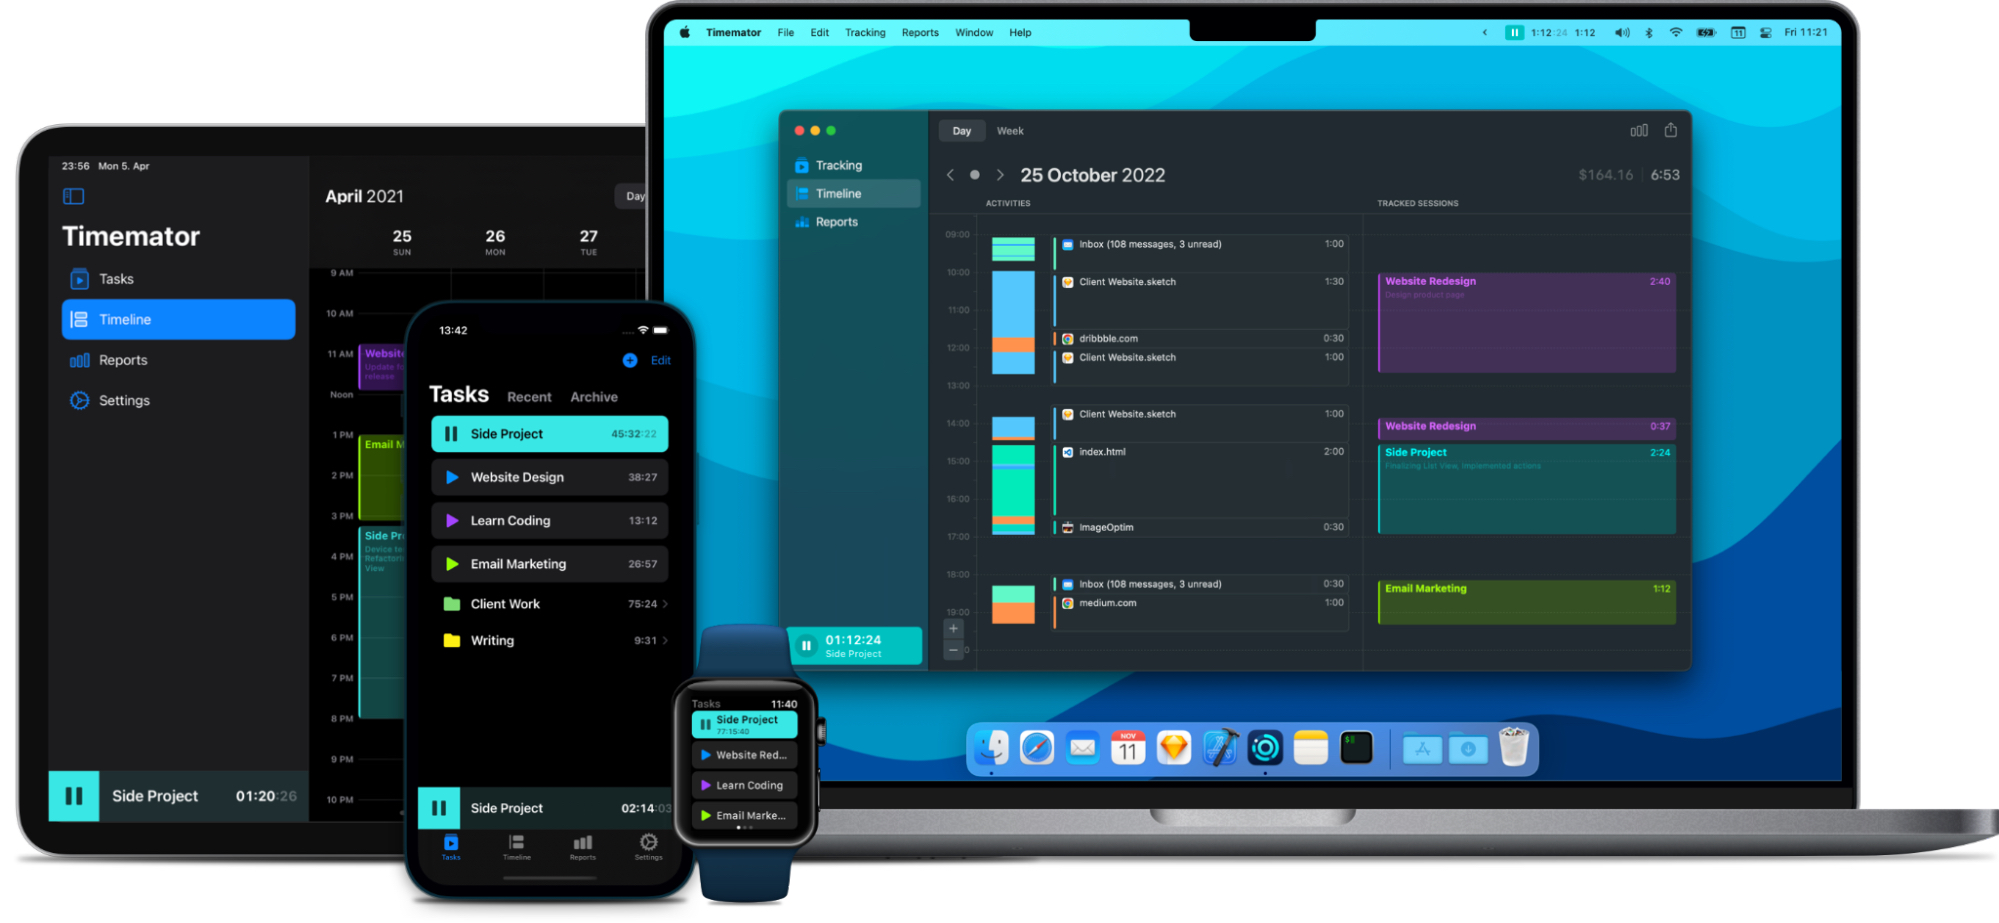
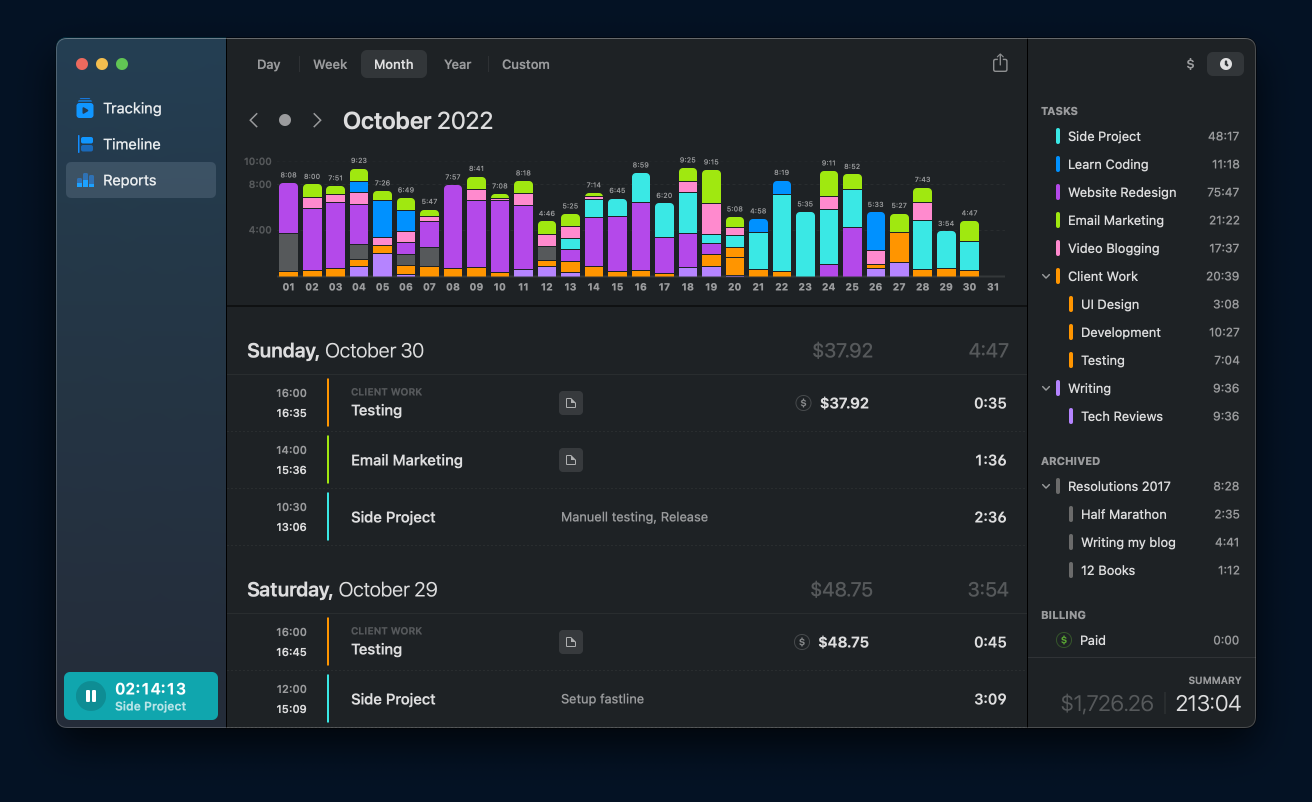
With Timemator, you can set up auto time-tracking rules for specific apps, files, or websites. For example, you can set rules so that the timer starts tracking when you work on a specific project on Figma or Adobe Photoshop.
The timer runs quietly in the background so that you can stay focused without any interruptions. You no longer need to manually start or pause the timer.
Pro tip: Use it to reduce distractions! Set up auto-tracking to track how much time you spend on meetings, talking to teammates or clients on Slack, or watching Netflix.
To help you identify where you’ve spent your time, Timemator gives detailed reports and analytics so you can reduce or eliminate time-wasting activities and get more done in less time.
As designers, we all know that font selection can make or break a creative project.
I was frustrated with Font Book (the default font manager on MacOS). It wasn’t user-friendly. Searching and comparing fonts was a chore.
I found Typeface to be useful — especially when you need to quickly browse through your font collection, customize the preview text and size in real-time, and compare to see how different fonts look side-by-side.
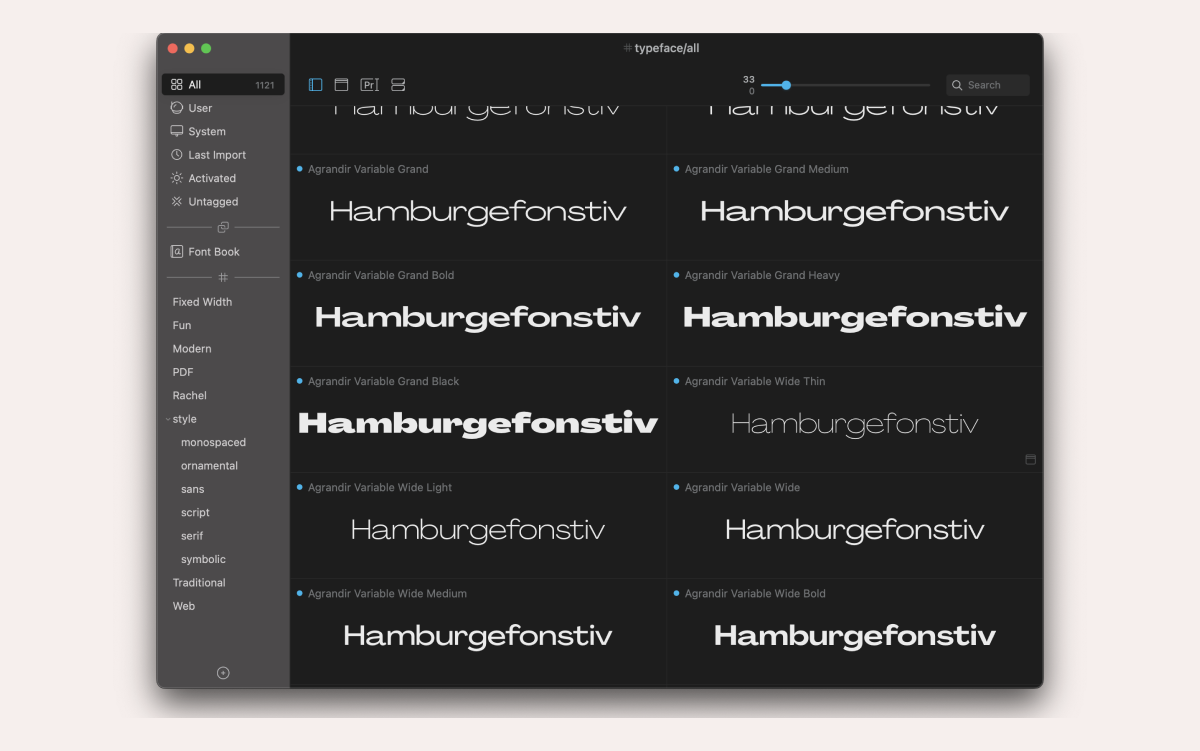
Over the years, I have saved up a huge font library. Typeface is able to load all my fonts quickly and remove duplicate fonts that bloat up my computer. It supports variable fonts and OpenType font features and has robust features for the busy designer.
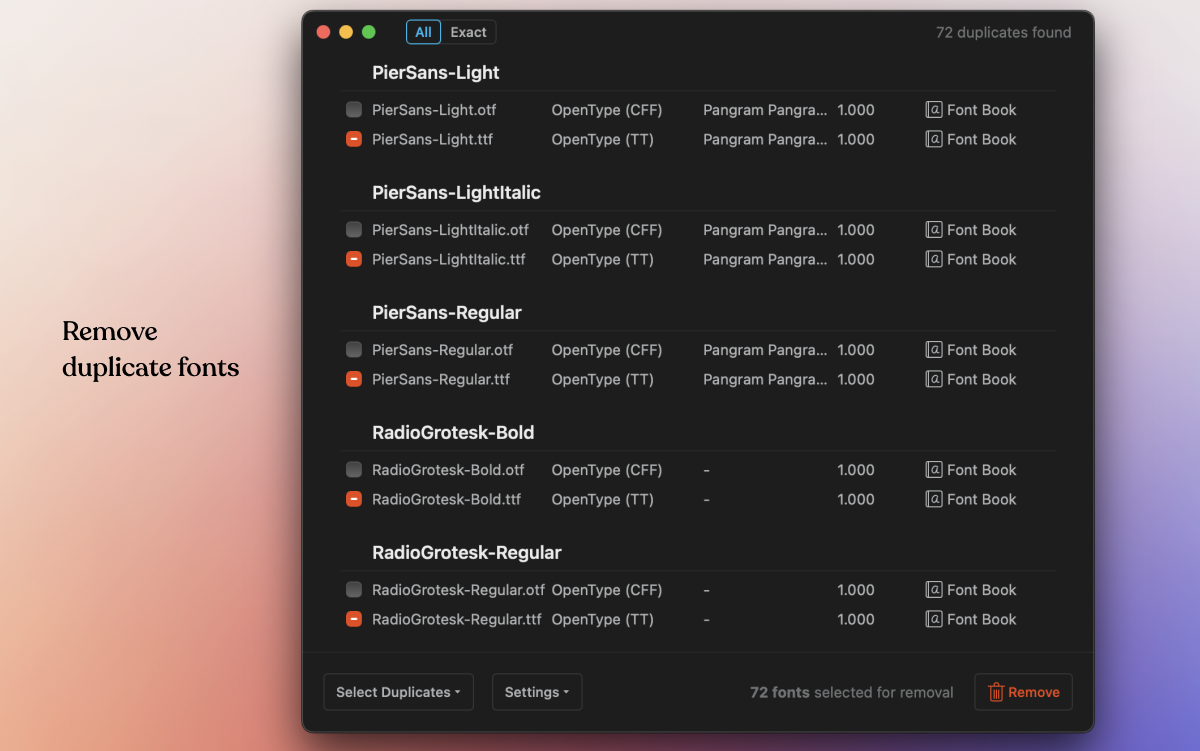
For fonts you don’t use often, you can choose to activate them only when necessary. This way, your computer stays clean and fast.
As a bonus, you can also easily organize fonts into custom collections or tags.
Fastest Way To Create Device MockupsWhen designing, we often need to create high-quality, professional-looking phone, tablet, and computer mockups to showcase our designs.
I used to spend hours searching for device mockup templates and launch Adobe Photoshop in order to use those templates. The whole process was time-consuming, so I switched to a tool called Mockuuups Studio.
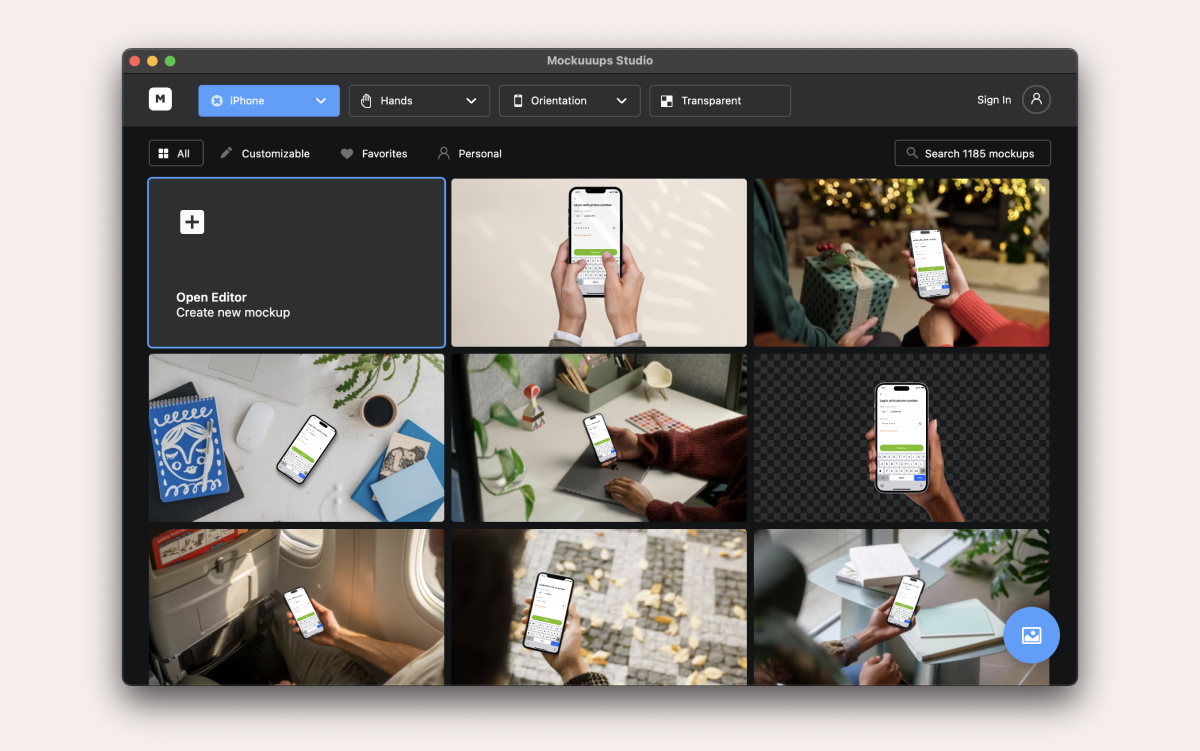
All you need to do is drag and drop a screenshot of your website or app into it, pick a scene, and it will generate thousands of mockups. It’s pretty neat.
You can filter through scenes, models, and devices to find the perfect mockup for your digital product. Then, add hands, overlays, realistic shadows, or backgrounds to your device mockups. In the example above, I have filtered ‘iPhone’ mockups only.
Since it’s cloud-based, you can access it anywhere and collaborate with your teammates in real time too.
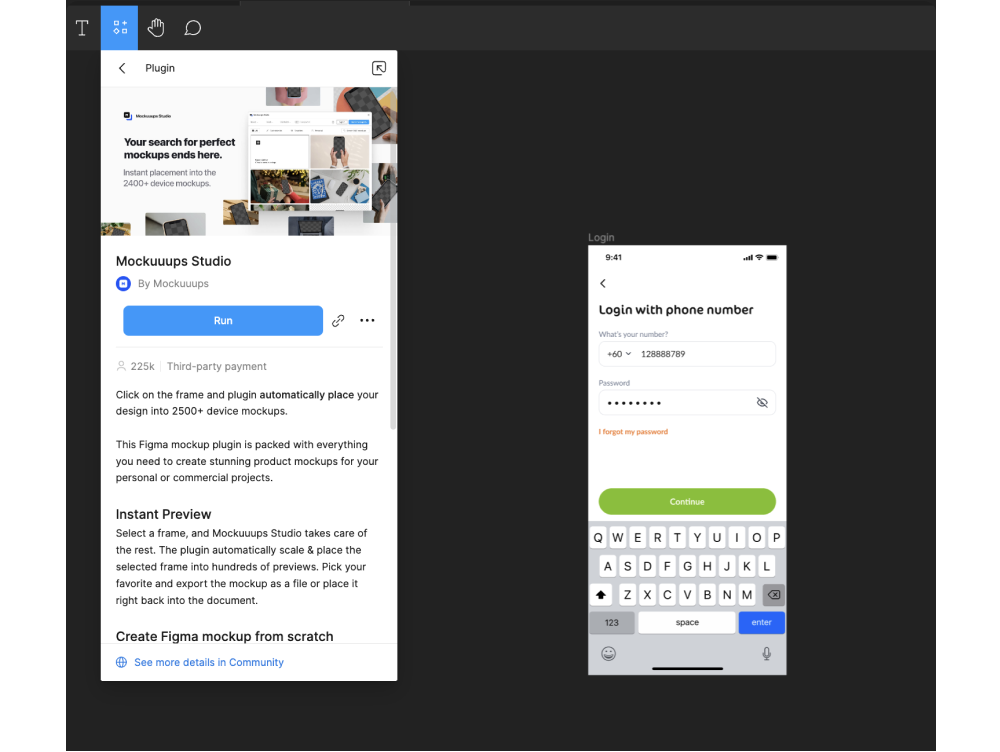
To further speed up your workflow, you can use their Figma, Sketch, or Adobe XD plugin. This is their Figma plugin:
When presenting designs (especially when working remotely), I take screenshots and screen recordings for my clients every day.
But instead of using the default Mac screenshot tool, CleanShot X is a better solution. This is an essential tool for every Mac user.
To quickly take a screenshot, use this shortcut key on your Mac: Command + Shift + 4.
This tool gives you the convenience to record MP4 or GIF with your desktop icons hidden, capture scrollable content, and annotate, highlight, or blur screenshots to hide sensitive personal information.
An example of how I annotate my screenshots:

I’ve used this tool for years with zero complaints. This tool will make your life easier when sharing screenshots with clients or on social media.
A cool feature you’ll also love: You can capture and copy any text, so you’ll never have to manually retype it again!
Your workflow will become much more streamlined and efficient since you no longer get bogged down in the technical details.
Never Waste Time Searching For Meeting Links AgainIt’s challenging to keep track of various meetings, their details, and attendees, especially when switching between Google Meet, Zoom, your email inbox, and calendars.
To solve this problem, you can use Meeter to schedule or join meetings with one click right from the menu bar on your Mac.
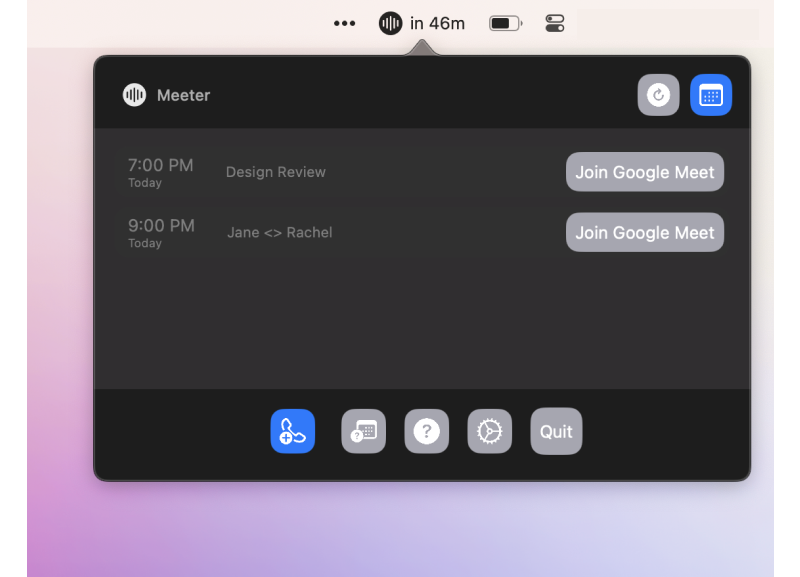
It supports Google Meet, Zoom, and Microsoft Teams. When you want to join a meeting, you no longer have to waste time searching for meeting links, then copy and paste the link into the browser. Instead, you can now focus on being present in every meeting.
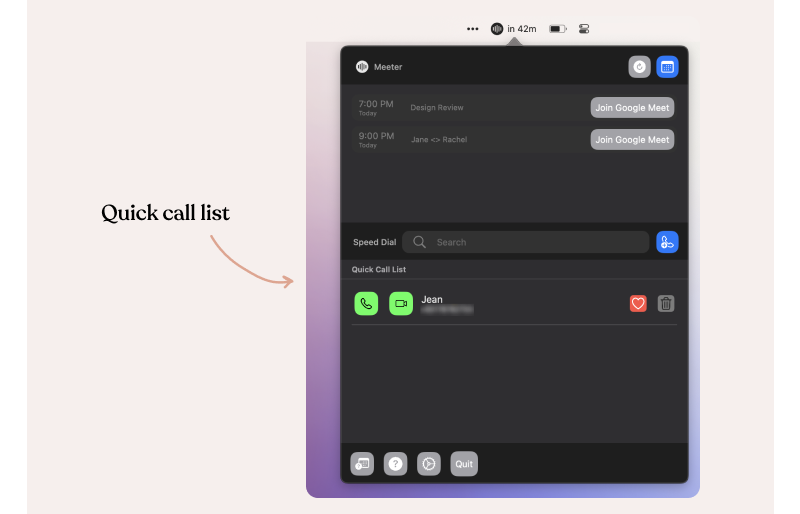
The tool allows you to directly call your FaceTime contacts and phone numbers and jump into recurring calls from the menu bar too. Pretty simple!
When working with multiple files and apps on your Mac, you need to be able to quickly find and access them instead of navigating through different folders.
With Spotlight, you can do these things quickly. While this is not an app, it’s one of the most powerful features on Mac that can save you plenty of time.
To open Spotlight, simply hit Command + Spacebar on your keyboard and start typing.
Then, try these on Spotlight:
- Perform quick calculations.
No need to open a calculator app. Simply type in your calculation in Spotlight and hit enter. It’s that easy. - Search for apps.
Quickly find any app on your Mac. - Search the internet.
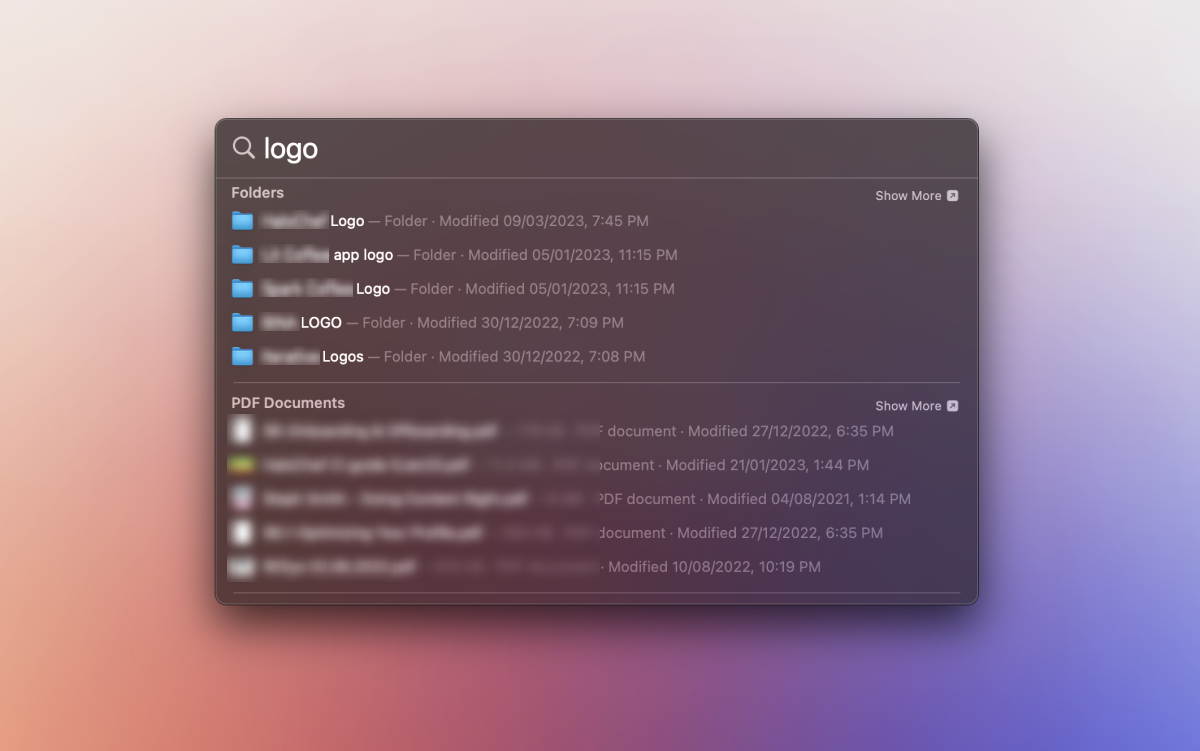
Type your search term, and it will launch your default browser with the search results. You’ve just saved a few clicks. - Find files or folders.
Type in the name of the file or folder, and you have it.
- Check the weather.
Type “weather” followed by your location, and it will give you up-to-date information on the current weather conditions and forecast.
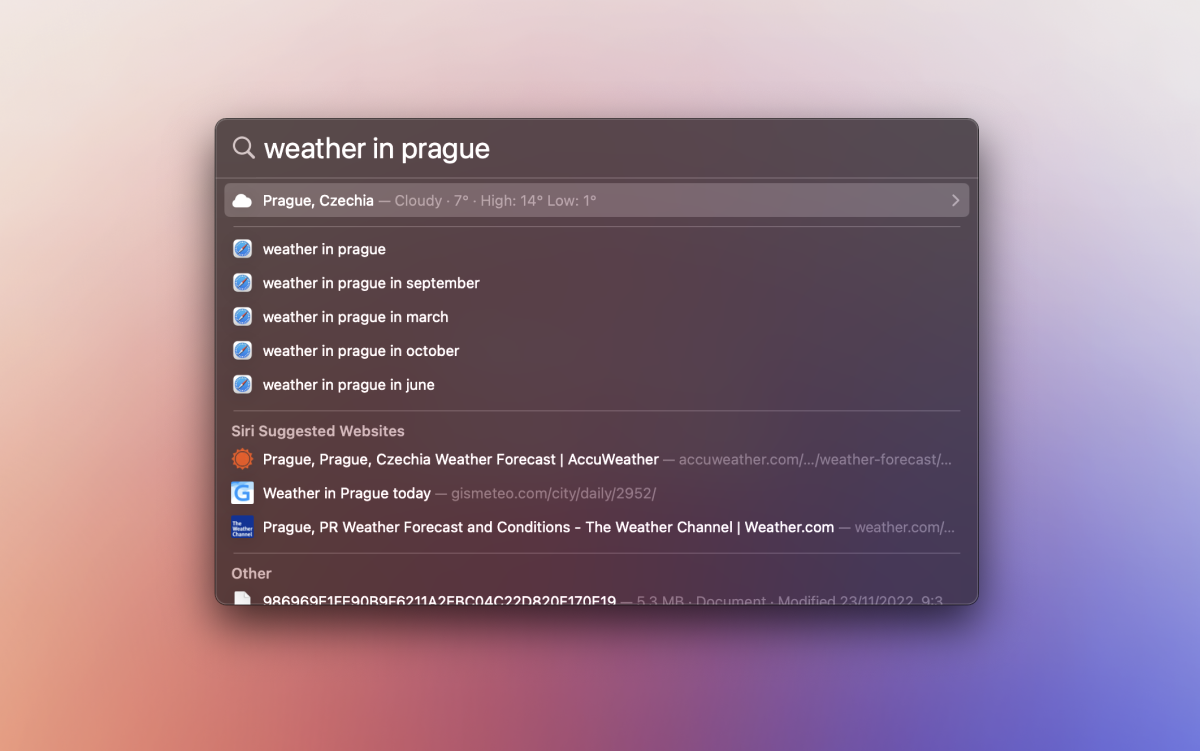
Cool, right? Learning how to use Spotlight effectively is a game-changer. Give it a try, and see how much time you can save.
Design Accessible InterfacesAs a product designer who also builds websites for clients, it’s a challenge to find and create the perfect color palettes while working on multiple projects at once. In the past, I've had to rely on a combination of tools like swatch libraries and notes to keep track of my palettes.
If you’re a designer or a developer, you’ll love Sip — a powerful color picker that can help you design beautiful and accessible interfaces easily.
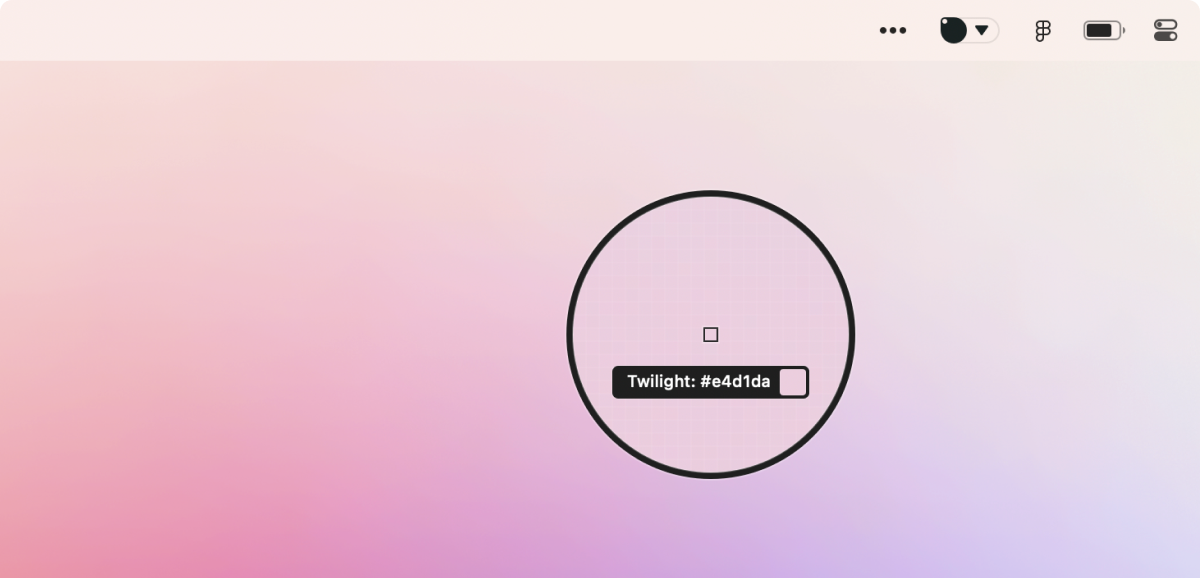
With Sip, you can quickly grab colors right from the Mac menu bar and drop them into any design or development tool, including Adobe Photoshop, Figma, and Sketch. This makes it easy to create custom color palettes that match the client’s brand.
You can create and save custom color palettes, and the quick access menu that floats on the side of your desktop gives you quick access to your color palettes.
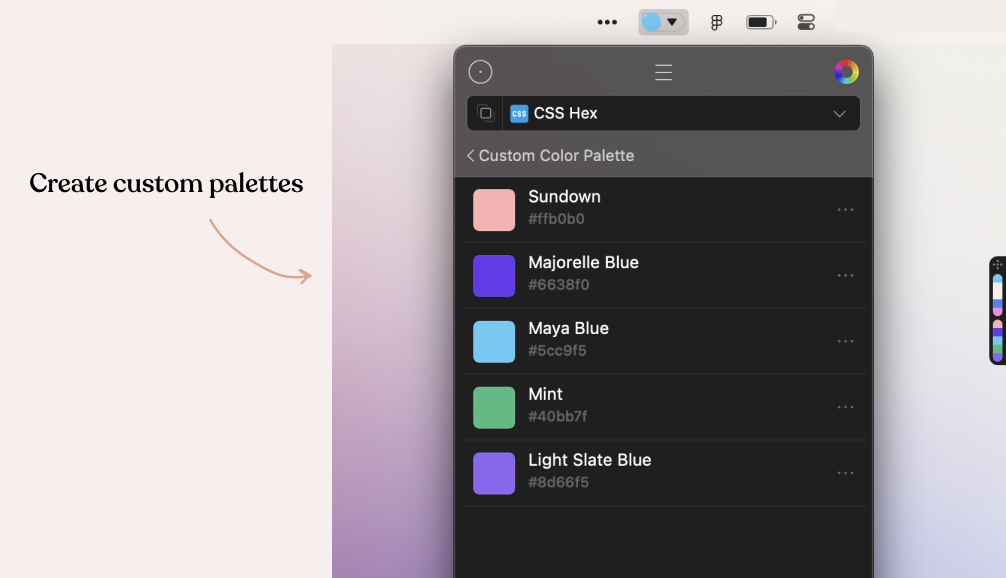
Currently, it supports 24 of the most popular color formats in the industry, like Android XML, CSS hex, RGB, and CMYK.
Now, my favorite feature is Sip’s Contrast Checker. In the example below, you can use the color picker to check the contrast between the gray text and white background, ensuring that it meets accessibility standards and is legible for all users.
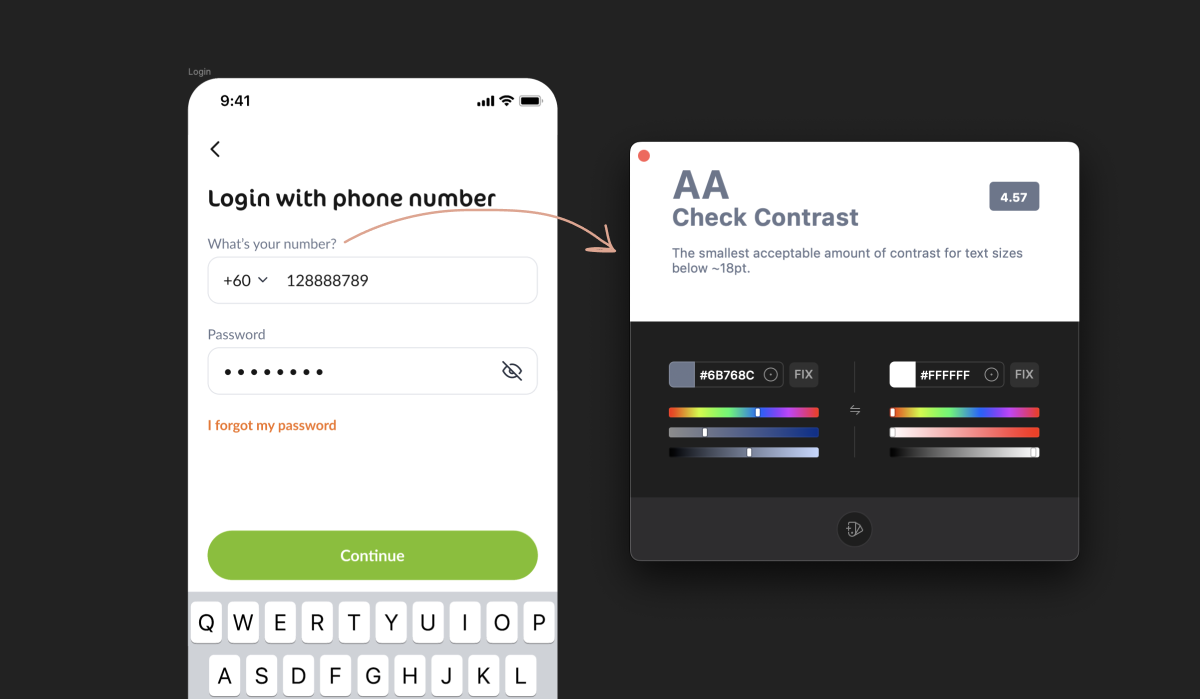
Tip: Always make sure the contrast between the text and background is greater than or equal to 4.5:1 for small text and 3:1 for large text. If the color contrast fails, click on the ‘FIX’ button to improve it!
Declutter Your Mac’s Menu BarIf you have a bunch of apps running on your Mac, your menu bar may be cluttered with all sorts of icons and notifications.
Just like physical clutter, digital clutter takes up mental space and affects your focus, too! To solve this problem, you can use Bartender.
Bartender allows you to organize your menu bar icons into neat and tidy groups or hide them completely — as simple as that. You can collapse your menu bar icons into a customizable dropdown menu so it remains clutter-free.

In the above example, most of my menu icons are hidden, except Figma and the battery level indicator.
After using it for over a month, I am able to focus better. It’s one of those subtle quality-of-life improvements that can have a big impact on your productivity and mindset.
Wrapping UpI wish I had discovered these tools sooner!
The apps I’ve shared above are available on Setapp. With a single monthly subscription, you get access to 240+ Mac and iPhone apps. They offer a free 7-day trial, so you can try it out and decide if it’s right for you.
These tools have completely transformed my workflow and helped me become more productive and less stressed. I hope that these tools will do the same for you so you can make the most of your time. After all, time is a limited resource, and it's up to us to use it wisely.
Thank you for reading. Have a productive day!
Further Reading On SmashingMag
- Top Front-End Tools Of 2022, Louis Lazaris
- Boosting Productivity For Designers With Efficient Tools, Ashish Bogawat
- Overcoming Imposter Syndrome By Developing Your Own Guiding Principles, Luis Ouriach
- Productivity Tips And Tools For A More Efficient Workflow, Cosima Mielke
Gain $200 in a week
from Articles on Smashing Magazine — For Web Designers And Developers https://ift.tt/QoZPsyN


