


SDL stands for Simple DirectMedia Layer, which is an open source library that provides APIs for user input, audio, and graphics. It also supports the most popular desktop and mobile operating systems — and even web browsers with WebAssembly — making it easier to write cross-platform code.
These features make SDL a reasonable and popular choice for writing games from scratch, as you can see from this extensive list of games made with SDL. In this blog post, we are going to create a simple Rust game that uses the rust-sdl2 crate.
Jump ahead:
- Setting up our Rust and SDL2 project
- Understanding a simple SDL program
- Writing our game logic
- Rendering our game state
- Thinking in ticks
- Reading user input to control the snake game
Note that this tutorial assumes Rust is already set up with Rustup.
Setting up our Rust and SDL2 project
Keep in mind that the rust-sdl2 crate just provides the Rust bindings for the new SDL2.0 libraries. The library itself is written in C, and we have to install the native development files to compile any program that uses it.
To set up for Mac OS, use the command below:
brew install sdl2
To set up for Linux through Ubuntu, use the command below:
sudo apt install libsdl2-dev
See the docs for setup instructions for other systems.
As a completely optional — but recommended — step in familiarizing yourself with this library, rust-sdl2 provides many examples you can run by cloning the repository. Note that some of them require additional development libraries, so refer to each example’s official README for more info.
The next step is to create our project. We are going to implement a very simple snake game:
cargo new snake-game
Next, add sdl2 under the dependencies in Cargo.toml:
[dependencies]
sdl2 = "0.35"
Run cargo build to download and compile the Rust bindings for SDL2. If this happens successfully, we’re all set!
Understanding a simple SDL program
Before we create our snake game, let’s take a look at the simplest demo from the rust-sdl2 library repository to ensure we understand each component:
extern crate sdl2;

use sdl2::event::Event;
use sdl2::keyboard::Keycode;
use sdl2::pixels::Color;
use std::time::Duration;

pub fn main() -> Result<(), String> {
    let sdl_context = sdl2::init()?;
    let video_subsystem = sdl_context.video()?;

    let window = video_subsystem
        .window("rust-sdl2 demo: Video", 800, 600)
        .position_centered()
        .opengl()
        .build()
        .map_err(|e| e.to_string())?;

    let mut canvas = window.into_canvas().build().map_err(|e| e.to_string())?;

    canvas.set_draw_color(Color::RGB(255, 0, 0));
    canvas.clear();
    canvas.present();
    let mut event_pump = sdl_context.event_pump()?;

    'running: loop {
        for event in event_pump.poll_iter() {
            match event {
                Event::Quit { .. }
                | Event::KeyDown {
                    keycode: Some(Keycode::Escape),
                    ..
                } => break 'running,
                _ => {}
            }
        }

        canvas.clear();
        canvas.present();
        ::std::thread::sleep(Duration::new(0, 1_000_000_000u32 / 30));
        // The rest of the game loop goes here...
    }

    Ok(())
}
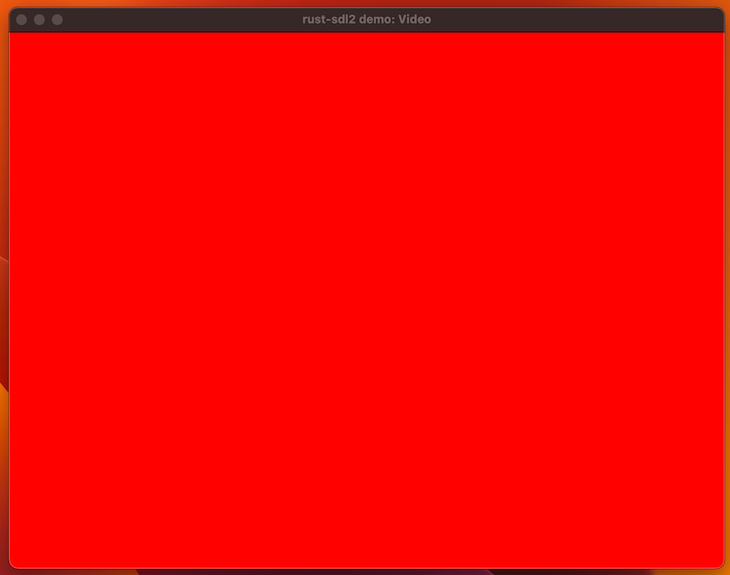
This will be our scaffold, so we can paste it into our generated src/main.rs and cargo run the project. The result should be a red window that does nothing and exits when you hit esc:
Let’s take a look at our boilerplate code and understand what happened.
Using sdl_context, video_subsystem, and window
The first piece that we will look at is copied below:
    let sdl_context = sdl2::init()?;
    let video_subsystem = sdl_context.video()?;

    let window = video_subsystem
        .window("rust-sdl2 demo: Video", 800, 600)
        .position_centered()
        .opengl()
        .build()
        .map_err(|e| e.to_string())?;
When using SDL2 with Rust, we have to create the following intermediate objects to render the red window shown above:
Sdl -> VideoSubsystem -> Window -> WindowCanvas
The sdl_context: Sdl object manages everything that can happen within the program. In this case, we used it to access the video resource and keyboard input. It can also be used to leverage other operating system resources, such as audio, clipboard and other user inputs.
The video_subsystem: VideoSubsystem groups everything video-related, such as querying display information, spawning new windows, and managing clipboard and text input with proper virtual keyboard support.
The WindowBuilder we call with video_subsystem.window can be used to spawn our main window with many parameters, such as size and position. It is also possible to add support for game rendering engines such as OpenGL and Vulkan.
If you want to read more about all of the above, check the official SDL2 Rust docs.
Note that both VideoSubsystem and Window keep the reference to the original Sdl context object. If we want, we can get to the original object by calling .sdl() from either of them.
Creating the canvas
Let’s create a canvas: WindowCanvas that we can manipulate to render our game:
    let mut canvas = window.into_canvas().build().map_err(|e| e.to_string())?;

    canvas.set_draw_color(Color::RGB(255, 0, 0));
    canvas.clear();
    canvas.present();
In the demo above, the three methods we called from canvas are enough to draw a red screen:
set_draw_colordefines the current color for all subsequent operations until called again with another colorclearapplies the current solid color to the whole canvaspresentrenders the next frame
canvas has many methods that we can use to deal with individual pixels or textures. In this example, we will use canvas.draw_rect to build all the objects we will need in it. Depending on the case, other methods such as draw_point and draw_line could also be called.
Writing the main loop
We have to write the code that our game will live in most of the time. This will be the main loop:
    'running: loop {
        for event in event_pump.poll_iter() {
            match event {
                Event::Quit { .. }
                | Event::KeyDown {
                    keycode: Some(Keycode::Escape),
                    ..
                } => break 'running,
                _ => {}
            }
        }

        canvas.clear();
        canvas.present();
        ::std::thread::sleep(Duration::new(0, 1_000_000_000u32 / 30));
        // The rest of the game loop goes here...
    }
In our implementation, we are going to use the main loop to do four things in sequence:
- Read the user’s input
- Change the game state
- Render the current game state
- Sleep until the next frame
Note that the order doesn’t actually matter too much in this case. For example, putting the game loop after the render is also ok.
Reading user input
SDL2 provides an event_pump for Rust that we can get like this:
let mut event_pump = sdl_context.event_pump()?;
We can then use it in the main loop:
for event in event_pump.poll_iter() {
    match event {
        Event::Quit { .. }
        | Event::KeyDown {
            keycode: Some(Keycode::Escape),
            ..
        } => break 'running,
        _ => {}
    }
}
In the example above, we are getting a stream of events using .poll_iter() and pattern matching each one. This example only matches esc key presses or Event::Quit events such as alt+f4 or cmd+w to exit the main loop, which is labeled as 'running.
Since you are in the main thread and many events may occur between one loop and another, .poll_iter() lets you get all of them and will read many events in each loop.
Managing and rendering the game state
The game state is completely up to us! As SDL2 is completely game state-agnostic, we may even want to implement it decoupled from our canvas.
Currently, all our example does is use our canvas to fill the screen with red with .clear() along with using .present() to render it each time. We’re going to change that later.
Sleeping until the next frame
Finally, this is how we wait until the next loop:
::std::thread::sleep(Duration::new(0, 1_000_000_000u32 / 30));
The second parameter of Duration is the number of nanoseconds. In this case, this means we wait one-thirtieth of a second for each frame, which ultimately means that we process, at most, 30 frames per second.
Let’s change that as we set up our snake game.
Writing our game logic
The easiest first step is to figure out how we should structure our game state. Even for a very simple snake game, we have a lot of data to keep track of. Here are the main considerations:
- The current game state, such as paused, playing, or over
- The player’s position, with the head and its segments
- The player’s head direction
- The current food position
We can create our own struct to group all this data. Here, I will call it GameContext:
pub enum GameState { Playing, Paused }
pub enum PlayerDirection { Up, Down, Right, Left }
pub struct Point(pub i32, pub i32);

pub struct GameContext {
    pub player_position: Vec<Point>,
    pub player_direction: PlayerDirection,
    pub food: Point,
    pub state: GameState,
}
We also created additional structures that would make sense assuming we’re going to implement a traditional snake game, which is always a two-dimensional grid. The Point struct we created will be used to represent the entities we want to manage and display to the user.
Note that player_position takes up a Vec<Point> that keeps the positions of the head and the segments of the snake. We can assume that the head lives at the first position, followed by the segments until it reaches its maximum size.
The player_direction keeps track of where the head is moving to, which is all the player needs to interact with when playing the game.
The food is just a point on the grid, which will change randomly after the player eats it.
Finally, we have the state, which lets us manage whether the game is running or not. We also need to think about our initial state. This is what we are going to put in our constructor:
impl GameContext {
    pub fn new() -> GameContext {
        GameContext {
            player_position: vec![Point(3, 1), Point(2, 1), Point(1, 1)],
            player_direction: PlayerDirection::Right,
            state: GameState::Paused,
            food: Point(3, 3),
        }
    }
}
Since this is the very first version of that code, we are assuming a lot by default. In short, this quick sketch shows what we want to render at first:
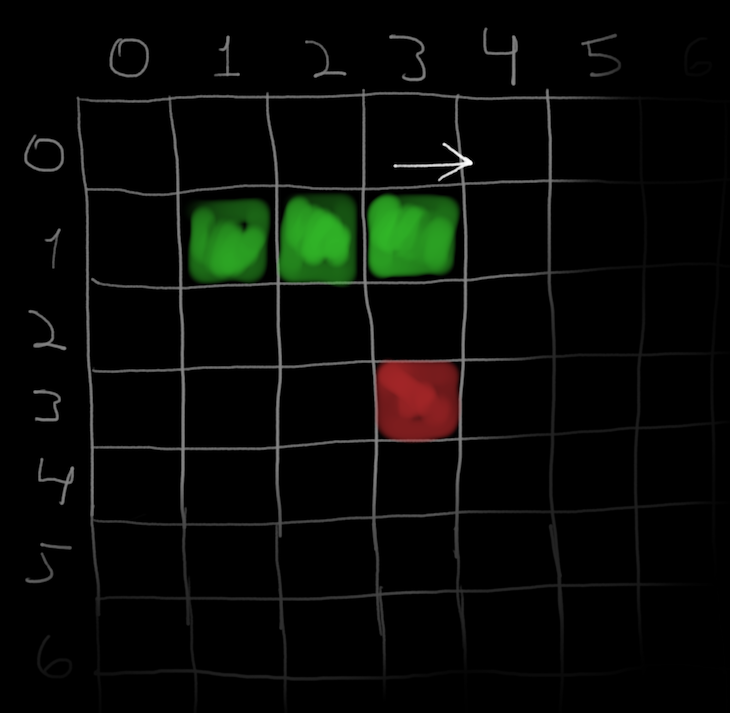
We also need to set a fixed size for our grid, considering that we are sticking with the traditional style of this game. For the sake of simplicity, we can give our game a 40×30 grid size over an 800×600 pixels window, making each grid point a perfect 20-pixel square.
Let’s add these constants at the beginning of the src file:
const GRID_X_SIZE: i32 = 40;
const GRID_Y_SIZE: i32 = 30;
const DOT_SIZE_IN_PXS: i32 = 20;
Going back to our main function, we can use these constants to initialize our window with a fixed size:
let window = video_subsystem
    .window(
        "Snake Game",
        GRID_X_SIZE * DOT_SIZE_IN_PXS,
        GRID_Y_SIZE * DOT_SIZE_IN_PXS
    )
    .position_centered()
    .opengl()
    .build()
    .map_err(|e| e.to_string())?;
And after that, we can initialize our game just before the loop.
let mut context = GameContext::new();
Later we will work on giving our game some life, but let’s first render it to see what it looks like.
Rendering our game state
Let’s create a struct called Renderer that will abstract the rendering of our game. Its main purpose is to translate the game state into calls to our canvas:
pub struct Renderer { canvas: WindowCanvas }
Here is what its constructor looks like for now:
impl Renderer {
    pub fn new(window: Window ) -> Result<Renderer, String> {
        let canvas = window.into_canvas().build().map_err(|e| e.to_string())?;
        Ok(Renderer { canvas })
    }
}
We also initialize it before the main loop. It has to be mutable because it references the canvas that we’re going to mutate when rendering our game:
let mut renderer = Renderer::new(window)?;
Let’s move on to implementing the most basic operation of our Renderer. Since we are dealing with a grid of big pixels, we’ll implement the method that will fill a single one of them:
// impl Renderer { ...

fn draw_dot(&mut self, point: &Point) -> Result<(), String> {
    let Point(x, y) = point;
    self.canvas.fill_rect(Rect::new(
        x * DOT_SIZE_IN_PXS as i32,
        y * DOT_SIZE_IN_PXS as i32,
        DOT_SIZE_IN_PXS,
        DOT_SIZE_IN_PXS,
    ))?;

    Ok(())
}
Let’s cheat a little bit to see if it really works. In this case, we’ll just draw the initial game state manually:
// impl Renderer { ...

pub fn draw(&mut self) -> Result<(), String> {
    self.canvas.set_draw_color(Color::BLACK);
    self.canvas.clear();

    self.canvas.set_draw_color(Color::GREEN);
    self.draw_dot(&Point(3, 1))?;
    self.draw_dot(&Point(2, 1))?;
    self.draw_dot(&Point(1, 1))?;

    self.canvas.set_draw_color(Color::RED);
    self.draw_dot(&Point(3, 3))?;

    self.canvas.present();

    Ok(())
}
In the main loop, let’s get rid of the old canvas calls and use our renderer instead:
renderer.draw()?;
If done correctly, a new cargo run should show us the same initial game state from the drawing before:
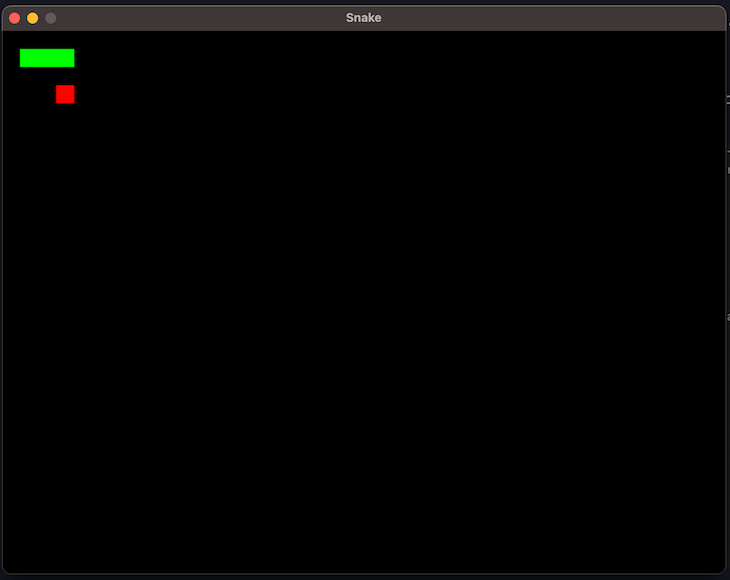
Let’s do it the right way now by making it use the game context that we created before:
renderer.draw(&context)?;
// impl Renderer { ...

pub fn draw(&mut self, context: &GameContext) -> Result<(), String> {
    self.draw_background(context);
    self.draw_player(context)?;
    self.draw_food(context)?;
    self.canvas.present();

    Ok(())
}

fn draw_background(&mut self, context: &GameContext) {
    let color = match context.state {
        GameState::Playing => Color::RGB(0, 0, 0),
        GameState::Paused => Color::RGB(30, 30, 30),
    };
    self.canvas.set_draw_color(color);
    self.canvas.clear();
}

fn draw_player(&mut self, context: &GameContext) -> Result<(), String> {
    self.canvas.set_draw_color(Color::GREEN);
    for point in &context.player_position {
        self.draw_dot(point)?;
    }

    Ok(())
}

fn draw_food(&mut self, context: &GameContext) -> Result<(), String> {
    self.canvas.set_draw_color(Color::RED);
    self.draw_dot(&context.food)?;
    Ok(())
}
Now if we cargo run again, we should see almost the same result as the previous hardcoded run, except now the background is a dark gray because the game is paused.
Our game is visually done! The next step is to give it some life.
Thinking in ticks
Currently, all our program does is draw the same initial game state in 30 frames per second. In order to make it “alive” and playable we need to update its state in the main loop.
In the case of a snake game, the next state would be basically moving the player’s head to the next slot. Depending on what the next slot is, one of the following will occur:
- If it’s a free space:
- The snake’s head takes its place
- All the snake segments shift to the next position
- If it’s a food piece:
- The snake’s head takes its slot
- The snake grows by 1 segment
- Another food piece spawns randomly on the map
- If it’s the wall or the snake’s own body segments:
- The game ends
Every game state update is usually called a tick. Many games tie ticks with the FPS at a 1:1 rate, especially older games.
We could update our game state on every frame, but that means our snake would travel 30 slots in one second, making the game extremely hard to play. Instead, let’s make the game tick once every 10 frames to make our snake move three slots per second.
We will have to keep track of the frames in our main loop, which will look like this:
let mut frame_counter = 0;
'running: loop {
    // ...input events... (omitted)

    ::std::thread::sleep(Duration::new(0, 1_000_000_000u32 / 30));

    frame_counter += 1;
    if frame_counter % 10 == 0 {
        context.next_tick(); // We will implement this yet.
        frame_counter = 0;
    }

    renderer.draw()?;
}
Depending on the game, it can be hard to visualize what needs to be updated between every tick to have the gameplay advance at a reasonable speed. Luckily for us, the snake game is fairly simple and can be implemented incrementally.
Let’s begin with the player movement:
// impl GameContext { ...

pub fn next_tick(&mut self) {
    let head_position = self.player_position.first().unwrap();
    let next_head_position = match self.player_direction {
        PlayerDirection::Up => *head_position + Point(0, -1),
        PlayerDirection::Down => *head_position + Point(0, 1),
        PlayerDirection::Right => *head_position + Point(1, 0),
        PlayerDirection::Left => *head_position + Point(-1, 0),
    };

    self.player_position.pop();
    self.player_position.reverse();
    self.player_position.push(next_head_position);
    self.player_position.reverse();
}
The logic above decides the next head position for the snake, removes the farthermost segment with .pop(), and adds the next_head_position to the head of the vec. This should give us the impression that all the segments are moving together.
However, the code above fails to compile because our program doesn’t know how to add points yet:
cannot add `Point` to `Point`
This is an easy method to implement:
impl Add<Point> for Point {
    type Output = Point;

    fn add(self, rhs: Point) -> Self::Output {
        Point(self.0 + rhs.0, self.1 + rhs.1)
    }
}
Also, in order to make Point objects work with the method we just implemented, we need the Copy and Clone traits. Luckily for us, they can be generated for our struct by adding the derive attribute:
#[derive(Copy, Clone)]
pub struct Point(pub i32, pub i32);
Finally, if we attempt to cargo run again, we should see our ticks happening:
This is looking great! Now the next step is to actually read and use the user inputs.
Reading user input to control the snake game
First, we may want to implement the methods that the user can interact with inside impl GameContext.
The controls of a snake game are extremely simple — we just change the direction of the snake’s movement, and additionally, we can pause and unpause the game.
We already track the player_direction and state fields. Now, we just need to be able to change them:
pub fn move_up(&mut self) {
    self.player_direction = PlayerDirection::Up;
}

pub fn move_down(&mut self) {
    self.player_direction = PlayerDirection::Down;
}

pub fn move_right(&mut self) {
    self.player_direction = PlayerDirection::Right;
}

pub fn move_left(&mut self) {
    self.player_direction = PlayerDirection::Left;
}

pub fn toggle_pause(&mut self) {
    self.state = match self.state {
        GameState::Playing => GameState::Paused,
        GameState::Paused => GameState::Playing
    }
}
It’s very basic, but should be a good start. Now let’s go back to the part where we pattern match the events:
match event {
    Event::Quit { .. }
    | Event::KeyDown {
        keycode: Some(Keycode::Escape),
        ..
    } => break 'running,
    _ => {}
}
Let’s change our code to call the methods we just implemented. In our case, we will use the WASD and Escape keys to handle movement and pause or unpause the game:
match event {
    Event::Quit { .. } => break 'running,
    Event::KeyDown { keycode: Some(keycode), .. } => {
        match keycode {
            Keycode::W => context.move_up(),
            Keycode::A => context.move_left(),
            Keycode::S => context.move_down(),
            Keycode::D => context.move_right(),
            Keycode::Escape => context.toggle_pause(),
            _ => {}
        }
    }
    _ => {}
}
Now that we are able to pause and unpause the game, let’s change the next_tick method to do nothing while the game is paused:
pub fn next_tick(&mut self) {
    if let GameState::Paused = self.state {
        return;
    }
    // ...
This is it! We can cargo run again to see if it works. Since our game starts paused, we can just press “Escape” and see if we’re able to control the snake. When we do so, the background should change from dimmed to pitch black.
Conclusion
This wraps up the very basics of using SDL2 with Rust. I hope this tutorial helps familiarize you with this library so you can apply these concepts to your own game development.
If you are interested in further practice using this simple snake game, here are the possible next steps:
- Manage collisions with the wall, food, and other snake segments
- Be able to consume the food and grow
- Add a
GameState::Overstate that you are able to restart from
Comment below if you have any questions.
The post Using SDL2 bindings in Rust for game development appeared first on LogRocket Blog.
from LogRocket Blog https://ift.tt/M7wYgh8
Gain $200 in a week
via Read more


