There are a lot of JavaScript frameworks out there, and some are better suited than others for certain aspects of development. The choice of which framework to select really depends on the specific needs of your project.
Riot.js is designed to be lightweight and easy to learn, making it a good choice for developers who are familiar with HTML and JavaScript — without requiring them to learn the rigors of coding with a specific framework. Riot.js emphasizes simplicity, performance, and modularity, its ecosystem allows for easy integration of third-party libraries and components, making it suitable for both small-scale and large-scale projects.
In this tutorial, we’ll take a deep dive into Riot.js, compare it to the native Web Components API, and demonstrate how to use Riot.js to build a simple SPA.
Jump ahead:
Prerequisites
To follow along with the tutorial portion of this article, you should have:
- Node.js v14 or later installed on your local machine
- Basic knowledge of HTML, CSS, JavaScript, and the DOM
What is Riot.js?
Riot.js is a lightweight, component-based UI library for developing web applications. Riot.js is similar to other popular JavaScript libraries and frameworks like React, Angular, and Vue.js, giving it an easier learning curve. Although it uses the same component-based approach as these frameworks, Riot.js aims to be smaller and easier to use, focusing on simplicity and flexibility.
Riot.js uses custom tags, combining HTML and JavaScript to form reusable components. With Riot.js, a developer can easily manipulate the DOM with the API feature and bind data to templates.
Some of the critical features of Riot.js include the following:
- Declarative component syntax: Enables developers to define UI elements as self-contained, reusable modules
- Powerful template system: Allows developers to define the structure and content of a component using a template language similar to HTML
- Inbuilt virtual DOM: Allows Riot.js to update the UI in response to data changes efficiently
- Support for custom tags and attributes: Enables developers to extend the capabilities of Riot.js and create custom UI elements
- Flexible and extensible API: Permits developers to customize and extend the functionality of Riot.js to meet the needs of their specific project
- Strong community support: The Riot.js open source library is actively maintained and supported by a community of developers
- Compatible with modern browsers: Can be used with other libraries and frameworks to build interactive web applications
Why use Riot.js?
Riot.js is an excellent choice for developers who desire a simple, lightweight, and flexible library for developing user interfaces. It is especially well-suited for applications where performance and optimization are a concern and where the developer wants the flexibility of selecting and making use of tools or libraries of their choice.
Here are some specific reasons why you should consider using Riot.js:
- Simple learning curve: Leverages a component-style approach and has a small codebase, making it easy to use; developers are free to integrate their own set of tools or libraries without being constrained
- Custom elements: Developers can easily use tags to create custom components, which can be reused at any point in the application
- Embeddable in HTML: Enabling Riot.js to be easily integrated into an existing project
- Lightweight and fast: This JavaScript framework is suitable for projects that require performance and speed without putting much work into the browser
Riot.js vs. Web Components API
Riot, at a basic level, is quite similar to the Web Components API, a set of standardized APIs allowing developers to create reusable and modular components for the web.
The Web Components API consists of three main technologies:
- Custom elements: Collection of JavaScript APIs enabling the definition of custom elements and their behavior in your UI
- Shadow DOM: Set of JavaScript APIs for attaching and controlling an encapsulated “shadow” DOM tree to an element that is rendered separately from the main document DOM. This allows you to keep an element’s features private, so they can be scripted and styled without fear of colliding with other document parts
- HTML templates:
<template>and<slot>elements enable you to create markup templates that will not appear on the rendered page; they can also be reused as the foundation of a custom element structure
Riot.js and Web Components both strive to simplify the development of reusable and modular web components, but they use significantly different approaches. Web Components uses standardized APIs to construct unique elements and attach them to the DOM, whereas Riot.js employs a template syntax and a limited set of directives to define components.
Riot.js SPA demo
To better understand how Riot.js works, let’s build a simple SPA consisting of a single page of quotations. We’ll start by setting up the project.
Setting up the project
To create a Riot.js project on your local machine, navigate to a directory of your choice on your local machine, open a CLI window, and enter the following command:
npm install -g riot webpack webpack-cli webpack-dev-server
Once installation is completed, create an instance of Riot using a provided template:
npm init riot
For this tutorial, we‘ll make use of the SPA template (webpack-spa):
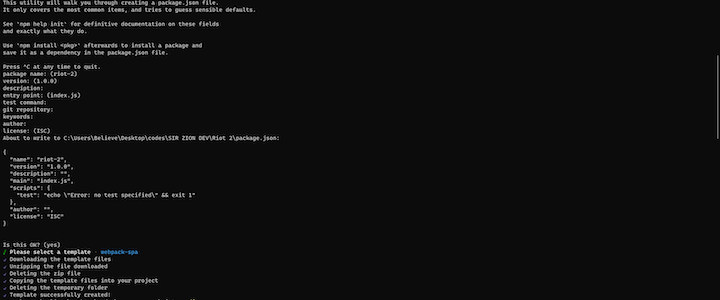
Once you select the template, a Riot.js project folder will be created in the directory with all the necessary dependencies for creating a Riot.js application.
Open the newly created project in a code editor of your choice. In this Riot.js project folder, you should see a tree structure that looks similar to this:
┣src ┃ ┣
components ┃ ┃ ┣
global ┃ ┃ ┃ ┣
my-component ┃ ┃ ┃ ┃ ┣
my-component.riot ┃ ┃ ┃ ┃ ┗
my-component.spec.js ┃ ┃ ┃ ┗
sidebar ┃ ┃ ┃ ┃ ┣
sidebar.riot ┃ ┃ ┃ ┃ ┗
sidebar.spec.js ┃ ┃ ┗
includes ┃ ┃ ┃ ┣
loader ┃ ┃ ┃ ┃ ┗
loader.riot ┃ ┃ ┃ ┗
user ┃ ┃ ┃ ┃ ┣
user.riot ┃ ┃ ┃ ┃ ┗
user.spec.js ┃ ┣
pages ┃ ┃ ┣
about.riot ┃ ┃ ┣
home.riot ┃ ┃ ┗
not-found.riot ┃ ┣
app.riot ┃ ┣
index.html ┃ ┣
index.js ┃ ┣
pages.js ┃ ┗
register-global-components.js ┣
.gitignore ┣
LICENSE ┣
package-lock.json ┣
package.json ┣
readme.md ┗
webpack.config.js
Here, the root of our application is index.html, and the main component is to be mounted in the app.riot component. Three routes are specified in the pages directory, and the components that make up these pages are in the components folder.
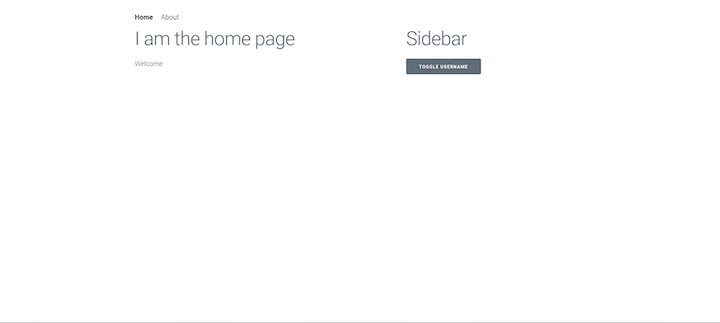
To run the application, enter the npm start command in the CLI. This will start up the application and produce the following result in the browser:
Creating the quotes page
To begin building our quotes application, we’ll need to create a new quotes page that will fetch the quotes and display them.
Start by creating a new file, ./src/pages/quotes.riot:
    <quotes>
        <section>
            <header>
                <h1>Quotes</h1>
            </header>
            <ul class="quotes-list">
                <li class="list-item">
                    <p class=" quote"> "I am not a product of my circumstances. I am a product of my decisions." </p>
                    <p class="author">- Stephen Covey</p>
                </li>
                <li class="list-item">
                    <p class=" quote"> "The best way to predict the future is to create it." </p>
                    <p class="author">- Peter Drucker</p>
                </li>
            </ul>
        </section>
    </quotes>
Here, we’re hardcoding the quotes in order to quickly proceed to setting up the routing configuration for this new page.
Adding the quotes page component
In order to add the quotes page component to app.riot, first we need to register the quotes page as a component in our ./src/app.riot file:
    <app>
      <div class="container">
        <!-- ... -->
      </div>
      <script>
        // ...
        export default {
          components: {
            // ...

            // register quotes page
            Quotes: lazy(Loader, () => import (
              /* webpackPrefetch: true, webpackChunkName: 'pages/quotes' */
              './pages/quotes.riot'
            ))
          },

          // ...
        }
      </script>
    </app>
Next, we assign the /quotes route to the page component using the ./src/pages.js file, like so:
    export default [{
      path: '/',
      label: 'Home',
      componentName: 'home'
    }, {
      path: '/about',
      label: 'About',
      componentName: 'about'
    }, {
      path: '/quotes',
      label: 'Quotes',
      componentName: 'quotes'
    }]
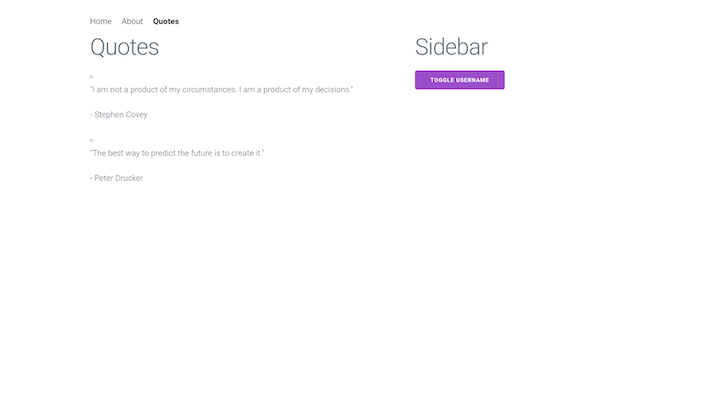
Now, if we navigate to http://localhost:3000/quotes on our browser, we should see something like this:
Awesome!
Fetching the quotes data
Next, we’ll fetch quotes data using the DummyJSON publicly available API, https://dummyjson.com/quotes.
First, we’ll create a state object with a quotes property in our component. Then we’ll create an async function, getQuotes(), which will use the native Fetch API to fetch the quotes.
We’ll call the getQuotes() function from the onBeforeMount() lifecycle hook to fetch the quotes before the component is mounted. Here’s how we can achieve that in the ./src/pages/quotes.riot:
    <quotes>
      <section>
        <!-- ... -->
      </section>
      <script>
        export default {
          state: {
            quotes: [],
          },
          async getQuotes() {
            try {
              const res = await fetch(`https://dummyjson.com/quotes`);
              const data = await res.json();
              this.update({ quotes: data.quotes });
              console.log({ quotes: this.state.quotes });
            } catch (error) {
              console.log({ error });
            }
          },
          async onBeforeMount({ isServer }) {
            await this.getQuotes();
          },
        };
      </script>
    </quotes>
If we save our changes and check our console, we should see our quotes:

Creating the quotes component
Now, we need to create a component to display each quote from the quotes array.
To create the quote component, create a new file, ./src/components/quote/quote.riot:
<quote>
<article class="quote">
<h3>{props.quote}</h3>
<p>— {props.author}</p>
</article>
</quote>
We have some pretty simple markup here to display, quote and author. We’re also using the props object to access values that will be passed to our component using attributes.
To use this component on our quotes page, we first need to register it. For now, we’ll register it locally in our quotes page component. To do so, add the following to the ./src/pages/quotes.riot file:
    <quotes>
      <section>
        <header>
          <h1>Quotes</h1>
        </header>
        <ul class="quotes-list">
          <li each={quote in the state.quotes} key={quote.id} class="list-item">
            <quote quote={quote.quote} author={quote.author} />
          </li>
        </ul>
      </section>
      <script>
        import Quote from "../components/quote/quote.riot";
        export default {
          components: {
            Quote,
          },
          state: {
            quotes: [],
          },
          // ...
        };
      </script>
      <style>
        .quotes-list {
            display: grid;
            grid-gap: 2rem;
            grid-template-columns: repeat(auto-fit, minmax(300px, 1fr));
        }
        .list-item {
            display: flex;
        }
      </style>
    </quotes>
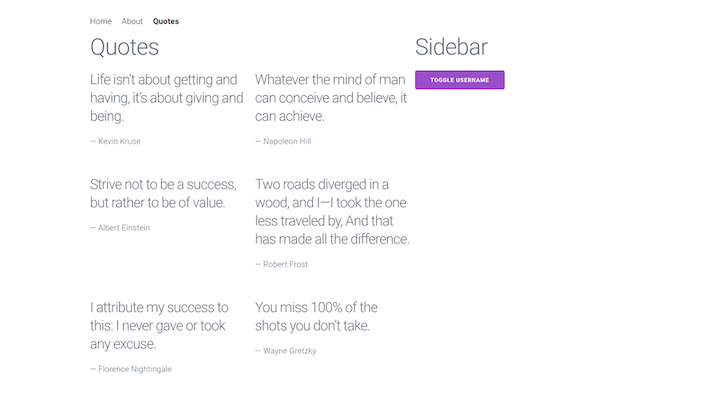
Here, we’re using the each directive to loop through the quotes array and pass the quote and the author as props to the Quote component.
At this point, our SPA should look something like this:
Setting up the dynamic route
Now, let’s see how we can set up dynamic routes in Riot.js to open a single quote on a new page when clicked. We’ll achieve this in just a few steps. First, let’s set up the links href in the ./src/pages/quotes.riot file:
    <quotes>
      <section>
        <!-- ... -->
        <ul class="quotes-list">
          <li each={quote in state.quotes} key={quote.id} class="list-item">
            <a href={`quotes/${quote.id}`}>
              <quote quote={quote.quote} author={quote.author} />
            </a>
          </li>
        </ul>
      </section>
      <!-- ... -->
    </quotes>
Clicking on a quote should now take us to /quotes/1 if the quote.id is 1.
Creating the quotes page route
Next, let’s create the quote page component and register it in our Riot.js app files.
Start by creating a new file, ./src/pages/quote-page.riot:
<quote-page>
<article class="quote">
<h1>{state.quote.quote}</h1>
<p>— {state.quote.author}</p>
</article>
<script>
export default {
state: {
quote: {},
},
async getQuote() {
try {
const id = this.props.id;
const res = await fetch(`https://dummyjson.com/quotes/${id || 1}`);
const quote = await res.json();
this.update({ quote });
} catch (error) {
console.log({ error });
}
},
onBeforeMount() {
this.getQuote();
},
};
</script>
</quote-page>
Here, we’re once again using props to get the post id. Then, we’ll fetch the quote by its id in the getQuote() function, which is then called in the onBeforeMount lifecycle gist.
Registering the quotes page component
Now, let’s register our newest page component in ./src/app.riot:
    <app>
      <!-- ... ->
      <script>
        import { Router, Route, route, toRegexp, match } from '@riotjs/route'
        import lazy from '@riotjs/lazy'
        import Loader from './components/includes/loader/loader.riot'
        import NotFound from './pages/not-found.riot'
        import pages from './pages'
        export default {
          components: {
            Router,
            Route,
            NotFound,
            Home: lazy(Loader, () => import(
              /* webpackPrefetch: true, webpackChunkName: 'pages/home' */
              './pages/home.riot'
            )),
            About: lazy(Loader, () => import(
              /* webpackPrefetch: true, webpackChunkName: 'pages/about' */
              './pages/about.riot'
            )),
            Quotes: lazy(Loader, () => import(
              /* webpackPrefetch: true, webpackChunkName: 'pages/quotes' */
              './pages/quotes.riot'
            )),
            QuotePage: lazy(Loader, () => import (
              /* webpackPrefetch: true, webpackChunkName: 'pages/quote-page' */
              './pages/quote-page.riot'
            ))
          },
        }
      </script>
    </app>
Next, we’ll add a route component with the /quotes/:id route path.
Now, let’s go back to our ./src/app.riot component. In the template, enter the following:
    <app>
      <div class="container">
        <router>
          <!-- ... -->
          <div if={!state.showNotFound} class="row">
            <div class="column column-60">
              <route each={page in state.pages} path={page.path}>
                <main is={page.componentName}/>
              </route>
              <!-- add new route for quotes -->
              <route path="/quotes/:id">
                <main is="quote-page" id={route.params.id} />
              </route>
            </div>
            <!-- notice how <sidebar> is registered as global component -->
            <div class="column column-40">
              <sidebar/>
            </div>
          </div>
        </router>
      </div>
    </app>
Here, we add a new route for /quotes/:id where :id is the parameter that will match the quote’s route by id.
Within the <route> component, we’ve set up a dynamic component. We assign it to the Quote page component by passing the "quote-page" component name to the is directive:
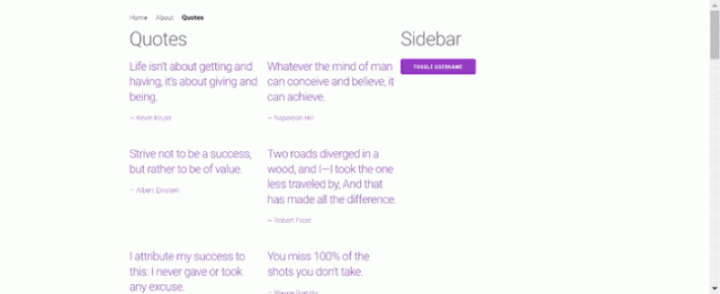
That’s it! We’ve used Riot.js to easily and efficiently build a user interface.
Conclusion
In this article, we demonstrated how to create a simple SPA with Riot.js. We covered the basics of setting up a simple Riot.js application with simple routing and local and global component setup using the Riot.js npm package.
We showed how to create functions for data fetching and how to use lifecycle functions to run them before the components are mounted. We also demonstrated how to set up dynamic routing using Riot.js route parameters.
The post Using Riot.js, a component-based UI library appeared first on LogRocket Blog.
from LogRocket Blog https://ift.tt/qm7W6K0
Gain $200 in a week
via Read more


