Serverless computing continues to prove productive to developers, allowing us to write applications that contain server-side functionality without the hassle of managing a physical server. This architecture offloads server tasks like authentication, database management, and more to a vendor, allowing for quicker development time and reduced cost. It is also a practice adopted in the Jamstack community.
Netlify, a pioneering Jamstack platform, created a service called Netlify Identity, which you can use to implement authentication in your web applications quickly. Netlify Identity is a plug-and-play microservice backed by the Netlify GoTrue API. This service comes with a full suite of authentication functionality (login, password recovery, OAuth providers), forestalling the need to roll out your authentication system.
In this article, you will learn how to implement authentication in a Next.js app with Netlify Identity.
Prerequisites
To follow along, you’ll need:
- A Netlify and GitHub account
- Familiarity with the Next.js framework
- Familiarity with the React Context API
Deploying a Next.js project to Netlify
For this tutorial, we will attempt to set up Identity in a pre-existing Jamstack blog from Netlify’s templates repository. You can view the finished project and source code.
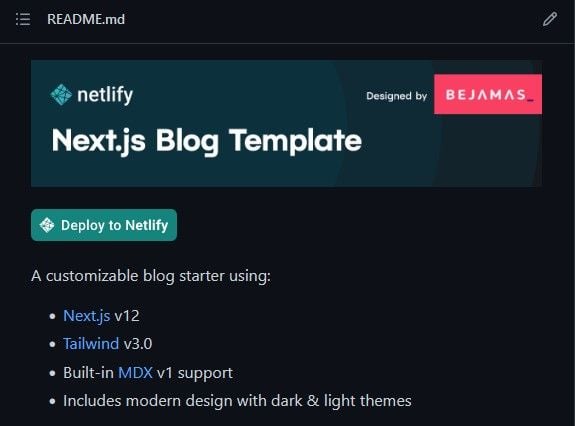
Click on the Deploy to Netlify button seen above in the project’s README.md file to deploy your site to Netlify. This will take you to Netlify’s site, prompting you to connect Netlify to your GitHub account.
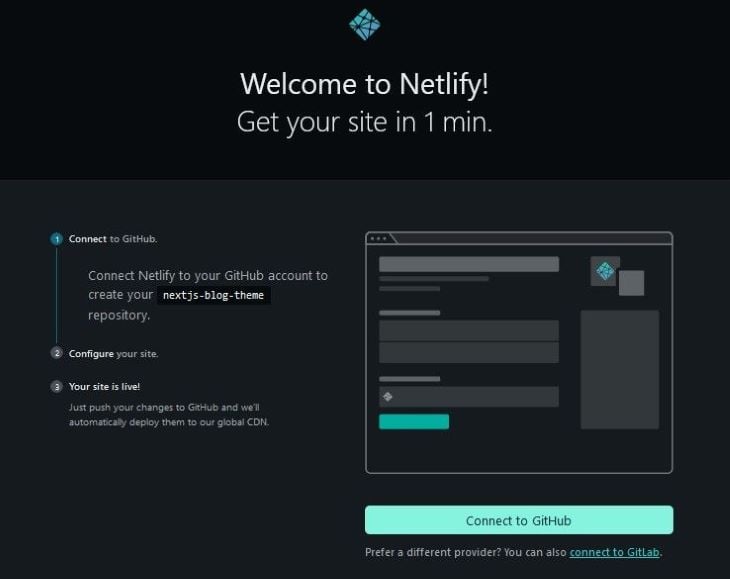
After linking your account and following the onscreen steps, a repository will be created under your GitHub profile, and in a moment, your site should be live on Netlify.
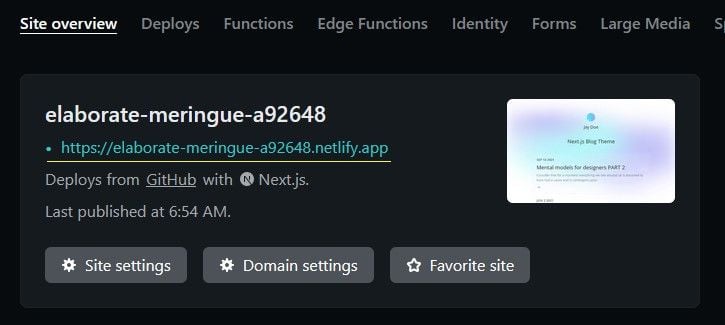
Notice the site’s live URL underlined above. Save this URL for later as Identity will need it to locate your application.
Before Identity can work in your project, Netlify requires you to enable the Identity feature in the project’s settings. From your dashboard, navigate to the Identity tab and click the Enable Identity button:
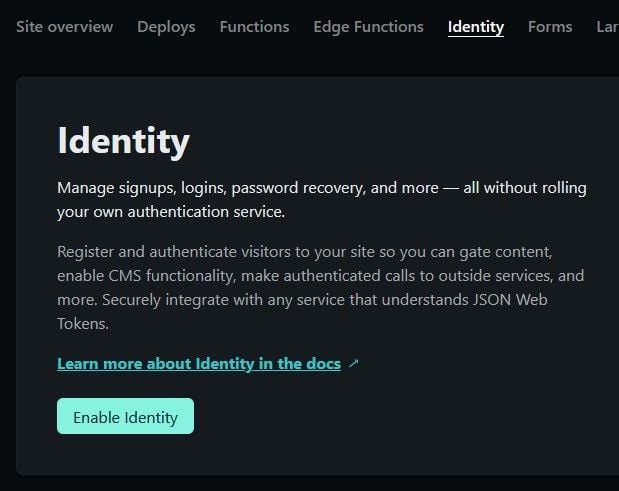
Now your application is set to start authenticating users! Next, we will install a JavaScript widget for Netlify Identity into this project.
Installing the Netlify Identity widget
The Netlify Identity widget is a component built around GoTrue.js — the JavaScript client library for the GoTrue API. GoTrue.js exposes several methods that can be used as a building block for constructing the UI for signups, login flows, and logout flows. You can also use this library to build your custom Identity authentication UI.
Locate the template’s repository under your GitHub profile and clone it locally with the following command:
git clone https://github.com/{your-github-username}/nextjs-blog-theme.git
Next, install the Netlify Identity widget:
npm install netlify-identity-widget
or
yarn install netlify-identity-widget
Now we can begin to set up an authentication context using React.createContext().
Creating the authentication context
The React Context API is a mechanism for creating and sharing data globally across React applications, without having to pass a prop through many levels of the component tree.
Using React.createContext creates a context object with two important React components: Provider and Consumer. Child elements wrapped in the Provider component can access and subscribe to state changes using React.useContext.
We can implement this API to track the user’s authentication status. Create a folder named context in the project’s root and add an AuthContext.js file:
// context/AuthContext.js
import { useState, createContext } from 'react';

export const AuthContext = createContext();

export const AuthContextProvider = ({ children }) => {
  const [user, setUser] = useState(null);

  const contextValues = { user };
  return (
    <AuthContext.Provider value={contextValues}>
      {children}
    </AuthContext.Provider>
  );
};
Here we’ve created and exported an AuthContext object created with createContext. We’ve then initialized a user state with the useState Hook.
AuthContext‘s Provider component has a value prop that accepts an object for the global state. I’ve summarized the context values into a contextValues object and assigned them to value.
AuthContext.Provider can then be used to wrap the entire application, allowing any child component to access its global state:
// _app.js
import '../styles/globals.css';
import 'prismjs/themes/prism-tomorrow.css';
import { AuthContextProvider } from '../context/authContext';

function MyApp({ Component, pageProps }) {
  return (
    <>
      <span className="theme-bejamas" />
      <AuthContextProvider>
        <Component {...pageProps} />
      </AuthContextProvider>
    </>
  );
}
export default MyApp;
Initializing Netlify Identity
To use the Netlify Identity Widget in your project, you have to first initialize it using the init() method — view the widget’s full API here. We can do this inside a useEffect Hook as such:
// context/AuthContext.js
import { useState, useEffect, createContext } from 'react';
import netlifyIdentity from 'netlify-identity-widget';

export const AuthContext = createContext();

export const AuthContextProvider = ({ children }) => {
  const [user, setUser] = useState(null);

  useEffect(() => {
    // initialize netlify identity
    netlifyIdentity.init();
  }, []);

  const contextValues = { user };
  return (
    <AuthContext.Provider value={contextValues}>
      {children}
    </AuthContext.Provider>
  );
};
When the widget initializes in the browser, the user’s authentication status is made available. You can sync this value with the user context by listening for an init event and updating the state accordingly. The Netlifiy Identity library provides an on() handler for binding to authentication events. It also returns a callback function that contains the data of the currently authenticated user.
netlifyIdentity.on("init" | "login" | "logout", (user) => {
  console.log(user.email) // johndoe@gmail.com
})
With this, you can listen for an init event and update AuthContext’s user state as such:
// context/AuthContext.js
import { useState, useEffect, createContext } from 'react';
import netlifyIdentity from 'netlify-identity-widget';

export const AuthContext = createContext();

export const AuthContextProvider = ({ children }) => {
  const [user, setUser] = useState(null);

  useEffect(() => {
    // initialize netlify identity
    netlifyIdentity.init();
  }, []);

  useEffect(() => {
    // update user state on init event
    netlifyIdentity.on('init', (user) => {
      setUser(user);
    });
  }, []);

  const contextValues = { user };
  return (
    <AuthContext.Provider value={contextValues}>
      {children}
    </AuthContext.Provider>
  );
};
For better readability, I’ve written this event handler in a separate useEffect Hook. Next, you’re going to see how to register and log in users.
Identity registration and login
The Netlify Identity Widget API provides an open() method for opening the signup/login modal below:
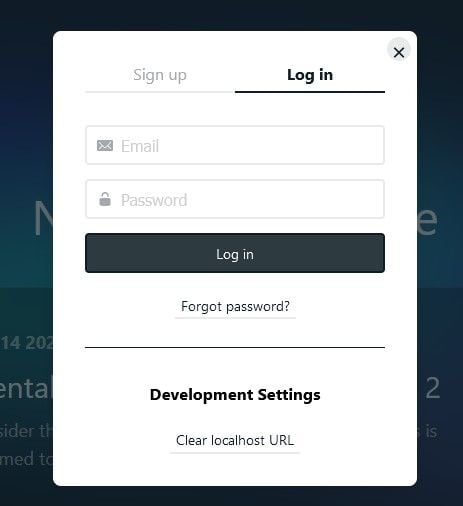
By default, the modal opens to the Login tab, but you can specify which tab you want open:
netlifyIdentity.open("login" | "signup")
Create a login function in AuthContext.js and call netlifyIdentity.open():
// context/AuthContext.js
import { useState, useEffect, createContext } from 'react';
import netlifyIdentity from 'netlify-identity-widget';

export const AuthContext = createContext();

export const AuthContextProvider = ({ children }) => {
  const [user, setUser] = useState(null);

  useEffect(() => {
    // initialize netlify identity
    netlifyIdentity.init();
  }, []);

  useEffect(() => {
    // update user state on 'init event
    netlifyIdentity.on('init', (user) => {
      setUser(user);
    });
  }, []);

  const login = () => {
    netlifyIdentity.open('login');
  };

  const contextValues = { user, login };
  return (
    <AuthContext.Provider value={contextValues}>
      {children}
    </AuthContext.Provider>
  );
};
Remember to include this function in the contextValues object so it’s available throughout the application. Next, we will use the netlifyIdentity.on() method to listen for a login event. When the widget detects this event, we will update the context’s user state as such:
// context/AuthContext.js
import { useState, useEffect, createContext } from 'react';
import netlifyIdentity from 'netlify-identity-widget';

export const AuthContext = createContext();

export const AuthContextProvider = ({ children }) => {
  const [user, setUser] = useState(null);

  useEffect(() => {
    // initialize netlify identity
    netlifyIdentity.init();
  }, []);

  useEffect(() => {
    // update user state on 'init event
    netlifyIdentity.on('init', (user) => {
      setUser(user);
    });
     // update user state after login
    netlifyIdentity.on('login', (user) => {
      setUser(user);
      // close the modal
      netlifyIdentity.close();
    });
  }, []);

  const login = () => {
    netlifyIdentity.open('login');
  };

  const contextValues = { user, login };
  return (
    <AuthContext.Provider value={contextValues}>
      {children}
    </AuthContext.Provider>
  );
};
Note that Netlify Identity allows for a maximum of 1000 registered users per site on the free tier.
Accessing context values with useContext
The React.useContext Hook can be used by child components to read and subscribe to state changes from the Context object passed to it:
const { user } = React.useContext(AuthContext)
conosle.log(user.email) // johndoe@gmail.com
Create an AuthButton.js file in the components folder and add the code block below:
// components/AuthButton.js
import { useContext } from 'react';
import { AuthContext } from '../context/authContext';

const AuthButton = () => {
  const { user, login } = useContext(AuthContext);
  return (
    <div className="absolute top-5 right-5">
      {!user ? (
        <button
          onClick={login}
          className="py-2 px-4 mr-2 bg-sky-500 hover:bg-sky-600 font-semibold rounded-md"
        >
          Login
        </button>
      ) : (
        <button
          className="py-2 px-4 mr-2 bg-sky-500 hover:bg-sky-600 font-semibold rounded-md"
        >
          Logout
        </button>
      )}
    </div>
  );
};
export default AuthButton;
We start by calling useContext and passing in the AuthContext object. In doing so, you can destructure the two values currently in AuthContext — user and login. Next, we’ve used the user state to conditionally render a login or logout button depending on the authentication status of the user. login is then attached to the onClick handler of the login button.
Now, let’s render this button component on the home screen:
// pages/index.js
import { useContext } from 'react';
import { getPosts } from '../utils/mdx-utils';
import Header from '../components/Header';
import Layout, { GradientBackground } from '../components/Layout';
import { getGlobalData } from '../utils/global-data';
import SEO from '../components/SEO';
import { AuthContext } from '../context/authContext';
import AuthButton from '../components/AuthButton';

export default function Index({ posts, globalData }) {
  const { user } = useContext(AuthContext);

  return (
    <Layout>
      <SEO title={globalData.name} description={globalData.blogTitle} />
      <Header name={user?.email} />
      <AuthButton />
      <main className="w-full">
        {/* markup for main element */}
      </main>
}

export function getStaticProps() {
  const posts = getPosts();
  const globalData = getGlobalData();
  return { props: { posts, globalData } };
}
Notice that useContext has been used above to read and display the email of the user in the Header component.
Now you can click the Login/Signup button to begin the authentication process.
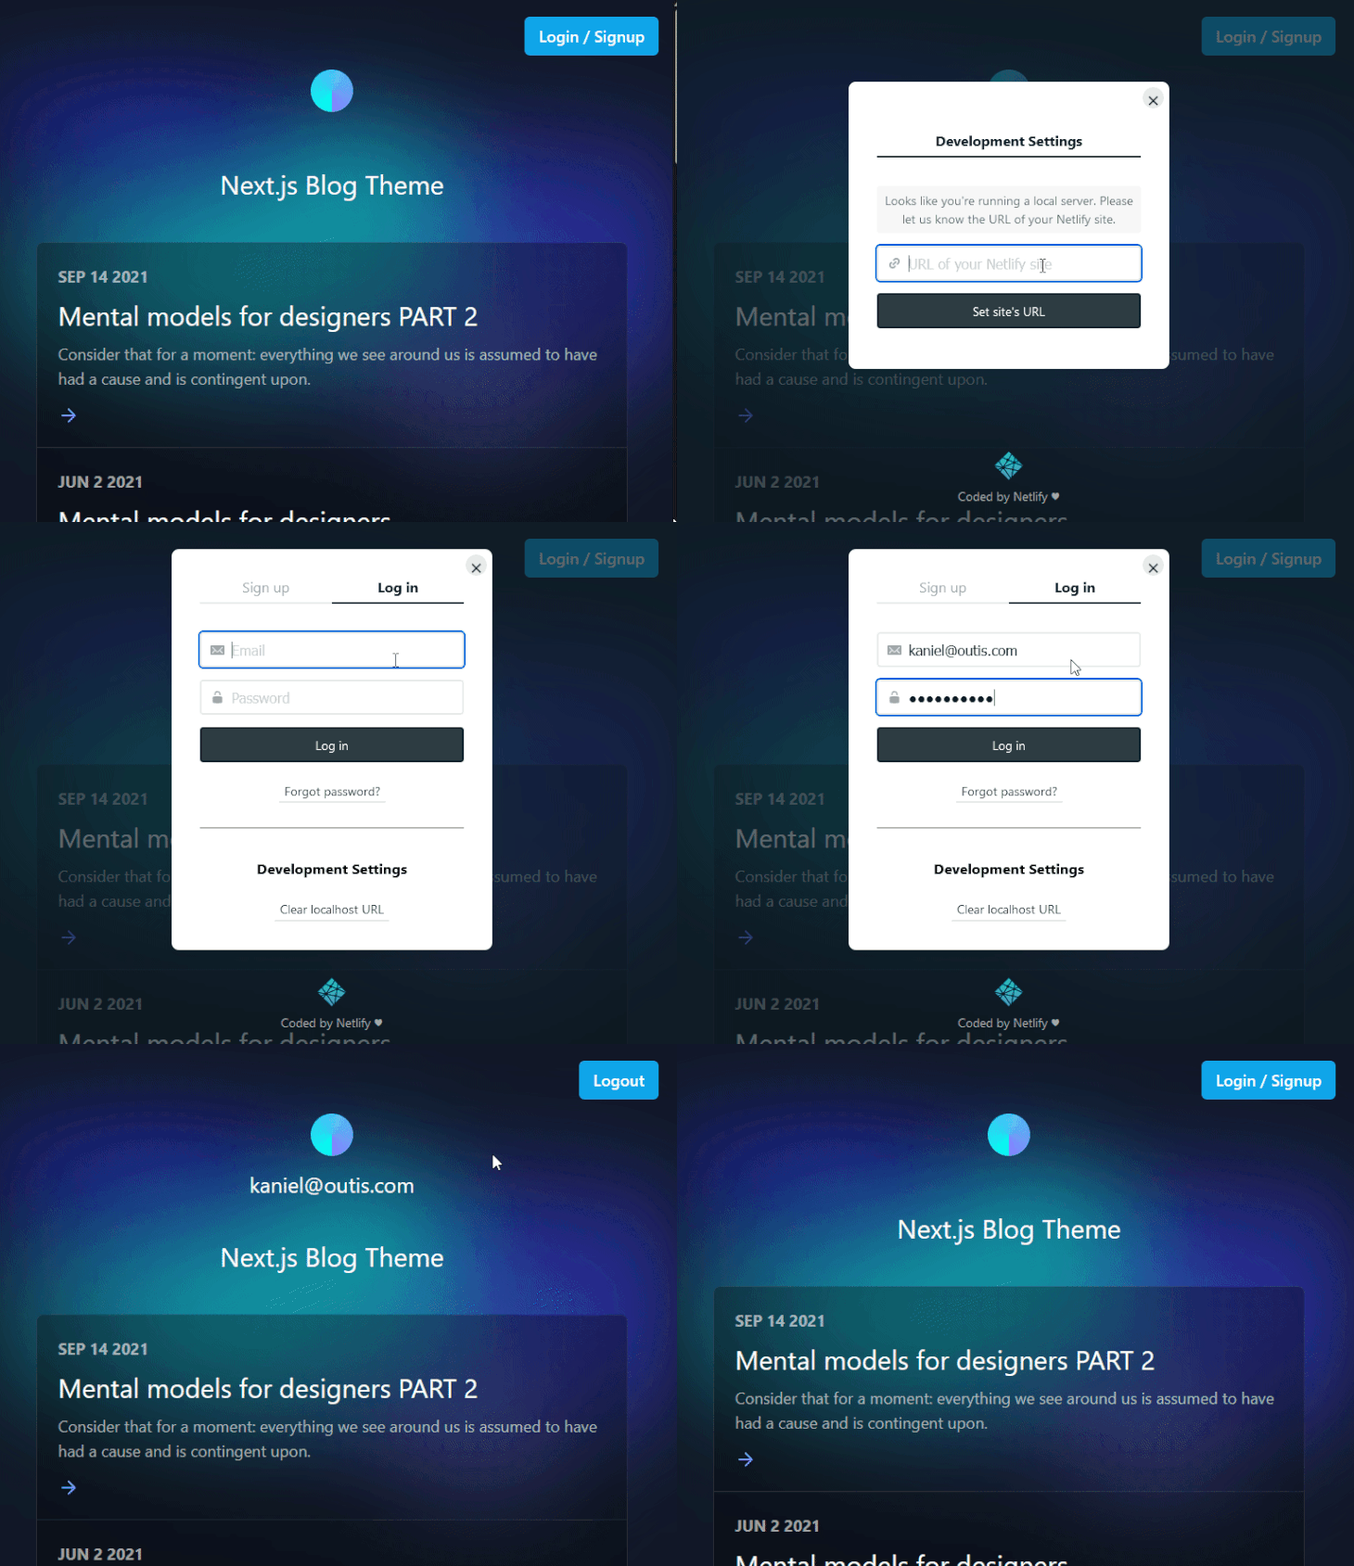
When opening the authentication modal for the first time, the widget will prompt you to set your Netlify’s Live Site URL from earlier. After that, your application can start to collect user information. Note that Netlify Identity allows for a maximum of a thousand users per site on the Free tier.
Next, let’s see how to log a user out.
Identity Logout
We’ll begin by adding a logout function to the context, which will call netlifyIdentity.logout:
// context/AuthContext.js
import { useState, useEffect, createContext } from 'react';
import netlifyIdentity from 'netlify-identity-widget';

export const AuthContext = createContext();

export const AuthContextProvider = ({ children }) => {
  const [user, setUser] = useState(null);

  useEffect(() => {
    // initialize netlify identity
    netlifyIdentity.init();
  }, []);

  useEffect(() => {
    // update user state after login
    netlifyIdentity.on('login', (user) => {
      setUser(user);
      netlifyIdentity.close();
    });
    netlifyIdentity.on('logout', () => {
      setUser(null);
    });
    netlifyIdentity.on('init', (user) => {
      setUser(user);
    });
  }, []);

  const login = () => {
    netlifyIdentity.open('login');
  };

  const logout = () => {
    netlifyIdentity.logout();
  };

  const contextValues = { user, login, logout };

  return (
    <AuthContext.Provider value={contextValues}>
      {children}
    </AuthContext.Provider>
  );
};
\
We’ve also used the netlifyIdentity.on method to listen for a logout event and subsequently clear the user state.
Now we can call this logout function from AuthButton as such:
// components/AuthButton.js
import { useContext } from 'react';
import { AuthContext } from '../context/authContext';

const AuthButton = () => {
  const { user, login, logout } = useContext(AuthContext);
  return (
    <div className="absolute top-5 right-5">
      {!user ? (
        <button
          onClick={login}
          className="py-2 px-4 mr-2 bg-sky-500 hover:bg-sky-600 font-semibold rounded-md"
        >
          Login
        </button>
      ) : (
        <button
          onClick={logout}
          className="py-2 px-4 mr-2 bg-sky-500 hover:bg-sky-600 font-semibold rounded-md"
        >
          Logout
        </button>
      )}
    </div>
  );
};
export default AuthButton;
AuthButton can be further simplified to the code block below:
// components/AuthButton.js
import { useContext } from 'react';
import { AuthContext } from '../context/authContext';

const AuthButton = () => {
  const { user, login, logout } = useContext(AuthContext);

  return (
    <div className="absolute top-5 right-5">
      <button
        onClick={!user ? login : logout}
        className="py-2 px-4 mr-2 bg-sky-500 hover:bg-sky-600 font-semibold rounded-md"
      >
        {!user ? 'Login / Signup' : 'Logout'}
      </button>
    </div>
  );
};
export default AuthButton;
Conclusion
Authentication is an important and sensitive part of any major web application, and having an external service like Netlify Identity manage this feature for you is honestly refreshing. Not only do but these external auth libraries lift off most of the burden, they are also more secure and less prone to cybersecurity attacks compared to your ad hoc auth implementation.
In this post, you’ve learned how to use Netlify Identity to implement basic authentication functionality, but the features of this service extend beyond the scope of this article. You can explore other Identity features like OAuth authentication, creating gated content with the provided JWT, and much more.
The post Implementing serverless authentication with Netlify Identity appeared first on LogRocket Blog.
from LogRocket Blog https://ift.tt/zZSBQdK
Gain $200 in a week
via Read more


