


Using the right color scheme in your React Native app will go a long way toward not just attracting users, but also compelling them to engage with certain parts of your application. However, coming up with suitable colors can be quite tricky.
Many developers find themselves in a quandary when choosing a color scheme. This results in them spending hours flipping between colors when they should be focusing on designing the general layout of the app.
If you’re one of those developers, you’re in the right place. In this article, we will demonstrate how to quickly come up with a color scheme for your app and also touch on some best practices to guide you in the process.
Jump ahead:
- Starting simply with a black-and-white layout
- Adding one more color to your theme
- Applying a triadic color scheme to our React Native app
- Adding custom fonts with
expo-font - Customizing React Native text color, weight, and transparency
Prerequisites
To follow along with this guide, grab the starter app from this Expo Snack project. We’ll make changes to the app as we progress through this tutorial.
Starting simply with a black-and-white layout
If you’re not yet sure what color scheme to use for your app, it’s best to start with a simple black-and-white layout.
Black and white go well with nearly any color. Most importantly, using a simple black-and-white theme allows you to focus first on organizing the general layout and making sure the elements look as good as possible.
Generally speaking, your layout needs to work before color is brought in. Coloring can only make things look good; it can’t fix major issues.
A black-and-white layout should use either:
- Black text placed on a white background
- White text placed on a black background
Here’s how our starter to-do list app looks in black and white:
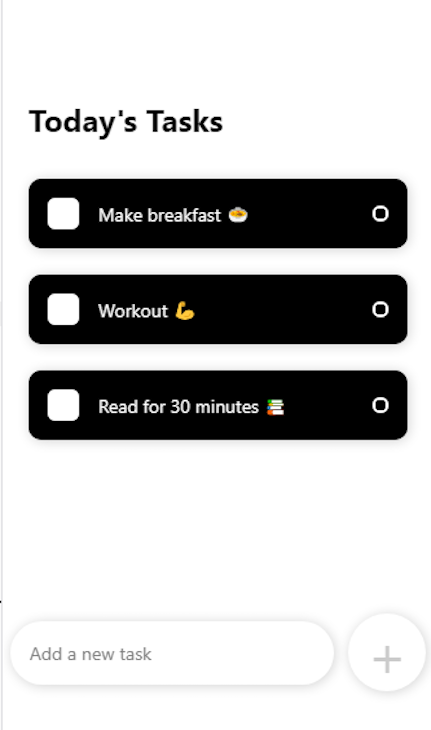
When you’re satisfied with the layout, you can then think about bringing in a “punch” color to make the theme look more lively.
Adding one more color to your theme
Many mobile apps use a combination of black, white, and a third color to add some variation to the theme.
The easiest way to get a third color is by selecting one from the images within your app. With this method, you’re more likely to end up with a coherent color scheme. If you’re unsure of which colors to combine, you can use a color generation tool like Adobe Color to solve that problem:
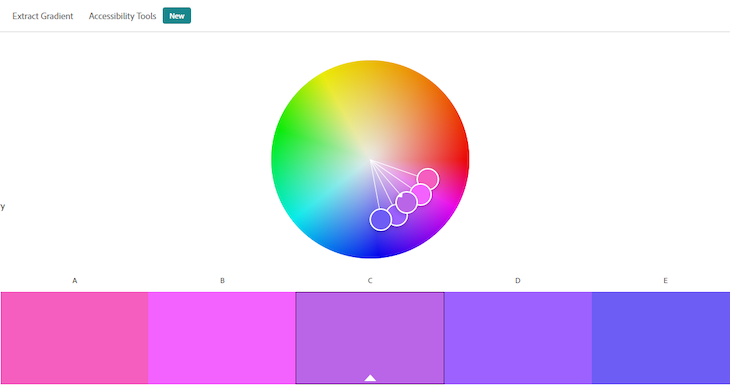
Adobe Color shows you colors that work harmoniously with a base color you select. It helps to have at least some basic knowledge of color theory. While that is a deep topic to cover, let’s just touch on its fundamental principles.
According to the color theory, there are three primary colors — red, yellow, and blue. By mixing these three primary colors, we can derive three secondary colors — green, orange, and purple. If we then mix the three primary and secondary colors, we can get six tertiary colors.
Let’s look at this basic theory as it relates to the color wheel for our objectives. To begin, the wheel displays all primary, secondary, and tertiary colors, with complementary hues placed across from one another:
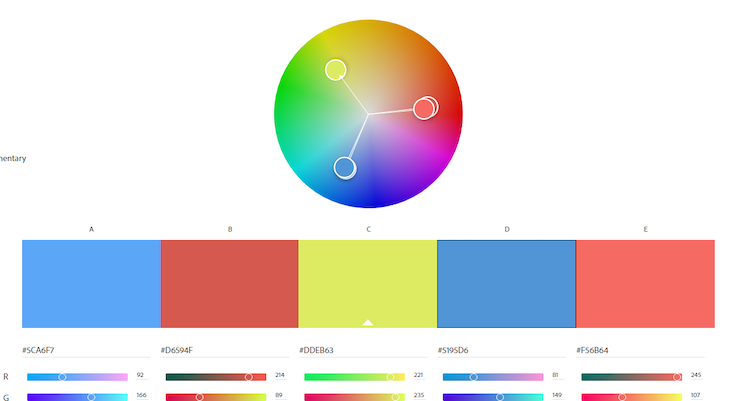
Now that we understand the logic behind choosing colors for our applications, let’s add a third color to our to-do list React Native app.
Applying a triadic color scheme to our React Native app
For this example, I’ll apply a shade of blue with a hex value of #55BCF6 to both the square and circle in the task box. Additionally, I’ll use a lighter version of the color with a hex value of #E8EAED to the main background.
Open your App.js file and scroll down to the stylesheet. First, change the background color of the main container from its existing hex value of #fff to #E8EAED — our lighter blue color:
 container: {
    // other CSS
    backgroundColor: '#E8EAED',
  },
Next, change the background color of the + button from #000 to #fff:
addWrapper: {
    // other CSS
    backgroundColor: '#fff'
  },
Next, go into the components/Task.js file. Change both the background color of the squares and the border color of the circles to #55BCF6 — our darker blue color:
square: {
    // other CSS
    backgroundColor: '#55BCF6'
  },

  circular: {
    // other CSS
    borderColor: '#55BCF6'
  }
Finally, change the text in each task box to black:
  itemText: {
    // other CSS
    color: '#000'
  },
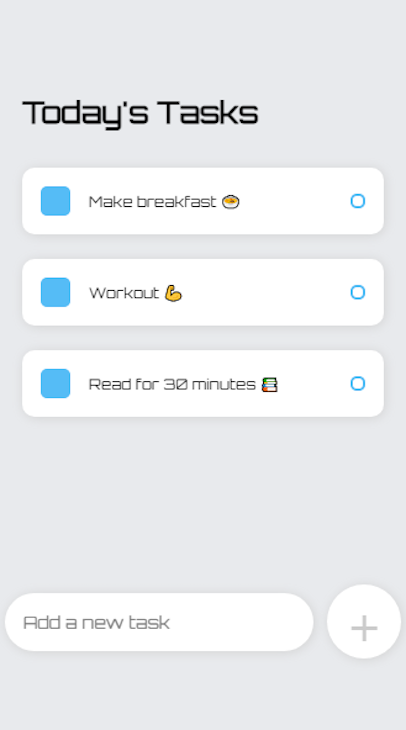
Your app should now look like the following image:
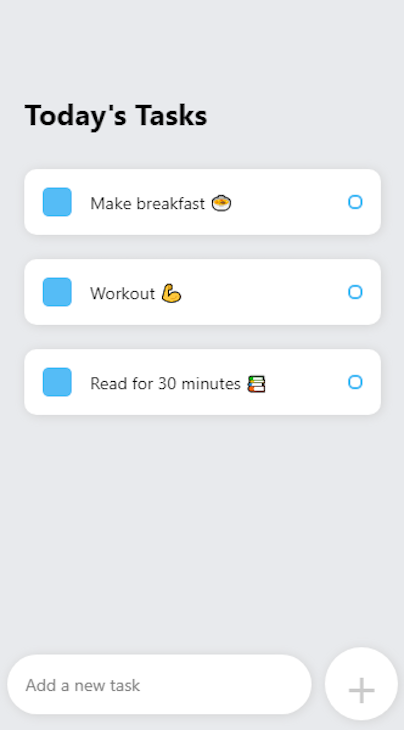
Our example app uses three colors — white, black, and blue. The more colors we add, the more complicated things get.
Generally speaking, it’s best to keep the color scheme of your app as simple as possible. You can use different shades of a particular color, as we did with the blue in our example app. But in general, the fewer colors you use in your app, the better your user experience will be.
Add new colors only if you have a good reason to do so, and make sure any new colors you add blend well with the existing colors in your React Native app.
Adding custom fonts with expo-font
You can use custom fonts in your React Native app with expo-font. For our app, let’s use the Orbitron font family from Google Fonts.
- Download the Orbitron font family to your local machine
- Create a folder named
fontsinside theassetsfolder of your Snack project - Import the fonts from your computer into your project
- Move the imported fonts into the
assets/fontsfolder
Now that you have uploaded the font to your project, add the following field inside the dependencies object in your package.json file:
"expo-font": "10.2.1",
Expo Snack will automatically add the library to your project.
Next, in App.js, import the useFonts hook from expo-font at the top of the file:
import { useFonts } from 'expo-font';
Load the font inside of your App function:
export default function App() {

  const [fontsLoaded] = useFonts({
    'Orbitron-Regular': require('./assets/fonts/Orbitron-Regular.ttf'),
  });

  // return (...)
}
Scroll down to the style sheet and apply the font family to the main sectionTitle:
sectionTitle: {
   // Other CSS
   fontFamily: 'Orbitron-Regular'
 },
Open the components/Task.js file and go through the same steps above. This time, apply the font to the .itemText element:
  itemText: {
    // other css
    fontSize: '12px',
    fontFamily: 'Orbitron-Regular'
  },
Your app should now look like so:
Here we’re using different sizes of the same font.
Things start to get more complicated when you bring in another font. You have to consider how those fonts will work together. It gets even more complicated when you bring in a third font, and a fourth, and so on.
In general, just as with colors, the more fonts you have, the harder it is to work with them.
Customizing React Native text color, weight, and transparency
When customizing the text in your React Native app, the first thing you’ll have to consider is color.
It’s important that you choose a color that contrasts well with the background color. If the contrast of your text is too subtle — as in, it blends with the background — people might have a hard time reading the text on your app, which negatively impacts user experience.
Earlier, in our example React Native application, we set the text color inside each task box to black. This choice contrasts nicely with the white task boxes. Learn more about why it’s important to choose colors with good contrast from the W3C Web Accessibility Initiative.
Other important UX elements related to text include transparency and type styles like bold and italics. By using different font variations, you make it easy for people to skim through the text on your app.
Bold text is typically used to emphasize words and phrases you want the user to see. This could be a benefit, a special offer, a headline, or some other form of urgent information.
Italic forms could be used to represent subtle information such as sidenotes, prompts, and other kinds of non-urgent information.
Fonts usually come in different weights — normal, bold, and light, to name a few examples. You can control the boldness of your text in React Native with the fontWeight property:
  itemText: {
    fontSize: '12px',
    fontWeight: 'bold' // other values include thin, light, normal, etc.
  },
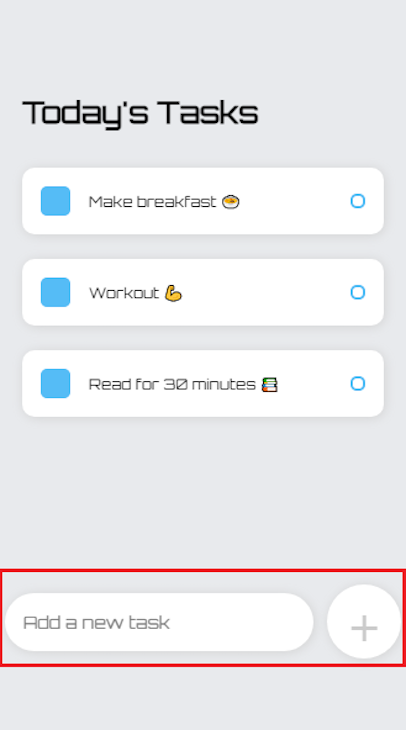
It’s also common to represent subtle information by making the text more transparent. We can see this in our example app. Take a look at how the text prompting the user to add a new task is grayed out to have less contrast than the other text:
  addText: {
    color: '#000',
    opacity: 0.2,
  }
When adjusting the opacity of a text, it’s important to make sure the contrast ratio between the text and its background is high enough that all people — including those with low vision — can read the content without struggle.
Conclusion
A good React Native color scheme can help you stand out, convey who you are and what you’re about, and eventually help people connect with you through your app. It’s important that you have the layout ready before testing out different colors.
Remember that with all Reach Native theme elements — including text color, font, overall color scheme, and more — less is better. Don’t go beyond four colors to avoid complicating the design. Try to stick with two or three colors.
Thanks for reading and have a great week.
The post Customize React Native text color and other theme elements appeared first on LogRocket Blog.
from LogRocket Blog https://ift.tt/bdlBwzM
Gain $200 in a week
via Read more
