


With the widespread adoption of web frameworks and libraries such as React and Vue, the development of web applications has shifted from having a single HTML file per page to having small reusable components that render a specific part of the application.
Similarly, testing practices have also expanded from having only end-to-end (E2E) tests for pages to having several unit tests, alongside testing the frontend components individually.
If you have been using Playwright to implement E2E tests for your application, you may be aware that Playwright now provides the ability to test your frontend components individually.
This tutorial will walk you through the process of writing unit tests for your Svelte, Vue, and React components using Playwright’s recently released, currently experimental component testing feature. We will cover:
- What is Playwright?
- Introduction to Playwright’s component testing feature
- Testing your components using Playwright
- Setting up Playwright component testing for React components
- Writing Playwright component tests for React
- Setting up Playwright component testing for Vue components
- Writing Playwright component tests for Vue
- Setting up Playwright component testing for Svelte components
- Writing Playwright component tests for Svelte
- Final thoughts on Playwright component testing
If you want to jump straight into the finished test cases, the code is available within the playwright-ct branch of the playwright-frontend-e2e-tests repository on GitHub.
Prerequisites
This tutorial contains hands-on steps that will guide you through the process of using Playwright to test components built with React, Vue, and Svelte. You will clone a boilerplate project containing React, Vue, and Svelte components in a single Yarn workspace.
To follow along with these steps, you will need the following:
- Node.js v16 installed on your computer
- The Git CLI installed on your computer
- A basic familiarity with the React, Vue, or Svelte frameworks
What is Playwright?
Playwright is an open source testing tool with primary support for web applications and additional experimental support for mobile applications.
Rather than testing the interface for your applications manually, Playwright provides you with the ability to automate your tests using executable scripts written in either JavaScript or TypeScript, Java, .NET, and Python.
Introduction to Playwright’s component testing feature
The experimental Playwright Test component testing feature allows you to create test cases within which to import and test your frontend components rather than having to programmatically navigate to the entire page.
Previously, developers who were already using Playwright for E2E tests may have still needed unit tests. Those developers had to adopt other testing libraries such as Jest to test their components directly.
Playwright removed this limitation following its v1.22.0 release in May 2022 with the component testing feature.
Currently, the component test feature only supports React, Vue, and Svelte. Playwright provides an additional package that wraps the @playwright/test package to provide other methods such as mount for mounting individual components.
As you consider using Playwright for your frontend unit tests, keep in mind that the component testing feature is still in an experimental stage. Hence, there might be future changes to the API.
Testing your components using Playwright
To enable you to focus on working with Playwright, this tutorial uses an existing monorepo project that contains smaller React, Vue, and Svelte applications.
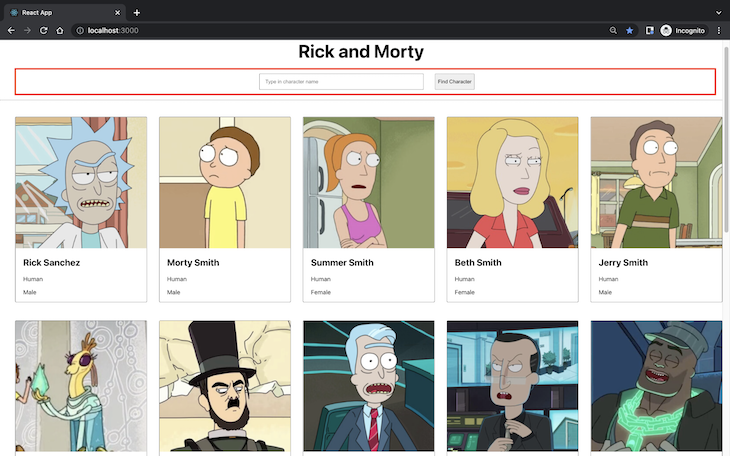
The monorepo is managed using Yarn workspaces, and the React, Vue, and Svelte applications will render the same page displaying JSON data fetched from the Rick and Morty API, which has information from the TV show Rick and Morty.
To get started, launch your terminal and clone the prebuilt frontend project from the GitHub repository using the Git CLI:
>git clone https://github.com/vickywane/playwright-frontend-e2e-tests.git
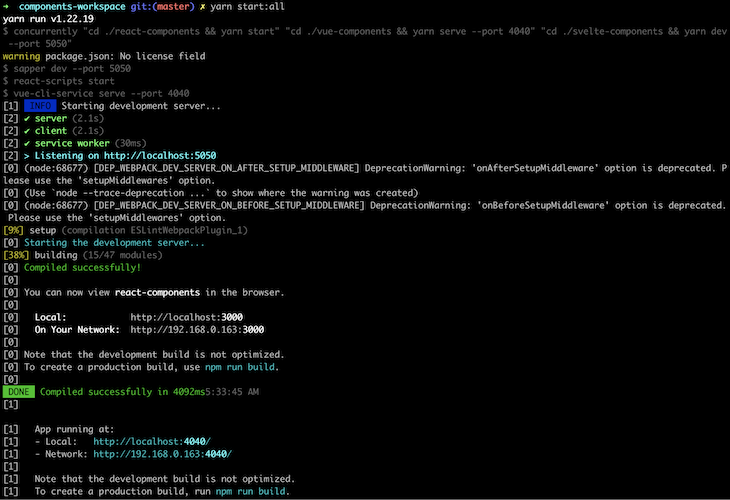
Use the next command below to change the directory into the cloned project, install the project dependencies, and run the frontend applications. The project uses the concurrently package underneath to run the React, Vue, and Svelte applications from a single terminal.
# change directory
cd playwright-frontend-e2e-tests

# install dependencies
yarn install

# start all applications
yarn start:all
You should then see something like the below:
Through the use of Yarn workspaces for the monorepo, you only need to install the project dependencies once at the root folder and Yarn will automatically link them to other projects. Learn more about Yarn workspaces and monorepos.
Each frontend application within the project displays 20 characters fetched from the Rick and Morty API across three child components imported in the main component. Within the next sections, you will write component tests for each of the child components.
With the project setup, let’s walk through the process of setting up and writing E2E tests in the individual applications using Playwright.
Setting up Playwright component testing for React components
Using your browser, navigate to http://localhost:3000 to view the React application before you begin writing the E2E tests. You will write component tests for the SearchField component highlighted in the image below:
Execute the next command to change your terminal directory into the react-components folder and launch the interactive Playwright CLI:
cd react-components

yarn create playwright --ct
The additional --ct flag in the command above will direct the Playwright CLI to set up the test, especially for testing components.
During the setup process, select JavaScript as the programming language for writing the E2E tests, and React as the frontend framework option.
All configurations generated by Playwright will be stored in a playwright-ct.config.js file, which is adjustable if you want to change the default configurations.
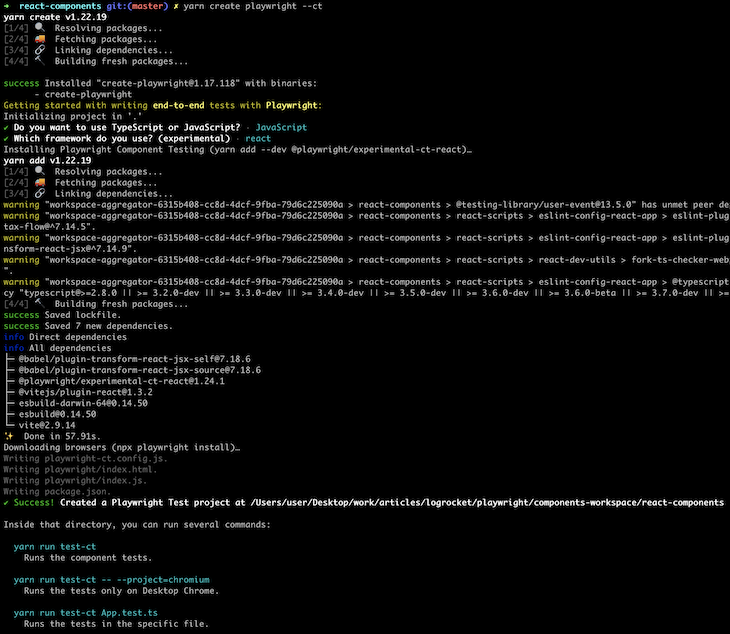
As a part of the setup process, Playwright will automatically install the @playwright/experimental-ct-react package for using the component testing feature.
At this point, Playwright has been set up in the react-components application.
Open the entire playwright-frontend-e2e-tests project using your code editor, as you will begin creating your first test cases in the following section.
Writing Playwright component tests for React
Using your code editor, create a directory named tests within the react-components/src directory. The tests folder will contain all the test files that you will create for Playwright.
Next, create a SearchField.spec.jsx file within the tests directory. The file will contain the component tests for the SearchField component, which are used to search for a character.
Playwright recognizes files with .spec prefixed to the filename extension as test files.
Add the content of the next code block below into the SearchField.spec.jsx file to assert that the input field within the SearchField component accepts text values.
The test case below uses the locator method to find the HTML element with a search-field id attribute, fills it with the text Rick, and asserts that the value of the input element is “Rick”.
import { test, expect } from '@playwright/experimental-ct-react';
import App, { SearchField } from '../App';

test('SearchField accepts text input', async ({ mount }) => {
    const searchComponent = await mount(<SearchField /> );
    const searchField = searchComponent.locator('#search-field')

    await searchField.fill('Rick')

    await expect(searchField).toHaveValue('Rick')
});
Next, add the code below into the SearchField.spec.jsx file to assert that the executeSearch prop is executed when the button within the component is clicked:
test('Click on `Find Character` button executes executeSearch prop', async ({ mount }) => {
    let isCalled = false
    const searchComponent = await mount(
        <SearchField
            executeSearch={() => isCalled = true}
        />
    );

    await searchComponent.locator('#search-field').fill('test character')
    await searchComponent.locator('#find').click()

    expect(isCalled).toBeTruthy()
});
As a part of a good user experience, the button within a form should be disabled until the mandatory input fields within the form have been filled.
Add code below to assert that the component’s button is disabled when the input field is empty:
test('Input field text length controls `Find Character` button disabled state', async ({ mount }) => {
    const searchComponent = await mount( <SearchField /> );

    const btn = await searchComponent.locator('#find').isDisabled()
    expect(btn).toBeTruthy()

    await searchComponent.locator('#search-field').fill('test character')
      await expect(searchComponent.locator('#find')).toBeEnabled();
});
This test case is necessary to ensure that search is only triggered when a user enters a text.
With the addition of the code above, you now have three test cases within the SearchField.spec.jsx file. Let’s proceed to execute them!
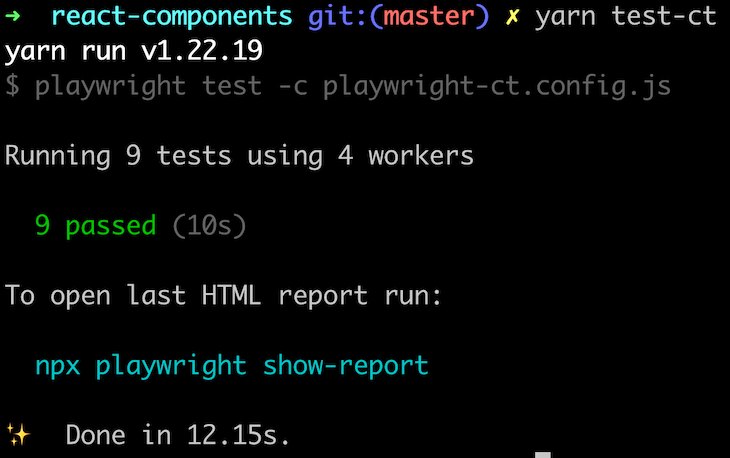
Execute the test cases you have created for the SearchField component using the command below:
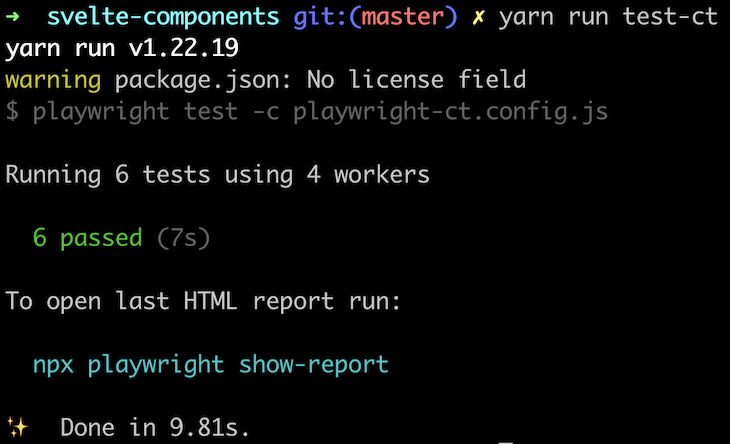
yarn test-ct
You should then see something like the image below:
By default, the component tests will be executed in a headless mode without opening the Chromium, Webkit, and Firefox browsers. Add the --headless flag to the yarn test-ct command to launch the three browsers and view your components being tested.
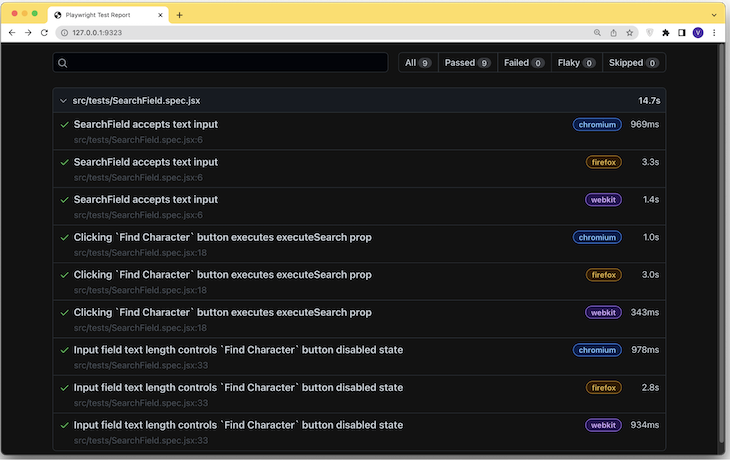
Playwright has a built-in feature to generate and serve an HTML report for every test run. The HTML report contains the test name, execution status, and duration for every test case.
Generate an HTML report for your tests using the show-report command from the Playwright:
npx playwright show-report
Playwright will spin up a local server on port 9323 for the HTML report. Using your browser, navigate to http://localhost:9323 to view the HTML report:
At this point, you have seen how components built using React are tested directly using Playwright. Let’s proceed further to set up Playwright for the vue-components application within the project.
Setting up Playwright component testing for Vue components
In the previous section, you used Playwright in the react-components application to test the SearchField component.
Within this section, you will use Playwright in the vue-components application in a similar manner to test the Character component that displays details about a single character from the Rick and Morty API.
Execute the next command to change your terminal directory into the vue-components directory and run the Playwright installer:
cd ../vue-components

yarn create playwright --ct
For the setup prompts, make sure to select Vue as the frontend framework. Choosing Vue will cause the Playwright CLI to automatically install the @playwright/experimental-ct-vue package for writing component tests.
In the next step, you will write two tests for the Character component within the vue-components application. The Character component is rendered in a grid list that displays an image and some details for a Rick and Morty character using props received from the parent component.
The highlighted box within the image below shows an example of the Character component:

Writing Playwright component tests for Vue
Create a directory called tests within the vue-components/src directory. As you did with the react-components application, the test files for the vue-components will also be stored in the tests directory.
Create a Character.spec.js file within the tests directory to store the test cases for the Character component.
Add the content of the code block below into the Character.spec.js file to assert that the Character component displays the props passed into the component as the details of a character.
import { test, expect } from '@playwright/experimental-ct-vue';
import Character from '../components/Character.vue'

const SAMPLE_CHARACTER = {
    "name": "Toxic Rick",
    "gender": "Male",
    "specie": "Humanoid",
    "type": "Rick's Toxic Side",
    "link": "https://rickandmortyapi.com/api/location/64",
    "image": "https://rickandmortyapi.com/api/character/avatar/361.jpeg"
}

test('Component displays character details from props', async ({ mount }) => {
    const characterComponent = await mount(Character, {
        props: { ...SAMPLE_CHARACTER }
    });


       await expect(characterComponent.locator('#character-name')).toHaveText(SAMPLE_CHARACTER.name);

   await expect(characterComponent.locator('#character-gender')).toHaveText(SAMPLE_CHARACTER.gender);

   await expect(characterComponent.locator('#character-type')).toHaveText(SAMPLE_CHARACTER.type);

   await expect(characterComponent.locator('#character-specie')).toHaveText(SAMPLE_CHARACTER.specie);

});
The code above contains an object with sample fields of a character similar to what would have been retrieved from an actual request to the Rick and Morty API.
Next, add the second test case below to assert that the Character component displays the character’s name with an anchor element having the href attribute.
test('Character name renders anchor link to character', async ({ mount }) => {
    const characterComponent = await mount(Character, {
        props: { ...SAMPLE_CHARACTER }
    });


   await expect(characterComponent.locator('#character-name > a') ).toHaveAttribute("href")

});
Now, execute the test-ct command to run the two Playwright test cases you have created using the two code blocks above:
yarn test-ct
As in the previous section, you should then be able to see your test results and generate an HTML report for your tests.
Setting up Playwright component testing for Svelte components
Having used Playwright with React and Vue applications in the previous sections of this article, you are now using Playwright with a Svelte application.
First, execute the following command to change your terminal directory into the svelte-components directory and run the Playwright installer.
cd ../svelte-components

yarn create playwright --ct
As you go through the setup prompts, make sure to select Svelte as the frontend framework. Choosing Svelte will cause Playwright to automatically install the @playwright/experimental-ct-svelte package.
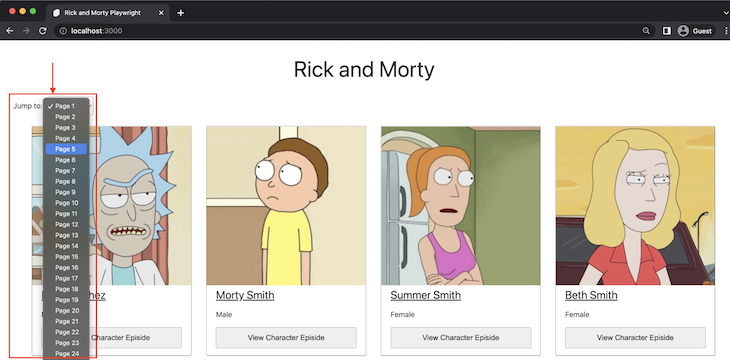
In the next part, you will write two test cases for the Paginator component, which renders a dropdown of page numbers. When users click on a page listed in the Paginator component, they will be taken to view the characters listed on that page, as shown in the image below:
Writing Playwright component tests for Svelte
Create a directory called tests within the svelte-components/src directory to store the files containing your Playwright test cases.
Next, create a Paginator.spec.js file within the tests directory to store the test cases for the Paginator component.
Add the content of the code block below into the Paginator.spec.js file. This code will create a test case that asserts that the Paginator component will display the options element based on the number passed through the pagesCount prop.
import { test, expect } from '@playwright/experimental-ct-svelte'
import Paginator from '../src/components/Paginator.svelte'

test('Displays pages option based on pagesCount prop', async ({ mount }) => {
    const component = await mount(Paginator, {
        props: {
            pagesCount: 42
        }
    })

   expect(await component.locator('#pages-option > option').count()).toBe(42)})
})
Add the second test case below to assert that the handlePageSelect prop for the Paginator component returns a number when an option is clicked to paginate the Rick and Morty characters by the number:
test('`handlePageSelect` prop returns the pages number when clicked', async ({ mount }) => {
    let pageClicked;
    const component = await mount(Paginator, {
        props: {
            handlePageSelect: number => pageClicked = number,
            pagesCount: 10,
        }
    })

    await component.locator('#pages-option > option').first().click()
    expect(pageClicked).toBe(1)
})
Finally, run the test-ct two test cases for the Paginator component.
yarn test-ct
That’s it!
After passing these last Playwright component tests for the Svelte application, you have successfully used the component test feature from Playwright to test the React, Vue, and Svelte applications within this example project.
Final thoughts on Playwright component testing
At the start of this tutorial, you set out to learn how your frontend components can be tested using Playwright.
The tutorial explained what the Playwright component testing feature is and took you through a hands-on component testing experience using a monorepo project containing React, Vue, and Svelte components.
As mentioned earlier, it is important to keep in mind that the component testing feature from Playwright is relatively new and still considered experimental. It has no support for Angular yet, and in comparison to other testing tools that have been around for years, you might discover that some assertions are not available for Playwright.
If you run into any issues while trying out the Playwright component testing feature, raise an appropriate issue within the GitHub repository or chat with the Playwright community on Slack.
The post Getting started with Playwright component testing appeared first on LogRocket Blog.
from LogRocket Blog https://ift.tt/SMYbu69
Gain $200 in a week
via Read more


