


The modal bottom sheet is a component that we’ve likely all seen before. It’s an element that slides up from the bottom of a screen to display extra content or longer descriptions within a mobile application. You’ve probably seen it in some of today’s most popular applications, such as Twitter, Instagram, and the Apple AppStore.
The modal bottom sheet pops up whenever an event is triggered by the user. You can see an example of this below in trying to install an app on my phone:

In this tutorial, we will be creating a basic realtor application with a modal bottom sheet feature. We’ll go over how to set up the app layout, fetch data from an API, implement the modal bottom sheet, pass data to it, and style it.
- Setting up the app and installing dependencies
- Creating our app layout
- Fetching data from the API
- Implementing the modal bottom sheet in our React Native app
- Passing data to the modal bottom sheet
- Styling the modal bottom sheet
Setting up the app and installing dependencies
The basic idea of our app is to display a list of properties available to rent. When a user decides which one they want or to learn more about, they can click on the View Details button and the modal bottom sheet will slide up to display additional information about that property.
We will be using the react-native-bottom-sheet package for the modal bottom sheet implementation. We’ll also use the Bayut API, which you can access by signing up here and can preview the API here, as well as Axios to make requests to the needed API endpoint.
First, we’ll be using Expo to build our React Native app. We will initialize our project by typing the command npx create-expo-app react-native-bottom-sheet in our CLI to get started.
We will also install our needed dependencies:
npm install axios @gorhom/bottom-sheet react-native-gesture-handler react-native-reanimated
Creating our app layout
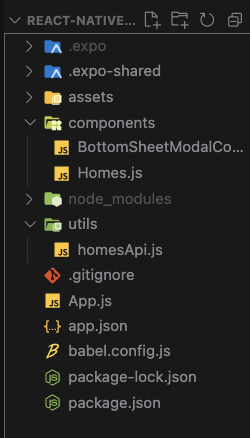
For the app’s folder structure, we will create utils and components folders. Inside the components folder, we will have the Homes and BottomSheetModalComponent components.
The Homes component will be used to render the list of properties and the BottomSheetModalComponent will be used to display the modal bottom sheet.
In the utils folder, we will create a homesApi file to create the function that fetches data from the API endpoint we mentioned earlier.
In the Homes.js component, we will initialize the component by adding the following to the file:
//Homes.js
import { StyleSheet, Text, View } from 'react-native'
import React from 'react'

const Homes = () => {
 return (
   <View>
     <Text>Homes</Text>
   </View>
 )
}

export default Homes

const styles = StyleSheet.create({})
Then, we’ll import this component into the App.js file like this:
//app.js

import { StyleSheet, Text, View } from "react-native";
import React from "react";
import Homes from "./components/Homes";

const App = () => {
 return <Homes />;
};

export default App;

const styles = StyleSheet.create({});
We should have this in our simulator:
N.B., Since the modal bottom sheet needs the react-native-reanimated dependency installed before using it, you’ll need to add the following code to your babel.config.js file (or else you’ll get an error):
plugins: ["react-native-reanimated/plugin"],
The file will look like this now:
module.exports = function (api) {
 api.cache(true);
 return {
   presets: ["babel-preset-expo"],
   plugins: ["react-native-reanimated/plugin"],
 };
};
Fetching data from the API
As previously mentioned, we will be fetching the list of properties from the API. Inside the homesApi file, we will create the function to fetch the data from the API endpoint:
//homesApi
import axios from "axios";

const options = {
 method: "GET",
 url: "https://bayut.p.rapidapi.com/properties/list",
 params: {
   locationExternalIDs: "5002,6020",
   purpose: "for-rent",
   hitsPerPage: "10",
   page: "0",
   lang: "en",
   sort: "city-level-score",
   rentFrequency: "monthly",
   categoryExternalID: "4",
 },
 headers: {
   "X-RapidAPI-Key": "5cf25132e5msh07ce895df09bd96p1fb02ajsn623ba5792950",
   "X-RapidAPI-Host": "bayut.p.rapidapi.com",
 },
};

export const getProperties = async () => {
 try {
   const response = await axios(options);
   return response.data.hits;
 } catch (error) {
   console.log(error);
 }
};
Then, in App.js, we will call this function and make the API call using the useEffect hook.
First, we create a homes state which will initially be an empty array (before it gets populated by the data from the API). Then, we will use the useEffect hook to fetch the data once the component renders and set the homes state to the data that is returned.
We’ll then wrap our entire app in a SafeAreaView component to the rendered content within the safe area boundaries of the device. FlatList will be used to map over the array of data returned from the API and the Homes component will be rendered.
Also, since the process of fetching the data is asynchronous and will take time to complete, we can initialize a loading state to display a loading text to the user before the data is rendered.
// App.js
import { StyleSheet, Text, View, SafeAreaView, FlatList } from "react-native";
import Homes from "./components/Homes";
import { useState, useEffect, useRef, useMemo } from "react";
import { getProperties } from "./utils/homesApi";
const App = () => {
const [homes, setHomes] = useState([]);
 const [loading, setLoading] = useState(true);

useEffect(() => {
   const fetchHouseData = async () => {
     const data = await getProperties();
     setHomes(data);
   };
   fetchHouseData();
 }, []);

 if (loading)
   return (
     <View style={styles.loading}>
       <Text>Loading Properties...</Text>
     </View>
   );

 return (
    <SafeAreaView style={styles.container}>
       <Text style={styles.header}>
         Find your Real Estate Properties Listing in Dubai
       </Text>
       <FlatList
         keyExtractor={(item) => item.id}
         data={homes}
         renderItem={({ item }) => (
           <Homes {...item} />
         )}
       />
     </SafeAreaView>

);
};

export default App;

const styles = StyleSheet.create({
 container: {
   flex: 1,
   backgroundColor: "#fff",
 },
 loading: {
   flex: 1,
   justifyContent: "center",
   alignItems: "center",
 },

});
As you will notice above, after mapping over the items in the array that are returned to us from the API, we have an object for each property. We are spreading the object using a spread operator on the Homes component. We can destructure the needed values and use them to build the Homes component.
//Homes.js
import {
 StyleSheet,
 Text,
 View,
 TouchableOpacity,
 Image,
} from "react-native";
import React from "react";

const Homes = ({ title, coverPhoto}) => {
 return (
   <View style={styles.container}>
     <Image source= style={styles.image} />
     <Text style={styles.text}>Name:{title}</Text>
     <TouchableOpacity style={styles.button}>
       <Text style={styles.buttonText}>View Details</Text>
     </TouchableOpacity>
   </View>
 );
};

export default Homes;

const styles = StyleSheet.create({
 container: {
   width: 200,
   height: 200,
   backgroundColor: "#fff",
   margin: 10,
   borderRadius: 10,
   borderWidth: 1,
   borderColor: "#121212",
   justifyContent: "center",
   alignItems: "center",
 },
 text: {
   color: "#121212",
   fontSize: 10,
   textAlign: "center",
   marginTop: 10,
 },
 image: {
   width: 100,
   height: 100,
 },
 button: {
   width: 80,
   marginTop: 10,
   padding: 6,
   backgroundColor: "#121212",
   justifyContent: "center",
   alignItems: "center",
   borderRadius: 10,
 },
 buttonText: {
   color: "white",
   fontSize: 10,
 },
});
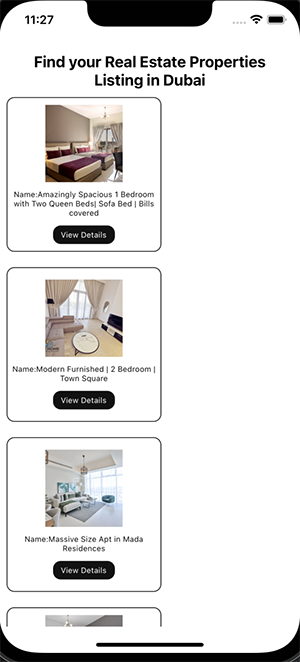
Here, we are only using the coverPhoto and title props while building our call to action button to trigger the modal bottom sheet. Now, we should have this in our simulator:
Implementing the modal bottom sheet into our React Native app
To start the modal bottom sheet implementation, we will import BottomSheetModal and BottomSheetModalProvider from the library and wrap the whole app with the BottomSheetModalProvider. Then, we will call the BottomSheetModal component from the library and pass in the following props: snapPoints, index, and ref.
snapPoints are the points for the bottom sheet to snap to, which should be sorted from the bottom to the top. This prop takes in an array of numbers.
index is the initial snap index.
After we pass in the props, we will pass a simple View component inside the BottomSheetModal and see what it looks like.
To make the pop-up modal work when we click View Details, we will pass an onPress prop to the Homes component that’ll take in an openModal function. The onPress prop will then be destructured in the Homes component and passed to the View Details button, so when the button is clicked, the modal bottom sheet slides up.
//App.js
import { StyleSheet, Text, View, SafeAreaView, FlatList } from "react-native";
import Homes from "./components/Homes";
import { useState, useEffect, useRef, useMemo } from "react";
import { getProperties } from "./utils/homesApi";
const App = () => {
const [homes, setHomes] = useState([]);
 const [loading, setLoading] = useState(true);

useEffect(() => {
   const fetchHouseData = async () => {
     const data = await getProperties();
     setHomes(data);
   };
   fetchHouseData();
 }, []);

 // ref
 const bottomSheetModalRef = useRef(null);
 const snapPoints = useMemo(() => ["50%"], []);

const openModal = () => {
   bottomSheetModalRef.current.present();
 };

 if (loading)
   return (
     <View style={styles.loading}>
       <Text>Loading Properties...</Text>
     </View>
   );

 return (
   <BottomSheetModalProvider>
    <SafeAreaView style={styles.container}>
       <Text style={styles.header}>
         Find your Real Estate Properties Listing in Dubai
       </Text>
       <FlatList
         keyExtractor={(item) => item.id}
         data={homes}
         renderItem={({ item }) => (
           <Homes {...item} onPress={() => openModal()} />
         )}
       />
     </SafeAreaView>
    <BottomSheetModal
       ref={bottomSheetModalRef}
       index={0}
       snapPoints={snapPoints}
       style={styles.bottomSheet}
     >
       <View style={styles.contentContainer}>
         <Text>Awesome </Text>
       </View>
     </BottomSheetModal>
   </BottomSheetModalProvider>

);
};

export default App;

const styles = StyleSheet.create({
 container: {
   flex: 1,
   backgroundColor: "#fff",
 },
 loading: {
   flex: 1,
   justifyContent: "center",
   alignItems: "center",
 },

});

//Homes.js
const Homes = ({ title, coverPhoto, onPress }) => {
 return (
   <View style={styles.container}>
     <Image source= style={styles.image} />
     <Text style={styles.text}>Name:{title}</Text>
     <TouchableOpacity style={styles.button} onPress={onPress}>
       <Text style={styles.buttonText}>View Details</Text>
     </TouchableOpacity>
   </View>
 );
};
</Text>
</View>
</BottomSheetModal>
</BottomSheetModalProvider>
);
};
export default App;
const styles = StyleSheet.create({
container: {
flex: 1,
backgroundColor: "#fff",
},
loading: {
flex: 1,
justifyContent: "center",
alignItems: "center",
},
});
//Homes.js
const Homes = ({ title, coverPhoto, onPress }) => {
return (
<View style={styles.container}>
<Image source= style={styles.image} />
<Text style={styles.text}>Name:{title}</Text>
<TouchableOpacity style={styles.button} onPress={onPress}>
<Text style={styles.buttonText}>View Details</Text>
</TouchableOpacity>
</View>
);
};
Now let’s see what we have:
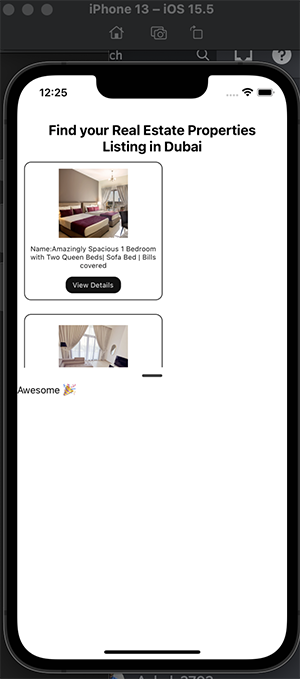
We can see our modal bottom sheet coming up once we trigger the View Details function!
N.B., for the snap points, you can snap them to your preference. Here, we used 50% so it won’t go past more than half of the screen. If you want it to snap to the very top, you can pass ["50%", "100%"] into the array.
Passing data to the modal bottom sheet
Now that the modal bottom sheet works, we will render the BottomSheetModalComponent we initially created and find a way to pass the API data into this component. When the modal bottom sheet slides in, this will allow us to see additional information about each property.
To do that, we will create a new state called houseDataModal and set the initial value to null. Since we have the item object in the Homes component where we are mapping over the homes data array, we can pass the item to the openModal function and setHouseDataModal to the item passed to the openModal function.
//App.js
 const openModal = (item) => {
   setHouseDataModal(item);
   bottomSheetModalRef.current.present();
 };

 <FlatList
         keyExtractor={(item) => item.id}
         data={homes}
         renderItem={({ item }) => (
           <Homes {...item} onPress={() => openModal(item)} />
         )}
       />
Then, in the BottomSheetModalComponent, we can spread the item object like this:
 <BottomSheetModal
       ref={bottomSheetModalRef}
       index={0}
       snapPoints={snapPoints}
       style={styles.bottomSheet}
     >
       <BottomSheetModalComponent {...houseDataModal} />
     </BottomSheetModal>
Lastly, we can destructure all the values we need from the returned API data and render them in the modal bottom sheet:
//BottomSheetModalComponent.js
import { StyleSheet, Text, View, Image } from "react-native";
import React from "react";
import { FontAwesome } from "@expo/vector-icons";
import { Fontisto } from "@expo/vector-icons";
import { MaterialIcons } from "@expo/vector-icons";
import { MaterialCommunityIcons } from "@expo/vector-icons";

const BottomSheetModalComponent = ({
 contactName,
 agency,
 rooms,
 baths,
 title,
 price,
 coverPhoto,
 isVerified,
 area,
 phoneNumber,
}) => {
 return (
   <View style={styles.container}>
     {/* text header */}
     <View style={styles.textContainer}>
       <Text style={styles.text}>{title}</Text>
     </View>
     {/* image */}
     <View style={styles.imageContainer}>
       <Image source= style={styles.image} />
     </View>

     {/* furniture */}
     <View style={styles.furniture}>
       {/* rooms */}
       <View style={styles.roomsContainer}>
         <Fontisto name="room" size={24} color="black" />
         <Text style={styles.subtext}>{rooms}</Text>
       </View>

       {/* baths */}
       <View style={styles.bathsContainer}>
         <FontAwesome name="bathtub" size={24} color="black" />
         <Text style={styles.subtext}>{baths}</Text>
       </View>

       {/* area */}
       <View style={styles.areaContainer}>
         <MaterialCommunityIcons name="island" size={24} color="black" />
         <Text>{area.toLocaleString()} Sq.km</Text>
       </View>
       <Text style={styles.price}> AED {price.toLocaleString()}</Text>
     </View>
     {/* end of furniture */}

     <View style={styles.details}>
       <MaterialIcons
         name={isVerified ? "verified" : null}
         size={24}
         color="blue"
       />
       <Image source= style={styles.logo} />
       <Text style={styles.name}>{contactName}</Text>
       <Text style={styles.phone}>{phoneNumber.mobile}</Text>
     </View>
   </View>
 );
};

export default BottomSheetModalComponent;
Styling the modal bottom sheet
Now, we can style our bottom sheet to suit our preference as follows:
>const styles = StyleSheet.create({
 container: {
   backgroundColor: "lavender",
   flex: 1,
 },
 textContainer: {
   marginTop: 10,
 },
 text: {
   textAlign: "center",
   fontWeight: "bold",
 },
 imageContainer: {
   justifyContent: "center",
   alignItems: "center",
   marginTop: 10,
 },
 furniture: {
   flexDirection: "row",
   justifyContent: "space-around",
   marginTop: 20,
   alignItems: "center",
 },
 roomsContainer: {
   flexDirection: "row",
   justifyContent: "center",
   alignItems: "center",
 },
 subtext: {
   marginLeft: 5,
 },
 bathsContainer: {
   flexDirection: "row",
   justifyContent: "center",
   alignItems: "center",
 },
 details: {
   flexDirection: "row",
   justifyContent: "center",
   alignItems: "center",
   marginTop: 20,
 },
 logo: {
   width: 25,
   height: 25,
   marginRight: 15,
   marginLeft: 15,
 },
 image: {
   width: 180,
   height: 180,
 },
 price: {
   fontWeight: "bold",
 },
 name: {
   fontWeight: "bold",
   marginRight: 10,
 },
 phone: {
   fontWeight: "bold",
 },
 areaContainer: {
   flexDirection: "row",
   justifyContent: "center",
   alignItems: "center",
 },
});
Great! We’ve applied the styles to our modal bottom sheet so they can be displayed in a more presentable way. We can see our title, property image, icons, and other details properly arranged.
We can take a look at what we have in our modal bottom sheet when we click on the View Details button:
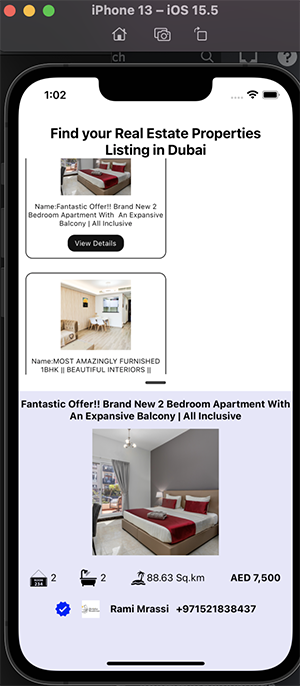
There we have it — we have successfully implemented a modal bottom sheet in a React Native application. We fetch the data from an API to render a list of properties and display this modal bottom sheet when the View Details button is triggered.
Conclusion
Our modal bottom sheet is ready! In this tutorial, we learned how we can use the @gorhom/bottom-sheet library to create a modal bottom sheet in our React Native applications.
We also learned how to share data between the rendered component and the modal bottom sheet for specific use cases, i.e., where we need to display more data to the user when the modal bottom sheet pops up.
If you’d like, you can integrate and modify this example in your own React Native project. You can find the full code in my repository here.
The post Creating and styling a modal bottom sheet in React Native appeared first on LogRocket Blog.
from LogRocket Blog https://ift.tt/mvqdj7X
Gain $200 in a week
via Read more


