


GraphCommerce is a React frontend framework that allows developers to create ecommerce storefronts connected with Magento.
By combining the ecommerce capabilities of Magento and the convenience of React, developers get access to many features such as:
- Next.js static site generation (aka SSG) capability
- PWA support thanks to next-pwa
- Magento’s ecommerce features such as cart and checkout
- the ability to store and fetch content from GraphCMS
In this tutorial, you will learn how to create an ecommerce store with GraphCommerce. You will discover where the PWA configuration and the payment methods are set up. Finally, you will create your own GraphCMS project and connect it to your GraphCommerce project. You can jump to any of these steps:
- Step 1: Create a GraphCommerce project
- Step 2: Launch your GraphCommerce project
- (Optional) Create a GraphCMS project
Step 1: Create a GraphCommerce project
The starter project for GraphCommerce is in the GraphCommerce GitHub repository under the examples folder.
To get the repository, start by cloning it:
git clone https://github.com/graphcommerce-org/graphcommerce.git
Once that’s done, you should have a folder called graphcommerce. To get the demo project, you should create a project beside your GraphCommerce one (not inside of it as you will be deleting the graphcommerce folder).
To create that folder, run the following command:
mkdir pwa-graphcommerce
Then, copy the starter project inside graphcommerce/examples/magento-graphcms/ into the folder you previously created. You can also delete the graphcommerce folder as you no longer need it.
cp -R graphcommerce/examples/magento-graphcms/. pwa-graphcommerce && rm -rf graphcommerce
With your new folder filled with all the necessary files, you can move inside of it.
cd pwa-graphcommerce
When inside your pwa-graphcommerce folder, you can create the .env necessary to run your application. You can copy it directly from the .env.example file supplied to you.
cp -R .env.example .env
You should also remove some of the unnecessary files and folders in your project.
rm CHANGELOG.md
rm -rf node_modules && rm -rf .next
Step 2: Launch your GraphCommerce project
Once you have finished step 1, you are ready to launch the application. To do so, you should install all the dependencies with:
yarn
Once the dependencies are installed, you need to also generate your client code based on your GraphQL schema and query documents. You can accomplish that by running the command:
yarn codegen
Finally, you can start your development server.
yarn dev
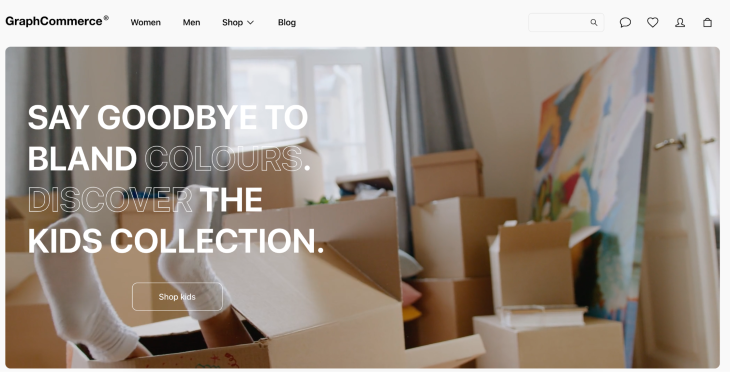
If you visit http://localhost:3000, you should see this:
Below are some things to note as you launch your GraphCommerce project.
PWA support
The PWA functionalities are offered through the library next-pwa. When you start your development server, you should see this in the server log:
[next] > [PWA] PWA support is disabled
You can see the configuration in your next.config.js. Inside you should see:
const nextConfig = {
  ...
    pwa: {
      dest: 'public',
      disable: process.env.NODE_ENV === 'development',
  },
  ...
}
Remove the disable line to enable PWA support on your local server.
Payment methods
The GraphCommerce project offers 2 payments methods for you to use:
- Mollie
- Braintree
If you would like to remove one of them, you will need to remove it from your package.json first.
Finally, head into your pages/checkout/payment.tsx and remove their references in this file.
(Optional) Create a GraphCMS project
Your project is currently using a demo Magento and GraphCMS. You can change that by configuring the API Keys in the .env file. In this section, you will discover how to create your own GraphCMS and link it to your project.
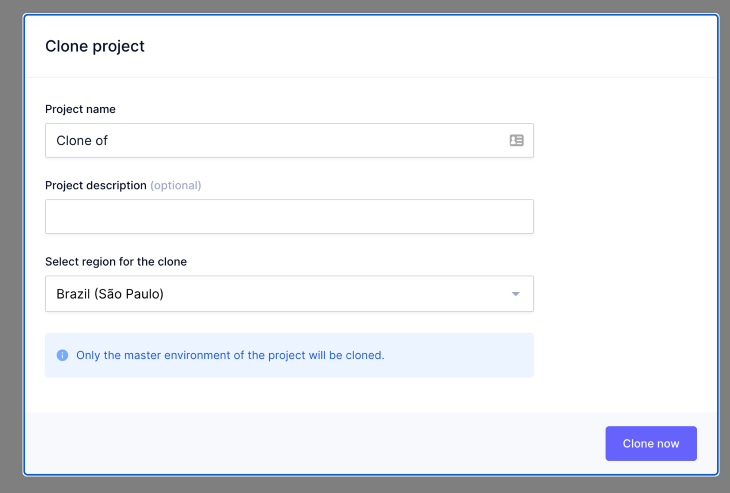
To start with, register to Hygraph and clone the default starter project. To do it, go to this address to clone the project: https://app.hygraph.com/clone/caddaa93cfa9436a9e76ae9c0F34d257
Once created, you can get the necessary API endpoint from your Project Settings (the cog in the left-hand side navigation) and then in API Access. In this page, you will see the endpoints section. From there, you can copy the Content API endpoint.
Then, head to your .env file and replace the GRAPHCMS_URL demo URL with your new URL.
You will have to kill your server and regenerate the files with yarn codegen.
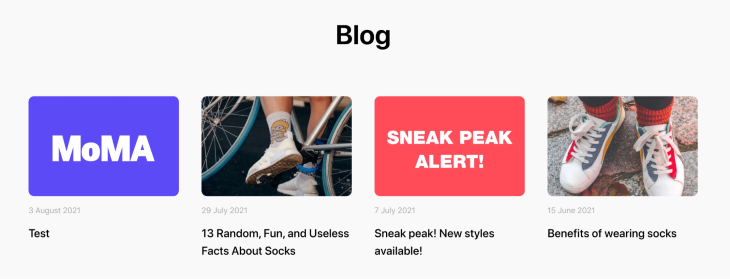
Once that is set up, you can change your content and see the changes reflected. For example, head to Content > Blogposts. Change the title of one of your posts to Test.

Once you go back to your app, you should see the changes reflected.
Conclusion
GraphCommerce is a frontend framework built in React. Its purpose is to offer a PWA for Magento 2 developers. With GraphCommerce, developers can create and customize their storefront quickly and easily.
In this tutorial, you learned how to set up and launched a GraphCommerce app using demo data. Then, you discovered how to create your own GraphCMS instance and link it to your GraphCommerce application. Enjoy testing out your new application.
The post Build a PWA with GraphCommerce and Next.js appeared first on LogRocket Blog.
from LogRocket Blog https://ift.tt/0RGWhLg
Gain $200 in a week
via Read more


