Axios is a promise-based HTTP client library for both browsers and Node.js applications, which means it can be used in both frontend JavaScript applications and backend Node servers.
In this article, we will look at how to use Axios in a simple Vue.js application. Vue is a simple frontend JavaScript framework, so the Axios use case here will be for the browser.
We will cover:
- Prerequisites for this tutorial using Axios with Vue.js
- Setting up our Vue.js project
- Adding Axios to our Vue.js app
- Using Axios with a simple import in your Vue.js component
- Using Axios in our Vue.js project by creating a plugin
Prerequisites for this tutorial using Axios with Vue.js
To follow along, you’ll need to install the following:
- Node.js v14 or newer
- A JavaScript package manager
- An IDE or text editor of your choice, like Sublime Text or Visual Studio Code
We’ll use npm as our JavaScript package manager, which is included when you install Node.
Setting up our Vue.js project
We will create our project using the Vue CLI, starting by running the following command:
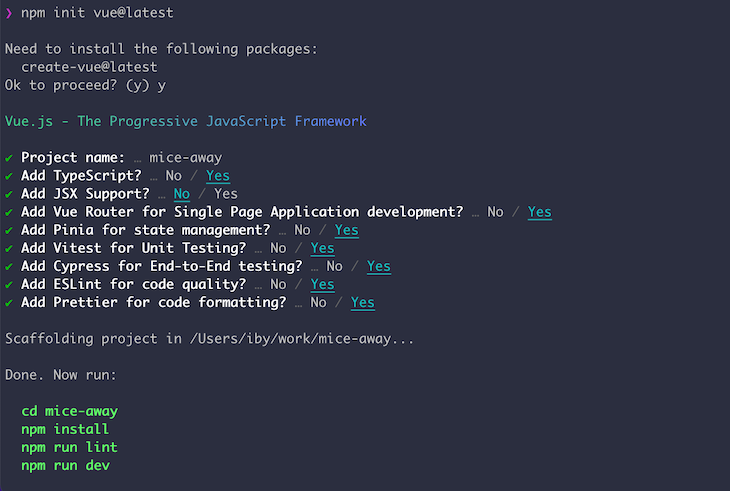
$ npm init vue@latest
This command prompts us with options on how we would like to set up our project.
I’ve chosen to name the project mice-away because — you guessed it — we’re building a fun cat-related app! We will also set it up to use TypeScript.
Here’s a vue view (I couldn’t help it  ) of my project configuration; feel free to change yours as you prefer:

Axios provides access to the different HTTP methods through functions of the respective names. For example, you can use .post(…) for POST requests, or you can use .get(…) for GET requests, etc. Let’s look at options for using Axios for HTTP requests in our Vue project!
Adding Axios to our Vue.js app
We can install Axios by running the following command:
$ npm i axios
Now that Axios is installed, we’ll look at two ways to use it in our project.
Using Axios with a simple import in your Vue.js component
You can use Axios in your Vue component by simply importing it in the component where you need to make an HTTP request. Here’s an example:
// AnimalFacts.vue


<template>
    <div class="row">
        <div class="col-md-12">
            <h3>Cat Facts</h3>
        </div>
        <div class="col-md-12">
            <ul class="list-group">
                <li v-for="(fact, index) in catFacts" :key="index" class="list-group-item">. </li>
            </ul>
        </div>
        <div class="row mt-3">
            <div class="col-md-12 text-center">
                <button @click="loadMoreFacts" class="btn btn-md btn-primary"></button>
            </div>
        </div>
    </div>
</template>
<script lang="ts">
    import { defineComponent } from 'vue'
    import axios from 'axios'
    interface AnimalFacts {
        text: string
    }
    export default defineComponent({
        name: 'AnimalFacts',
        data() {
            return {
                catFacts: [] as AnimalFacts[],
                fetchingFacts: false
            }
        },
        methods: {
            async fetchCatFacts() {
                const catFactsResponse = await axios.get<AnimalFacts[]>('https://cat-fact.herokuapp.com/facts/random?animal_type=cat&amount=5')
                this.catFacts = catFactsResponse.data
            },
            async loadMoreFacts() {
                this.fetchingFacts = true
                const catFactsResponse = await axios.get<AnimalFacts[]>('https://cat-fact.herokuapp.com/facts/random?animal_type=cat&amount=5')
                this.catFacts.push(...(catFactsResponse.data || []))

                this.fetchingFacts = false
            }
        },
        async mounted() {
            await this.fetchCatFacts()
        }
    })
</script>
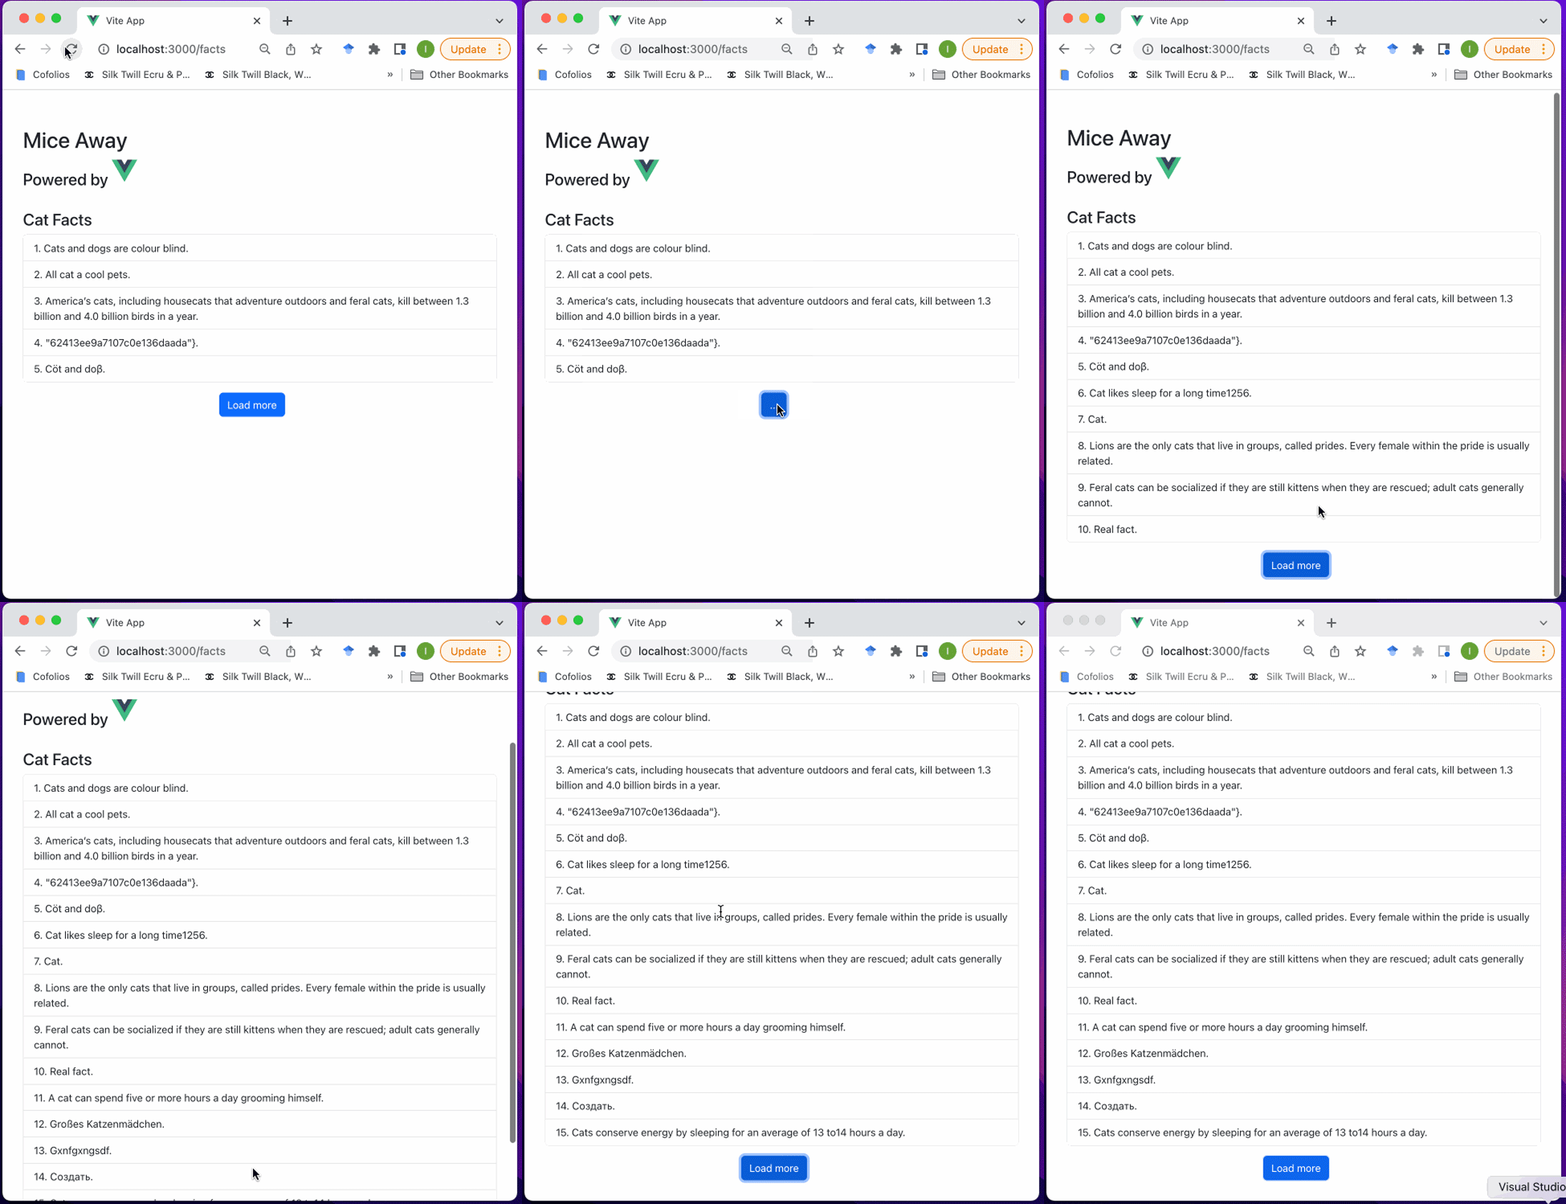
In this example, we imported Axios in our component and used it within one of the component methods to fetch data for display on the page by calling the GET method. You can see the result of this method below:

Using Axios in our Vue.js project by creating a plugin
Another option for using Axios in our project is to create a plugin and assign a global Axios instance to our project. This option is useful when you are building an app to consume a specific API, which can be configured as the base URL.
Let’s create our Axios plugin!
First, we’ll create a directory to house our plugin by running the following in our terminal:
$ cd src/
$ mkdir plugins
Next, we will create our Axios plugin file axios.ts by running the following in our terminal:
$ touch axios.ts
Then, in our newly created axios.ts file, we will create an Axios instance and make it a global property:
// axios.ts

import axios from 'axios'
import type {App} from 'vue'

interface AxiosOptions {
    baseUrl?: string
    token?: string
}

export default {
    install: (app: App, options: AxiosOptions) => {
        app.config.globalProperties.$axios = axios.create({
            baseURL: options.baseUrl,
            headers: {
                Authorization: options.token ? `Bearer ${options.token}` : '',
            }
        })
    }
}
Now, we will register our plugin to our Vue instance in main.ts. While registering our Axios plugin, we will pass in the instance options, including our baseUrl:
// main.ts

import { createApp } from 'vue'
import { createPinia } from 'pinia'

import App from './App.vue'
import router from './router'
import axios from './plugins/axios'

const app = createApp(App)

app.use(createPinia())
app.use(router)
app.use(axios, {
    baseUrl: 'https://cataas.com/',
})

app.mount('#app')
Now that we have registered Axios, we have a global Axios object accessible as this.$axios. Let’s use it in our component:
// HomeView.vue

<script setup lang="ts">
</script>
<template>
  <main>
    <div class="row">
      <div class="col-md-12 text-center mb-3">
        <span @click="selectTag(tag)" v-for="(tag, index) in visibileTags" :key="index"
          class="badge rounded-pill fs-5 me-2" :class="[tag === activeTag ? 'text-bg-primary' : 'text-bg-secondary']">
            #
        </span>
        <span @click="showNext()" class="badge rounded-pill text-bg-light fs-4">...</span>
      </div>
    </div>
    <div v-if="catImage" class="row">
      <div class="col-md-12 text-center">
        <img :src="catImage" class="img-fluid" height="500" width="450" :alt="activeTag ?? 'Default image'">
      </div>
    </div>
  </main>
</template>
<script lang="ts">
import { defineComponent } from 'vue'
import type {AxiosInstance} from 'axios'

declare module '@vue/runtime-core' {
  interface ComponentCustomProperties {
    $axios: AxiosInstance
    catTags: string[]
  }
}

interface DogBreed {
  name: string
}

export default defineComponent({
  name: 'HomeView',
  data() {
    return {
      catTags: [] as string[],
      displayStart: 0,
      displayCount: 5,
      activeTag: '',
      catImage: '',
    };
  },
  computed: {
    cleanCatTags() {
      return this.catTags.filter((tag) => tag !== '').map((tag) => tag.replace(/[&\/\\#,+()$~%.'":*?<>{}]/g, ''))
    },
    totalTags() {
      return this.cleanCatTags.length
    },
    displayEnd() {
      const sliceEnd = this.displayCount + this.displayStart
      return this.totalTags > sliceEnd ? sliceEnd : this.totalTags
    },
    visibileTags() {
      return this.cleanCatTags.slice(this.displayStart, this.displayEnd)
    },
    hasNextTags() {
      return this.displayEnd < this.totalTags
    }
  },
  methods: {
    async fetchCatTags() {
      const tagsResponse = await this.$axios.get('/api/tags')
      this.catTags = tagsResponse.data
    },
    showNext() {
      this.displayStart += this.displayCount
      this.selectTag(this.cleanCatTags[this.displayStart])
    },
    selectTag(tag: string) {
      const baseUrl = 'https://cataas.com/'
      this.catImage = `${baseUrl}cat/${tag}`
      this.activeTag = tag
    },
    loadDefaultCatImage() {
      const baseUrl = 'https://cataas.com/'
      this.catImage = `${baseUrl}cat/gif`
    }
  },
  async mounted() {
    await this.fetchCatTags()
    this.loadDefaultCatImage()
  },
});
</script>
In our component, we must overwrite the ComponentCustomProperties type to include $axios as a property. Without this, we would get the following compiler error:
Property $axios does not exist on type ComponentCustomProperties
In order to register $axios, we must also install Axios types by running npm i @types/axios and importing the Axios instance type AxiosInstance.
In the fetchCatTags method of our HomeView component, we used this.$axios to fetch cat tags, with which we can display cat images.
The difference between using our plugin instance and importing Axios directly into our component is that with the plugin, we can configure options for our Axios instance to avoid passing certain values for each request.
For example, with our plugin, we don’t have to pass in the baseUrl, and our request to /api/tags resolves to the baseUrl we configure.
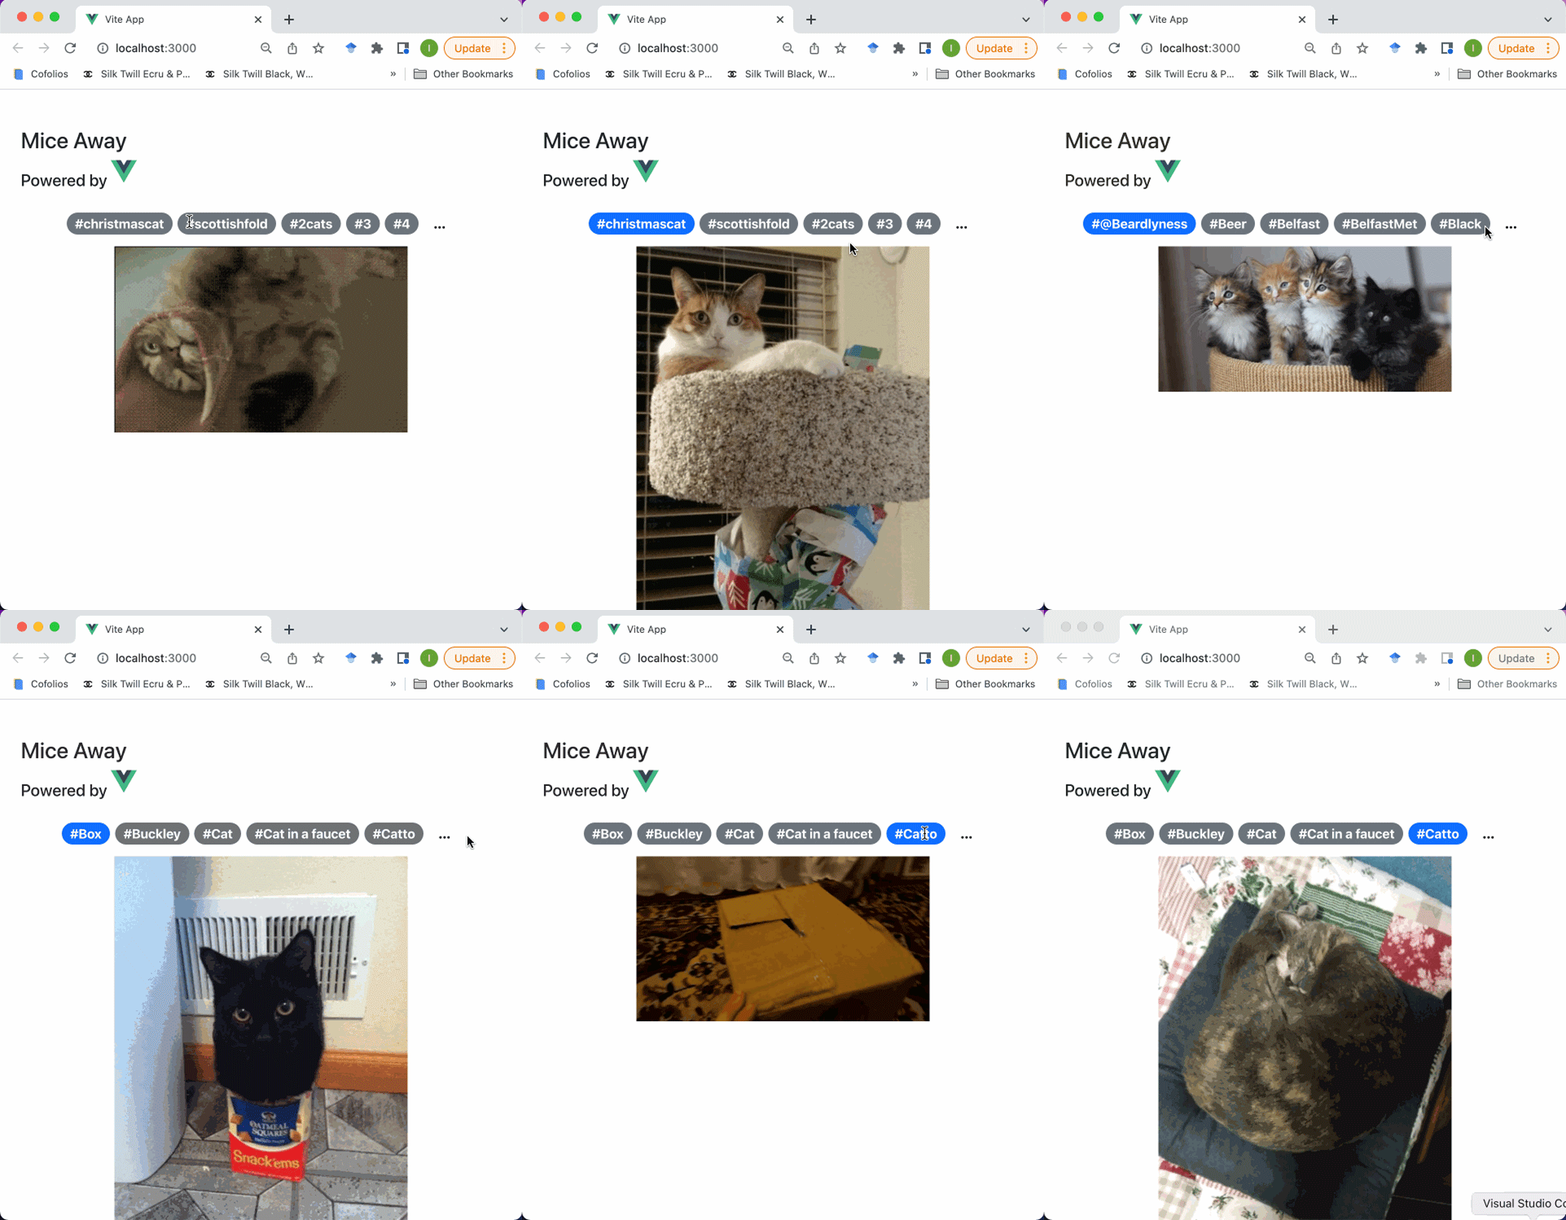
You can see the result of using Axios with Vue by creating a plugin below:

Conclusion
In this article, we tried out two ways of using Axios in a Vue project.
The first option was importing the Axios object directly into our component, which we used to fetch cat facts from a cool cat facts API.
Our second option was creating an Axios plugin that injected a global Axios object. We also configured our Axios instance’s base URL to a cat as a service API, which meant we didn’t have to specify the full URL in our requests.
You can find the entire code used in this article in my Github repo.
I hope you found this article useful. Please share any thoughts or questions you might have in the comment section!
The post How to use Axios with Vue.js appeared first on LogRocket Blog.
from LogRocket Blog https://ift.tt/bQzcqUP
Gain $200 in a week
via Read more


