


Often when you start developing a game in Unity, you want a trimmed-down version of an environment where you can move your characters around. ProBuilder allows you to quickly create and prototype 3D levels, as well as create basic 3D models without leaving Unity.
In this article, you will learn how to design a simple level in Unity using ProBuilder.
- Unity project setup
- Setting up ProBuilder with Unity
- Selection modes in Unity
- Create a room in Unity using ProBuilder
- Bring a character into your Unity environment
This is a sneak preview of our final result.
Unity project setup
If you haven’t done so already, create a new Unity 3D project and name it “Hello ProBuilder.”
You can do so by launching Unity Hub on your computer and clicking New Project.
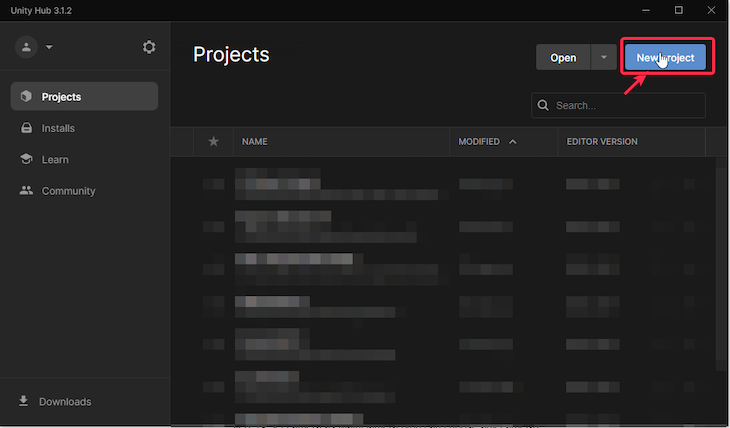
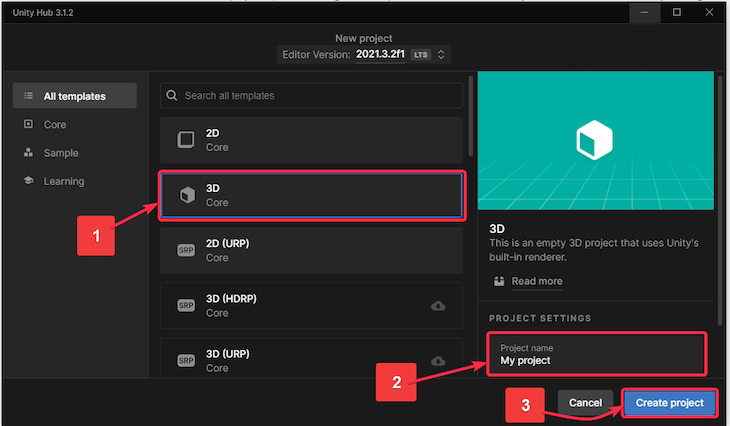
After clicking on New Project, the window below pops up. To ensure that we are creating a 3D project, complete the following steps:
- Select 3D from the templates
- Update the Project Name from “My Project” to “Hello ProBuilder”
- Click the Create Project button
The project will take a few minutes to open up in Unity.
Keep the project open, and let’s work on integrating ProBuilder.
Setting up ProBuilder with Unity
In this step, you will add the ProBuilder package to the Hello ProBuilder project in Unity.
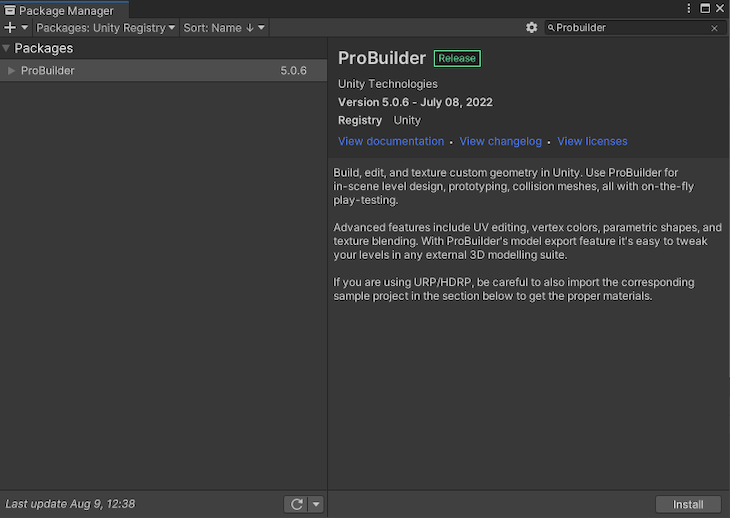
To start, download the ProBuilder package. To do so, go to Window > Package Manager. Switch Packages to Unity Registry. Search for ProBuilder and click Install.
To verify if ProBuilder is installed successfully, go to the Project panel on the bottom left-hand side of the Unity editor. Expand Packages. If you see ProBuilder on the list, you know that ProBuilder was successfully installed.
In the top toolbar, click Tools > ProBuilder > ProBuilder Window. Dock the ProBuilder window wherever you want. I like to dock it just next to the Hierarchy panel.

Great. You are all set to explore the different features of ProBuilder.
Using shapes in ProBuilder
Let’s begin with New Shape.
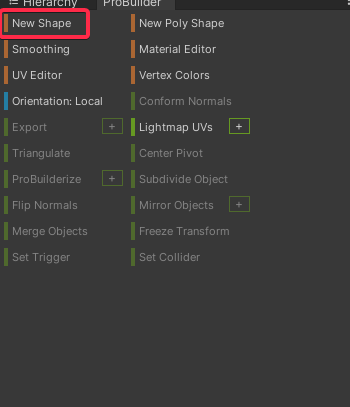
The New Shape feature allows you to create 12 different primitive shapes:
- Arch
- Cone
- Cube
- Cylinder
- Door
- Pipe
- Plane
- Prism
- Sphere
- Sprite
- Stairs
- Torus
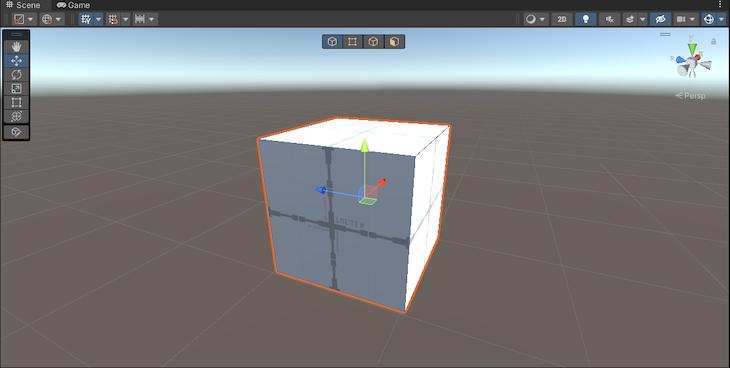
Let’s begin with bringing a cube into our scene. To do so, click New Shape. You will see a Create Shape panel open in the right-hand corner of your Scene panel. Select the cube icon. Hold left click and drag the shape out like this:
Set the cube size to 1 unit across X, Y, and Z.
Note: If you go back to the Hierarchy panel, you will see that the new shape (i.e., the cube) is a GameObject.
Selection modes in Unity
The four buttons at the top of the Scene panel are used to switch between the following four selection modes:

- Object selection
- Vertex selection
- Edge selection
- Face selection
This level of manipulation is not possible with the standard 3D objects in Unity. In other words, you can create a cube GameObject (right click > 3D Object > Cube), but you cannot control its vertices, edges, or faces within Unity. This is why creating a cube (or any other shape) with ProBuilder is a better alternative.
There are certain operations that you can perform on your 3D object to help you create the shape that you want to achieve. The three operations that you will perform in this article are:
- Flipping normals
- Extrusion
- Bevel
Create a room in Unity using ProBuilder
Let’s begin by creating the boundaries of a room. It’s easier than you think.
- Create a cube (using ProBuilder and not Unity’s standard 3D object)
- Keep the dimensions 5 x 2 x 5. This is what you get
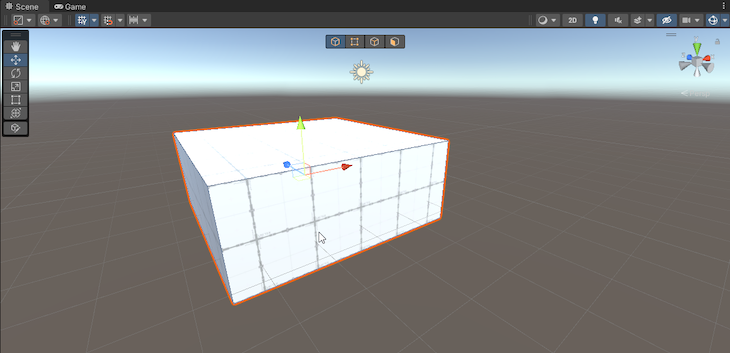
- Make sure you are in the Object selection mode. Select the cube. Click Flip Normals from the ProBuilder panel, and you get a room. Simple, right?
Now let’s add stairs inside this room.
First, scale the room up 10x by going to the Hierarchy panel > Select Cube. From the Inspector panel on the right-hand side, ensure you enable constrained proportions for the Scale Property. Then put 10 as the scale for X, Y, and Z.
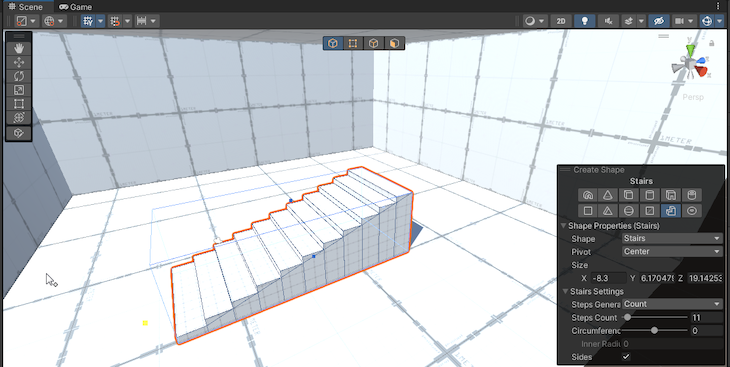
Next, switch to the ProBuilder panel, click New Shape, then click the Stairs icon from the Create Shape panel. Left click on the scene and hold. Drag to stretch along the X and Z axis. Release the left click. Move the cursor along the +ve Y axis to set the height of the stair. Do a left click and that’s it. You have created a stairway.
Pro tip: Make sure that you do not select any other object instantly after creating a new shape. Otherwise, you won’t be able to change the stairs from their configuration window (or Create Shape window). You will have to delete the existing stair and create another one. This might be difficult during the first few attempts, but you will get the hang of it with some practice. My advice here would be to go slow at first. Gradually, you will become faster.
Play around with the different Stairs Settings for the stairs here and observe the changes.
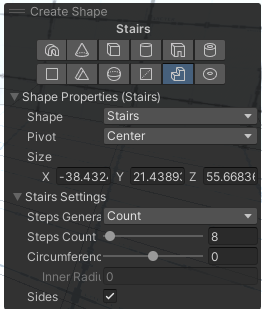
I have kept these settings for the stairs:
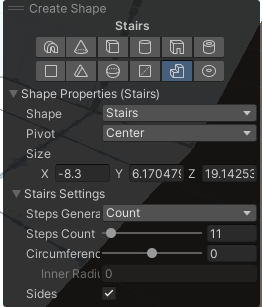
Ignore the values under Shape Properties. You might have different values depending on the look you are going for.
This is what my room looks like:
Now, let’s say that if there was a character going up the stairs, there should be some kind of platform at the end of the stairs to walk around; otherwise, the character would fall down. Let’s build that little platform by using extrusion.
- Switch to Face Selection mode and select the end face of the stairs:
- Hold Shift and drag the selected face forward. This step is called extrusion. You just extruded one face of the stairs.
- Now, increase the length of the platform horizontally, like this:
You can increase the thickness of the platform as much as you want. Feel free to experiment. Think of this as “artistic freedom.”
Let’s see how to bevel now. Beveling can be performed on edges and faces. Technically, if you bevel a face, then all the edges that make up that face are going to become beveled, so it is still only being applied to edges. This is what beveling looks like — the sharp edges of the selected face become rounded (beveled).
To perform beveling, select a face or an edge and click the Bevel button from the ProBuilder panel.
If you click on the + icon on the right side of the Bevel button, you can also adjust the amount of beveling.
Try the other operations, including:
- Subdivide
- Merge
- Delete
See what environment you can come up with.
Bring a character into your Unity environment
Download this free Starter Assets pack from Unity. If you haven’t downloaded it before, it will say “Add to my Assets.” Click that and then click Open in Unity.
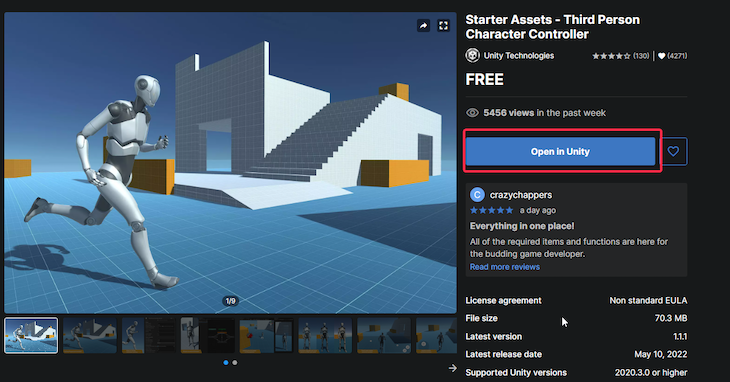
The Package Manager will open automatically in your Unity project. Then, click the Download button in the bottom right-hand corner.
Next, click Import.
Delete the Main Camera from the scene.
Then go to the Assets panel > Starter Assets > ThirdPersonController > Prefabs.
Drag the NestedParentArmature_Unpack prefab into the scene and position it inside the room anywhere you like.
Increase the size of the prefab by changing the scale by 5 (or whatever looks good to you).
From the Hierarchy panel > NestedParentArmature_Unpack > select PlayerArmature. In the Inspector panel, locate the “Third Person Controller” script and change the following values:
- Move Speed = 15 (as per your liking)
- Sprint Speed = 25 (as per your liking)
Click Play to let your character walk around in the environment. Use the W, A, S, and D keys to move around. Hit Space to jump and use the mouse to look around.

Conclusion
Awesome! You just created a level in Unity with ProBuilder.
If you face any issues or need some help, please ping me on Twitter or LinkedIn, and check out my Gumroad page or YouTube channel if you’re looking for more Unity tutorials and resources.
Extra resources
The post How to design a simple level using Probuilder in Unity appeared first on LogRocket Blog.
from LogRocket Blog https://ift.tt/3rhv1qy
Gain $200 in a week
via Read more


