Getting started with your projects as quickly as possible can be a very essential factor in web development – both in business and private contexts. That’s why frameworks like Next.js and libraries like MUI are so popular and useful.
In this blog post, we’ll cover the process of setting up Next.js with MUI through the following sections:
- What is special about the combination of Next.js and MUI?
- Getting started
- Create your custom theme
- Add server-side-rendered styles
- The
emotionStyleTagsarray
Before we have a look at the concrete setup, let me first explain what Next.js and MUI are and why the setup can be different from using MUI in other scenarios.
What is MUI?
MUI (formerly Material UI) is a very well-documented library of components that implements Google’s Material Design system. This library is open source and, hence, fully customizable. Right out of the box, MUI offers production-ready components like buttons, alerts, menus, tables, and much more.
Check out MUI’s docs to get an overview of what they offer.
What is Next.js?
Next.js is a very popular framework for developing fully functional web apps with React. Next.js not only takes everything from you concerning the configuration of your project, but also offers solutions for problems like data fetching and routing.
What is special about the combination of Next.js and MUI?
Another reason why Next.js is so popular is that it allows you to pre-render every page of your web app. As a consequence, Next.js will generate HTML in advance on the server side, instead of making JavaScript do all that on the client side. This behavior normally leads to improved performance and SEO.
However, when combined with MUI, server-side rendering presents us with some challenges. Even though MUI is designed to be rendered on the server side, developers need to make sure that this functionality is correctly integrated — and this is exactly what this blog post is about.
Generally, it is not absolutely necessary to render CSS on the server side. But if you don’t include the styles in your server response and let the CSS be injected by the client, the risk of FOUC (flickering) will be present.
Getting started
To follow along well, I’d recommend having basic knowledge of JavaScript, React and Next.js (especially principles like server-side rendering) will be helpful.
The source code from this blog post can be found here.
In order to get started, let’s create a new Next.js project. For that, change into a directory where you want to store your project and run:
npx create-next-app@latest
In the process, you’ll be asked to name your project. Choose whatever you like here. After that, change into your project with:
cd <project-name>
There is one thing left concerning the setup and that is to install the necessary packages.
npm install @mui/material @emotion/react @emotion/server
You’ll notice that we install packages from a library called Emotion. In short, Emotion is a library that allows you to write CSS in JavaScript and is used in the latest version of MUI (5) to create styles.
Once you have installed all packages, go ahead and start your Next.js application:
npm run dev
Create your custom theme
Before we customize the theme, we can clean up our project. You can delete the API directory in the pages directory, since we won’t implement any API routes in this post.
Secondly, replace all the styles in the Home.module.css file in the styles directory with the following CSS:
.container {
 padding: 0 2rem;
 display: flex;
 flex-direction: column;
 justify-content: center;
 align-items: center;
 height: 100vh;
 background-color: aquamarine;
}
Now, jump over to the index.js file in your pages directory and replace the code with the following:
import styles from "../styles/Home.module.css";
import Switch from "@mui/material/Switch";

const label = { inputProps: { "aria-label": "Switch demo" } };

export default function Home() {
 return (
   <div className={styles.container}>
     <div>
       <span>With default Theme:</span>
     </div>
     <Switch {...label} defaultChecked />
     <Switch {...label} />
     <Switch {...label} disabled defaultChecked />
   </div>
 );
}
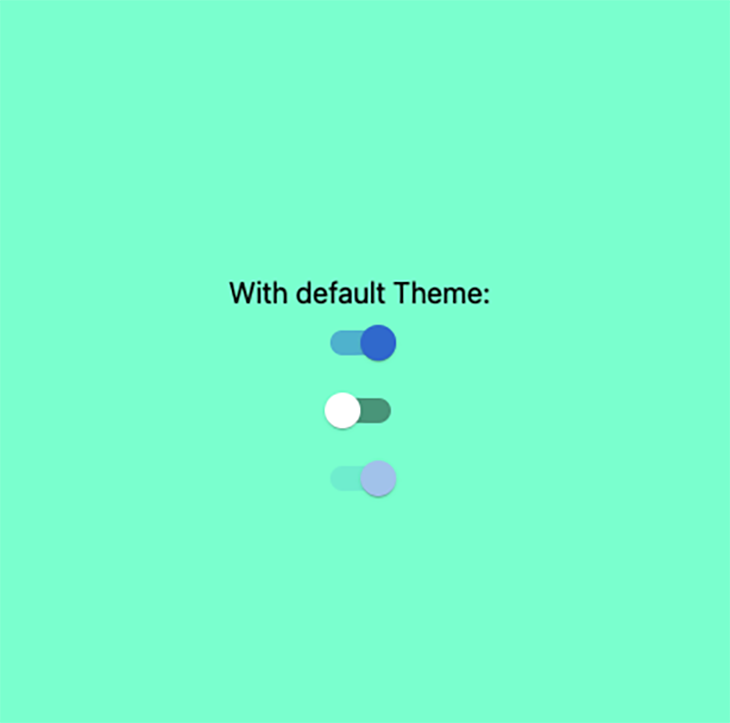
As you can see in the code above, we import a Switch component, which we use three times with three different states. Your webpage should look like this:

At this point, there is no rendering of the styles on the server side yet. Still, our page looks like we intend it to, and it is quite possible that you won’t notice any flickering.
But, if the page gets more complex and extensive, the likelihood of flickering will increase.
Implement the custom theme
Next, let’s actually implement our custom theme. For that, you’ll need to create a new directory at the root level of your project. In my case, I called it utils. Inside that directory, create a file called theme.js and add the following code:
import { createTheme } from "@mui/material/styles";

export const theme = createTheme({
 palette: {
   primary: {
     main: "#fcba03",
   },
 },
});
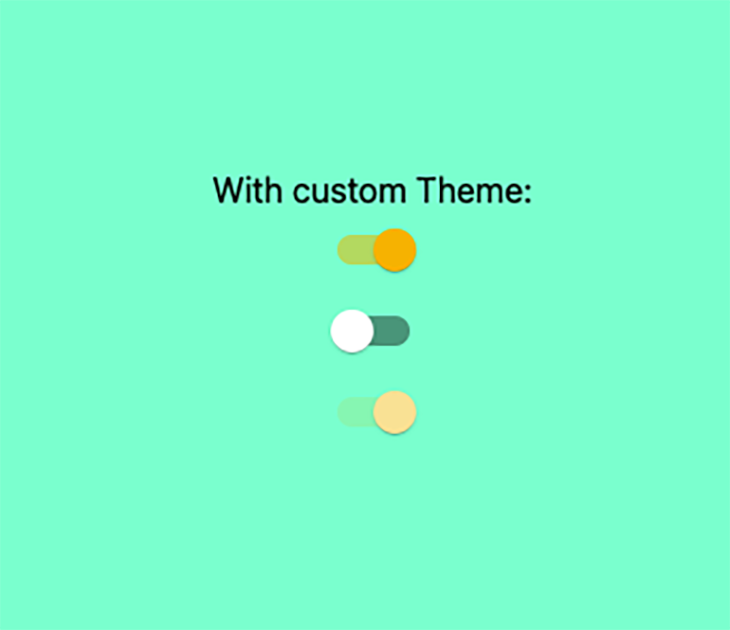
This file will allow you to override MUI’s default theme settings. For the sake of simplicity, we will only change the primary palette to be orange.
To actually apply those changes, we need to tell our webpage to use this custom theme. This is done in the _app.js file in the pages directory:
import "../styles/globals.css";
import { ThemeProvider } from "@mui/material";
import { theme } from "../utils/theme";

function MyApp({ Component, pageProps }) {
 return (
   <ThemeProvider theme={theme}>
     <Component {...pageProps} />
   </ThemeProvider>
 );
}

export default MyApp;
The only thing that needs to be adjusted here is to wrap our component with a ThemeProvider component and pass our custom theme to it. This ThemeProvider component will handle the injection of our theme to our application.
Now, our page should look like this:
 id=”add-server-side-rendered-styles”>Add server-side-rendered styles
To finally add server-side-rendered CSS, we need to add/customize three final files.
First, create a new file in the utils directory called createEmotionCache.js.
import createCache from "@emotion/cache";

export default function createEmotionCache() {
 return createCache({ key: "css", prepend: true });
}
This createEmotionCache function ensures that Emotion’s default settings will be replaced with our custom styles and that this information will be configured both on the client and server sides. The prepend option is set to be true, which will cause our custom styles to load first.
In the next step, we will first provide this cache to the client side in the _app.js file in the pages directory:
import "../styles/globals.css";
import { ThemeProvider } from "@mui/material";
import { theme } from "../utils/theme";
import createEmotionCache from "../utils/createEmotionCache";
import { CacheProvider } from "@emotion/react";

const clientSideEmotionCache = createEmotionCache();

function MyApp({
 Component,
 emotionCache = clientSideEmotionCache,
 pageProps,
}) {
 return (
   <CacheProvider value={emotionCache}>
     <ThemeProvider theme={theme}>
       <Component {...pageProps} />
     </ThemeProvider>
   </CacheProvider>
 );
}

export default MyApp;
In the first line of the code snippet above, we create the client-side cache with the function we just defined. After that, all we need to do is to wrap our component inside a CacheProvider in order to provide our styling to our components.
Lastly, we need to figure out a way to tell the server side to render the styles correctly before the page/response is sent to the clients. This will be done in a custom _document.js file, which we need to add to the pages directory. The aim is to add our styles to the <head> tag of our page. Add following code to the newly created _document.js file:
import * as React from "react";
import Document, { Html, Head, Main, NextScript } from "next/document";
import createEmotionServer from "@emotion/server/create-instance";
import createEmotionCache from "../utils/createEmotionCache";

export default class MyDocument extends Document {
 render() {
   return (
     <Html lang="en">
       <Head>
         {this.props.emotionStyleTags}
       </Head>
       <body>
         <Main />
         <NextScript />
       </body>
     </Html>
   );
 }
}

MyDocument.getInitialProps = async (ctx) => {
 const originalRenderPage = ctx.renderPage;

 const cache = createEmotionCache();
 const { extractCriticalToChunks } = createEmotionServer(cache);

 ctx.renderPage = () =>
   originalRenderPage({
     enhanceApp: (App) =>
       function EnhanceApp(props) {
         return <App emotionCache={cache} {...props} />;
       },
   });

 const initialProps = await Document.getInitialProps(ctx);

 const emotionStyles = extractCriticalToChunks(initialProps.html);
 const emotionStyleTags = emotionStyles.styles.map((style) => (
   <style
     data-emotion={`${style.key} ${style.ids.join(" ")}`}
     key={style.key}
     dangerouslySetInnerHTML=
   />
 ));

 return {
   ...initialProps,
   emotionStyleTags,
 };
};
The code from the snippet above will only run on the server side. Even though the getInitialProps function can also be used on the client side, this code will not be executed on the client side. This is because Next.js is configured in a way that this _document.js file is only being rendered on the server.
If you take a look at the top of the getInitialProps function, you will notice that we are using the same createEmotionCache function as on the client side. Just this cache is then passed to the App component in the ctx.renderPage function as the emotionCache prop.
The emotionStyleTags array
The last thing we’re going to have a closer look at is the emotionStyleTags, which can be found at the bottom of the code snippet in the return statement of our getInitialProps function.
In the end, emotionStyleTags is an array of JSX-elements; respectively, style-tags. These style-tags are created based on this line of code:
const emotionStyles = extractCriticalToChunks(initialProps.html);
This code is from where we grab the styles from Emotion.
Finally, we add emotionStyleTags inside the <Head> component with this line of code:
<Head>
   {this.props.emotionStyleTags}
</Head>
Conclusion
As you can see in this blog post, setting up Next.js in combination with MUI can be sort of a struggle. But considering the advantages of this combination, the trade off is still pretty good. If you want to get started right away, feel free to clone the repo with the code from this blog post.
The post Getting started with MUI and Next.js appeared first on LogRocket Blog.
from LogRocket Blog https://ift.tt/gUf7hGj
via Read more


