


Cardano is a public, proof of stake, decentralized, third-generation blockchain network founded in 2015 by Ethereum co-founder Charles Hoskinson.
The Cardano blockchain was built to foster interoperability across blockchains, scalability, and decentralization to foster mass adoption.
Cardano development is natively in Plutus, Marlowe, or Glow; However, the Cardano community provides an SDK for development in JavaScript and other programming languages.
This tutorial will guide you through getting started with Cardano development in Javascript using Cardanocli-js and Cardano-wallet-js.
- What are Cardanocli-JS and Cardano WalletJS?
- Getting Started using Cardanocli-js
- Creating a Stake Pool using Cardanocli-js
What are Cardanocli-JS and Cardano WalletJS?
Cardanocli-js is the most popular javascript SDK for Cardano blockchain development. It supports a wide range of functionalities you’ll need to develop on the Cardano blockchain including minting NFTs.
Cardano-wallet-js is a javascript SDK for Cardano blockchain development with typescript support. It can be used to create native tokens and NFTs along with several functionalities.
In this publication, you’ll learn how to integrate Cardano blockchain functionalities like creating wallets, stake pools, and getting network information in your Javascript apps.
Prerequisites
To get started, you’ll need to have these installed on your computer/machine.
- Download and install NodeJs from the NodeJs official website, it’s best that you download the latest LTS version of NodeJS.
- Download and Install the CardanoCli executable on your machine, This is a dependency for CardanoCli-JS SDK as it helps with connecting to Cardano blockchain nodes which you need to query and develop on the Cardano blockchain.
- Cardanocli-JS can be installed using this command after you have installed NodeJs.
npm install cardanocli-js
- Cardano-wallet-js can be installed using this npm command.
npm install cardano-wallet-js
Cardano-wallet-js requires that you have a cardano-wallet server running. you can use docker to start a server by running the command below or follow these instructions to get a wallet cardano-wallet server up and running.
wget <https://raw.githubusercontent.com/input-output-hk/cardano-wallet/master/docker-compose.yml>
NETWORK=testnet docker-compose up
- A text editor or IDE of your choice. I’ll be using Jetbrains Webstorm in this tutorial.
Once you have all these setups, create a javascript file in your workspace for this tutorial.
I am using Ubuntu OS, if you’re using Windows or macOS, there might be slight differences in setup.
Getting Started using Cardanocli-js
Connecting to a Cardano Node with Cardanocli-js
Get a node build number for the IOHK website. The node build number is the number in the URL when you open the link in your browser.
Create a bash script in your workspace and enter these commands.
wget -N <https://hydra.iohk.io/build/${NBM}/download/1/mainnet-shelley-genesis.json>
Replace ${NBM} with the node build number from the website and run the bash script using this command in your terminal.
chmod +x fileName.sh
./fileName.sh
The first line changes permissions to make the file executable while the second line executes the file, creating a JSON configuration file in your workspace with the necessary configurations.
The configuration file helps with connecting to a Cardano node on the mainnet or testnet as you specify in your program.
Cardano Development Using Cardanocli-js
First, you import the cardanocli-js SDK for use in your program. In this case, it’s named clijs.
const clijs = require(“cardanocli-js”)
Next, you have to create an instance of the import where you will specify the network, the configurations file path, and an output directory.
const cclijs = new cjs({
network: "mainnet",

directory: __dirname + "output Directory here",

shelleyGenesisPath: __dirname + "config file path here"
})
The network could be a mainnet or testnet depending on your use case.
You can testnet as you follow this tutorial and mainnet in development.
Now that you have set up a blockchain connection instance, you can perform multiple operations with Cardanocli-js
Creating a Cardano Wallet using Cardanocli-js
Creating a Cardano wallet is fairly easy; you have to specify a wallet name as parameters in methods of your cardanocli-js instance as shown below.
const createAWallet = (walletName) => {
cclijs.addressKeyGen(walletName)

cclijs.stakeAddressKeyGen(walletName)

cclijs.stakeAddressBuild(walletName)

cclijs.addressBuild(walletName)

return cclijs.wallet(walletName)
}
The function above creates a wallet with the name specified when the function is called.
console.log(createAWallet(‘your wallet name here”))
Once the function is executed onchain, a directory named priv will be created in your specified outputs folder containing the private and public keys for the wallet you just created.

Querying Wallet Balances using Cardanocli-js
You can query for wallet balances by specifying the name of the wallet in the wallet method of your cardanocli-js instance.
const getBalances = (walletName) => {
const query = cardano.wallet(walletName)

return query.balance()
}
The function above returns the wallet balance of the specified wallet name in a JSON format as thus.
{
utxo : [

    {

        txHash: "7436d178c092222396bd0b5cb71211bd87b098bb9e7e98d1a0f41390c1604711",

        txId: 0,

        amount: [Object]

    }

],

    amount:

{

    lovelace : 350000000

}
}
In the output above, it is assumed that the wallet has the Cardano native asset $ADA.
The balance is displayed in Lovelaces which can be converted to ADA by dividing the value by one million.
Creating a Stake Pool using Cardanocli-js
Stake pools are the custom names for Cardano nodes. They operate similar to Ethereum nodes except that Cardano is a proof of stake blockchain.
Stake pools can be public or private and they have a public address to which network participants can delegate their ADA tokens for rewards.
Creating a stake pool using Cardanocli-js is as easy, and similar to creating a wallet.
const createAStakePool = (poolName) => {
cclijs.nodeKeyGenKES(poolName);

cclijs.nodeKeyGen(poolName);

cclijs.nodeIssueOpCert(poolName);

cclijs.nodeKeyGenVRF(poolName);

return cclijs.pool(poolName);
};
The function above creates a stakepool associated with the name you’ve specified and outputs files in your specified directory just as the createAWallet function did. The function returns the pool name when it’s called.
console.log(createAWallet(‘your stakepool name here”))
You have successfully created a Cardano stake pool and just like when you created a wallet above, the files have been created in your output directory.
Getting Started with Cardano-wallet-js
Once you have installed Cardano-wallet-js, you can import it for use.
const { seed, WalletServer: walletserver } = require(‘cardano-wallet-js’);
let walletServer = WalletServer.init(‘Your wallet server host URL’);
The wallet server instance is created and initialized using the link to your wallet server. The seed will be used for wallet creation.
Creating a Wallet using Cardano-wallet-js
Creating a Cardano wallet using Cardano-wallet-js is more practical than Cardanocli-js. You can create a wallet using the function below.
let recoveryPhrase = seed.generateRecoveryPhrase()
let passPhrase = “name”
let walletName = “name”
let wallet = await walletServer.createOrRestoreShelleyWallet(walletName, mnemonic, passPhrase)
console.log(seed.toMnemonicList(recoveryPhrase))
In the code above, the seed is used to generate a recovery phrase, then, the passPhrase and walletName variables are created and passed into the wallet variable which creates or restores a Cardano Shelley wallet.
The last line logs the list of mnemonics to the console, Shelly era wallet mnemonics are 24 words.
Querying Cardano Blockchain Information
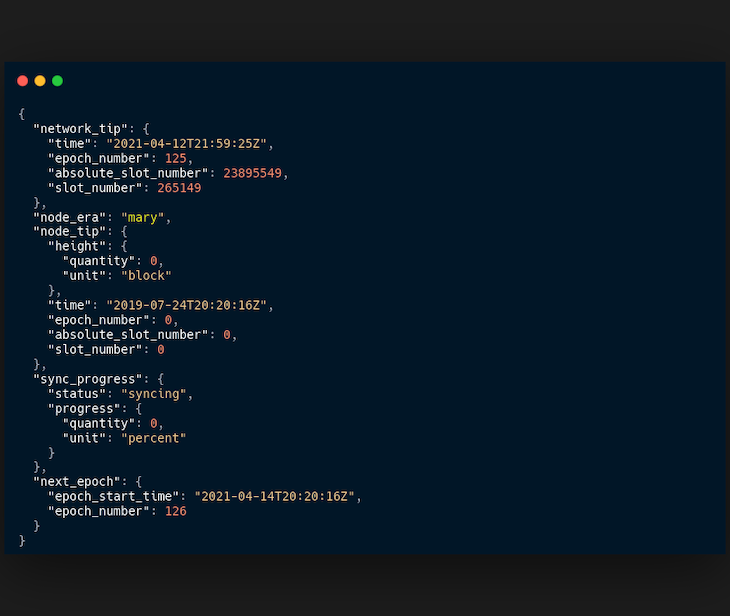
You can query the state of the Cardano blockchain using the getNetworkInformation method on the wallet server instance you created.
let query = await walletServer.getNetworkInformation()
console.log(query)
This would output a JSON containing various parameters such as network status, node information, blockchain sync progress, and epoch information from which you can select the specific data you need.
Querying Wallet Address Transactions
Querying the transactions of a wallet address can come in handy in many cases. You can do that using the getTransactions method of the wallet instance.
let transactions = await wallet.getTransactions();
console.log(transactions)
You can pass in a date range into the getTransactions method to select transactions in a specific date range.
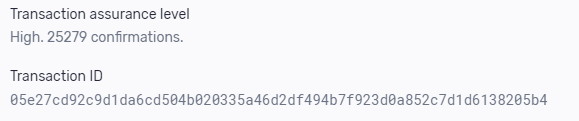
Querying Specific Transaction Details
Functionality for querying specific transaction details can be done by passing the transaction ID of the transaction.
let transaction = await wallet.getTransaction(“transaction id”);
The transaction ID is a set of random strings assigned after a transaction was completed and can be copied from the wallet or blockchain provider.
Conclusion
The Cardanocli-js and Cardano-wallet-js SDKs make it easy to interact with the Cardano blockchain using Javascript instead of writing Plutus, Marlowe Glow, or Bash Scripts to interact with the blockchain.
However, it is impossible to write Cardano native smart contracts in javascript at the time. You can integrate the Cardanocli-js and Cardano-wallet-js SDKs into your Web3.0 and Web2.0 Projects as you please.
The post Interacting with the Cardano Blockchain using JavaScript appeared first on LogRocket Blog.
from LogRocket Blog https://ift.tt/PEezlKt
via Read more


