


In this article, I will show you how to create a 360 VR video in Unity with the help of two tools:
- Unity Recorder
- Google Spatial Media Metadata Injector
This technique can be used to create 360 VR videos for any scene inside Unity. For demonstration purposes, I will be using the free Apartment Kit asset available in the Unity Asset Store, and this is what you will get after following the steps in this article.
Play the YouTube video and swipe across the video player to get a 360 view of the apartment.
Let’s get started:
- Project setup
- Record a 360 VR Video of any scene in Unity
- Add 360 capability to a video using Google’s Spatial Media Meta Data Injector
Additionally, here’s the full video tutorial:
Project setup
If you haven’t done so already, create a new Unity 3D project and name it “VR 360 Apartment.”
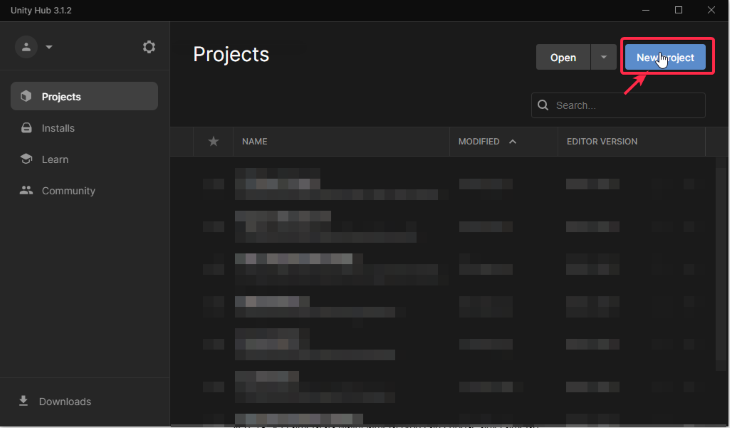
You can do so by launching Unity Hub on your computer and clicking New Project.
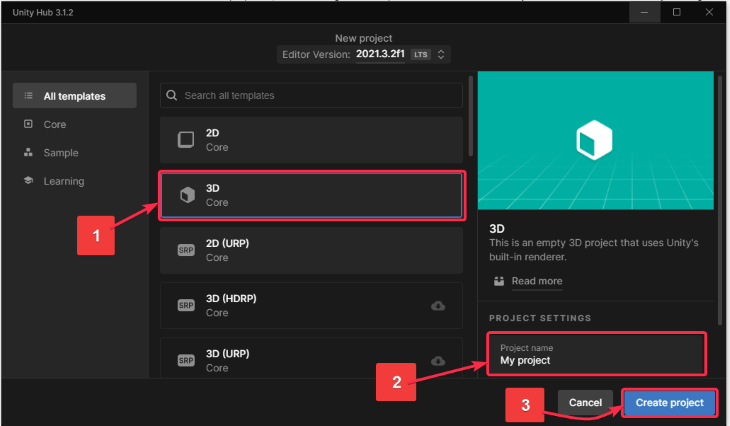
After clicking on New Project, the below window pops up. To ensure that we are creating a 3D project, do the following steps:
- Select 3D from the templates
- Update the Project Name from My Project to VR 360 Apartment
- Click the Create Project button
The project will take a few minutes to open up in Unity.
Once the project is open, go to the Unity Asset Store and get the Apartment Kit asset. Instead of the Open in Unity button (in the image below), you will see the Add to my Assets button. After clicking the Add to my Assets button, you will also see the Open in Unity button.
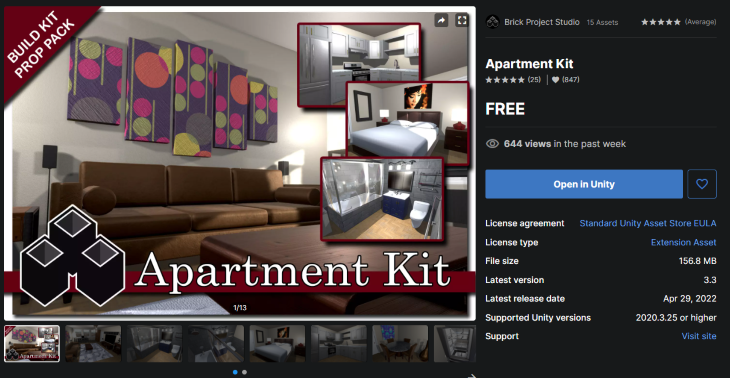
When the Open in Unity button appears, click on it.
This is what you will see:
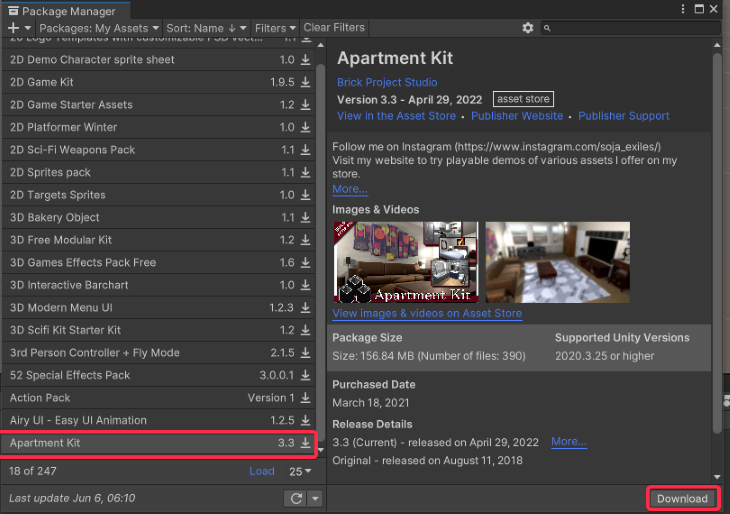
This window is called the Package Manager. On the left-hand side, you will see all the assets that you have purchased from the Unity Asset Store. On the right-hand side, you get the description of that asset. Convenient, isn’t it?
Click Download. Once the asset gets downloaded, click Import.

After clicking on Import, simply click on the Install/Upgrade button if you get a warning. After that, you will see this pop-up:
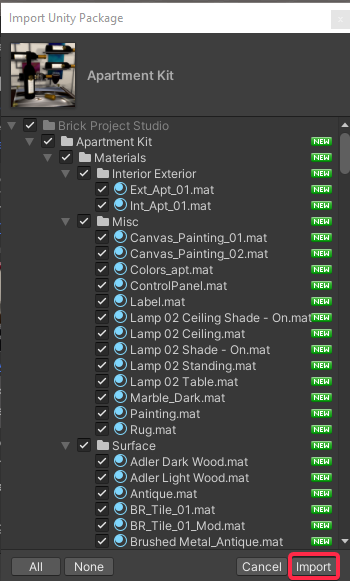
N.B., many times when you import a third-party asset like the one above, you need not import all the files of that asset in your project. This is why Unity gives you the option of selecting specific files for your project so that you don’t bloat your project with unnecessary things.
For the purpose of this tutorial, ensure that all the files are checked and then hit Import.
After the asset is imported, you will see a new folder called Brick Project Studio under Assets in the Project Panel on the bottom left-hand side. This means that you have successfully downloaded the Apartment Kit asset. 
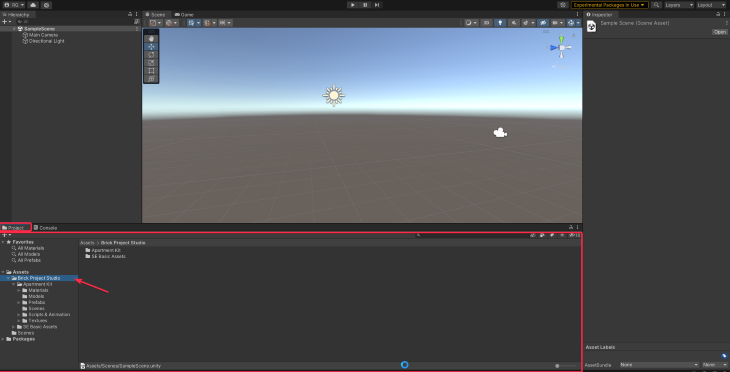
 If the assets panel looks a bit different for you, you can change the view by dragging the little switch left and right (as demonstrated below). The switch is located on the bottom right-hand side.
Now click on the Scenes folder located under Assets > Brick Project Studio > Apartment Kit. And now double click to open the Scene_01.unity file.
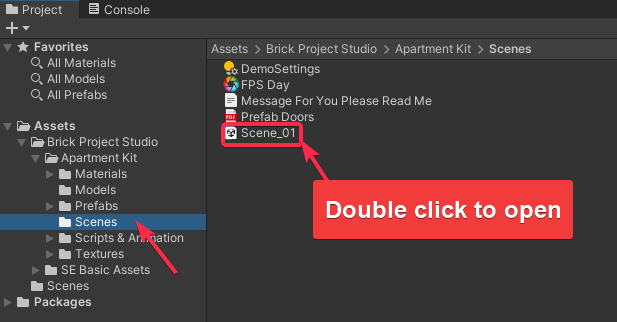
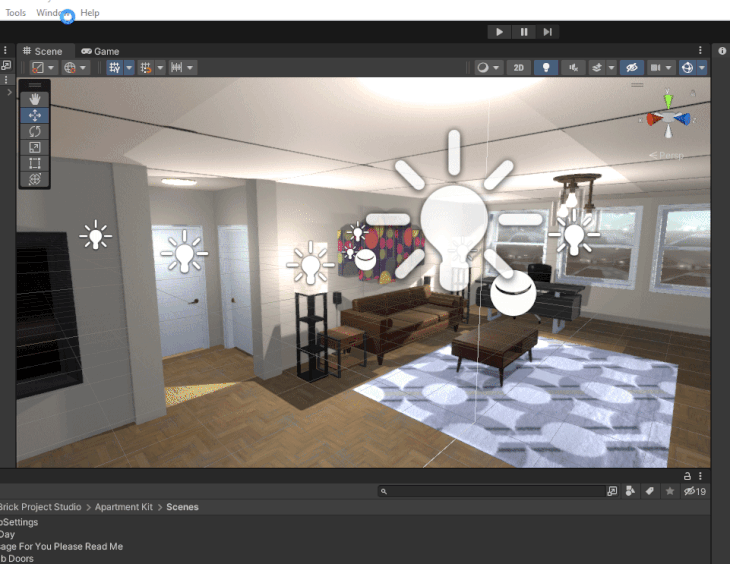
This is what you will see in the Scene panel:
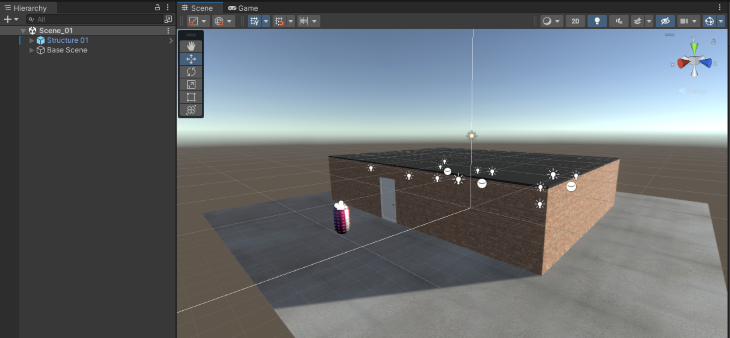
Try zooming in to get a good view of your apartment:

In the Scene Hierarchy window, expand the Base Scene Game Object.
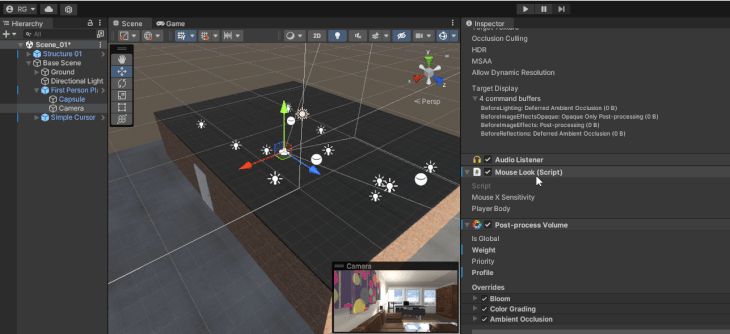
Select First Person Player. Reposition this game object so that it is inside the apartment. Here is a quick demo:

We position the First Person Player inside the apartment so that the Camera object (child of the First Person Player game object) is also positioned inside the apartment. We will use this Camera in a later step in this article.
Please make sure that this Camera object is tagged as Main Camera. Here is how you can do so from the Inspector Panel:
Also, uncheck the Mouse Look Script Component for the Camera game object from the Inspector Panel.
Phew! Now the apartment is set up.
All we have to do now is record a 360 VR video of the apartment.
Let’s go.
Record a 360 VR Video of any scene in Unity
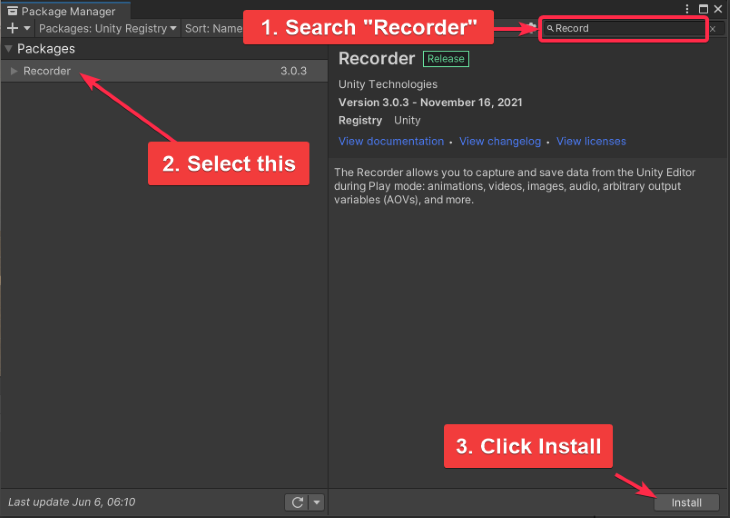
Step 1: Go to Window > Package Manager
Step 2: Switch to Unity Registry instead of My Assets
Step 3: Install Recorder by Unity Technologies
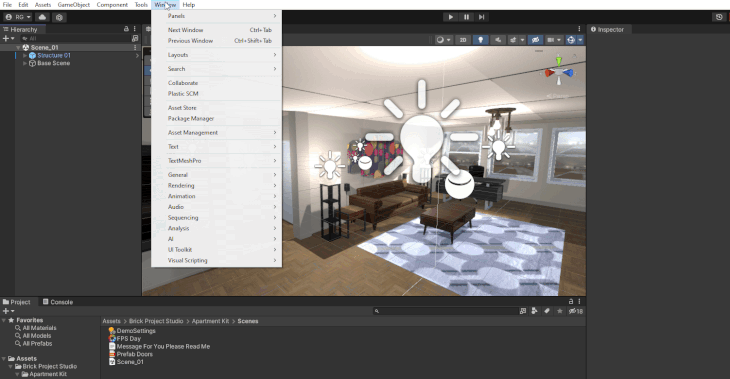
Step 4: Go to Window > General > Recorder > Recorder Window
Step 5: Add Recorder > Movie
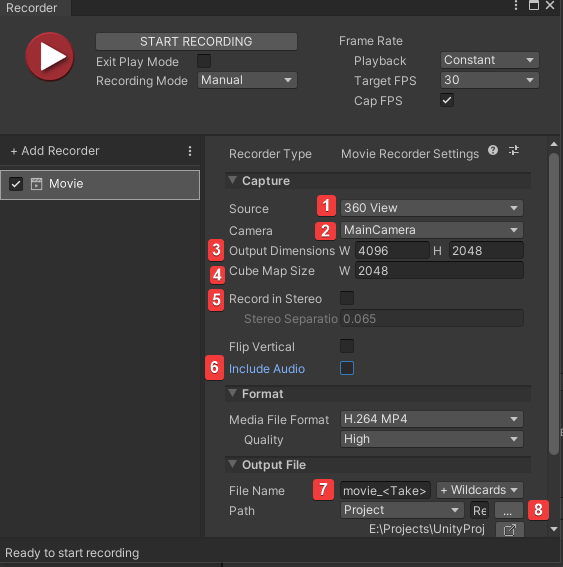
Step 6: In the Movie Settings, keep the following settings (annotated in the image below).
- Set Source as 360 View
- Set Camera as MainCamera
- Set Output Dimensions Width = 4096 & Height = 2048
- Set Cube Map Size Width = 2048
- Deselect Record In Stereo
- Include or exclude audio (personal preference. I am excluding it as we don’t have any sound effects in this project)
- Set Output File > File Name to “Apartment 360 Video”
- Select Output File > Path. The default path will create a folder called Recordings inside the project itself. If you want, you can set it to a custom destination on your computer by clicking the three dots icon on the right-hand side
Keep this Recorder window open. We will need it in the next two steps.
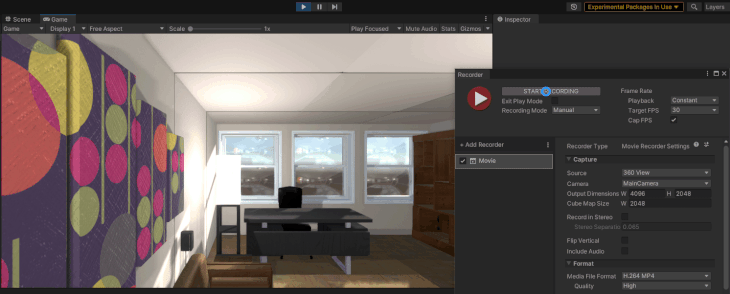
Step 7: Click the play button in the Unity Editor.
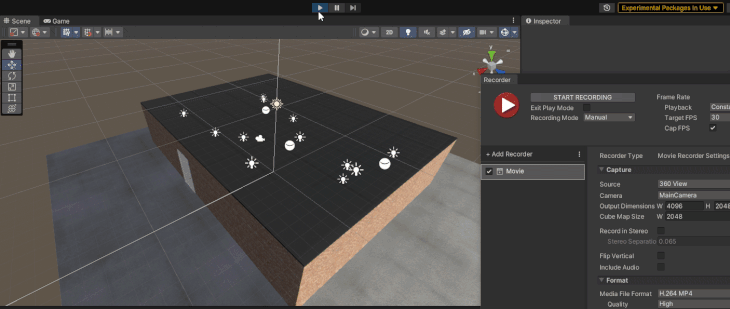
Step 8: While in Play Mode, click Start Recording in the Recorder Panel.
Step 9: After 30 seconds (roughly) stop recording. You can record a longer video based on your requirement. Then go to your Project folder > Recordings. You will find a file called “Apartment 360 Video.mp4.”
Try playing the above video in any video player such as VLC Media Player. It will appear a bit distorted. It is expected behavior. This happens because the video doesn’t include any data about the 360 support capability. To add this 360 support, you have to inject data, or rather “metadata,” using a tool by Google.
Let’s see how to install Google’s Spatial Media tool and then inject 360 metadata into Apartment 360 Video.mp4.
Add 360 capability to a video using Google’s Spatial Media Meta Data Injector tool
Step 1: Download the Spatial Media Meta Data from their official repository. Scroll down a bit till you see this Assets section in their releases page. Get the “360.Video.Metadata.Tool.win.zip” file.

Step 2: Extract the zipped folder anywhere on your computer and then run the Spatial Media Metadata Injector.exe file. You will get this pop-up.
Step 3: Click Open. Select your Apartment 360 Video.mp4 file and then click Open.
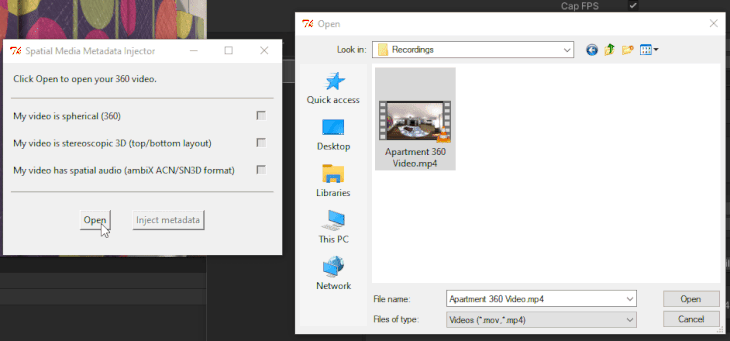
Step 4: Finally, click on Inject Metadata. This will create a file called Apartment 360 Video_injected.mp4. That’s it.
Now, this video can be easily uploaded to YouTube or you can even try playing it on VLC Media Player. You will be able to pan around the 360 video by holding the left click on your mouse and moving around.
Try it out in the YouTube video player:
Conclusion
You can get the final project here.
Feel free to use other assets from the Unity Asset Store and create your own 360 videos in Unity. You can even create your own environments using different assets, arrange them as you wish, and then record a 360 video of it. Isn’t that amazing?
If you’re exploring AR and VR, get my 100+ AR/VR Resources Pack and save thousands of hours on AR/VR research. Or check out some of my other work here.
The post How to make a 360 VR video in Unity appeared first on LogRocket Blog.
from LogRocket Blog https://ift.tt/xRltHfS
via Read more


