


Rhai is a high-level scripting language that allows you to write the logic of an application in scripts. These scripts can then be embedded into and executed within Rust programs.
Since Rhai scripts are easier to understand than Rust, they can make it easier to create more complex programs.
In this article, you will learn how to embed Rhai scripts in Rust and build RESTful APIs using Rhai and the Actix Web framework, along with the following:
- What is Rhai?
- Benefits of using Rhai with Rust
- Guide to running Rhai scripts in Rust
- Setting up the Actix Web framework for Rust
- Simple Rust REST API example using Actix Web
- Example Rust REST API with a dynamic route
- Examples of the
greetfunction with multiple parameters - Using REST APIs to extend complex functionalities from Rust to run in Rhai
To follow this article, you should be familiar with Rust, Rhai, and RESTful APIs.
What is Rhai?
Rhai, or RhaiScript, is a small, fast, and embeddable scripting language that can be integrated into Rust programs. Rust programs can execute Rhai scripts while they are running, which allows you to implement complex algorithms in an easy-to-understand script.
The name “Rhai” was inspired by Chai, a scripting language for C++. Just like Rhai can be embedded into Rust, Chai can also be embedded into C++, and allows you to abstract complex algorithms in an easy-to-understand script.
ChaiScript and RhaiScript use JavaScript-like syntax. These scripting languages provide a secure way to add scripts to their respective programming languages.
Benefits of using Rhai with Rust
Rhai has a number of benefits. For example, Rhai scripts are faster compared to other scripting languages for Rust, including popular options like JavaScript, Lua, and Python. They are also dynamically typed, which allows flexibility and reduces complexity.
In addition, Rhai is a higher-level language than Rust, which makes it easy for developers to implement complex algorithms within Rust programs. Rhai scripts can easily be embedded into Rust programs, interact with the program’s variables, and function in a sandboxed environment.
Finally, Rhai scripts are memory safe and cannot affect Rust programs. This is because they run in a controlled environment and have no ability to change the environment outside their sandbox.
Guide to running Rhai scripts in Rust
To execute Rhai scripts in your Rust program, you need to follow the steps below.
First, add the Rhai library to your Cargo.toml file:
[dependencies]
rhai = "1.6.1"
Next, build the project to download the library with the following command:
cargo build
You also need to have your Rust project set up. You can create an empty one using the below command:
cargo init rhai_tutorial --bin
After building the project, you can start writing your Rhai scripts. In our next steps, we’ll set up a “Hello world” program as a simple example of a Rust program using a Rhai script.
First, copy the below to your main.rs file:
// import the scripting engine
use rhai::{ Engine };

fn main() {
    // Create the scripting engine
    let engine = Engine::new();

    // Run the script at "src/my_script.rhai"
    let result = engine.eval_file::<String>("src/my_script.rhai".into()).unwrap();

    // print the results of the script
    println!("{}", result);
}
The program above executes the script we will create in the next step, then print out the script’s returned value.
Next, create a new file named my_script.rhai in the src folder and copy the following into it. This script returns “Hello, World!” back to Rust.
// a simple function that appends "Hello, "
// to the beginning of the argument
fn hello(name) {
    return "Hello, " + name;
}

// Rhai return the value of the last expression
hello("World!");
To run this program, write the Rust program in the src/main.rs file, and the Rhai script in the src/my_script.rhai file.
After creating the example using the steps above, run it with the following command:
$ cargo run
   Compiling rhai_tutorial v0.1.0 (..../rhai_tutorial)
    Finished dev [unoptimized + debuginfo] target(s) in 19.09s
     Running `target/debug/example`
Hello, World!
In the Rhai script, the hello(); function takes a string, appends "Hello, " to the beginning of the string, and then returns the result.
After Rust executes a Rhai script, it receives the value of the last line of the script. In this example, Rust receives “Hello, World!” from the Rhai script and prints it to the terminal.
You can also write Rust functions that can be called from a Rhai script. This is useful for creating Rhai scripts that need access to some Rust functionality. Let’s take a look at how to accomplish this in the next example.
First, copy the below into your main.rs file:
// import the scripting engine
use rhai::{Engine};

fn main() {
    // Create scripting engine
    let mut engine = Engine::new();

    // create a hello function using an anonymous function
>   let hello = |name: String| -> String {
>       let mut text = String::from("Hello, ");
>       text.push_str(&name);
>       return text;
>   };

    // register the function in the engine
>   engine.register_fn("hello", hello);

    // Run the script at "my_script.rhai"
    let result = engine.eval_file::<String>("src/my_script.rhai".into()).unwrap();

    // print the results of the script
    println!("{}", result);
}
Next, copy the below into your my_script.rhai file:
// Rhai return the value of the last expression
hello("World!");
Now if you run this program, you should see “Hello, World!” as before. However, instead of writing the function in your Rhai script, we accomplished this by writing a Rust function that was called from the Rhai script.
Setting up the Actix Web framework for Rust
Representational state transfer (REST) APIs are designed to facilitate communication between clients and servers. Since clients work independently from servers, they use APIs as an interface to send and receive requests.
The Actix Web framework is a commonly used framework for building REST APIs. Rust web frameworks provide tools that you need to quickly build large, scalable, and efficient REST APIs in Rust.
To set up this framework, follow the steps below.
First, add the dependency below into your project’s Cargo.toml file:
[dependencies]
actix-web = "4.0.1"
Next, build the project to download the library using the command below.
cargo build
After installing the library, you can begin to create RESTful APIs in Rust. To follow along with the examples below, you should be working in your main.rs file.
Simple Rust REST API example using Actix Web
The following is a simple example of an API using the Actix Web framework:
// import the the necessary modules from the library
use actix_web::{
  HttpServer,
  App,
  get,
  Responder,
};

// create a "/" route that
// responds with "Hello, World"

#[get("/")]
async fn greet() -> impl Responder {
  "Hello, World!"
}

#[actix_web::main]
async fn main() -> std::io::Result<()> {
  // create the server
  HttpServer::new(|| {
    App::new()
      .service(greet)
  })
    .bind(("127.0.0.1", 8080))  // bind the server to localhost:8080
    .unwrap()                // unwrap the result of the bind trait
    .run()                    // run the server
    .await
}
When you run the above program and make a request to http://localhost:8080/, it responds with “Hello, World!”
Example Rust REST API with a dynamic route
The below is another example of an API you can create using this framework. In this example, the program creates a dynamic route that says “Hello” to the value of the parameter in the last segment of a URL:
use actix_web::{
  HttpServer,
  App,
  get,
  Responder,
  web,
};

// if you send a request to /users, you get "Hello, users".

#[get("/{name}")]
async fn greet(path: web::Path<(String, )>) -> impl Responder {
  // assign the first of the path's parameter to "name"
  let name = path.into_inner().0;

  // Append "Hello, " to the beginning of the string,
  // and return it
  format!("Hello, {name}!")
}

#[actix_web::main]
async fn main() -> std::io::Result<()> {
  HttpServer::new(|| {
    App::new()
      .service(greet)
  })
    .bind(("127.0.0.1", 8080))   // bind the server to localhost:8080
    .unwrap()                // unwrap the result of the bind trait
    .run()                    // run the server
    .await
}
Dynamic routes are routes that have one or more flexible URL segments. In Rust, you reference flexible segments by their position relative to other flexible segments. In Actix Web, this position uses a zero index: the first occurs at zero, and the second occurs at one.
URL segments are part of the route that are between slashes. For example, in the URL http://example.com/path/to/resource, the segments are “path,” “to,” and “resource.”
Let’s say you sent a request to this example URL: http://localhost:8080/humans
As a result of the program we just created, you would get a “Hello, humans!” response. This is because the last URL segment specifies “humans,” which is then assigned to name in the program.
Examples of the greet function with multiple parameters
Let’s take our previous example a step further. The following is an example of the greet function with one, two, or three parameters.
Let’s start with a single parameter, as we did before. Copy the code below into your file:
#[get("/{name}")]
async fn greet(path: web::Path<(String, )>) -> impl Responder {
  let name = path.into_inner().0;
  format!("Hello, {name}")
}
Now let’s use two parameters: name and age. Replace the contents of your file with the code below:
#[get("/{name}/{age}")]
async fn greet(path: web::Path<(String, i32)>) -> impl Responder {
  let name: String = path.into_inner().0;
  let age: i32 = path.into_inner().1;
  format!("Hello, {name} you are {age} years")
}
Now we’ll add a third parameter: hair_color. For these three parameters, use the code below:
#[get("/{name}/{age}/{hair_color}")]
async fn greet(path: web::Path<(String, i32, String)>) -> impl Responder {
  let name: String = path.into_inner().0;
  let age: i32 = path.into_inner().1;
  let hair_color: String = path.into_inner().2;
  format!("Hello, {name} you are {age} with {hair_color} hair")
}
You can have any number of flexible segments on a single URL. This way, you can add logic to handle routing that is not known before the API is running.
Using REST APIs to extend complex functionalities from Rust to run in Rhai
Rhai is an evaluation engine, which means you can’t run complex functionalities, like database operations. To use these complex functionalities, you need to extend them from Rust.
In the following REST API project, the API and the routing are created using Rust while Rhai handles the logic.
The libraries that are used for building this type of API are actix-web and rhai. Follow the steps below to install these libraries.
First, add the following dependencies to your project’s Cargo.toml file.
[dependencies]
actix-web = "4.0.1"
rhai = "1.6.1"
Next, let’s build the project. Install the libraries in the project with the command below:
cargo build
Now we’re ready to get started.
Registering the project’s endpoints with Rust
The example project in this section has two endpoints.
The endpoint /multiply/{num1}/{num2} is used for multiplying two numbers. For example, if you send a GET request to http://localhost:8080/multiply/5/10, you would get “50” as the response.
Meanwhile, /add/{num1}/{num2} is used for adding two numbers. If you send a GET request to http://localhost:8080/add/5/10, you would get “15” as the response.
The program below will be written in our main.rs file:
use actix_web::{
    HttpServer,
    get,
    App,
    web::Path,
    Responder,
};
use rhai::Engine;

#[get("/multiply/{num1}/{num2}")]
async fn multiply(path: Path<(i64, i64)>) -> impl Responder {
    // get the numbers from the url path
    let (num1, num2) = path.into_inner();

    // create an instance of the rhai engine
    let mut engine = Engine::new();

    // register an API that exposes the numbers to Rhai
    engine.register_fn("num1", move || num1);
    engine.register_fn("num2", move || num2);

    // run the script
    let result = engine.eval_file::<i64>("src/multiply.rhai".into()).unwrap();

    // return the result
    format!("{result}")
}

#[get("/add/{num1}/{num2}")]
async fn add(path: Path<(i64, i64)>) -> impl Responder {
    // get the numbers from the url path
    let (num1, num2) = path.into_inner();

    // create an instance of the rhai engine
    let mut engine = Engine::new();

    // register an API that exposes the numbers to Rhai
    engine.register_fn("num1", move || num1);
    engine.register_fn("num2", move || num2);

    // run the script
    let result = engine.eval_file::<i64>("src/add.rhai".into()).unwrap();

    // return the result
    format!("{result}")
}

// When Rust executes the Rhai script, Rhai returns the result of the last expression

#[actix_web::main]
async fn main() -> std::io::Result<()> {

    HttpServer::new(|| {
        App::new()
            .service(multiply)
            .service(add)
    })
        .bind(("127.0.0.1", 8080))
        .unwrap()
        .run()
        .await
}
After copying the code above, you can now use the multiply and add functions in the Rhai engine. Create two files in the src folder:
multiply.rhai, which performs the logic of the/multiplyroute.add.rhai, which performs the logic of the/addendpoint
Copy the following script into the multiply.rhai file:
fn multiply(num1, num2) {
  return num1 * num2;
}

let num1 = num1();
let num2 = num2();

multiply(num1, num2);
Copy the following script into the add.rhai file:
fn add(num1, num2) {
  return num1 + num2;
}

let num1 = num1();
let num2 = num2();

add(num1, num2);
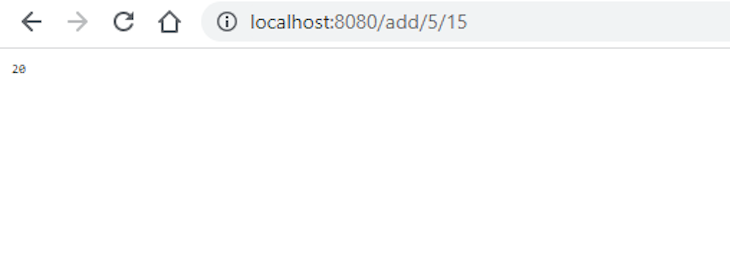
After compiling and executing the Rust program, test the results by opening up an example such as http://localhost:8080/add/5/15 in your browser. This example should result in something like the below:
Conclusion
In this article, we covered creating Rhai scripts, building backend APIs using Actix Web, and using Rhai scripts in backend APIs.
Rhai is a very useful tool for building Rust programs, which helps developers to write complex code in the easier to understand script, and can then be embedded into the Rust programs.
Take a look at the Github repo for the final project in this article to check or compare your work. If you’re interested in learning more on this topic, read The Rhai Book or learn how to create a backend API with Rust.
I hope you found this article useful. Thanks for reading!
The post Building a REST API in Rust with Rhai and Actix Web appeared first on LogRocket Blog.
from LogRocket Blog https://ift.tt/fIbltvq
via Read more


