


SolidJS is fast becoming the center of attention in the web development community. With its straightforward state management, fine-grained reactivity, and high performance, SolidJS has put itself on a pedestal for other JavaScript frameworks.
SolidJS is everything React developers have been asking for, and in this article, I’ll walk you through building a task tracker with SolidJS. We’ll cover the following topics:
- Why SolidJS?
- Setting up a SolidJS app with TypeScript
- Using JSX to structure our task tracker
- Creating and updating state in SolidJS
- Control flow and looping through data in SolidJS
- Updating tasks in our nested state
- Using
createStorefor nested reactivity in SolidJS
Prerequisites
To follow along with this tutorial, you’ll need knowledge of JavaScript and TypeScript, Node.js modules, and components in frontend frameworks.
Why SolidJS?
If you’ve worked with React before, SolidJS will look very familiar. When React Hooks was first announced, I was so happy because I thought it would solve our state management crisis. Hooks made local state management in components easier, but global state management remained complex.
It was still difficult for disconnected components to share data and numerous libraries showed up to try and solve the state management problem — which increased development fatigue and added unnecessary complexity to our codebase.
I’ve also seen the same problem happen in other frontend frameworks; it’s as if global state management is an afterthought, rather than something that was planned for from the beginning.
With SolidJS, things are different. Global state management is as easy as creating state and exporting it. There’s no need for any complex setup or third-party library.
SolidJS also uses JSX, the popular HTML-like syntax extension to JavaScript. This makes handling UI logic, events, and state changes straightforward. Coupled with that, SolidJS compiles to plain JavaScript, so there’s no need for a virtual DOM, making it relatively faster than frameworks like React and Angular.
SolidJS also has a simple workflow. Components only render once, just like in JavaScript, so it’s easier to predict the outcome of your code.
Another huge advantage of SolidJS is that it builds on the shoulders of other web frameworks, so it proudly emulates the good parts and improves the not-so-good parts.
Let’s go ahead and setup our SolidJS app to learn how to build a web app with SolidJS step-by-step.
Setting up a SolidJS app with TypeScript
To set up a SolidJS app on your local machine, you’ll need to install Node.js. If you already have it installed, running the following command on your terminal should return your current Node.js version:
node --version
Next, let’s create a new SolidJS app by running the following command on our terminal:
npx degit solidjs/templates/ts task-tracker
Using solidjs/templates/ts generates a Solid/TypeScript app. For JavaScript, you’ll have to change the command to solidjs/templates/js.
After running the command, you should see a success message that looks like this:
> cloned solidjs/templates#HEAD to task-tracker
Now, go ahead and open the generated app in your code editor or IDE of choice. Here’s what the app structure should look like:
![]()
Notice that our SolidJS app uses Vite as its default build tool and pnpm as the default package manager. These tools combined provide a great development experience for component rendering, app startup time, and package management.
Our app component currently lives inside of the ./src/App.tsx file:
import type { Component } from 'solid-js'
...
const App: Component = () => {
  return (
    <div>
      ...
    </div>
  );
}

export default App
First, we import the Component type from solid-js which is then used as the type for our App component.
Components in SolidJS are JavaScript functions. They are reusable and can be customized using props, which are similar to function parameters/arguments.
Inside of the ./src/index.tsx file, we render our App component:
import { render } from 'solid-js/web'
import App from './App'

render(() => <App />, document.getElementById('root') as HTMLElement)
The render() method from solid-js/web expects two arguments:
- A function that returns our
<App />component - An HTML element
When you navigate to the ./index.html file, you’ll see the root div and the use of our ./src/index.tsx file via the <script /> tag:
...
<body>
  <noscript>You need to enable JavaScript to run this app.</noscript>
  <div id="root"></div>
  <script src="/src/index.tsx" type="module"></script>
</body>
To run our SolidJS app, we’ll have to first install our packages by running the command pnpm install on our terminal, and then pnpm dev to start our application in development mode. You should see a success message that looks like this:
 vite v2.9.9 dev server running at:

 > Local: http://localhost:3001/
 > Network: use `--host` to expose

 ready in 378ms.
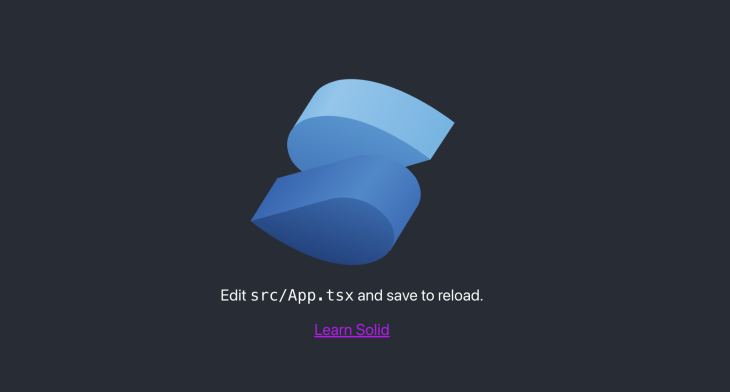
When you navigate to http://localhost:3001 or the displayed URL on your terminal, you should see a page similar to this:
Installing Bootstrap to style our SolidJS app
Now that we’ve successfully set up our SolidJS app, let’s install Bootstrap for styling so that we don’t have to bother about CSS.
To install Bootstrap, run the following command on your terminal:
pnpm install bootstrap
Next, we’ll use the following line of code to import Bootstrap in our ./src/index.tsx file:
import 'bootstrap/dist/css/bootstrap.min.css'
We can also remove the current ./index.css import as we won’t be needing it. Our index.tsx file should now look like this:
import { render } from 'solid-js/web'
import App from './App'
import 'bootstrap/dist/css/bootstrap.min.css'

render(() => <App />, document.getElementById('root') as HTMLElement)
Using JSX to structure our task tracker
Let’s use JSX to structure our task tracker. Inside the ./src/App.tsx file, replace what you currently have with this:
import type { Component } from 'solid-js'

const App: Component = () => {
  return (
    <div class="container mt-5 text-center">
      <h1 class="mb-4">Whattodo!</h1>

      <form class="mb-5 row row-cols-2 justify-content-center">
        <input type="text" class="input-group-text p-1 w-25" placeholder="Add task here..." id="taskInput" required />

        <button class="btn btn-primary ms-3 w-auto" type="submit">
          Add task
        </button>
      </form>

      <div>
        <h4 class="text-muted mb-4">Tasks</h4>
        <div class="row row-cols-3 mb-3 justify-content-center">
          <button class="btn btn-danger w-auto">X</button>
          <div class="bg-light p-2 mx-2">Push code to GitHub</div>
          <input type="checkbox" role="button" class="form-check-input h-auto px-3" />
        </div>
      </div>
    </div>
  )
}
export default App
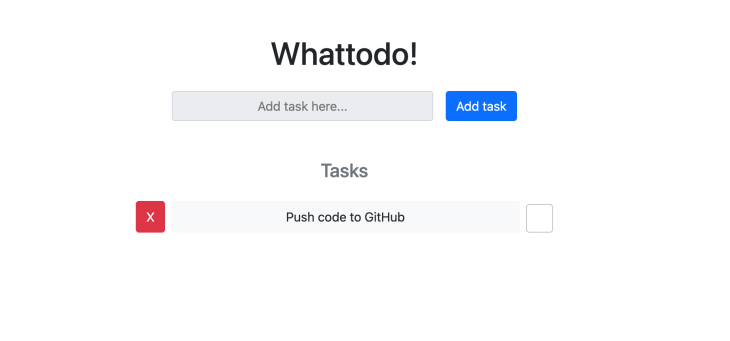
Our JSX code contains the form for inputting new tasks and the tasks section. For now, we’re using hard-coded data, but we’ll learn how we can make our app dynamic so that when a user inputs a new task in the form and clicks the Submit button, our SolidJS app updates with the new data.
When you go back to your browser, your page should now look like this:
Next, let’s learn how to create and manage state in SolidJS. We’ll do this by creating a taskList state and we’ll also create functions for adding new tasks to our state, removing them, and updating their completion status.
Creating and updating state in SolidJS
SolidJS has a createSignal Hook to create state. As an example, let’s create a taskList state to house our tasks. Inside the ./src/App.tsx file, we’ll start by creating a type for each task:
const App: Component = () => {
  type Task = {
    text: string
    text: string
    completed: boolean
  }

  return (...)
}
Next, we’ll create our taskList state:
import { Component, createSignal } from 'solid-js'

...
const [taskList, setTaskList] = createSignal([] as Task[])
...
The createSignal() Hook returns an array containing two variables, taskList and setTaskList. Unlike what you’ll see with React Hooks, both variables are functions. We call the taskList() function to access our task data, and the setTaskList() function to update our taskList state.
Adding tasks to our state
Now that we’ve created our taskList state, let’s create a function for adding tasks to our state. We’ll name it addTask:
const [taskList, setTaskList] = createSignal([] as Task[])

const addTask = (e: Event) => {
  e.preventDefault()

  const taskInput = document.querySelector('#taskInput') as HTMLInputElement

  const newTask: Task = {
    id: Math.random().toString(36).substring(2),
    text: taskInput.value,
    completed: false,
  }

  setTaskList([newTask, ...taskList()])
  taskInput.value = ''
}
Inside of our addTask() function, we’ve started by using the e.preventDefault() method to prevent the default reload behavior when we submit our form. We’re also getting our taskInput from the <input /> element with an ID of “taskInput”.
For each new task, we create an object named newTask with properties id, text, and completed. When a new task is created, our function will use the Math.random() method to generate a random string for our task ID and set the default completed value to false.
Finally, the setTaskList() function will be called with an array as its argument, appending the newTask with the current taskList state.
Let’s also create a function for deleting tasks:
...
const deleteTask = (taskId: string) => {
  const newTaskList = taskList().filter((task) => task.id !== taskId)
  setTaskList(newTaskList)
}
When we call our deleteTask() function with the task ID as its argument, it will filter through our taskList state and return every task except the one with the ID we want to delete. Then, the setTaskList() method will be called with the new task list as its argument.
To put our addTask() function to use, we’ll add an onSubmit event listener to our <form /> tag in the JSX code, which will call our function whenever the submit button is clicked.
...
return (
 <div class="container mt-5 text-center">
    <h1 class="mb-4">Whattodo!</h1>
    <form class="mb-5 row row-cols-2 justify-content-center" onSubmit={(e) => addTask(e)}>
     ...
    </form>
  </div>
)
Next let’s see how we can show our taskList data in our app whenever a user adds a new task.
Control flow and looping through data in SolidJS
SolidJS has a <For /> component for looping through data. While the JavaScript Array.map() method will work, our component will always map the taskList state when it’s updated. With the <For /> component, our app will only update the exact part of the DOM that needs updating.
Let’s replace what we currently have in the Tasks div with this:
...
<div>
  <h4 class="text-muted mb-4">Tasks</h4>
  <For each={taskList()}>
    {(task: Task) => (
      <div class="row row-cols-3 mb-3 justify-content-center">
        <button class="btn btn-danger w-auto">X</button>
        <div class="bg-light p-2 mx-2">{task.text}</div>
        <input type="checkbox" checked={task.completed} role="button" class="form-check-input h-auto px-3" />
      </div>
    )}
  </For>
</div>
...
Notice how we’re wrapping our taskList in the <For /> component. We’ve also updated the task text from “Push code to GitHub” to task.text from our task parameter.
We can now go ahead and use the deleteTask() method we created earlier. We’ll add an onClick event listener to the Delete button:
...
<button class="btn btn-danger w-auto" onclick={() => deleteTask(task.id)}>
  X
</button>
...
If we go over to our browser, our SolidJS app should now work like this:
Updating tasks status in our nested state
SolidJS has a createStore() Hook for creating and managing nested states. But before we talk about it, let’s see how we can make updates to pre-existing tasks in our createSignal() state. We’ll create a new function named toggleStatus just under the deleteTask() function:
...
const toggleStatus = (taskId: string) => {
  const newTaskList = taskList().map((task) => {
    if (task.id === taskId) {
      return { ...task, completed: !task.completed }
    }
    return task
  })
  setTaskList(newTaskList)
}
Our toggleStatus() function expects a taskId argument, which we’ll use to get the particular task we want to mark as either completed or not-completed. We’re also using the map() method to loop through our taskList state, and if we find the task that has the same ID as the parameter taskId, we’ll change its completed property to the opposite of what’s currently there. So, if true, we’ll make it false, and if false, true.
Finally, we’re using the setTaskList() method to update the taskList state with our new taskList data.
Before we use our toggleStatus() function, let’s add a distinction between completed tasks and uncompleted tasks in our JSX code. We’ll add the Bootstrap class “text-decoration-line-through text-success” to the task text if its completed property is true. In our JSX code, just below the Delete button, let’s update the task text div to this:
<div class={`bg-light p-2 mx-2 ${task.completed && 'text-decoration-line-through text-success'}`}>
  {task.text}
</div>
Next, we’ll add an onClick event listener to the checkbox input tag, where we’ll call the toggleStatus() method whenever it’s clicked:
<input
  type="checkbox"
  checked={task.completed}
  role="button"
  class="form-check-input h-auto px-3"
  onClick={() => {
    toggleStatus(task.id)
  }}
/>
The JSX code that our <App /> component returns should now look like this:
<div class="container mt-5 text-center">
      <h1 class="mb-4">Whattodo!</h1>
      <form class="mb-5 row row-cols-2 justify-content-center" onSubmit={(e) => addTask(e)}>
        <input type="text" class="input-group-text p-1 w-25" placeholder="Add task here..." id="taskInput" required />
        <button class="btn btn-primary ms-3 w-auto" type="submit">
          Add task
        </button>
      </form>
      <div>
        <h4 class="text-muted mb-4">Tasks</h4>
        <For each={taskList()}>
          {(task: Task) => (
            <div class="row row-cols-3 mb-3 justify-content-center">
              <button class="btn btn-danger w-auto" onclick={() => deleteTask(task.id)}>
                X
              </button>
              <div class={`bg-light p-2 mx-2 ${task.completed && 'text-decoration-line-through text-success'}`}>
                {task.text}
              </div>
              <input
                type="checkbox"
                checked={task.completed}
                role="button"
                class="form-check-input h-auto px-3"
                onClick={() => {
                  toggleStatus(task.id)
                }}
              />
            </div>
          )}
        </For>
      </div>
    </div>
When we go over to our browser, our SolidJS app should be able to work like this:

Using createStore for nested reactivity in SolidJS
Before we wrap up, let’s see how we can use the createStore Hook in SolidJS to create and update nested state. Instead of mapping through our state, creating a new task list, and replacing all of our state data with the new list, we can instead directly update the task that needs updating using its ID.
To use the createStore Hook, we’ll first import it from solid-js/store:
import { createStore } from 'solid-js/store'
Notice that createSignal was imported from solid-js, while createStore is imported from solid-js/store.
Next, we’ll update our taskList state creation to this:
const [taskList, setTaskList] = createStore([] as Task[])
The store we create with the createStore() Hook is not a function, unlike the one created with the createSignal() Hook. So, we’ll modify all instances of taskList in our code to just taskList instead of taskList(). The second variable, setTaskList, remains a function, and we’ll use it to update our store.
Let’s go ahead and use the setTaskList() method to modify the toggleStatus() function:
const toggleStatus = (taskId: string) => {
  setTaskList(
    (task) => task.id === taskId,
    'completed',
    (completed) => !completed,
  )
}
In the toggleStatus() function, we pass three arguments to the setTaskList() method:
- A function to get the particular task we want to update. In our case we’re returning the task that has the same id as the
taskIdparameter - The property we want to modify —
completed - For the third argument, we’re passing another function that takes in the current value of our chosen property and returns a new value. Here, we’re returning the opposite of what it currently is
When we go back to the browser, our app should still work as expected:
Conclusion
In this article, we’ve covered the basics of SolidJS by building a task tracker. Solid’s approach to building web applications is quite impressive and relatively straightforward when compared to other frontend frameworks like Angular and React. With direct compilation to real DOM nodes and without the need for a virtual DOM, web applications built with SolidJS have the uncommon advantage of being fast.
That said, SolidJS is still new, and its ecosystem and community are small compared to that of frameworks like React, Vue, and Angular, so there’s a good chance that you’ll be the first to encounter problems or be in need of specific functionalities, libraries, or integrations. But SolidJS is growing fast and lots of people have already started migrating existing apps to the framework. The SolidJS community is fairly responsive and you should not have any problem getting help when you need it.
You can find the repo for our task tracker on my GitHub. I also have a SolidJS crash course on my YouTube channel, which I’d love for you to check out. And if you want to keep in touch, consider following me on LinkedIn. Keep building!
The post Build a task tracker with SolidJS and TypeScript appeared first on LogRocket Blog.
from LogRocket Blog https://ift.tt/E84Bgct
via Read more


