This article provides an introduction to IOTA (Internet of Things Application), an open source distributed ledger, explains how IOTA’s gasless transactions work, and demonstrates two methods for deploying smart contracts on IOTA.
As of this writing, IOTA is still an early-stage platform and its docs are fairly confusing. This article aims to demystify and simplify the IOTA smart contract deployment process.
In the demos, we’ll step through the full deployment of a node, chain, and EVM contract on IOTA using the IOTA Smart Contract Protocol (ISCP). We’ll also show how to deploy smart contracts on IOTA using the Remix IDE.
Jump ahead:
- Prerequisites
- How is IOTA different from blockchains?
- IOTA Smart Contract Protocol demo
- Remix IDE smart contract demo
Prerequisites
To follow along with the demos in this article, you’ll need the following:
- Basic knowledge of Solidity
- A newer generation processor with at least three cores
- GitHub account; if you don’t have one, you can create one here
- Go 1.16
- Docker
- Bash
- Access to a GoShimmer node for production (optional)
- Remix
Before getting started with the demos, let’s take a moment to explore IOTA.
How is IOTA different from blockchains?
IOTA is a distributed ledger, just like blockchains, but its data structure is different. Instead of storing and transferring data in blocks, IOTA uses a directed acyclic graph (DAG), called the Tangle. Instead of referring to itself as a blockchain, IOTA refers to itself as a DLT solution.
Here are some additional details about IOTA:
- Fees: no fees; IOA is free
- Validation: proof-of-work incentives for miners
- Transaction and data storage: objects, called messages, are used to store data and transactions; the messages are stored within the Tangle and are maintained by the nodes
- Transaction processing time: unlike blockchain, in which validators can only place new messages at the end of a block and processing happens sequentially, IOTA messages may be placed anywhere in the Tangle and they are processed in parallel
- Transaction validation time: IOTA transactions validate in seconds, due to its parallel processing, compared to about 13 minutes for Ethereum and 19 minutes for Bitcoin
For more information about IOTA, see the official Wiki.
IOTA Smart Contract Protocol demo
To run a smart contract on IOTA using the ISCP, we need to create the following:
- Wasp node
- Wasp chain
- EVM chain
- Smart contract, written in Solidity
Let’s start by creating a Wasp node and getting it running. A Wasp node is base binary software that was developed specifically to run on the IOTA smart contract protocol (ISCP).
Running a Wasp node
To run a Wasp node, first open Bash.
Then, cd into your folder (step 1, below) and clone the Wasp GitHub repo (step 2, below):
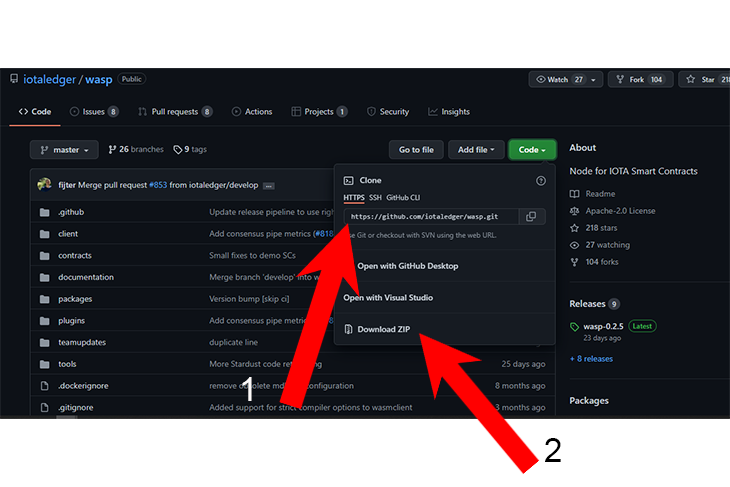
Here’s the code:
cd Desktop
git clone https://github.com/iotaledger/wasp
cd wasp
make build -t wasp-node .
In the above code block, you’ll notice that we use make build instead of make install. We could actually use either of these commands to build out our node library, but each does the same thing a bit differently.
make install stores the binary in our global bin and can be called using ./wasp.
make build, however, stores the binary in our local bin file and can be called from the directory directly which is what we want.
For this demo, I’ll be using a pre-configured development Docker setup. Docker will use a modified GoShimmer image and Wasp binary to make it easy for the node to communicate.
If you prefer, you can follow the direct node installation instead of the Docker installation. You’ll find the instructions for the direct node installation here.
Next, set up docker-compose by running this command:
docker-compose up
It will take a few minutes to build and store the binary. You may want to get a coffee while waiting for the binary to complete.
Following installation, open the docker_config.json file, using the editor of your choice.
notepad docker_config.json
Now, change the nodeconn as shown in the below code block. This is very important.
  "database": {
    "directory": "waspdb"
  },
  "logger": {
    "level": "debug",
    "disableCaller": false,
    "disableStacktrace": true,
    "encoding": "console",
    "outputPaths": [
      "stdout",
      "wasp.log"
    ],
    "disableEvents": true
  },
  "network": {
    "bindAddress": "0.0.0.0",
    "externalAddress": "auto"
  },
  "node": {
    "disablePlugins": [],
    "enablePlugins": []
  },
  "webapi": {
    "bindAddress": "0.0.0.0:9090"
  },
  "dashboard": {
    "auth": {
      "scheme": "basic",
      "username": "wasp",
      "password": "wasp"
    },
    "bindAddress": "0.0.0.0:7000"
  },
  "peering":{
    "port": 4000,
    "netid": "127.0.0.1:4000"
  },
  "nodeconn": {
    "address": "goshimmer:5000"
  },
  "nanomsg":{
    "port": 5550
  }
}
Next, test your node, by running the following command:
docker-compose up
You should see the output like this on your screen:

You can check your results by opening the GoShimmer page on your localhost: http://127.0.0.1:7000.
Creating a Wasp chain
Now that you’ve created your node, the next step is to create a Wasp chain (IOTA’s terminology for a blockchain) to run the node.
To run a Wasp chain, you must already have a Wasp node running. Use this command:
docker-compose up
As soon as your node is running, initialize the chain:
./wasp-cli init
This will create a wasp-cli.json file:
![]()
Next, add your MetaMask wallet address:
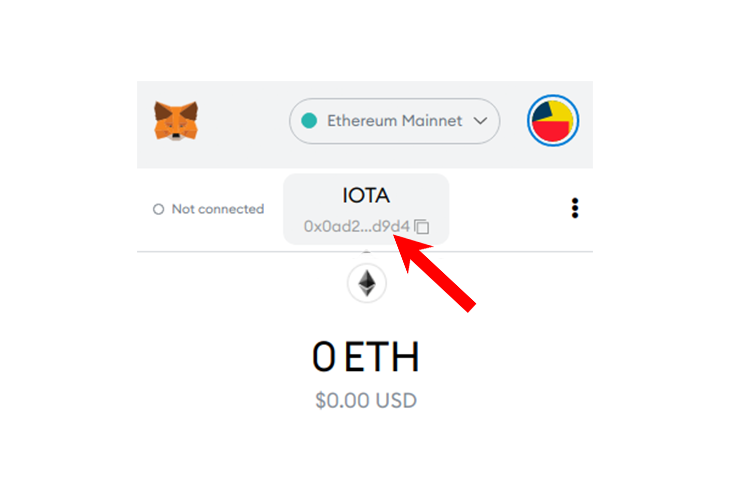
This initializes the file and creates a wallet. But, since you may not see anything like this on your page, copy the code and save it in your wasp-cli.json file:
{
"wallet":{
"seed": "j0x483f2BF505E7e494a87cC4AC9eD563e21756ec49"
},
"wasp":{
"0":
"api": "127.0.0.1:9090",
"namomsg":127.0.0:5550",
"peering":127.0.0:4000"
}
},
"goshimmer":{
"api":"shimmer.chrysalis2.com:8080",
"faucetpowtarget": -1
}
}
Now, save the file and request funds by running the below command:
./wasp-cli request funds
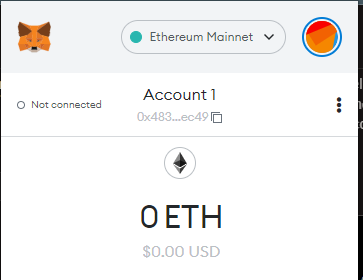
Next, run the following code to deploy a chain using the Wasp CLI tool:
./wasp-cli chain deploy --committee=0 --quorum=1 --chain=wasptest --description="My first deployment"
The above command functions are defined as follows:
committee: creates a number of similar peers that work together in a nodequorum: the number of nodes that can agree before a transaction is allowed to pass throughchain: the name of the deployment
To learn more about setting up a Wasp chain, see IOTA’s Wiki.
Creating an Ethereum virtual machine chain
Next, we’ll create an Ethereum virtual machine chain inside the IOTA Wasp chain. This is the IOTA chain we created earlier and that is currently running on the Wasp node.
I should mention here, that we’re choosing to use an EVM chain to introduce Remix and MetaMask. There are many other chains to select from, but EVM offers many resources and is more stable than other chains. To learn more about EVM and IOTA, refer to IOTA’s Wiki.
You should be aware that IOTA’s support for EVM is still considered experimental. Here are some limitations to be aware of:
- The EVM chain will need to be started with a new supply of EVM-specific tokens assigned to a single address
- EVM runs inside the IOTA smart contract, so any tokens will need to be deposited manually
This information is rapidly changing, but you can read the latest updates here.
Deploying the smart contract
The ISCP does not automate the process of building smart contracts at this time. But, you can build a Solidity smart contract from scratch or develop one using the Remix IDE (as we’ll demonstrate later in this article).
To deploy your smart contract you must have both your Wasp node and Wasp chain running.
Next, fund your account using the following command:
wasp-cli chain deposit IOTA:10000
This provides funds to pay for the EVM chain contract.
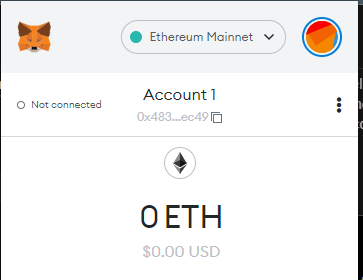
Now, deploy the contract using the following code snippet:
wasp-cli chain evm deploy -a mychain --alloc 0x483f2BF505E7e494a87cC4AC9eD563e21756ec49:1000000000000000000000000
At this point, you’ve deployed the EVM contract. Now, we need to link the MetaMask account.
Setting up an RPC server
To enable your MetaMask account to communicate with the contract, we’ll need to set up an RPC server.
Run the following command:
wasp-cli chain evm jsonrpc --chainid 1074
This will start a JSON-RPC server on port 8545 with chain ID 1074.
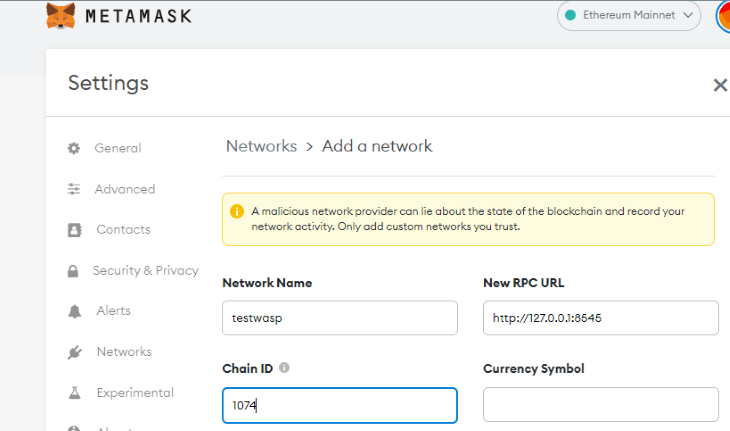
We’ve demonstrated how to deploy a smart contract using the IOTA Smart Contract Protocol. Now, let’s see how to build and deploy a smart contract on IOTA using the Remix IDE.
Remix IDE smart contract demo
For this demo, we will use the Remix IDE to build and deploy our Solidity smart contract.
Click here to begin —this will open the Remix interface.
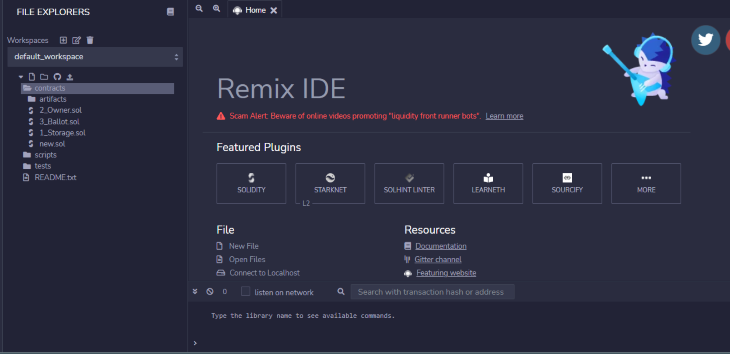
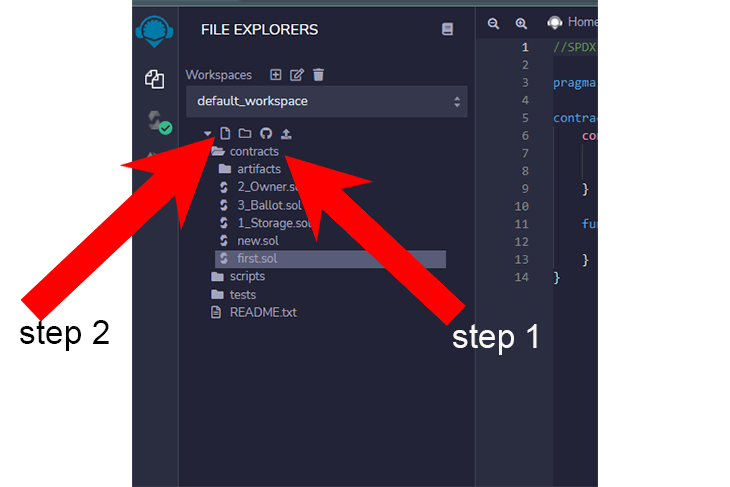
Next, click on contracts (step 1, below) and click on the file icon (step 2, below) to create a new document named first.sol
For demonstration purposes, we’ll create a simple contract that does nothing but enable us to break down the Remix process and interface into simple steps.
Workspace
All Remix contracts and projects are housed in a workspace. We’ll be creating a new contract called new.sol. The .sol file prefix denotes it is for Solidity.

License
Solidity must always begin with a license. We have many different licenses, but we will be using the MIT license. If you fail to include the license, Solidity will throw an error.
Version
For this demo, we will be using Solidity v0.8.6. The version is important, as it will throw an error if the version and compiler are different. Note that in the below code block, we use a ^ before the version. With this character, we’re specifying that we want Solidity to use the listed version (0.8.6) or above.
//SPDX-License-Identifier: MIT
pragma solidity ^0.8.6;
We could also stipulate the Solidity version like so: >=0.4.17 < 0.9.0;. This would instruct the compiler to use any of the version from 0.4.17 to 0.9.0
Contract name and constructor()
In creating the contract we opened it in the curly braces { } with the name of the contract as the contract firstclass we opened.
The constructor is a very important function that runs only once and it does this when the contract is deployed.
contract firstclass{
    constructor(){
        address owner;
        owner = msg.sender;
    }
    function class()public {

    }
}
Deployment through the Remix IDE
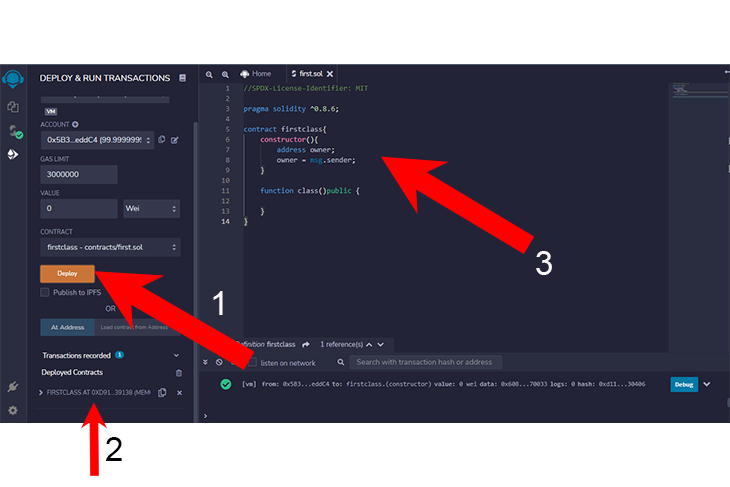
Before deploying a contract, it is important to check it for errors. If errors exist, the contract will not be deployed.
On the left panel (below) you see the deployment button (#1) which when clicked creates a deployment file (#2). The contract code is visible in #3. This is the deployed contract as it can be interacted with on the IOTA chainlink.
Conclusion
Woo Hoo!!! We just completed the full deployment of a Wasp Node, Chain, EVM contract on IOTA using two different methods. As of this writing, IOTA is still fairly early stage, but it is rapidly gaining ground. IOTA’s gasless infrastructure offers a lot of promise, particularly with growing concerns over the environmental impact of many blockchains.
Here are some additional resources for writing a smart contract from scratch in Solidity and creating a smart contract on IOTA.
The post How to deploy smart contracts on IOTA appeared first on LogRocket Blog.
from LogRocket Blog https://ift.tt/dYlfrb1
via Read more


