


Pterodactyl is a free, open source server management tool built with PHP, React, and Go. It’s mainly used for game server management because of its interactive and simple UI for end users, and it currently has more than 150 contributors.
Pterodactyl runs its game servers in Docker containers. Along with all of its features, it also provides top-notch security, and as a user, you are free to dig deeper into the code and find any vulnerabilities.
Games that are supported by Pterodactyl include Minecraft, Rust, Terraria, Teamspeak, Mumble, Team Fortress 2, Counter Strike: Global Offensive, Garry’s Mod, and ARK: Survival Evolved. To this day, the Pterodactyl community continues to add more and more to that list. Pterodactyl provides the perfect platform to manage game servers with significantly less effort.
In this article, we’re going get our hands dirty with Pterodactyl. We’ll start with the installation process and move forward with the setup required to smoothly host supported games. We’ll also introduce and walk through terminologies of Pterodactyl.
- Installation guide
- Pterodactyl Wings
- Server setup
- Database setup
- SSL certificate setup
- Advantages of using Pterodactyl
Installation guide
One huge plus for users is that Pterodactyl supports many popular operating systems. Pterodactyl has some significant dependencies, however. The full list can be found here.
Before moving ahead, confirm that you have installed the dependencies.
It’s better to have one directory for Pterodactyl where you can install all necessary files and operate from that path only. For downloading Panel-related files, you need to fire the curl request as written below:
curl -Lo panel.tar.gz https://github.com/pterodactyl/panel/releases/latest/download/panel.tar.gz
tar -xzvf panel.tar.gz
Before installation starts, a prompt will ask for a few details like admin user configuration, database name, SSL, etc. It’ll install after you enter the details. After that, you can navigate to your domain and open a panel. Log in with your credentials and it will look like this:
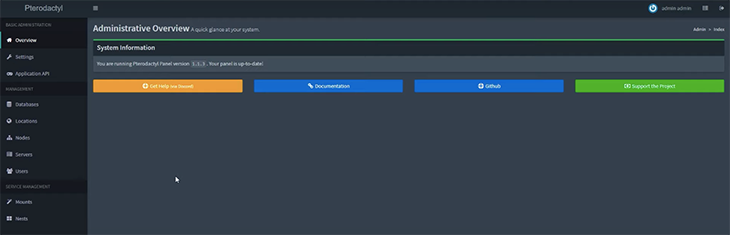
All required files for the installation are here. The next step is to set up a server, but you need to have Wings (previously known as Daemon) before that can happen.
Pterodactyl Wings
Wings is used for Pterodactyl server control. It’s built using Go and Node.js daemon. Like Pterodactyl Panel, Wings also supports multiple operating systems like CentOS and Ubuntu, however it does not support Windows.
There are also some basic system dependencies like curl and Docker. If you don’t have those in your machine, you should install them before installing Wings.
Let’s take a look at how to install Wings:
mkdir -p /etc/pterodactyl
curl -L -o /usr/local/bin/wings "https://github.com/pterodactyl/wings/releases/latest/download/wings_linux_$([[ "$(uname -m)" == "x86_64" ]] && echo "amd64" || echo "arm64")"
chmod u+x /usr/local/bin/wings
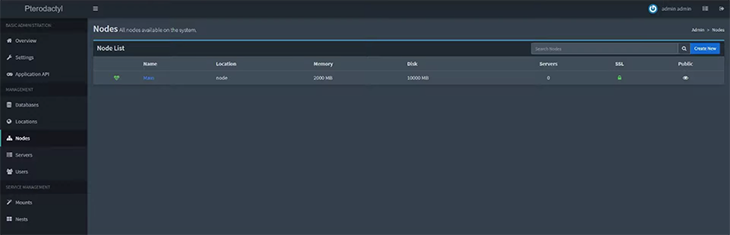
Now you can create a node on your installed Panel from the administrator view by clicking on Nodes from the sidebar. The screen looks like this:
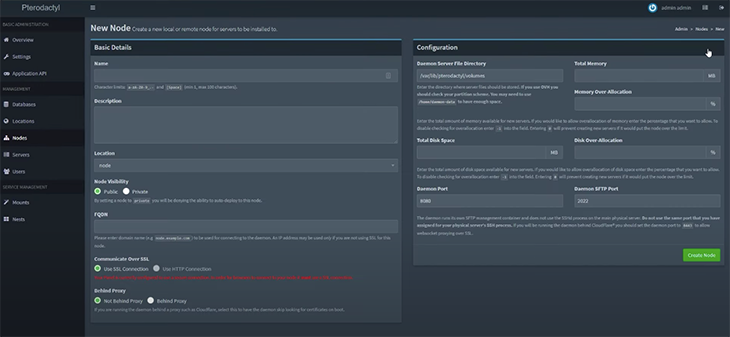
Two sections are displayed on the screen: one for basic details and the other for configuration. Basic Details will ask for your name, description, location, domain name, and a few other things, while in the Configuration tab, you’ll specify RAM, disk space, port, etc. After that, click on the Create Node button.
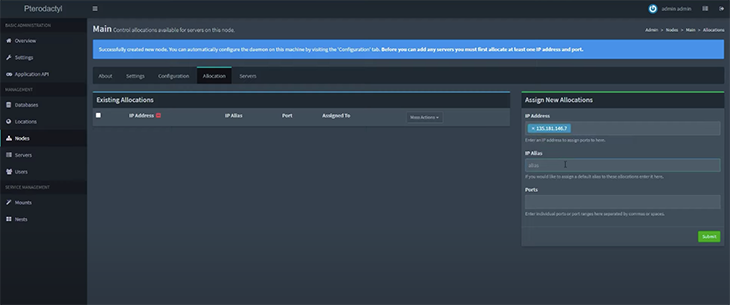
Next, fill up details in the Assign New Allocation box and click Submit.
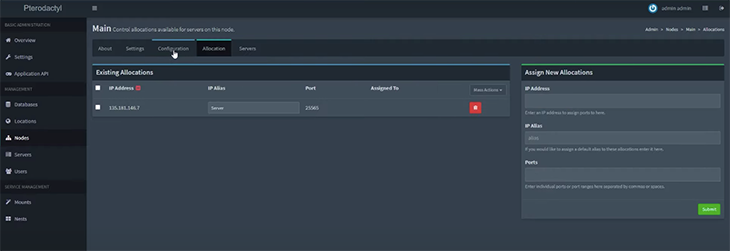
You can see all of your allocated nodes in the Allocation tab from the top menu.
There is another option available to autoconfigure a node. For that, go to the Configuration menu from the sidebar and click on the Generate Token button. This will generate a token for you as shown below:
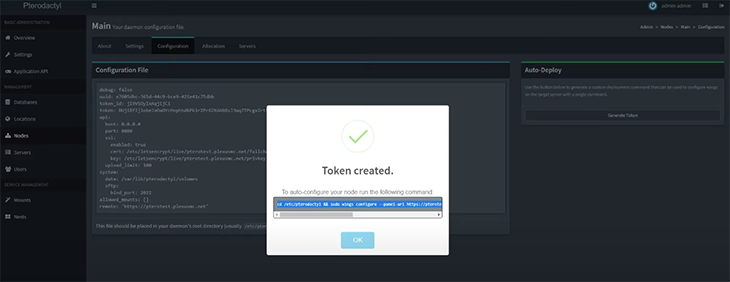
Now, copy and paste the Bash command into your terminal and restart Wings. Then, go to Nodes and refresh the page. You can see a green heart before the node list.
To start Wings, execute sudo wings. Node allocation is also done based on IP and port number and can be assigned to your server. Node settings can be found under the Nodes tab in the sidebar.
Server setup
A web server is nothing but the hardware responsible for managing HTTP/HTTPS requests. There are two web servers for Pterodactyl: Nginx and Apache. You can use whichever one you’re more comfortable with, and they can both be configured with or without SSL. My suggestion is to go with SSL to make your server more secure.
Pterodactyl does not work on default configuration so you’ll have to remove it beforehand. For more details on this step, you can check the official setup guide.
After the web server is created, you now need to create a server for the Panel that will act as a point of contact for your games. To do that, click Servers in the sidebar. As you can see, you’ll have to fill out a lot of fields in this section.
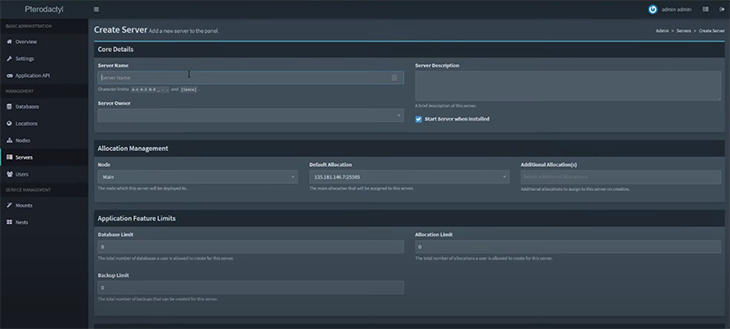
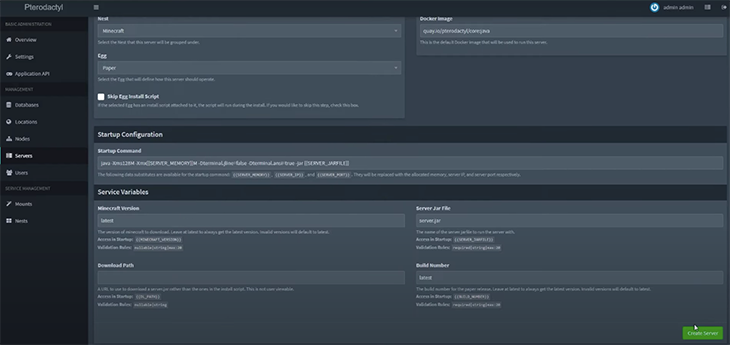
After filling in all the details and clicking on Create Server, the server will now be listed on the homepage.

After some time, the installation process will finish and you can click on that server to manage it. The screen will look like this:
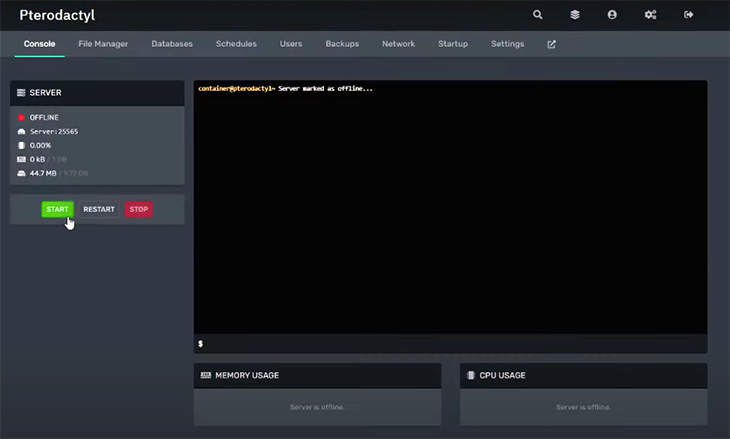
Once it’s up, you can navigate to your game and choose this server as a connection. I connected my Minecraft game with the Pterodactyl server by providing the server address, as demonstrated below:
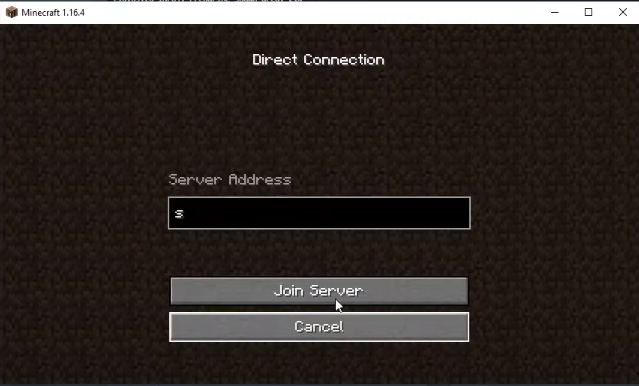
Now your brand-new server will be mapped with the game and you can enjoy playing!
Once you complete the setup, some other things need to be configured. The first is backup storage.
A backup is needed in case something terrible happens to your essential data and provides you with a quick recovery. Pterodactyl allows us to back up both locally and on the S3 bucket and provides a straightforward configuration for switching storage. You can set that in the .env file.
Local backup
This option was configured in the .env file as a backup option by default.
# Setting backup driver to choose local backup via Wings
APP_BACKUP_DRIVER=wings
Now, you might wonder where your backup will be stored. For this, you need to write down the path inside Wings’ config.yml:
system:
  backup_directory: /path/to/backup/storage
S3 backup
AWS S3 can also be used to create a backup. For implementing a backup on S3, change the given configuration in the .env file:
APP_BACKUP_DRIVER=s3

# Info to actually use s3
AWS_DEFAULT_REGION=
AWS_ACCESS_KEY_ID=
AWS_SECRET_ACCESS_KEY=
AWS_BACKUPS_BUCKET=
AWS_ENDPOINT=
Pterodactyl provides setup options for the reverse proxy, reCAPTCHA, and 2FA.
Database setup
A database is an integral part of the system and is used to store data correctly. In our case, it’s best to have a database and one admin user with all permissions.
Pterodactyl is using MySQL for management, which you’ll need to install as a prerequisite. You can get installation steps on their official website. After that, follow the given steps to set up the database:
mysql -u root -p

# Remember to change 'yourPassword' below to be a unique password
CREATE USER 'pterodactyl'@'127.0.0.1' IDENTIFIED BY 'yourPassword';
CREATE DATABASE panel;
GRANT ALL PRIVILEGES ON panel.* TO 'pterodactyl'@'127.0.0.1' WITH GRANT OPTION;
exit
Once that executes, you need to generate an encryption key file by executing the given command:
cp .env.example .env
composer install --no-dev --optimize-autoloader

# This will be executed for the initial setup only. If you had set up Pterodactyl previously, then skip it.
php artisan key:generate --force
After the initial setup, environment setup is essential. You need to run two commands as described, which will set up a session, caching, and DB credentials.
php artisan p:environment:setup
php artisan p:environment:database
Currently, the database is set up with structure only. You need to insert base data that will be used in the panel. Just run the below command and wait until it executes:
php artisan migrate --seed --force
After the base data, you need one admin user. To set an admin user and its permissions, let’s run a few more commands:
php artisan p:user:make

# If using NGINX or Apache (not on CentOS):
chown -R www-data:www-data /var/www/pterodactyl/*

# If using NGINX on CentOS:
chown -R nginx:nginx /var/www/pterodactyl/*

# If using Apache on CentOS
chown -R apache:apache /var/www/pterodactyl/*
Now you have one admin user and a fully set up database!
SSL certificate setup
SSL, or Secure Socket Layer, helps system security.
Generally, SSL will encrypt data and authenticate a user. If there’s an SSL certificate configured at the server level, then the communication of a browser to the server will be secure. Pterodactyl also gives an option for this, and you can set up SSL for both Panel and daemon.
There are two methods in which an SSL certificate can be created.
The first method is using Certbot. For this option, you need to install Certbot via the given command:
sudo apt update
sudo apt install -y certbot
# Run this if you use Nginx
sudo apt install -y python3-certbot-nginx
# Run this if you use Apache
sudo apt install -y python3-certbot-apache
After the installation, you can generate a certificate using the webserver-specific plugin. In the given command, mention your domain name accordingly:
# Nginx
certbot certonly --nginx -d example.com
# Apache
certbot certonly --apache -d example.com
# Standalone - Use this if neither works. Make sure to stop your webserver first when using this method.
certbot certonly --standalone -d example.com
The SSL certificate has been added to your server. As you may know, every SSL certificate has some expiry date and will need to be regenerated. Here, you can actually set up autorenewal and free you from any regeneration troubles.
Let’s explore the second method, designed for single-use cases only. Let’s use an example where the user does not have access to Port 80. For that case, you need to use the Cloudflare API. Complete installation instructions can be found at acme.sh.
curl https://get.acme.sh | sh
After installation, get your Cloudflare API key from the tab under My Profile. Now, execute the below command to create a certificate:
sudo mkdir /etc/letsencrypt/live/example.com

export CF_Key="Your_CloudFlare_API_Key"
export CF_Email="Your_CloudFlare_Account@example.com"

acme.sh --issue --dns dns_cf -d "example.com" \
--key-file /etc/letsencrypt/live/example.com/privkey.pem \
--fullchain-file /etc/letsencrypt/live/example.com/fullchain.pem
This is how the SSL certificate is generated! It is an integral part of a secure system.
Advantages of using Pterodactyl
Pterodactyl provides some out of bound advantages that are very attractive to users. There are a number of beneficial features and we’ll highlight a few important ones below.
Security
We live in a time that’s all about better security. Information is very important and should not fall in the wrong hands, and Pterodactyl keeps that in mind. Pterodactyl provides AES-256-CBC encryption mechanism, bcrypt hashing, and HTTPS support.
Hosting game servers with Docker
Pterodacyl allows us to use Docker containers to host game servers. Docker provides a number of benefits, including a setup limit on resource utilization and an environment setup for each game.
Scalability
You’ll probably start with fewer resources, and as your audience starts growing, you may think about adding more. With Pterodactyl, it’s very easy to scale on the fly. Eventually, this can provide a seamless experience for all users.
Easy troubleshooting and mounting
Pterodactyl has a nice troubleshooting mechanism. By running a command, you can get an error log file and identify issues that can be fixed in less time.
Pterodactyl also provides a mount feature for administrators, allowing mounting other directories from the host file storage to the server’s storage. That configuration is available for both Panel and Wings.
In general, Pterodactyl is built on modern tooling with, in my opinion, the best design. It supports custom modification and has a user-friendly interface that anyone can use with minimal guidance — not to mention the fact that Pterodactyl is free, and the code is open source.
Conclusion
With Pterodactyl, anybody can achieve robust performance for gaming servers with high-level security. It provides a scalable hosting facility and stands out amongst other free and open source gaming servers. Pterodactyl also has a good support system that will solve queries for any individual or hosting provider.
I have been using Pterodactyl for a while and recommend it to anyone interested in setting up a game server. Not only will you get a seamless experience with this improved configuration, but you can invite users to your server and generate revenue on top of it.
The post Getting started with Pterodactyl Panel appeared first on LogRocket Blog.
from LogRocket Blog https://ift.tt/iTpr47y
via Read more


