Fastlane is an open-source tool suite used to automate releases and deployments for Android and iOS apps, favored by many developers because it can significantly cut down on deployment time.
Working with Android and iOS apps can be quite tedious, especially when handling screenshots, beta deployments, App Store deployments, and code signing, among others.
This article will serve as a guide on how to use Fastlane with your Flutter applications.
Let us get started!
Prerequisites
To proceed, I recommend you to have:
- An active Flutter application
- Familiarity with Flutter and Flutter SDK
- Familiarity with Firebase and have Firebase CLI installed on their device
- Installed Homebrew. If you haven’t, here is a link on how to do so on Mac
Setting up
Installing Fastlane
To make use of Fastlane in your Flutter application, you will need to install it correctly.
(Note: We are using MacOS to run our application.)
You can check out the documentation on installing Fastlane on any device of your choice. Use the command below to install Fastlane:
brew install fastlane
To confirm Fastlane has been installed successfully on your device, check its version by running the following command:
fastlane -v
If the version of Fastlane and the path to where we installed it is returned, we have installed Fastlane successfully.
Setting up your package name
The package name of your application must be distinct.
If you created your Flutter application using Android Studio, you will already have a default package name assigned to your application. The package name is unique to your local device but may not be on Google Play or the App Store.
If you want to change your application package name, you can do so in Android Studio. Below are the steps involved to do this.
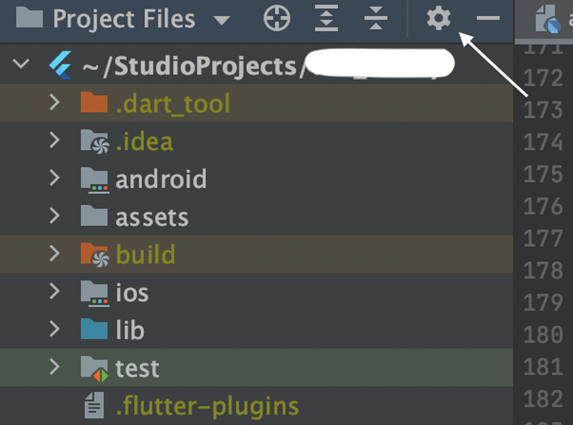
At the project pane in Android Studio, click on the settings icon at the top (shown below).

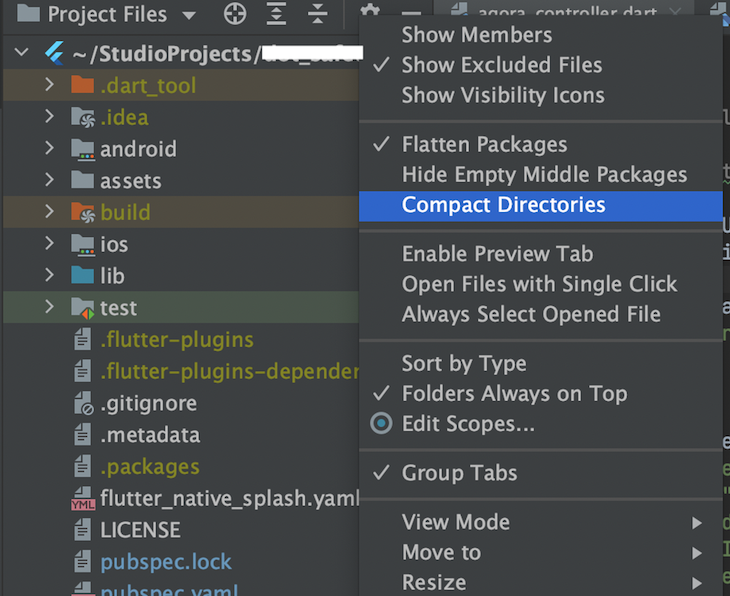
This will bring up a dropdown; ensure that the Compact Directories option is unchecked.

Next, you can refactor your package name. To do this, right-click on your application’s package name and select Refactor, then Rename. A window will pop up; click Rename Package in the window, rename, and then save the update.
Setting up Supply and getting our JSON file
Supply is a tool in Fastlane that enables you to upload app metadata, binaries, and screenshots to Google Play.
To initialize Supply, you need to have successfully uploaded an APK to your app in the Google Play Console at least once. Setting it up requires downloading a credentials file from your Google Developers service account.
Now, we need to obtain our JSON secret file. This file will be required when we set up our Fastlane deployment flow. To get this file, follow these steps:
- Open your Google Play Console account, click on the Account Details section, and take note of the Developer Account ID listed
- Next, click on Setup, then on API access
- Click on the Create new service account button
- Follow the Google Cloud Platform link in the dialog; this will open a new window, then do the following:
- Click on the Create a service account button located at the top of the Google Cloud Platform Console
- Ensure that you are on the correct Google Cloud Platform project
- Input a service account name and click Create
- Next, select a role; find and select Service Account User, and click Continue
- Click Done
- Next, select the Actions vertical three-dot icon of the service account you just created
- Select Manage Keys on the menu.
- Click Add Key, then Create New Key
- Make sure JSON is selected as the key type, and click Create
- Once this is created, you have your JSON file. Note the path of the file
- Head back to the Google Play Console module, and click Done to close the dialog
- Next, select Grant Access for the newly added service account at the bottom of the screen. Try refreshing the page to reflect the latest updates if it does not show
- Select the permissions of your choice
- Invite a user to wrap up the process
Initializing Fastlane
In a standard manual application deploration instance, once you have a unique package name, the next step is to package your application for distribution, then to create a new Keystore, and so on. We will use Fastlane to handle the whole process.
To proceed, head on to the root directory of your Flutter application and initialize Fastlane for Android deployment by navigating to your Android folder directory and running the following command:
fastlane init
You will receive a prompt to input your application package name; in our case, our application name is votersapp, and the package name is com.votersapp.votersapp.
(Note: You can find your package name under the bundle.gradle file in the defaultConfig option.)
Click Enter after supplying your package name.

Next, you will receive a prompt to enter the path to your JSON secret file. Input the path to the JSON file we downloaded above. Alternatively, if you are yet to obtain your JSON file, click Enter to skip this step.

Next, you will receive a notification or pop-up asking if you intend to upload any metadata or screenshots; for this demonstration, we will not be uploading those, so input “n”.

Hit Enter to set up the rest of the initialization from here on.
Once complete, we will see a “Fastlane” folder in the Android directory. Within this is an “Appfile” and a “fastfile.” Follow the process to initialize Fastlane for iOS. The Fastlane file contains all Fastlane configuration tools.
To fetch all the Google Play store metadata:
fastlane supply init
Next, we will deploy our application to the Play Store.
Navigate to your project’s directory, then execute the following command in the terminal:
flutter clean && flutter build apk
Deploying the application for testing
To demonstrate the capabilities of Fastlane, we will deploy our APK to Firebase App Distribution. We can perform testing and CI/CD using the Fastlane application.
Now, we will set up our Firebase project. To do this, follow these steps:
- Head on to Google Firebase Console and create an account if you do not already have one
- Click Create a project
- Specify your project name and click Continue
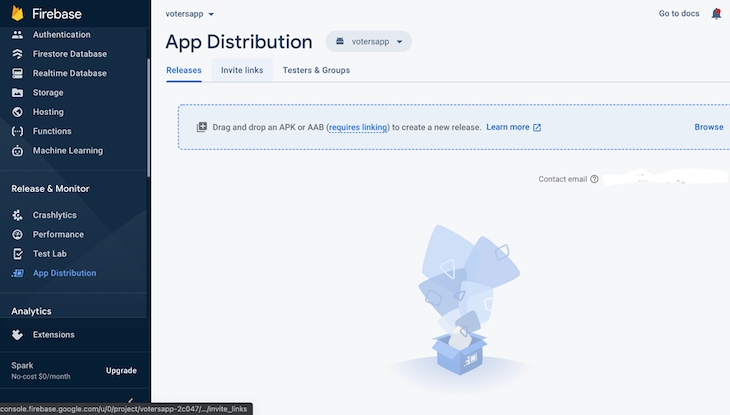
- On the menu sidebar to the left, select App Distribution and the Android icon
- Click Register application
- Specify the same package name as specified in your application for the package name. If you are not using any Firebase services, skip downloading the
google-services.jsonfile - Click Continue to register App Distribution for your project
- Your setup should look like this:

- Finally, head to the tester and group section and create a new group. Then, add a new tester to the group
To assign Flutter app distribution to Fastlane, execute the following command in your terminal:
fastlane app_plugin firebase_app_distribution
In your Fastlane file, replace the existing code with the code below. This code will ensure you map Fastlane distribution to deploy to Firebase.
default_platform(:android)

platform :android do
 desc "Deploy to Firebase app distribution"
 lane :deploy do
  begin
  firebase_app_distribution(
   groups: "testers",
   release_notes: "Fixing bug in features",
   apk_path: "../build/app/outputs/flutter-apk/app-release.apk",
   firebase_cli_path: "/usr/local/bin/firebase",
   firebase_cli_token: <FIREBASE_CLI_TOKEN>
   app: <YOUR_APP_ID>
  )
  end
 end
end
Run the command below in your terminal and grant Firebase access to get your Firebase CLI token in the above code.
firebase login:ci
Copy and replace it as the value for firebase_cli_token in the code above.
(Note: This is a secret and should be kept safe.)
Get your App ID from the Firebase console.
Next, we will deploy our application by specifying the lane we wish to deploy.
In the code we placed in our Fastlane file, we deploy the value for the “Lane” field. So, to execute a deployment in other lanes, we will tell Fastlane to run that particular lane. To deploy our application using Fastlane, we implement the command here:
fastlane deploy.
The command above will upload the APK specified in that particular lane.
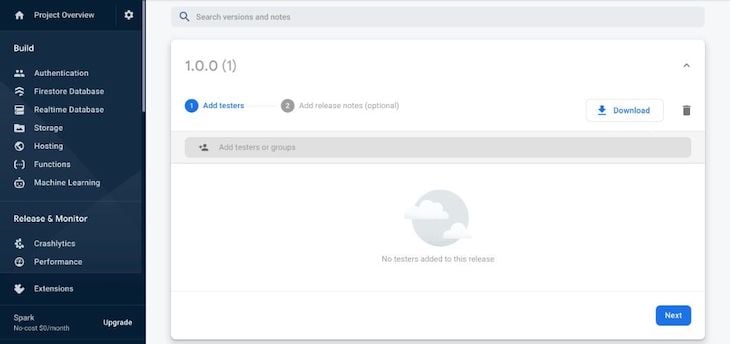
Once completed, you can head to your Firebase console and view your application deployed using Fastlane.

Conclusion
Fastlane is simple and easy to implement — as I noted in the introduction, it saves hours of deployment time and is extremely useful.
In this article we have demonstrated the process of installing and initializing Fastlane and deploying our application for testing. Check on the official documentation to learn more about Fastlane. Happy coding!
The post Using Fastlane for Flutter: A complete guide appeared first on LogRocket Blog.
from LogRocket Blog https://ift.tt/TEFJypb
via Read more


