


Third-party packages, compilers, and bundlers are magic behind the curtain. Due to lack of time and massive competition, we don’t worry enough about the low-level stuff to know what’s exactly happening behind the scenes in these third-party packages.
In this article, we are going to build a file upload service with vanilla JavaScript from scratch. The goal is to build this with no external libraries to understand some of JavaScript’s core concepts. We will be reading the file uploaded by the user on the frontend and streaming it in chunks to the backend, storing it there.
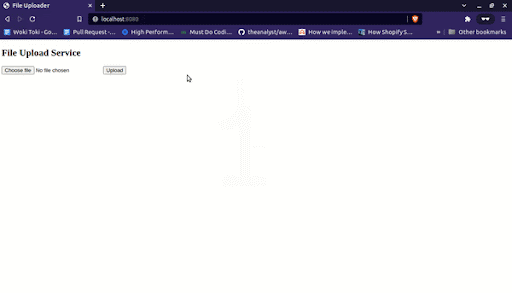
Here’s a quick look at what we will be making:
Let’s dig in.
Table of contents
Set up the Node.js server
We are going to make use of the beautiful, inbuilt HTTP package to set up the backend server.
First, we need to create a new folder for the project.
mkdir fileupload-service
After doing so, we need to create an index.js file that would be the entry point of our backend server.
touch index.js
After this, create the HTTP server.
const http = require('http');      // import http module
const server = http.createServer();     // create server

server.listen(8080, () => {
    console.log('Server running on port 8080') // listening on the port
})
The above code is pretty self-explanatory. We have created an HTTP server, running on port 8080.
Set up the frontend
The next step is to set up the frontend. As we are not doing anything fancy, we will create a basic HTML file with file input and an upload button, which will initiate the uploading process when clicked.
In vanilla JS, to add an action on any button click, we can simply attach an event listener.
<html lang="en">
<head>
    <meta charset="UTF-8">
    <meta name="viewport" content="width=device-width, initial-scale=1.0">
    <title>File Uploader</title>
</head>
<body>
    <h2>File Upload Service</h2>
    <input type="file" id="file">
    <button id="upload">Upload</button>

    <script>
        const file = document.getElementById('file');
        const upload = document.getElementById('upload');

        upload.addEventListener('click', () => {
                console.log('clicked the upload button!');
        })
    </script>
</body>
</html>
Users can select the file and upload it by clicking on the upload button. Easy-peasy!
To serve this HTML file on calling the home route, we need to send this file from the backend. The simplest approach is below.
server.on('request', (req, res) => {

    if(req.url === '/' && method === 'GET') {
        return res.end(fs.readFileSync(__dirname + '/index.html'))
    }
})
N.B., the server.on('request') method is used to listen to all HTTP requests in a Node backend server.
Read the file content on the frontend
As our backend server is up and running, we need a way to read the file on the frontend. To do so, we are going to use the FileReader object. It lets web applications asynchronously read the contents of files (or raw data buffers) stored on the user’s computer, using File or Blob objects to specify the file or data to read.
The syntax to read a file on the client-side using FileReader object is the following.
const fileReader = new FileReader(); // initialize the object
fileReader.readAsArrayBuffer(file); // read file as array buffer
We can access selected input files under the files field for the input. Currently, we are only building it for a single file upload, but later on, we can extend it for multiple file uploads as well.
const selectFile = file.files[0];
To read a file, FileReader provides a couple of methods.
FileReader.readAsArrayBuffer()— read file as array buffer-
FileReader.readAsBinaryString()— read the file in raw binary data -
FileReader.readAsDataURL()— read the file and returns result as a data url -
FileReader.readAsText()— If we are aware of the type of file as text, this method is useful
For our use case, we will be using the readAsArrayBuffer method to read the file in bytes and stream it to the backend over the network.
To track reading the file on the client side, FileReader provides a couple of event listeners like onload, onprogress, etc.
Our goal is to read the file, split it into chunks, and upload it to the backend, so we will be using the onload event, which is triggered once the file reading is completed.
You might wonder, why we are not using the onprogress method to make the application for a fully streamable file upload? But the issue with the onprogress method is it does not tell the new read chunk, it tells the complete data read until now. So, we use the onload method.
Once the file is completely read, we split it into small chunks and stream it to the backend.
<html lang="en">
<head>
    <meta charset="UTF-8">
    <meta name="viewport" content="width=device-width, initial-scale=1.0">
    <title>File Uploader</title>
</head>

<body>
    <h2>File Upload Service</h2>


    <input type="file" id="file">
    <button id="upload">Upload</button>


    <script>


        const file = document.getElementById('file');
        const upload = document.getElementById('upload');


        upload.addEventListener('click', () => {


            const fileReader = new FileReader();
            fileReader.readAsArrayBuffer(file.files[0]);


            fileReader.onload = (event) => {
                console.log('Complete File read successfully!')
            }
        });
    </script>
</body>
</html>
Divide and stream the file in chunks to the backend
Sometimes, the file size can be large, so it’s not a good practice to send the complete file at once. Some of the proxy servers such as Nginx might block it because it seems malicious.
So, we will be splitting this file into a chunk size of ~5000 bytes and sending it to the backend one by one.
If we carefully look at the event parameter, we find out that, once it has read the file, we can access the content of the file as an array buffer in the event.target.result field.
We are going to split the array buffer of this file into chunks of 5000 bytes.
// file content
const content = event.target.result;
// fix chunk size
const CHUNK_SIZE = 5000;
// total chunks
const totalChunks = event.target.result.byteLength / CHUNK_SIZE;

// loop over each chunk
for (let chunk = 0; chunk < totalChunks + 1; chunk++) {
    // prepare the chunk
    let CHUNK = content.slice(chunk * CHUNK_SIZE, (chunk + 1) * CHUNK_SIZE)

        // todo - send it to the backend
}
Now, we need to send these chunks to the backend. To hit the backend server, my old friend fetch is here to the rescue.
Before we send the chunks to the backend, we need to make sure we do it in order otherwise the file will be corrupted.
The second thing is to use async await while uploading because we don’t want to flood the backend server with requests.
fileReader.onload = async (event) => {

    const content = event.target.result;
    const CHUNK_SIZE = 1000;
    const totalChunks = event.target.result.byteLength / CHUNK_SIZE;

    // generate a file name
    const fileName = Math.random() * 1000 + file.files[0].name;


    for (let chunk = 0; chunk < totalChunks + 1; chunk++) {
        let CHUNK = content.slice(chunk * CHUNK_SIZE, (chunk + 1) * CHUNK_SIZE)


        await fetch('/upload', {
                'method' : 'POST',
                'headers' : {
                    'content-type' : "application/octet-stream",
                    'content-length' : CHUNK.length,
                    'file-name': fileName
                },
                'body': CHUNK
        })
    }
}
Receive the chunks and store them on the server
Because we have completely set up the frontend, the next step is to listen to the file chunks and write them to the server.
server.on('request', (req, res) => {

if(req.url === '/' && req.method == 'GET') {
    return res.end(fs.readFileSync(__dirname + '/index.html'))
}

if(req.url=== '/upload' && req.method == 'POST') {
    const fileName = req.headers['file-name'];

    req.on('data', chunk => {
        fs.appendFileSync(fileName, chunk); // append to a file on the disk
    })


    return res.end('file uploaded.')
}
})
As you can see, we have added the file name as a custom header to make sure we append it to the correct file on the server. Ideally, we should not send any custom header because most of the proxies such as Nginx or HAProxy might block it.
A better approach would be to pass on the file name in the query params of the body of the request.
Conclusion
We learned how to build a file upload service with vanilla JS. Obviously, it’s not the most efficient implementation, but it’s more than enough to give you a fair idea of a couple of core concepts.
We can extend it to have a progress bar while uploading, retry chunk upload in case of failure, upload multiple files, upload multiple chunks at once, and so on.
I’m active on Twitter as and would love to hear your thoughts. And in case you are interested in my other articles, you can find them here.
The post How to build a file upload service with vanilla JavaScript appeared first on LogRocket Blog.
from LogRocket Blog https://ift.tt/ZegAfYL
via Read more
