


Flutter is an open source SDK developed by Google that helps to create natively optimized applications for mobile, web, desktop, and embedded apps from a single codebase. Flutter’s popularity is increasing day by day; Flutter applications are now everywhere.
When it comes to making an app, it’s not just about developing beautiful UI; it’s also about providing a better user experience by splitting your app into multiple pages. We’ll learn about navigation and multi-page apps with Flutter in this article.
What is a page in Flutter?
A page is a single screen that is visible at a point in time. A single page or screen can be made up of numerous widgets organized together to create the desired UI. Pages/screens in Flutter are known as Routes, and we use the Navigator widget to navigate between them.
In Flutter, everything — including multi-page applications — are widgets. Flutter uses convenient widgets (like MaterialApp) that display different screens depending on the user’s navigation and preferences.
How do you navigate pages?
The Navigator widget comes bundled with MaterialApp and manages a stack of Route objects. You can think of a route object as a representation of a single page or screen. The route at the top of this stack is visible to the user, and when the user pushes the back button, the uppermost route pops out, revealing the route below it, just like a stack of cards.
Let’s go 
Let’s start by creating a MaterialApp widget that will configure the top-level Navigator along with other basic things for our app:
class MyApp extends StatelessWidget {
  const MyApp({Key? key}) : super(key: key);

  // This widget is the root of your application.
  @override
  Widget build(BuildContext context) {
    return MaterialApp(
      title: 'Naviation Demo',
      theme: ThemeData(
        primarySwatch: Colors.blue,
      ),
      home: const FirstPage(title: 'FirstPage'),
    );
  }
}
Since our app has multiple pages, we’re going to create two pages/screens called FirstPage and SecondPage.
Below is the FirstPage widget, which consists of a Scaffold with an AppBar displaying the page/screen title and a body displaying a button to navigate to the SecondPage:
class FirstPage extends StatelessWidget {
  const FirstPage({Key? key, required this.title}) : super(key: key);
  final String title;
  @override
  Widget build(BuildContext context) {
    return Scaffold(
      appBar: AppBar(
        title: Text(title),
      ),
      body: Center(
        child: TextButton(
          onPressed: () {},
          child: const Text('Next'),
        ),
      ),
    );
  }
}
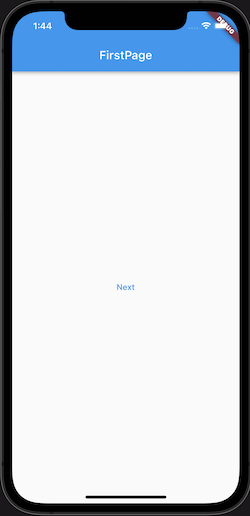
Now, this is what our first page currently looks like.
Navigate to SecondPage 
If you try to tap on the Next button, nothing will happen because we haven’t told Flutter yet what to do when the user taps on the button.
Use the Navigator.push() method to switch to a new route. The Navigator’s push() method adds a Route to the stack of routes it manages.
In order to navigate to SecondPage, first we need to create it, don’t you think so?  SecondPage will be almost identical to the FirstPage with the text now changing to Go Back:
class SecondPage extends StatelessWidget {
  const SecondPage({Key? key, required this.title}) : super(key: key);
  final String title;
  @override
  Widget build(BuildContext context) {
    return Scaffold(
      appBar: AppBar(
        title: Text(title),
      ),
      body: Center(
        child: TextButton(
          onPressed: () {},
          child: const Text('Go Back'),
        ),
      ),
    );
  }
}
Now that our SecondPage is built, we can navigate to it by updating the onPressed() method in FirstPage. Replace theonPressed() in the TextButton of the FirstPage with the following code:
onPressed: () {
   Navigator.push(context, MaterialPageRoute(builder: (context) {
     return const SecondPage(title: 'SecondPage');
   }));
}
Most of the time we use MaterialPageRoute to navigate between pages/screens, but at times when we want more control to add things like custom transitions, then we can use PageRouteBuilder.
Going back to FirstPage 
Hurray!  You’ve successfully created your first multi-page app in Flutter. Enough celebrations; now it’s time for you to navigate back to the FirstPage.
To navigate back, we use the Navigator.pop() method. It removes the current Route from the Navigator’s stack of routes.
In the SecondPage, replace onPressed() with the below code:
onPressed: () {
  Navigator.pop(context);
}
Here is the result of all the hard work we have done until now:

Returning some data from SecondPage to FirstPage 
There are times when you want some data to be returned from the route that is being popped from the Navigator’s stack. Suppose in our case when we navigate back from SecondPage to FirstPage, we’ll return a message saying Returned from SecondPage.
In the build() method of SecondPage , update the onPressed() callback:
onPressed: () {
  Navigator.pop(context, "Returned from SecondPage");
}
Now in the build() method of FirstPage, replace the onPressed() method with this:
onPressed: () async {
  var message = await Navigator.push(context,
   MaterialPageRoute(builder: (context) {
     return const SecondPage(title: 'SecondPage');
    }));
        // This message will be printed to the console
   print(message);
}
The onPressed() method here seems like a strange method now because we are using async/await keywords to wait for the Future returned by the method Navigator.push().
Understand it like we’re waiting using the keyword await on the push() method until it gets popped and returns the message. In order to use the await keyword, you have to make the onPressed() method asynchronous using the keyword async. Learn more about asynchronous programming in Dart if you need help.
Run the app and press the Go Back button on the SecondPage. Check the console to see the message returned:
flutter: Returned from SecondPage
Last Words
In this article, you learned how to use the Navigator widget to create multi-page apps in Flutter and also how to return data when a route pops out. This is not the end, but the beginning of tons of lessons that will come to you as you move forward in your journey of learning Flutter. I would suggest you to go through the official docs to learn more about navigation and other basic stuff.
Good luck! Happy Fluttering! 
If you have any questions, feel free to post them. 
Any feedback is welcome.
The post Creating a multi-page app in Flutter appeared first on LogRocket Blog.
from LogRocket Blog https://ift.tt/pRvcOo5
via Read more


